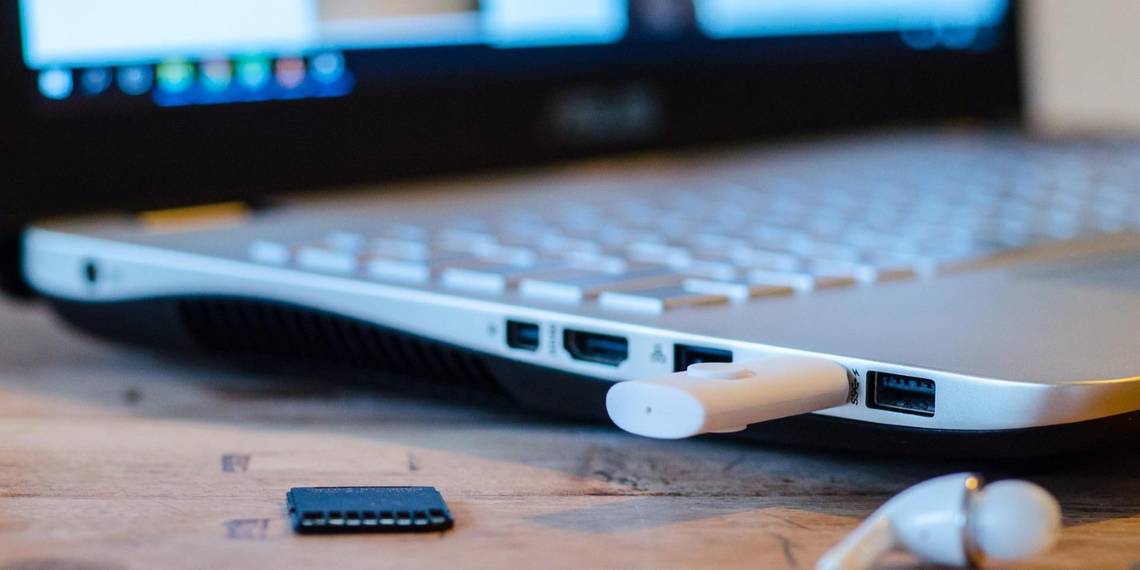
We use external flash drives and hard disks on a regular basis for file transfer and sharing. While cloud sharing is gaining popularity, physical disk sharing is still best suited for large or personal files. You can connect multiple USB devices on your system at the same time and move data from one drive to others.
But some users encounter the "You Need To Format The Disk In Drive before you can use it" error. It forces you to format the disk before you can use it. However, it isn’t a sensible option if you have important files on the disk. We will list multiple methods using which you can reassess your disk drive. Let’s begin.
What Are the Reasons Behind the Error Message?
You can see the “Format Disk in drive” message due to one or more of the following reasons:
- The USB drive or the port is malfunctioning.
- The device drivers of the disk are corrupt or outdated.
- Malware is preventing access to the disk.
- Core system files have gone missing or corrupt.
- A third-party app is conflicting with system apps and services.
Methods to Fix the “You Need to Format the Disk in Drive Before You Can Use It” Error
Try out the following methods to fix the disk error message and save your data stored on it:
1. Check the USB Drive
If connecting the USB drive to any USB port on your system produces the same error, then unplug it. Connect it to another computer and check if it shows up in Device Manager and you can access the file contents without any issues. If it works, create a copy of all your data on that system for backup purposes.
2. Perform a Complete Shutdown
Microsoft enables Fast Start-up in newer versions of the Windows operating system by default. It hibernates the system and kernel-level processes so your system boots up faster after a shutdown.
But if the core system services encounter a glitch and stop working properly, you will see the error message every time. So, performing a complete shutdown can help in restarting all core services.
Repeat the following steps:
- Press Win + R to launch the Run command box.
- Type cmd in the text input box and press Ctrl + Shift + Enter to open Command Prompt with administrator privileges.
-
Input the following command and press the enter key: shutdown /s /f /t 0
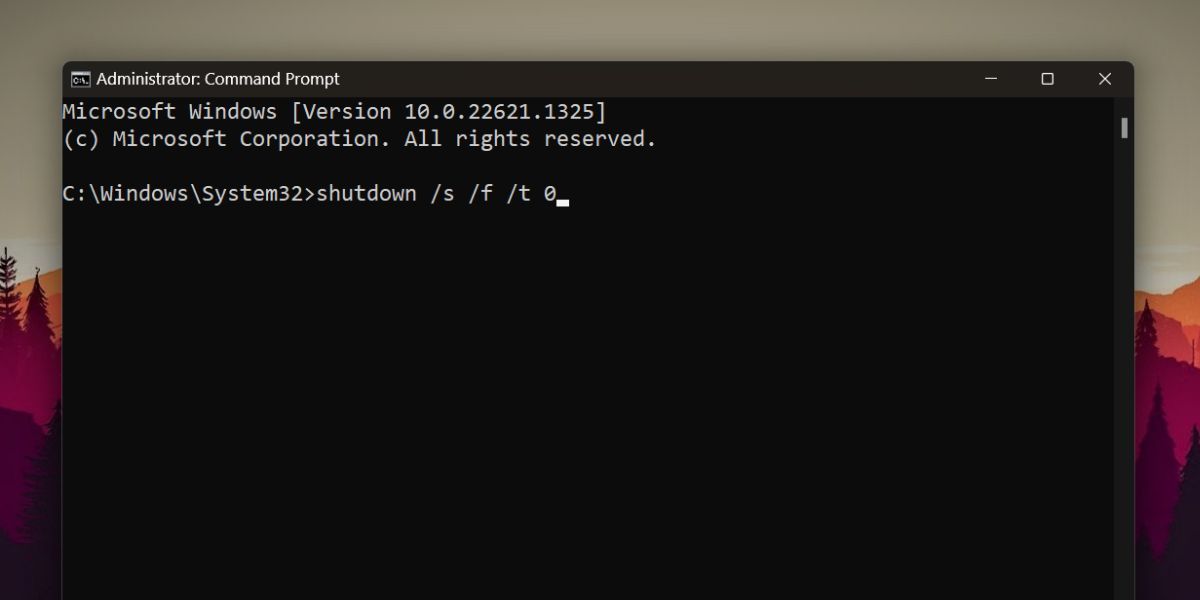
- It will take longer than usual for your system to shut down. Power it on again and open File Explorer.
- Click on the USB disk and check if you are able to access the files on it.

3. Do a Clean Boot
Third-party applications and services can interfere with system apps and impede their normal functioning. So, perform a clean boot of your system. It will disable all the third-party services and programs from running at startup. If you are able to access the disk now, repeat the clean boot process while enabling third-party services one by one to isolate the culprit program.
4. Change the USB Drive Letter Using Disk Management
Changing the drive letter could help in resolving the USB drive error on your system and make it accessible. Repeat the following steps to change the drive letter:
- Press Win + R to open the Run dialog box. Type diskmgmt.msc and press the enter key.
- In the Disk Management window, find your USB disk drive and right-click on it.
- Select the Change Drive Letter and Paths option from the context menu.
-
Click on the Change button. Then, click on the arrow button to expand the drop-down list and select a drive letter from it.
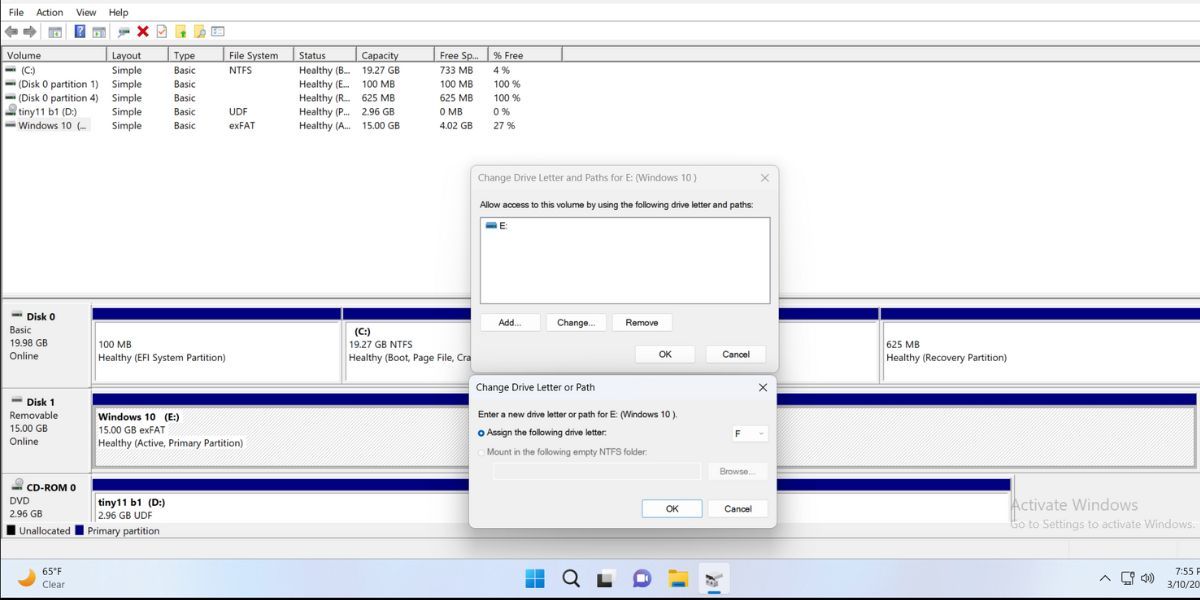
- Lastly, click on the OK button. Reconfirm your decision and click on the Yes button to change the Drive letter.
- You will see a system notification informing you about the Drive letter change and mounting the drive.
- Press Win + E to open the File Explorer and check whether the USB drive is accessible or not.

5. Scan the Hard Disk Using CHKDSK
It is possible for the USB disk to contain bad files and sectors; due to which Windows asks you to format it before usage. But you can leverage the inbuilt CHKDSK utility to scan the USB disk for errors and fix them for you. It will scan all the files on the disk and repair the drive. You can either use the command prompt method or Run CheckDisk using the Properties window in File Explorer.
6. Run an SFC and DISM Scan
If the check disk doesn’t do any good, and you still have the error, it is possible that your system files are missing or corrupt. Start with an SFC scan to check and replace any corrupt system files. Follow that up with a DISM scan to fix the Windows installation image. Make sure you have an active internet connection to run the DISM scan without any issues.
7. Use a Linux Installation Media to Access the USB Disk Drive
This method is more of a workaround to not lose your data. If you don’t have a second system nearby, you can create a Linux installation media and use the Try Ubuntu mode to mount and access the contents of the USB disk. It will save the effort of searching for another computer, and you can successfully create a backup of the USB disk.
To access the USB disk using Linux installation media repeat the following steps:
- Plug the Linux installation media into your system.
- Press the Esc key and power on your system to enter the boot devices menu. Select the Linux installation media and boot it up.
- In the Grub menu, select the Try or install Ubuntu option. Wait for the setup Window to launch and then click on the Try Ubuntu option.
-
Go to the left-hand side menu and click on the Files app.
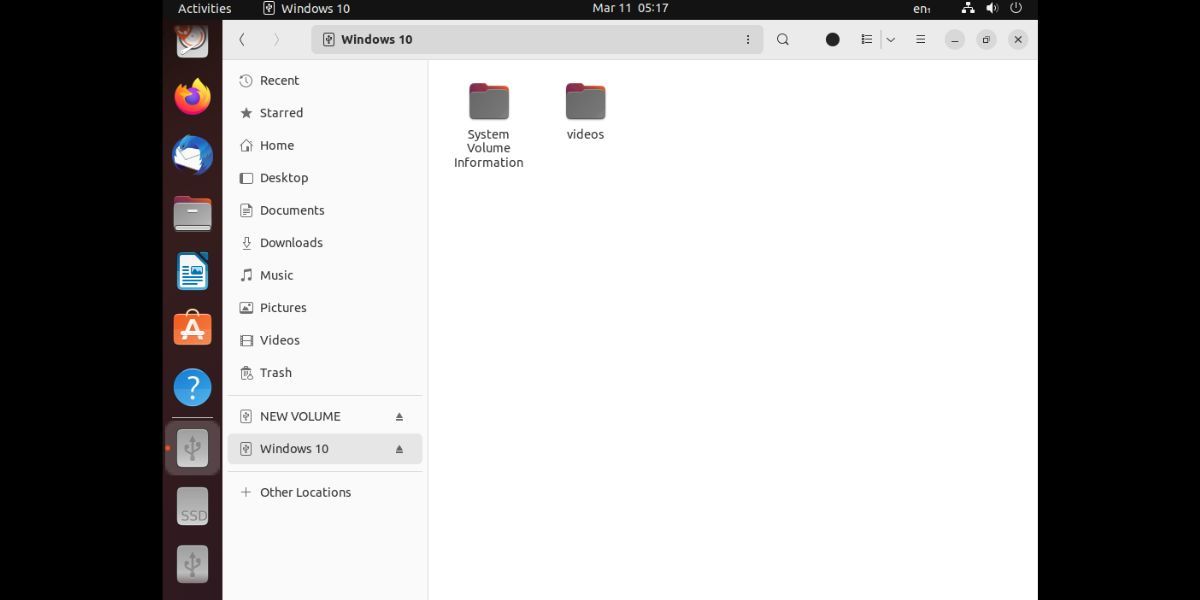
- Click on the USB disk name in the navigation pane to open it. Now, you can copy these files to another location on your hard drive or an external hard disk.
- After you finish copying the contents of the USB disk, click on the power icon and choose the Power off option to close the Try Ubuntu mode.

8. Try Generic Fixes for Drive Formatting Issues
If none of those worked, it's time to apply more general fixes before diving into more drastic measures. There are a few different error messages related to storage drive formatting issues that Windows can throw, and all of them share some common fixes.
As such, check out how to fix format disk errors on Windows without formatting your drive for more tips.
9. Reset Windows
If nothing seems to work, and you see the error with every USB disk you try to connect to the system, consider a complete Windows reset. It will remove all your system files and installed apps (though you can choose to keep personal files on the system drive).
However, before performing a System Reset, try System Restore using any available System Restore points. If that fails, and a reset doesn't seem to work, you can factory reset your Windows computer.
Access USB Disk Contents Without Formatting
It is a bad idea to click on the Format button when File Explorer prompts you to do it to access the USB disk. Firstly, try to check the hardware malfunctions and salvage the data on the USB disk. You can use another system or create a Linux installation media to access files on the USB disk.
If SFC and DISM fail to repair the system, and you still see the error with every USB disk you connect to your system, reset your Windows computer.