Joystick drift is a big problem regardless of what controller you use, but some models are more prone to the issue than others. Xbox controllers for instance can often start drifting just months into their lifespan, and that's a problem for a $60 controller.
Luckily, fixing Xbox controller drift is just a matter of taking apart the controller and running some simple repairs. In extreme cases, a quick joystick replacement would be required, but that's about all you need to do.
What Causes Xbox One Controller Drift?
Before we talk about how to fix Xbox controller drift, let's take a quick look at what causes it in the first place. We've covered what joystick drift is and how manufacturers can fix it before, but in a nutshell, it happens when the potentiometer inside the joystick module wears out from constant usage or gets dust and debris stuck in it.

This causes inaccurate readings which are in turn read as inputs by your controller, resulting in stick drift. It can cause a bunch of problems, including menus and in-game characters operating on their own.
If you're playing a particularly input-sensitive game like a first-person shooter, joystick drift can make it nearly impossible to aim. Even in casual games where you don't need spot-on joystick accuracy, drift can throw your inputs off by a lot, causing you to hold the joystick in a particular place off-center to cancel those inputs.
How to Fix Xbox One Controller Drift
As mentioned above, fixing Xbox controller drift is a matter of taking your controller apart and performing some simple repairs. The issue is seldom caused by software, so you can safely assume that something's broken with your controller if you're experiencing drift in your controller.
That said, it's not a bad idea to try and update your Xbox controller or change batteries before you take it apart for repairs. Also, if your controller is under warranty, any DIY or unofficial physical repairs will void it, so proceed with caution.
Disassembling Your Xbox One Controller
The first step to starting the repair process is to disassemble the controller. You need to take out five screws: two on either side under the palm grips and one inside the battery compartment which is usually hidden under a sticker.
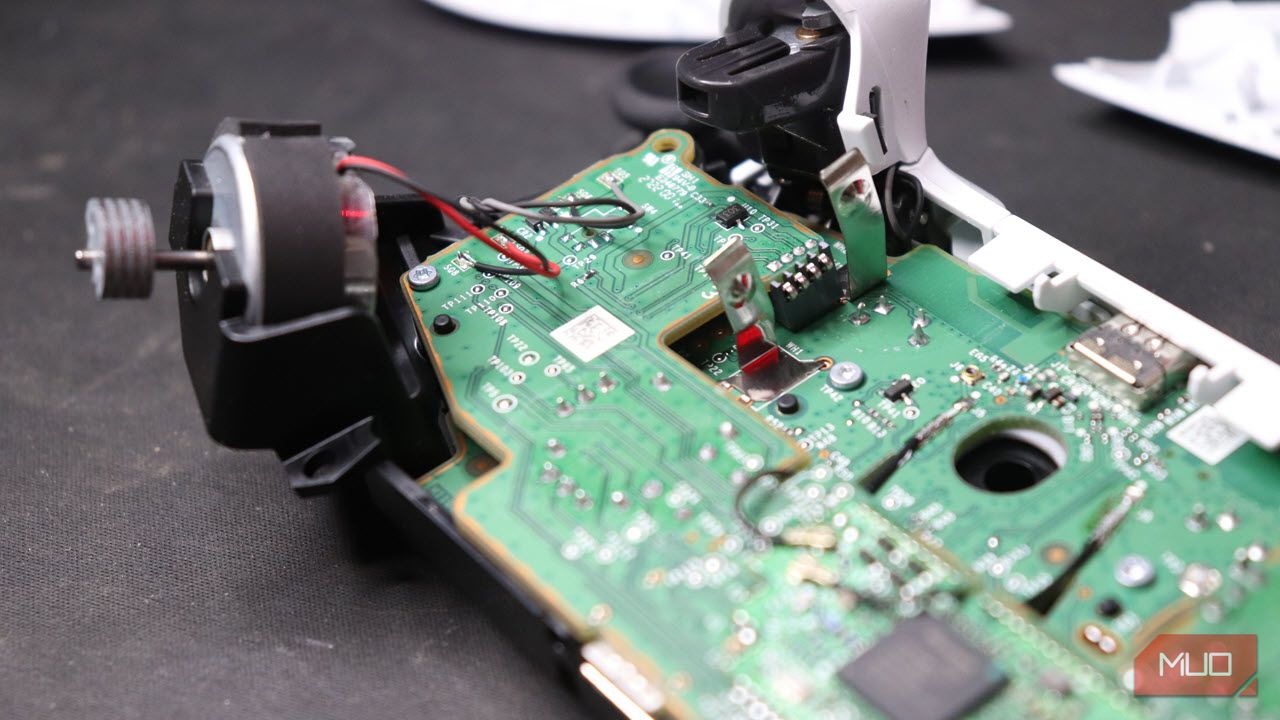
We've already covered how to take apart your Xbox One controller, so we won't be going into exact steps here, but do keep in mind that depending on the exact repair you wish to carry out, you might have to go as deep as the actual PCB of the controller.
Additionally, while the basic steps for an Xbox One and Xbox Series X|S controller are the same, the latter has some additional circuitry meaning you'll have to take care of small things like trigger vibration motors before you can get to the PCB. Last but not least, newer Xbox Series X|S controllers come with Torx Security bits instead of regular Torx bits, so you might want to take a look at your toolkit first.
Fixing Worn Out Thumbstick Pads
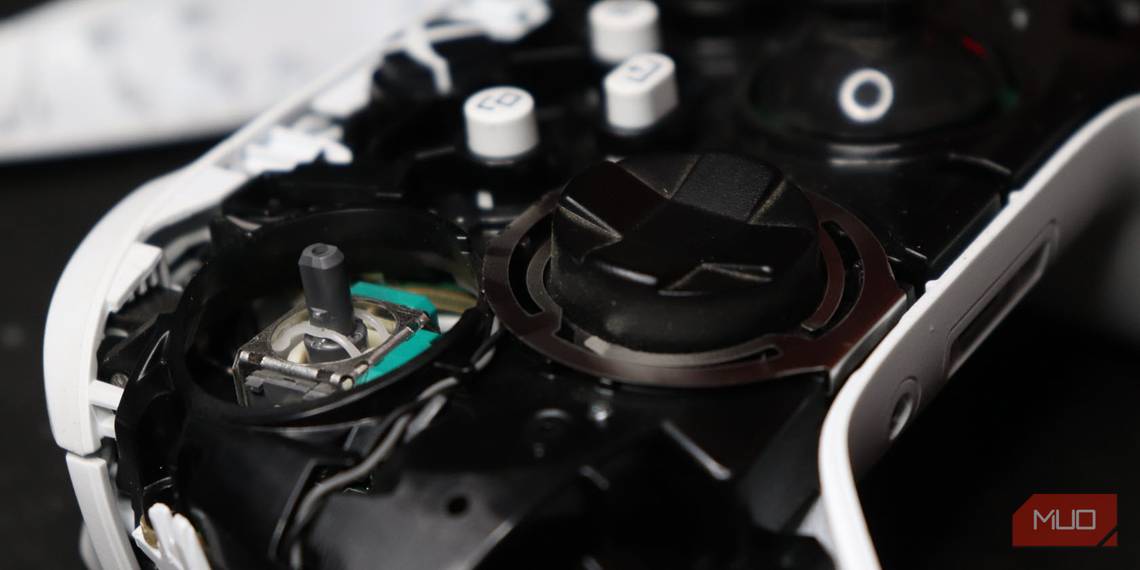
First up is the simplest repair you can carry out when it comes to your Xbox controller's thumbsticks. Dirty thumbsticks aren't the most obvious or even the most common source of your problem, but they only take a moment to fix, so you might as well carry out the repair.
Just get some rubbing alcohol and a cotton swab. Wet the swab with the alcohol and gently scrub along the base of the thumbstick pad. Clean all the dirt and grime that you see. Once you're done, check to make sure that the thumbsticks themselves fit snugly onto the module. You can also use canned air to blow out any dust or debris that might've fallen into the small gaps on the thumbstick sensors underneath.

If the thumbsticks don't fit properly, consider buying a replacement. Alternatively, you can also just put them back on the module with a sliver of paper or plastic—just enough to get them snugly in place.
Now give your controller a quick test to see if the problem is resolved. If you're still experiencing drift, move on to the next fix.
Fixing the Thumbstick Sensor
Next up, we're going to try and replace the actual sensor (also called a spring) inside the thumbstick module. This fix is a little bit tricky to perform, but will almost definitely fix your Xbox controller drift issues.
Follow these steps to replace your thumbstick sensors.
-
Disassemble your controller and take out the daughterboard to access the joystick module.
- Carefully pry off the green plastic covers on the side using a prying tool, flathead screwdriver, or a guitar pick.
-
Pull out the sensors using a pair of tweezers and replace them with new ones. You can also pull out sensors from an older controller that uses the same-sized thumbstick module.
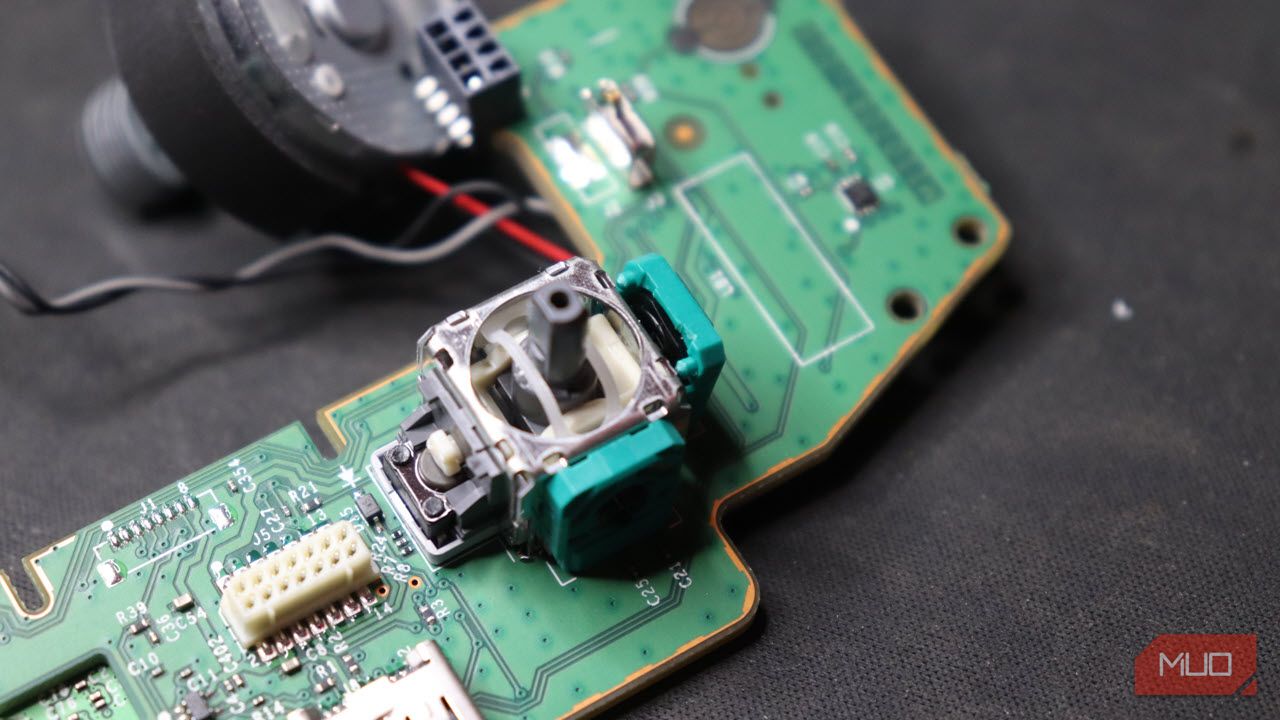
- Put the green plastic covers back into place and test the thumbstick for smooth and stable movement.
- Put the controller back together and run a test.


It's also not a bad idea to spray some canned air into the sensor cavities to get any dust and debris out while they're open. Sometimes this dust can also get in the way of a perfectly functional sensor and so you may not have to change yours at all.
Replacing the Thumbstick Module
If changing the thumbstick sensor didn't do the trick, your last resort is to swap out the entire thumbstick module. You can buy new thumbstick modules from Amazon for as low as $10, or even at your local DIY store. Just make sure they're the same size and resistance as the ones already on your controller. Working modules from an old controller will also work fine, but only as a last resort.
Keep in mind that the process does require some soldering—it's possible to fry the controller PCB if you don't know what you're doing.
Swapping the thumbstick module entirely also gives you a chance to upgrade to Hall effect joysticks. They don't require a physical connection to work, which means they have a longer lifespan, are pretty much immune to drift, and are rather smooth in operation.
Regardless of the thumbsticks you decide to use, follow these steps to change your thumbstick modules.
-
Disassemble your controller and take out the daughterboard to access the joystick module.
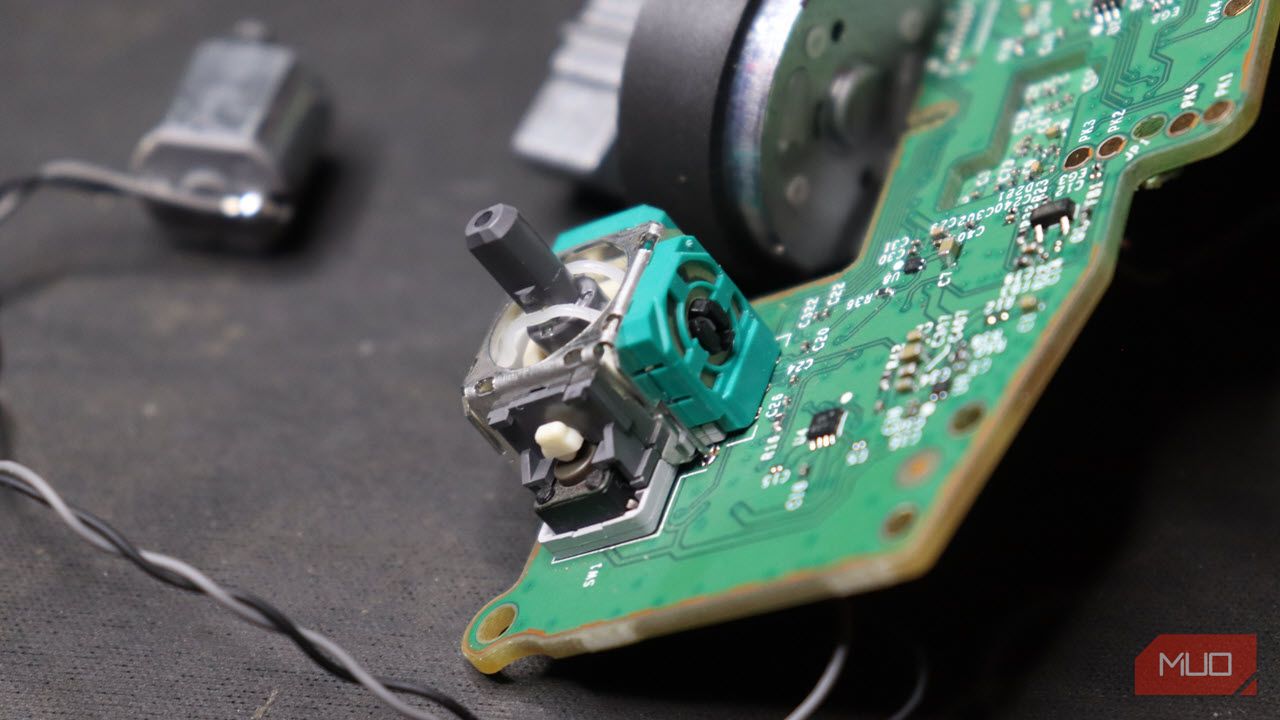
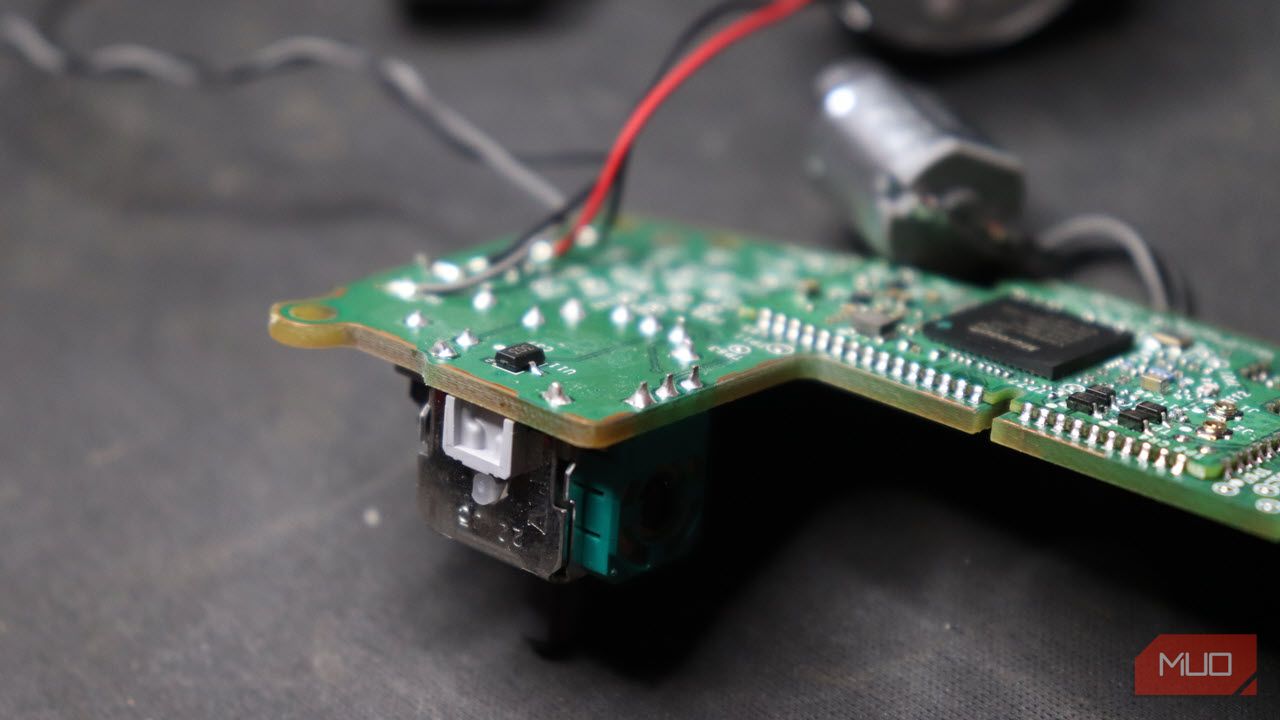
- Flip the board over to access the solder joints. Use a desoldering tube to remove the solder and pull out the module. Alternatively, you can also use a soldering iron to heat up the solder and remove the module.
-
Put the new module through the mounting holes, make sure it's in the right orientation, and solder the joints again.


Make sure the solder makes a good connection with the contacts on the PCB and that there are no shorts among connections between the module or with adjacent components.
Xbox Controller Drift Is a Big Issue
Xbox controller drift, aka controller drifting, is a big issue that most gamers run into quite often. It can render a perfectly functional controller useless, causing the everyday gamer to just toss it in the garbage and get a new one.
However, if you're a bit handy, fixing the drift issue isn't that difficult at all. Opening a few screws and using some carefully blasted canned air can do wonders for your controller's longevity.