
Xamarin is a platform that allows you to build mobile applications. It's open-source and has community support from developers and users worldwide.
You can build mobile apps across various platforms, such as iOS, Android, or Windows. UI can also be specific to a platform, or shareable across platforms, depending on whether you use Xamarin Native or Xamarin Forms.
Visual Studio allows you to create a new Xamarin project and add your content to your mobile application. You can then test your mobile app by running it through the emulator.
What Are Xamarin Native and Xamarin Forms?
Xamarin Native includes Xamarin iOS, Xamarin Windows, or Xamarin Android. It allows you to build user interfaces for a specific platform.
For example, you can use some UI components only on Android and other UI components only on iOS. This is great if you want custom designs for different platforms, but can lead to slower development.
Xamarin Forms, on the other hand, allows you to build shared UI components that you can re-use over many platforms. This is good for generic components such as buttons or text boxes that will look the same across all devices. This also generally leads to faster development.
Microsoft is currently in the process of replacing Xamarin with .NET MAUI (Multiform App User Interface), as part of .NET 6. According to Microsoft’s .NET Blog, one of the new features is the ability to use a single project, rather than many projects across many platforms.
How to Download and Install Mobile Development for .NET
To build a Microsoft Xamarin mobile application you need to download and install Mobile Development for .NET in Visual Studio. This gives you the ability to create Xamarin projects. It also comes with an emulator to test your mobile app on a PC.
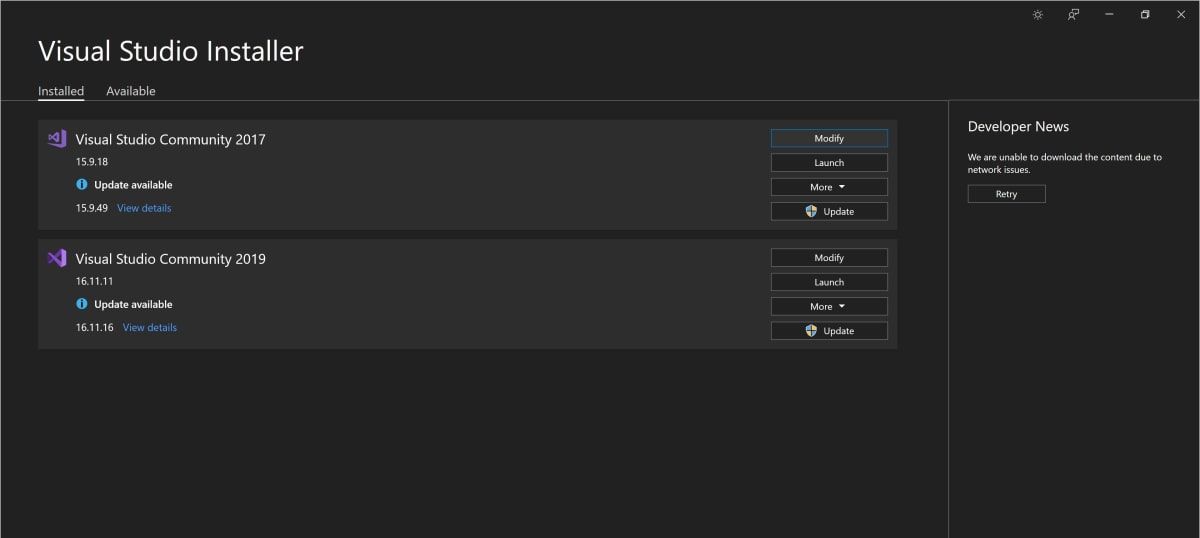
- Open Visual Studio Installer.
-
Choose the version of Visual Studio you want to use, and click on Modify.
-
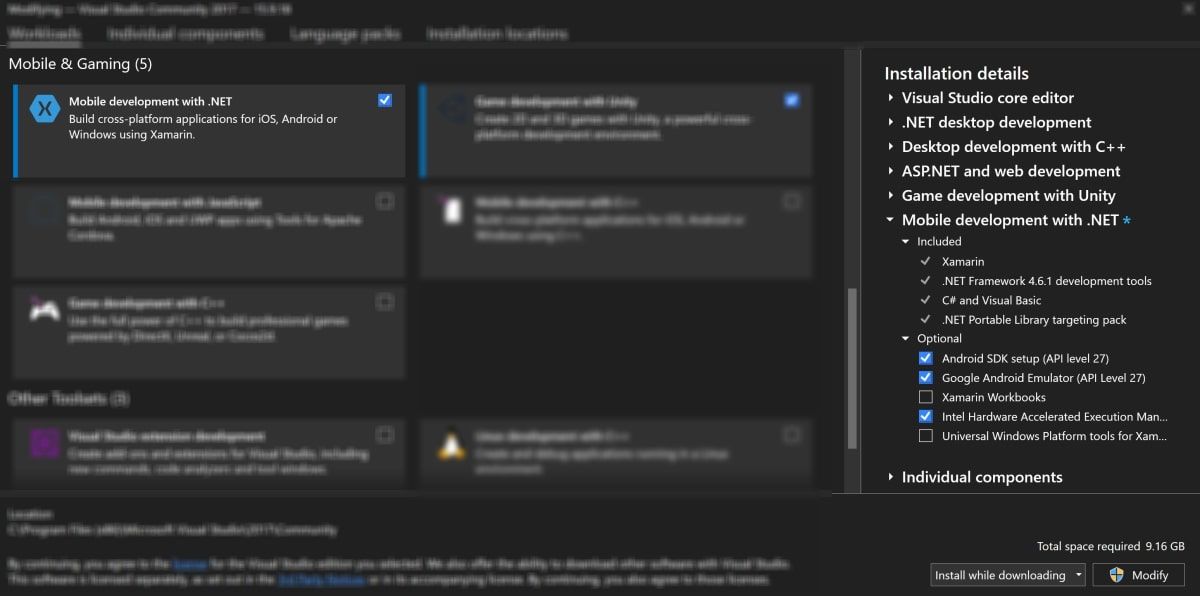
Scroll down to the Mobile and Gaming category. Select Mobile development with .NET. You can view the list of what this includes in the right-hand panel.
-
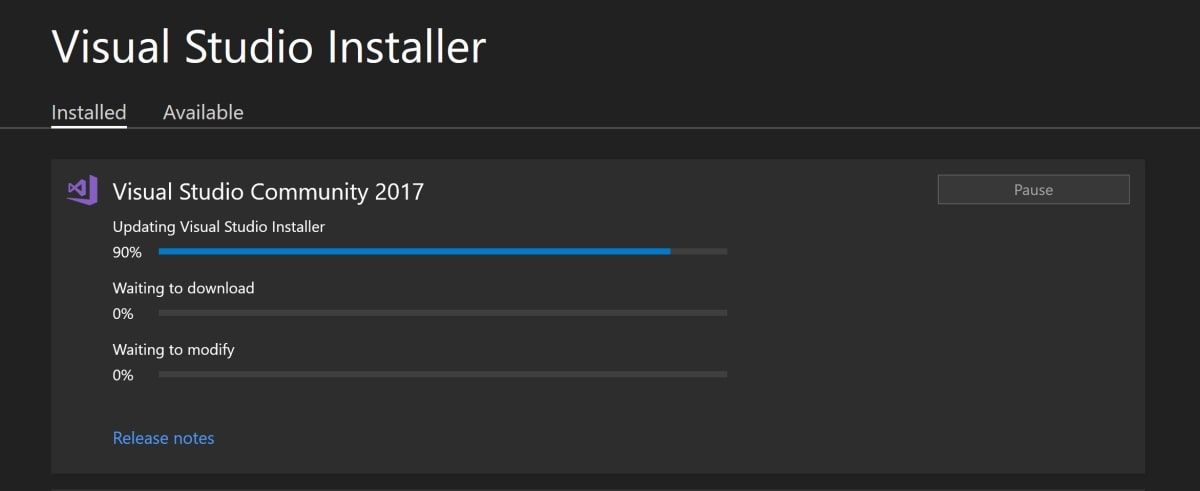
On the bottom-right, select Install while downloading, and click on Modify. Wait for the installation process to complete.


How to Create a New Xamarin Project
Once you have installed Mobile development with .NET, open Visual Studio and create a new Xamarin project.
- At the top of Visual Studio, open the File tab. Hover over New, and select Project.
-
Use the search bar to search for Xamarin. The window will populate with a list of Xamarin projects you can create, including projects for Xamarin Native or Xamarin Forms.
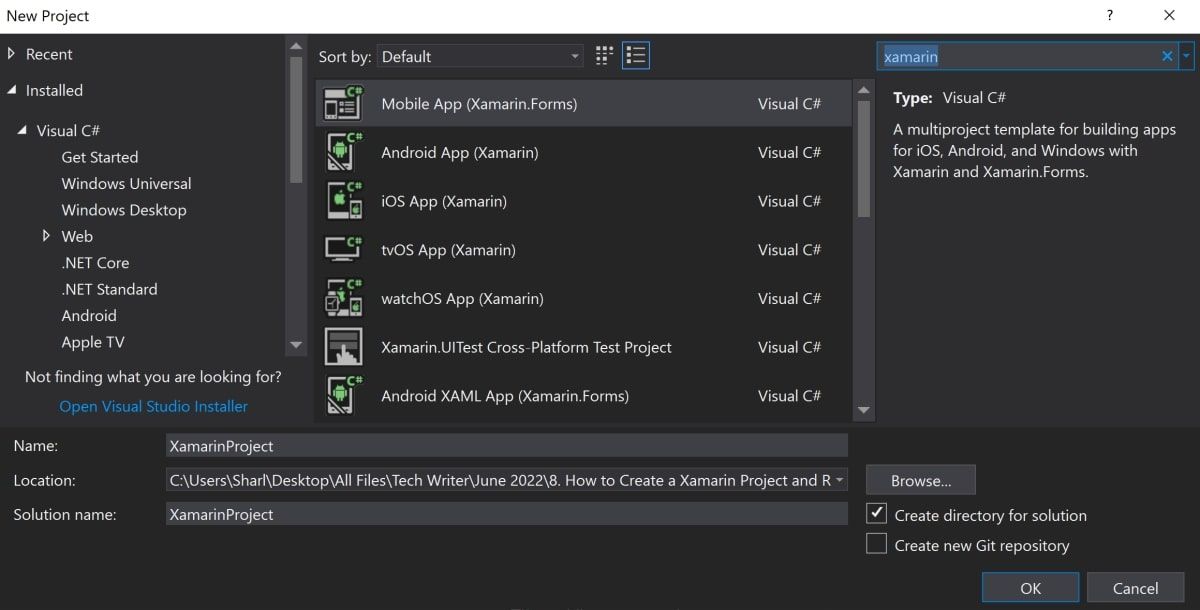
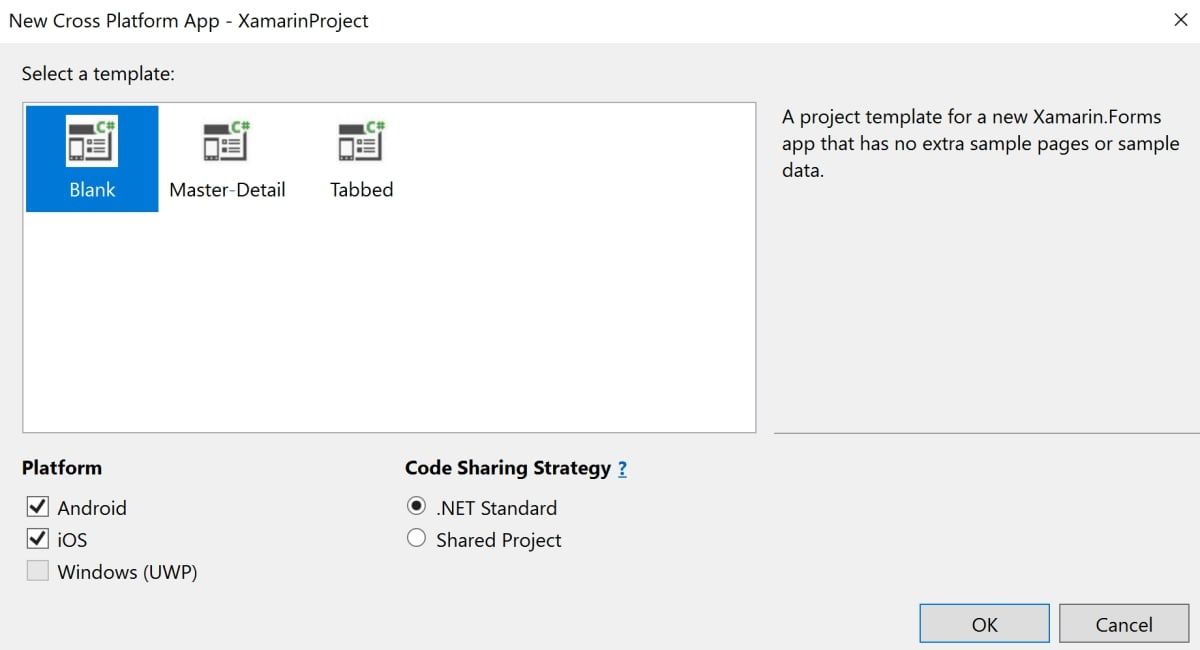
- Select Mobile App (Xamarin Forms).
-
Select a Blank template. Under Platform, choose the platforms you want to build your mobile app for (can be both Android and iOS).


The Basic Components of a Xamarin Application
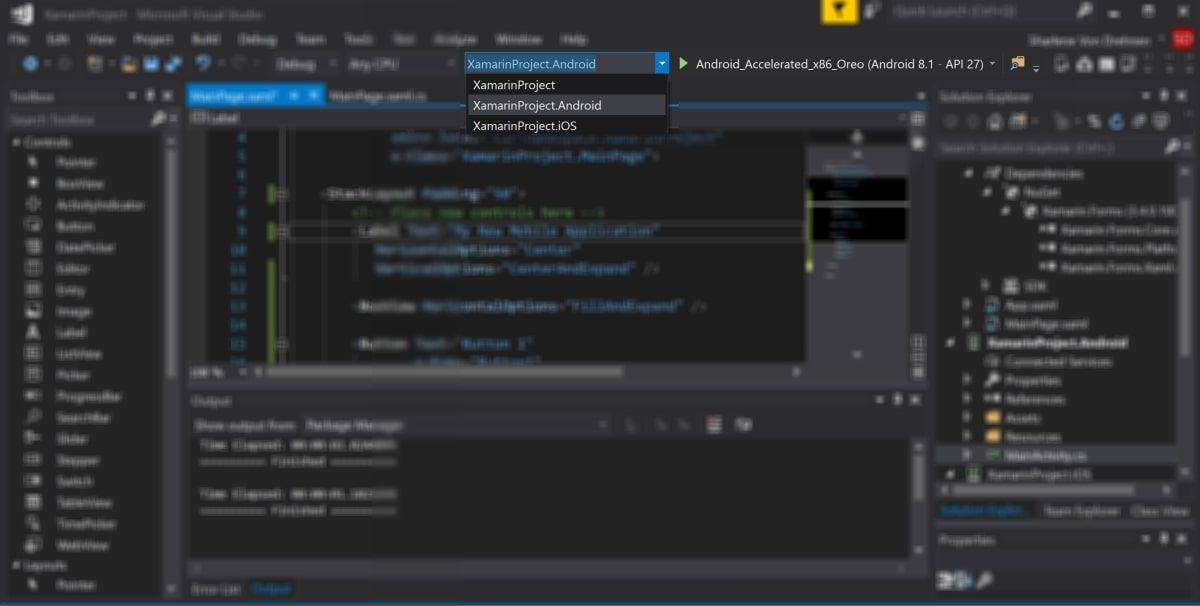
By default, multiple projects make up a Xamarin application. The XamarinProject stores shared UI elements or logic. It contains the MainPage.xaml file, which stores shared UI elements that will work for both iOS and Android devices.
The XamarinProject also contains the Dependencies folder, which stores some NuGet packages. These NuGet packages include the required functions for the Xamarin project to work.
There are also two other separate projects, each for the Android and iOS platforms. If you are running the mobile app using Android, the app starts from the MainActivity.xaml file. If you are running the mobile app using iOS, the app starts from the Main.cs file.

How to Add Content to Your Xamarin Application
Add some content to your mobile application. Xamarin includes a range of built-in elements such as labels, buttons, or boxes that you can use to build your interface.
Each element also has attributes, such as color, text, or other applicable styling. The syntax is a bit similar to how you would create HTML tags. For example:
<Label Text = "Hello" />
In the MainPage.xaml file, modify the code to add a few basic UI elements, such as a label and a button.
-
Add a Label within the StackLayout element. The StackLayout element lets you organize the elements inside it in order, either vertically or horizontally.
        <StackLayout Padding = "50">
   <Label Text = "My New Mobile Application"
          HorizontalOptions = "Center"
          VerticalOptions = "CenterAndExpand"
          FontAttributes = "Bold, Italic"
          FontSize = "24"
          TextColor = "Black" />
</StackLayout> -
Underneath the Label, and still within the StackLayout element, add a Button.
        <Button Text = "Button 1"
            x:Name = "Button1"
            Clicked = "ClickButton"
            BackgroundColor = "#2196F3"
            TextColor = "WhiteSmoke"
HeightRequest = "50" /> -
Add a function in MainPage.xaml.cs, that will execute when you click on the button.
        async void ClickButton(object sender, EventArgs e)
{
    // Change the text of the button when it is clicked on
    Button button = (Button)sender;
    button.Text = "The button was clicked!";
}
How to Run Your Xamarin Application Using the Android Emulator
You can run the Xamarin application using an emulator, which you can select at the top of the toolbar in Visual Studio.
- At the top of Visual Studio, click on the dropdown. Here you can select which platform you want to use. Select XamarinProject.Android.
-
Click on the green play button next to the dropdown, to launch the mobile app.
-
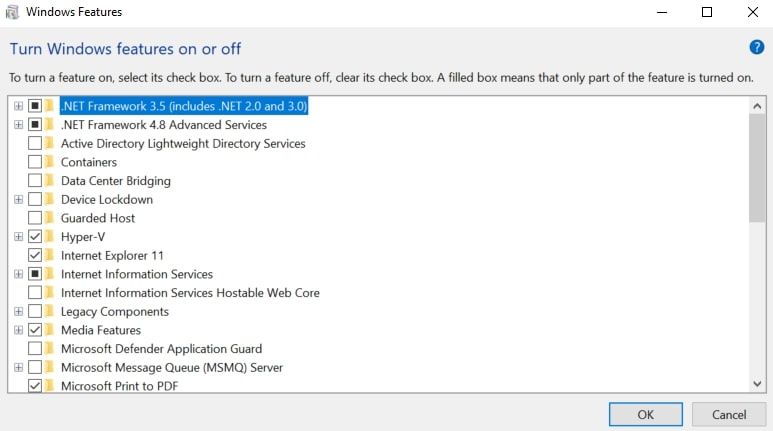
If you are using Windows and have Hyper-V, you may be asked to turn Hyper V on. In this case, open Turn Windows Features on or off, and select Hyper-V.
-
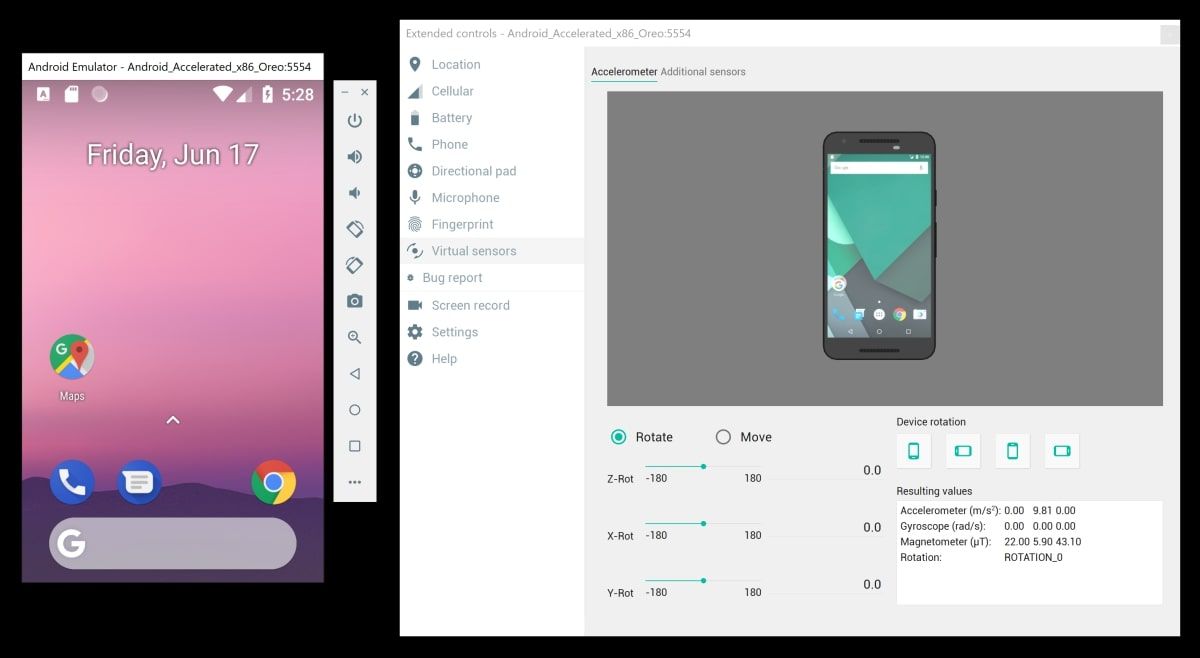
When the emulator launches, you can explore the functions that are available to you. This includes standard mobile functions such as turning your phone on or off. You can also access location and cellular information, virtual sensors, and additional settings.
-
Wait for the Visual Studio project to finish building. Once completed, the mobile screen on the emulator will change to show the main page of your mobile application.

- To test your application using iOS, change the dropdown to select iOS instead of Android, and then click on the green play button again.


Creating Mobile Applications Using Xamarin
Xamarin allows you to build Mobile applications across many platforms, such as iOS, Android, or Windows. It allows you to use UI elements that are re-usable or UI elements that you can share across many platforms.
When you create a new Xamarin project, you can add your content in the available xaml and C# files. You can also test what your mobile application looks like by opening it using an emulator.
There are many courses and resources you can explore to improve your knowledge on how to build mobile applications. This also includes development courses for specific platforms, such as Android or iOS development.