As you build more Rust programs, you may need to interact with databases for data storage and retrieval.
Rust's strong typing, memory safety, and performance, combined with its support for asynchronous operations, ORMs, and migrations, enable efficient and scalable data processing, making Rust an excellent choice for building database applications.
Introduction to Using SQL Databases in Rust
There are many database crates and libraries in the Rust ecosystem that provide support for the various database paradigms.
For SQL databases, you get to choose between database drivers like Libpq, Mysql-connector, and Sqlite3 that provide an interface for Rust programs to interact with databases directly without any abstraction layer on the SQL and ORMs (Object-Relational Mappers) like Diesel, Sqlx, and Rust-postgres that provide a convenient way to work with database over Rust data types such as structs and functions.
The Diesel ORM is one of the most popular database packages in the Rust ecosystem. As an ORM, Diesel provides features from query building and execution to model definition and database schema migrations, making it easier for you to interact with databases and write efficient, clean, and easy-to-maintain code.
Diesel also supports multiple database engines including PostgreSQL, MySQL, and SQLite, and provides a robust set of features for handling complex database operations like transactions, joins, and aggregate functions.
With powerful tools, features, and excellent documentation, Diesel has become a go-to choice for many Rust developers looking to build robust and scalable data-driven applications.
Getting Started With Diesel
You’ll have to add the diesel and dotenv crates to your project’s dependencies in the dependencies section of your cargo.toml file.
        [dependencies]
diesel = { version = "1.4.4", features = ["sqlite"] }
dotenv = "0.15.0"
After adding the crates as dependencies, you must install the diesel_cli CLI tool to interact with Diesel.
Run this command to install the diesel_cli tool:
cargo install diesel_cli
You can call the CLI tool with the diesel command after installing the tool.
Next, create an environment variables file and specify your database URL.
Run this command to create and insert the database URL for an in-memory SQLite database.
echo DATABASE_URL=database.db > .env
To work with Diesel, you must install sqlite3 or your preferred database on your computer.
Finally, run the setup command for Diesel to set up a database for your project:
diesel setup
The setup command creates a migrations directory, creates the database specified in the DATABASE_URL, and runs existing migrations.
Setting Up Migrations With Diesel
After setting up your database with Diesel, you’ll use the migration generate command to generate migration files. You’ll add the name of the file as an argument:
diesel migration generate create_humans
The command generates two SQL files in the migrations directory: up.sql and down.sql.
You’ll write SQL for your database table definitions in the up.sql file:
        -- Your SQL goes here

CREATE TABLE "human"
(
    "id"         INTEGER NOT NULL PRIMARY KEY AUTOINCREMENT,
    "first_name" TEXT    NOT NULL,
    "last_name"  TEXT    NOT NULL,
    "age"        INTEGER NOT NULL
);
You’ll write SQL code to drop database tables in the down.sql file:
        -- down.sql

-- This file should undo anything in `up.sql`
DROP TABLE "human"
After writing the SQL files, run the migration run command to apply pending migrations.
diesel migration run
Additionally, you can use the migration redo command to revert migrations:
diesel migration redo
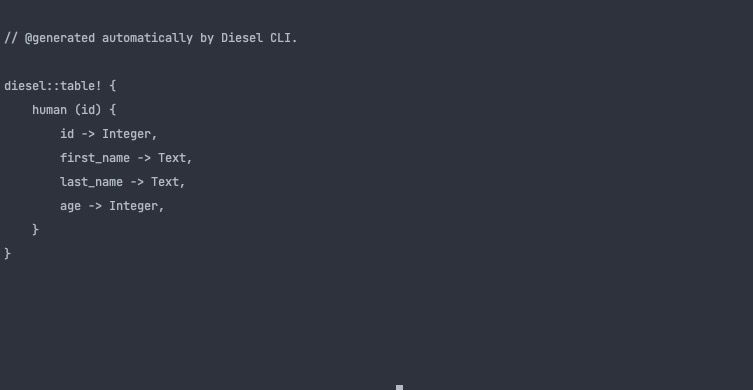
Also, you can use the print-schema command to print the schema. The command prints the contents of the schema.rs file.
diesel print-schema
The output of the print_schema command is Rust code that matches your SQL schema:
Connecting to Your SQL Database With Diesel
First, add these imports and directives to your file:
        mod schema;

#[macro_use]
extern crate diesel;
use dotenv::dotenv;
use diesel::prelude::*;
use std::env;
use Diesel::{Connection, ExpressionMethods, QueryDsl, RunQueryDsl, SqliteConnection};
use crate::schema::human;
You’ll use the imports and directives to connect to your database and perform operations.
Here’s how you can connect to an SQLite database with a function and return a connection instance:
        use std::env;
use diesel::{Connection, SqliteConnection};

fn establish_connection() -> SqliteConnection {
    dotenv().ok();

    let database_url = env::var("DATABASE_URL")
        .expect("DATABASE_URL must be set");
    SqliteConnection::establish(&database_url)
        .unwrap_or_else(|_| panic!("Error connecting to {}", database_url))
}
The establish_connection function returns the connection instance struct (SqliteConnection). The establish_connection loads the environment variables with the ok function, accesses the database URL with the var function, and establishes a connection with the database via the URL with the establish function.
After a successful connection, you can execute queries and insert them into your database.
Inserting Values to a Database With Diesel
You’ll use a struct that matches your SQL schema to insert values into your database.
Here’s a struct that matches the human table schema:
        #[derive(Queryable)]
pub struct Human {
    pub id: i32,
    pub first_name: String,
    pub last_name: String,
    pub age: i32,
}
The insertion function will return an instance of the Human type for other operations.
You’ll need a struct for your insertion function; the struct will implement two macro attributes, one for insertion functionality and the other that identifies the table for the operation.
Here’s the struct for the insertion operation:
        #[derive(Insertable)]
#[table_name = "human"]
struct NewHuman<'a> {
    first_name: &'a str,
    last_name: &'a str,
    age: i32,
}
Your insertion function will take in a connection instance and the data you want to insert into the database. Insert the data and print a message based on the status of the operation.
        fn insert_into<'a>(conn: &SqliteConnection, first_name: &'a str, last_name: &'a str, age: i32) -> Human {
    use crate::schema::human;

    let new_human = NewHuman {
        first_name,
        last_name,
        age,
    };

    diesel::insert_into(human::table).values(&new_human).execute(conn).expect("Error inserting new human");

    human::table.order(human::id.desc()).first(conn).unwrap()
}
The insert_into function takes in the parameters and inserts the values into the database with Diesel’s insert_into function that takes in the table and the values function that takes in a struct instance. The function assigns the ID in descending order with the desc function before executing the operation.
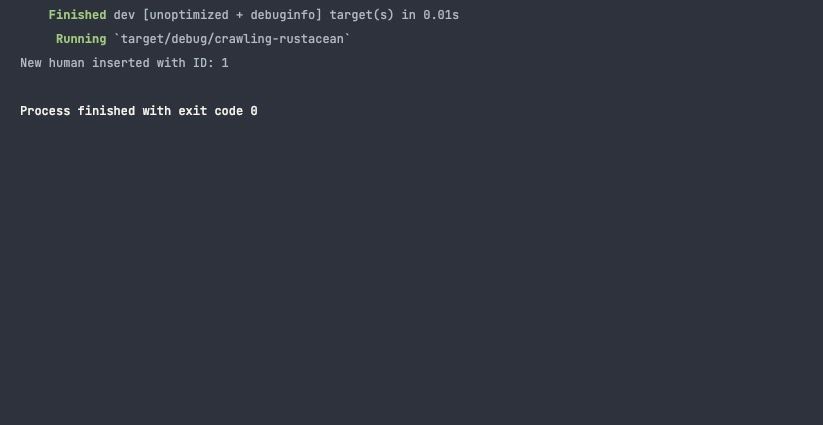
Here’s the main function that calls the insert_into function:
        fn main() {
    let conn = establish_connection();
    let new_human = insert_into(&conn, "John", "Doe", 25);
    println!("New human inserted with ID: {}", new_human.id);

}
The conn variable is a connection instance, and the new_human variable is the function call. The main function prints the ID after a successful operation.
Querying Databases With Diesel
Alternatively, your query function struct will implement the Queryable attribute with a derive macro.
Here’s the struct for the query operation:
        // Define a struct that represents a row in your table
#[derive(Queryable)]
struct Human {
    id: i32,
    first_name: String,
    last_name: String,
    age: i32,
}
The query function will take in a connection instance and return a Human struct as follows:
        fn query_db(conn: &SqliteConnection) -> Human {
    human.filter(age.eq(25)).first(conn).expect("Error querying database")
}
The query_db function filters the human table for the row where the age equals 25 and returns the first occurrence as a struct instance.
        fn main() {

    let conn = establish_connection();
    let person = query_db(&conn);

    println!("ID: {}", person.id);
    println!("First Name: {}", person.first_name);
    println!("Last Name: {}", person.last_name);
    println!("Age: {}", person.age);
}
In the main function, the person variable calls the query_db function and prints the fields of the row with an age value equal to 25.
You Can Build Web Servers With Rust
Rust continues to gain popularity in web development as a server-side language with libraries like Actix-web and Rocket that make it easier to set up servers and build APIs and websites by abstracting complex functionality.
Most web servers have to interact with databases for data storage and retrieval. You can further integrate your Diesel-powered apps with Actix-web or Rocket to build sophisticated web applications.


