
It’s common for desktop applications to use dialog boxes when prompting information from the user. You can create input dialog boxes in a Windows Forms application, by displaying a new window.
You can also add UI elements to the new dialog window. These include messages, text boxes, and "Ok" and "Cancel" buttons. When the user enters information in the input box, you can store the result and use it in other parts of the app.
How to Create an On-Click Function to Trigger the Input Dialog Box
The dialog box should not always be visible. You can trigger the dialog box to show when the user completes an action, such as a button click. You can also learn more about other Windows Forms events that you can use in a Windows Forms app.
Add a button to the canvas and create a function that will run when the user clicks on the button.
- Create a new Windows Forms application in Visual Studio.
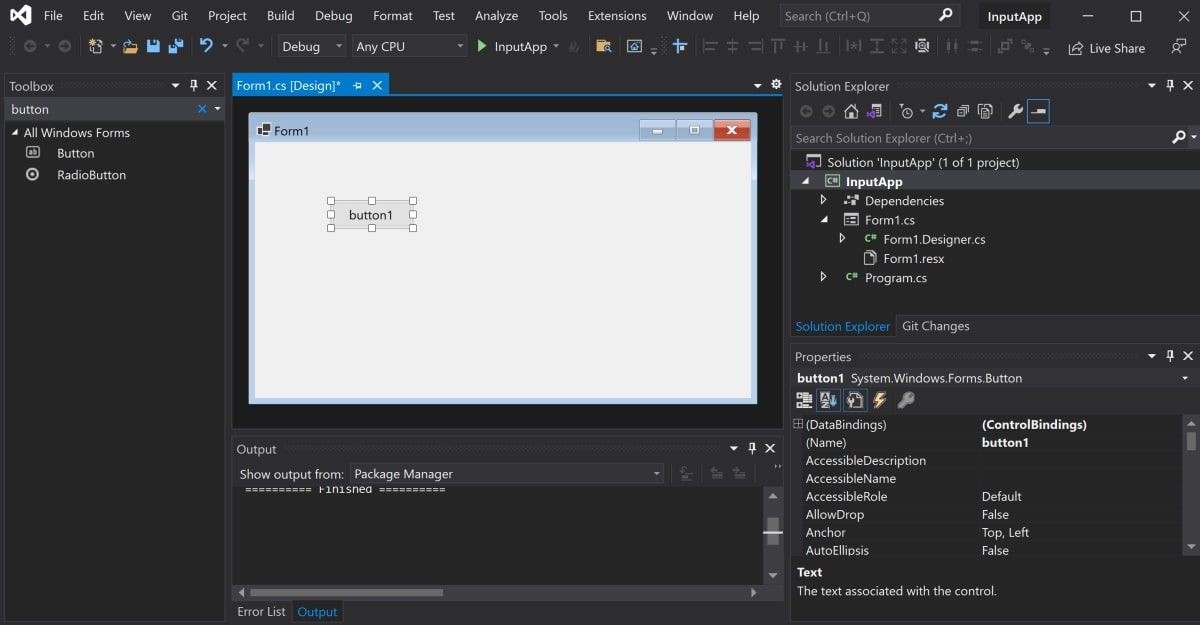
- In the Toolbox, search for a button UI control.
-
Click and drag a button onto the canvas.
-
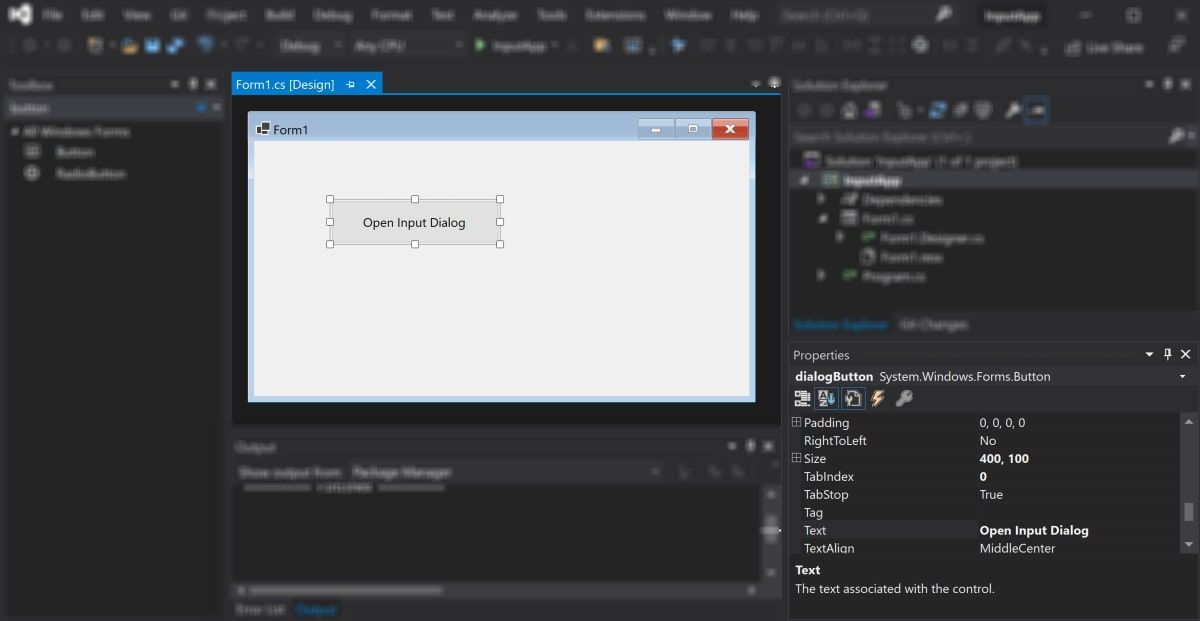
In the properties window, change the properties of the button to the following new values:
Property Name
New Value
Name
dialogButton
Size
400, 100
Text
Open Input Dialog
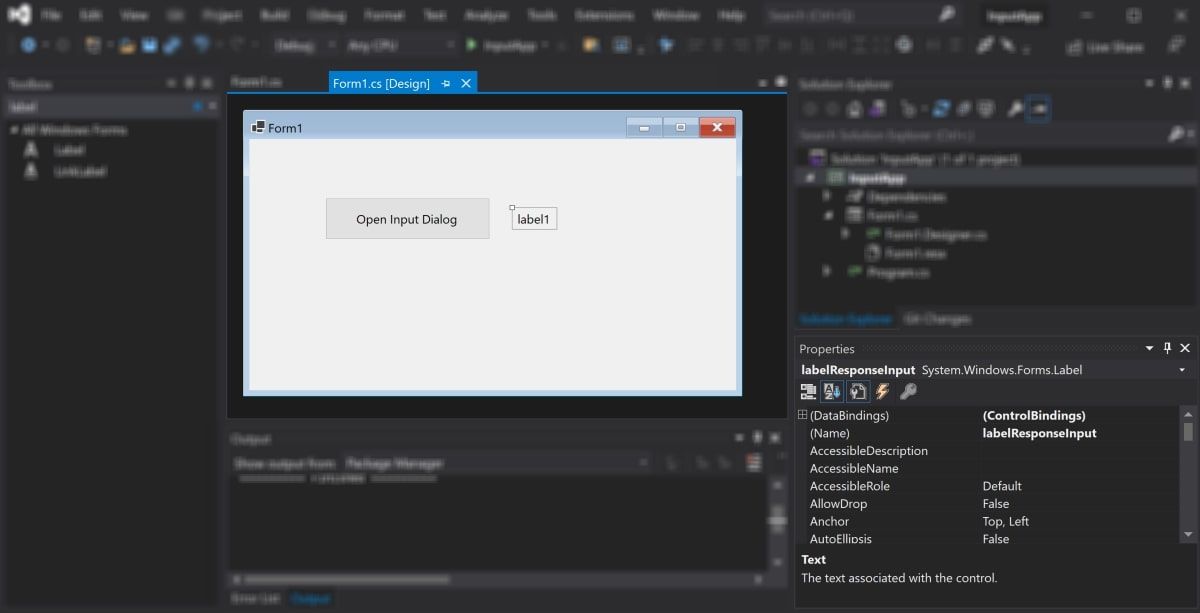
- In the Toolbox, click and drag a label onto the canvas. Place the label to the right side of the button.
-
In the properties window, change the properties of the label to the following values:
Property Name
New Value
Name
labelResponseInput
Visible
False
-
Double-click on the new Input Dialog button. This will generate an on-click function in the code-behind CS file for the form.
        private void dialogButton_Click(object sender, EventArgs e)
{
    // The code here will trigger when the user clicks on the button
    // It will display the input dialog box
}


How to Create the Input Dialog Box
Create the dialog box inside a new function. The function will programmatically create a new form, and add UI elements to it, including a text box with "Ok" and "Cancel" buttons.
-
Under the dialogButton_Click() function, create a new function that will create the Input Dialog box. The "title" parameter will show in the top-left corner of the window. The value for the "promptText" will display to the user. The "value" parameter is an out parameter and will return the value that the user entered inside the input box.
        public static DialogResult InputBox(string title, string promptText, ref string value)
{

} -
Inside the InputBox() function, create the UI elements that will display on the form.
        Form form = new Form();
Label label = new Label();
TextBox textBox = new TextBox();
Button buttonOk = new Button();
Button buttonCancel = new Button(); -
Add the title of the form, which will display in the top-left corner. Also add the main message that will display to the user, above the input box.
        form.Text = title;
label.Text = promptText; -
Add values for the "Ok" and "Cancel" buttons. The text property contains the text that shows on top of each button. The DialogResult property contains the type of result the button will represent. You can read more about DialogResult in Microsoft’s official documentation.
        buttonOk.Text = "OK";
buttonCancel.Text = "Cancel";
buttonOk.DialogResult = DialogResult.OK;
buttonCancel.DialogResult = DialogResult.Cancel; -
Use the SetBounds() method to set the x and y positions of the label, text box, and buttons on the form. You can also specify each element’s width and height.
        label.SetBounds(36, 36, 372, 13);
textBox.SetBounds(36, 86, 700, 20);
buttonOk.SetBounds(228, 160, 160, 60);
buttonCancel.SetBounds(400, 160, 160, 60); -
Configure some properties for the dialog window itself. These properties set the form size, borders, and start position. It also controls the ability to minimize or maximize the window, or resize the label if necessary.
        label.AutoSize = true;
form.ClientSize = new Size(796, 307);
form.FormBorderStyle = FormBorderStyle.FixedDialog;
form.StartPosition = FormStartPosition.CenterScreen;
form.MinimizeBox = false;
form.MaximizeBox = false; -
Add the UI elements onto the new form, and set the form's accept and cancel buttons to the button objects created earlier.
        form.Controls.AddRange(new Control[] { label, textBox, buttonOk, buttonCancel });
form.AcceptButton = buttonOk;
form.CancelButton = buttonCancel; -
Show the newly created dialog window to the user.
DialogResult dialogResult = form.ShowDialog(); -
Store the value that the user entered into the textbox. Return the result of the form, which would either be "Ok", or "Cancel", based on the button the user clicks on.
        value = textBox.Text;
return dialogResult;
How to Use the Input Dialog Box
To use the input dialog box, call the InputBox() function inside the dialogButton_Click() function. When the user clicks on the "Open Input Dialog" button, it will show the dialog box.
-
Inside the dialogButton_Click() function, create a variable to store the value that the user enters inside the text box. This value will come from the "value" out parameter.
string value = ""; -
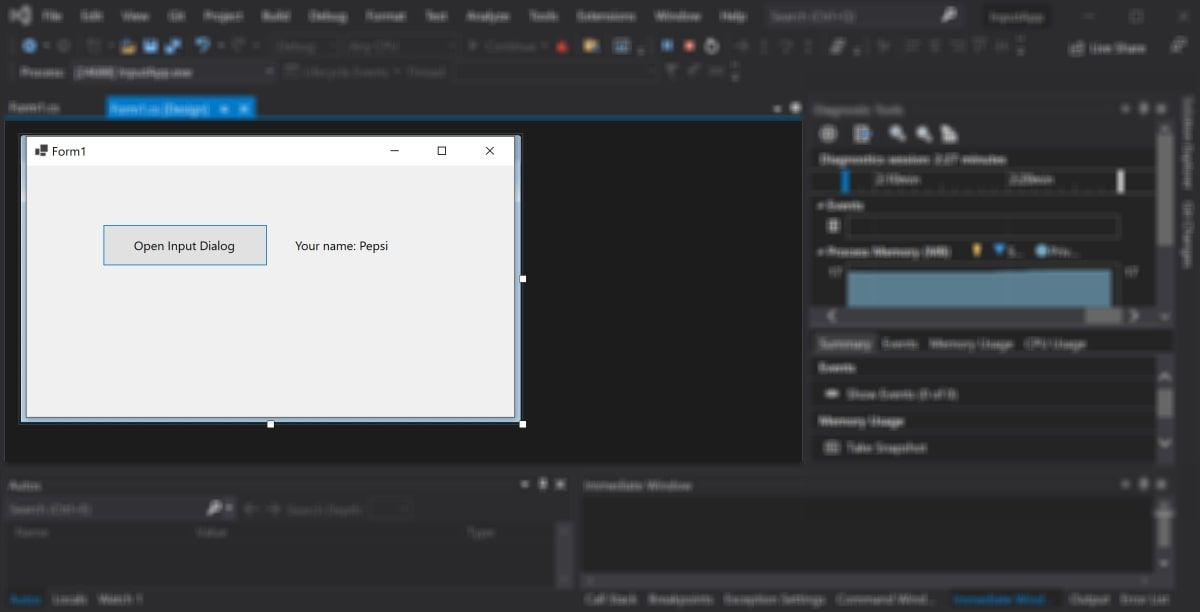
Display the dialog box by calling the InputBox() function. Check if the user clicks on the "Ok" button, and if so, add some text onto the screen to display the response back to the user.
        if (InputBox("Dialog Box", "What is your name?", ref value) == DialogResult.OK)
{
    labelResponseInput.Visible = true;
    labelResponseInput.Text = "Your name: " + value;
}
How to View the Input Dialog Pop Up
Run the application and trigger the dialog box.
-
Click on the green play button at the top of the Visual Studio window.
-
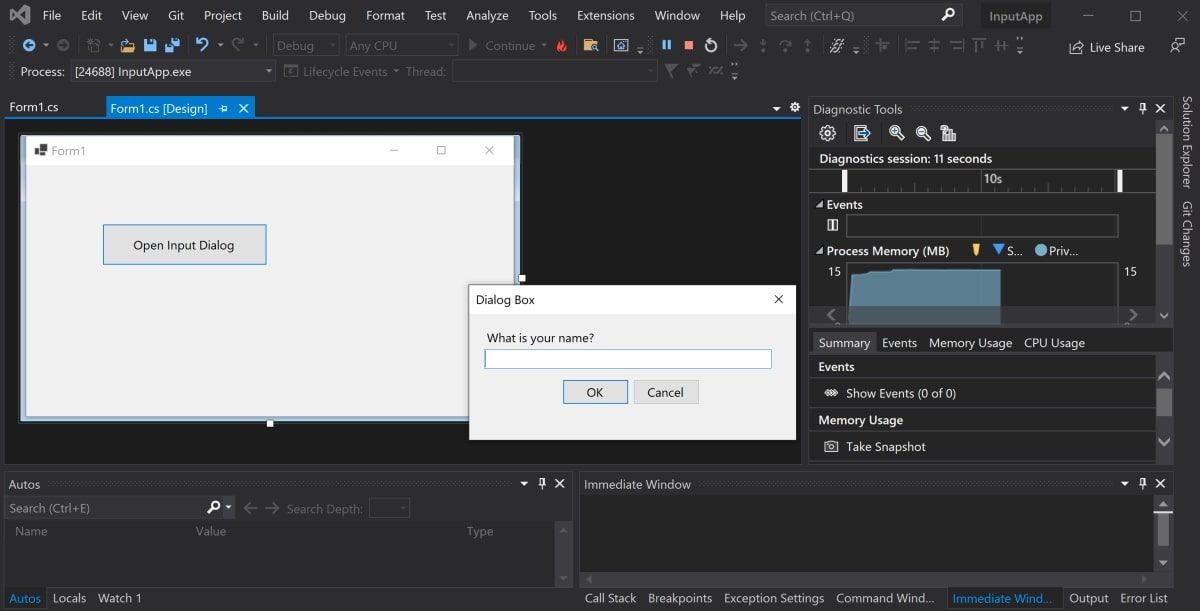
Click on the Open Input Dialog button to show the dialog box.
-
Enter a name into the text box and click on the OK button. The dialog box will close and display the results entered into the text box.
- Click on the Open Input Dialog button again to re-open the dialog box.
- Click on the Cancel button to close the dialog box. This cancels the dialog box without completing any actions or updating the UI.


Adding Content and UI Elements to Your Windows Forms Application
You can create input dialog boxes in a Windows Forms application, and display them to the user when certain events happen. You can create a new dialog window by creating a new form. You can then add new UI elements to it, such as labels, text boxes, or buttons.
Once the user has entered the required information, you can close the input box and store the information that they entered.
If you want to add more content to your UI or dialog box, you can explore how to add other UI elements. This includes elements such as shapes or images.