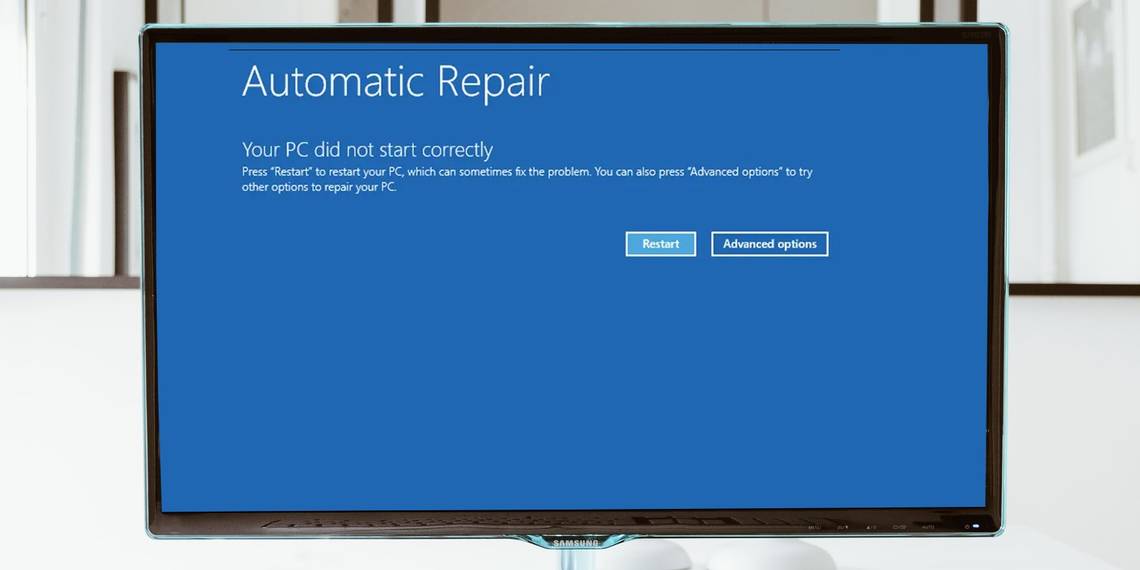
You may sometimes come across an error message that reads “Your PC did not start correctly,” right after you boot into Windows. While this error isn’t grave as a one-off, you should pay attention to it if you encounter it repeatedly.
Various causes, such as a recent hardware upgrade, a new or updated driver, or file system corruption, can trigger this error. If it’s the first time you see the error, try to restart your PC and see the error appears again. If it does, keep reading to know all the possible fixes for resolving the "Your PC did not start correctly” issue.
1. Run the Startup Repair Tool
Startup Repair is a built-in Windows utility that tries to diagnose and fix any PC problems. If your PC is not booting correctly and landing on the same Automatic Repair screen repeatedly, try the Startup Repair tool once.
Here's how you can run the Startup Repair tool on your Windows PC:
-
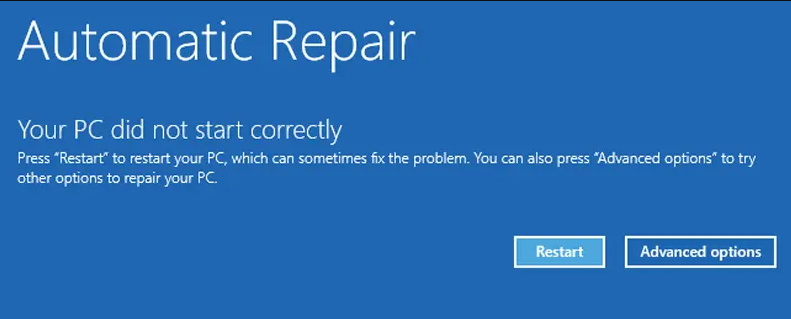
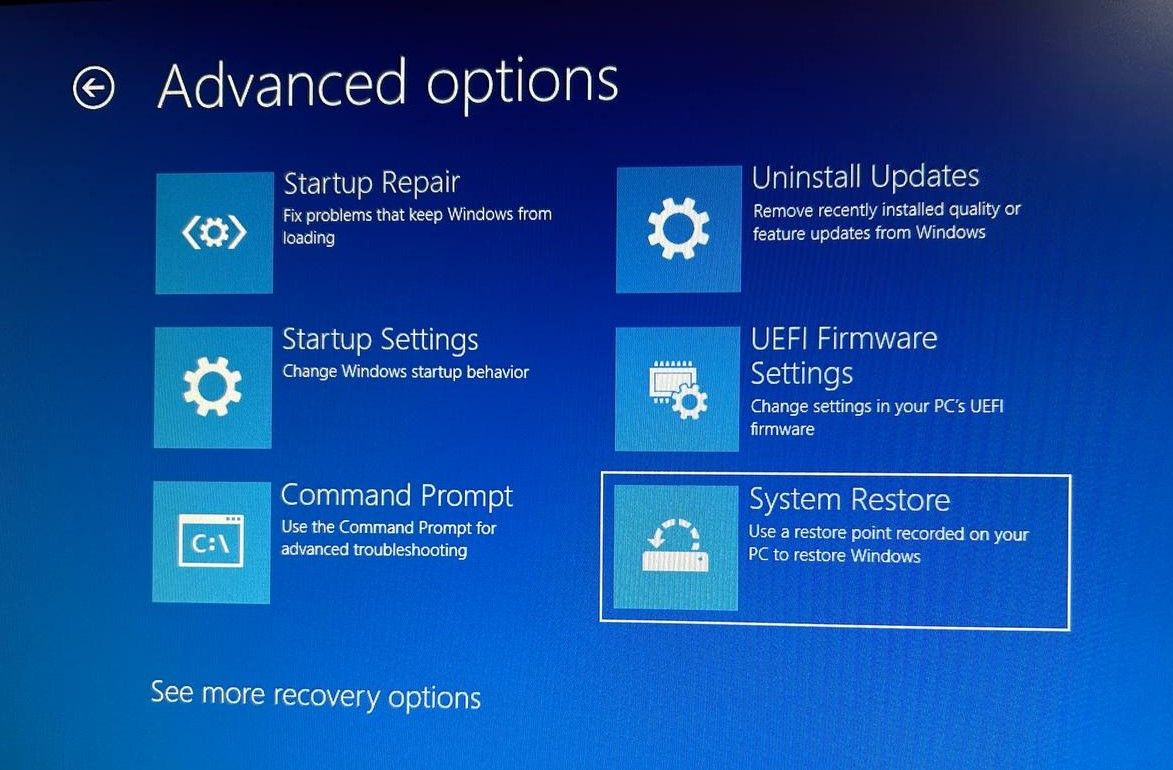
First, trigger the "Your PC did not start correctly" screen, then select Advanced options instead of Restart.
-
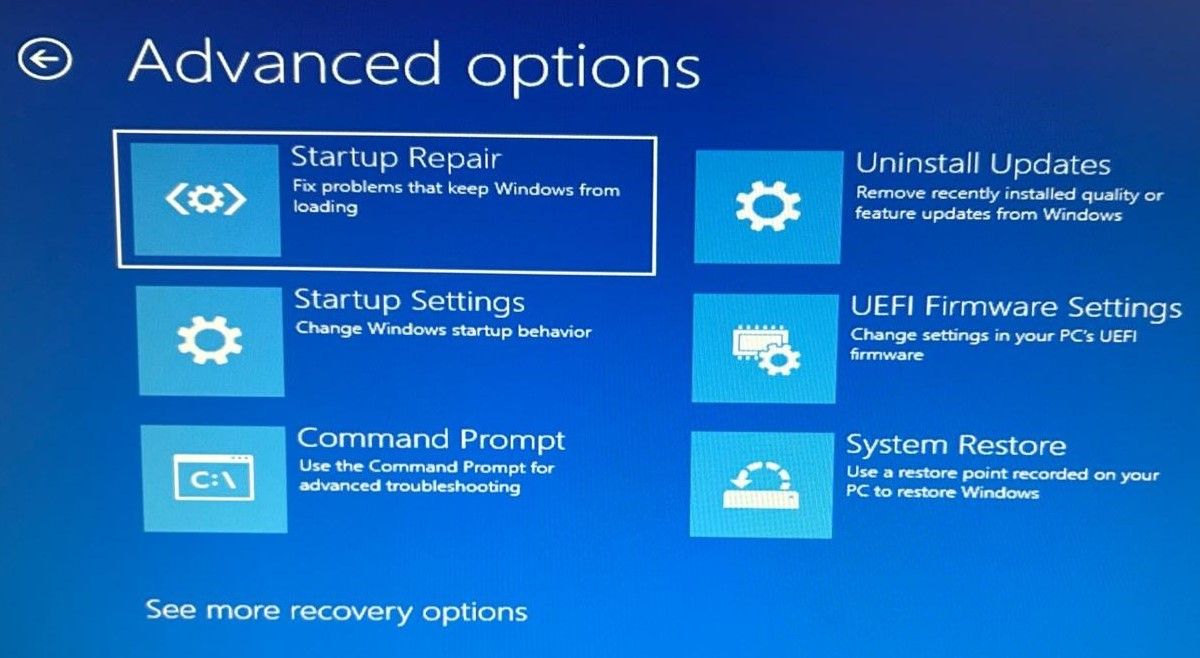
Go to Troubleshoot > Advanced options and click on Startup Repair. A new screen will appear, telling you that Windows is now trying to fix the boot issues with your device.
- If, even after the above step, you still witness the same blue screen, click the Restart button and let the process complete.


The Startup Repair tool, in most cases, should do the job, but if it's not working, move to the next given method.
2. Boot into Safe Mode
Safe Mode allows you to troubleshoot Windows by starting your PC in a limited state. If you need to retrieve important data from a malfunctioning computer, you can use Safe Mode and transfer your data to a flash drive. Plus, booting into Safe Mode and restarting your PC usually might fix the “Your PC did not start correctly” error.
Follow these steps to boot your computer into the Safe Mode:
-
Click on Advanced Options when the blue screen appears.
-
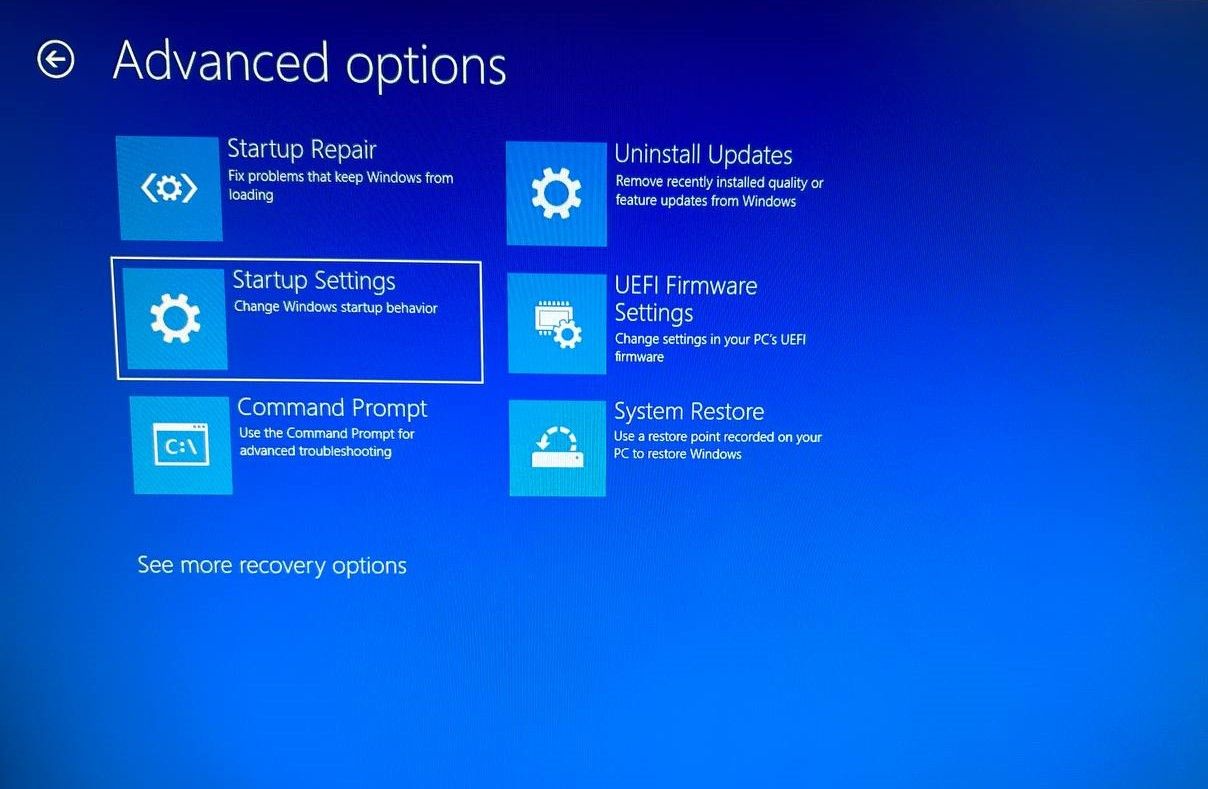
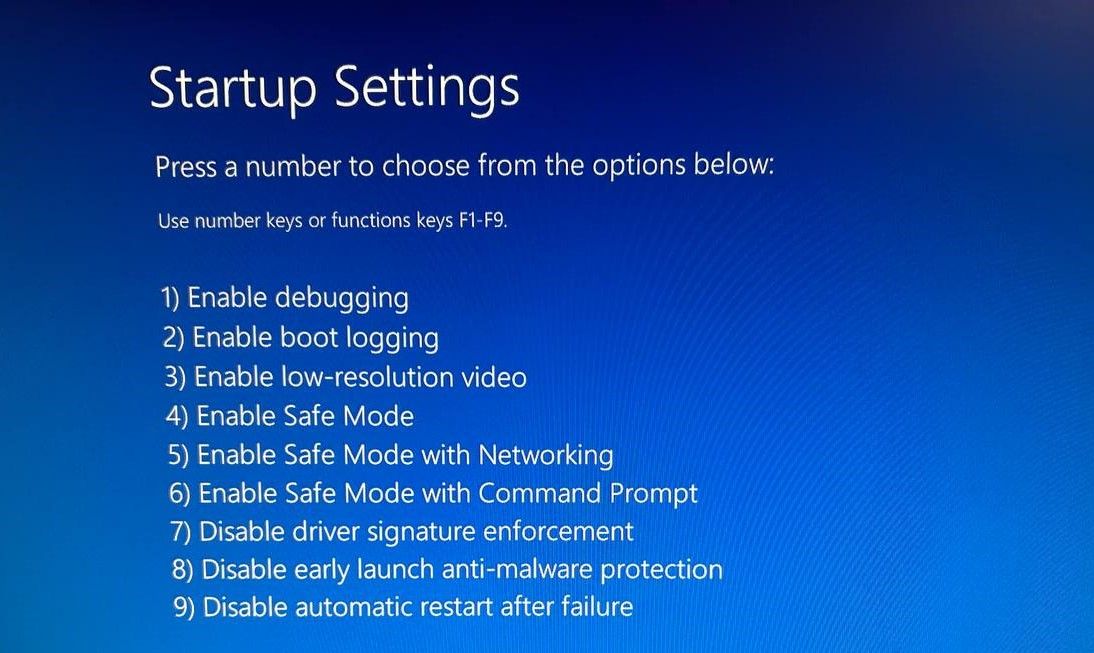
Navigate to Troubleshoot > Advanced options > Startup Settings.
- Click on Restart. When the PC restarts, you’ll see a list of startup options.
-
Press the 4 or F4 key on your keyboard, which should boot your PC in Safe Mode.


If you need to transfer any data, now is a good time. Restart the PC to return to the standard Windows OS when you're done. If things go well, your error will disappear.
Besides the Safe Mode, you'll find many other things under the Startup Settings. To know more about their use cases, read our complete guide on Windows Startup Settings.
3. Perform a System Restore
If you’ve recently made any changes to the system, it could have caused the error to begin appearing. However, if you’re unsure what changes you could have made, you can have your system time-travel to a point where it works fine. It may sound like magic, but it's not; it's the System Restore feature, one of Windows' most powerful recovery tools.
However, you can only use System Restore when your system has created a restore point in the past. Fortunately, if System Restore is enabled on your PC, Windows will create a restore point each time you make a critical change, such as a driver installation or a Windows update. As such, there's a good chance you already have some restore points ready to use
If you're ready, follow these steps to perform a system restore:
-
Click on Advanced options > System Restore. At this point, you may need to choose and log in to an administrator account you want to restore if you have multiple administrator accounts.
- Click Next to go to the main screen for system restore.
-
Select a restore point created when your system worked fine, and click Next.
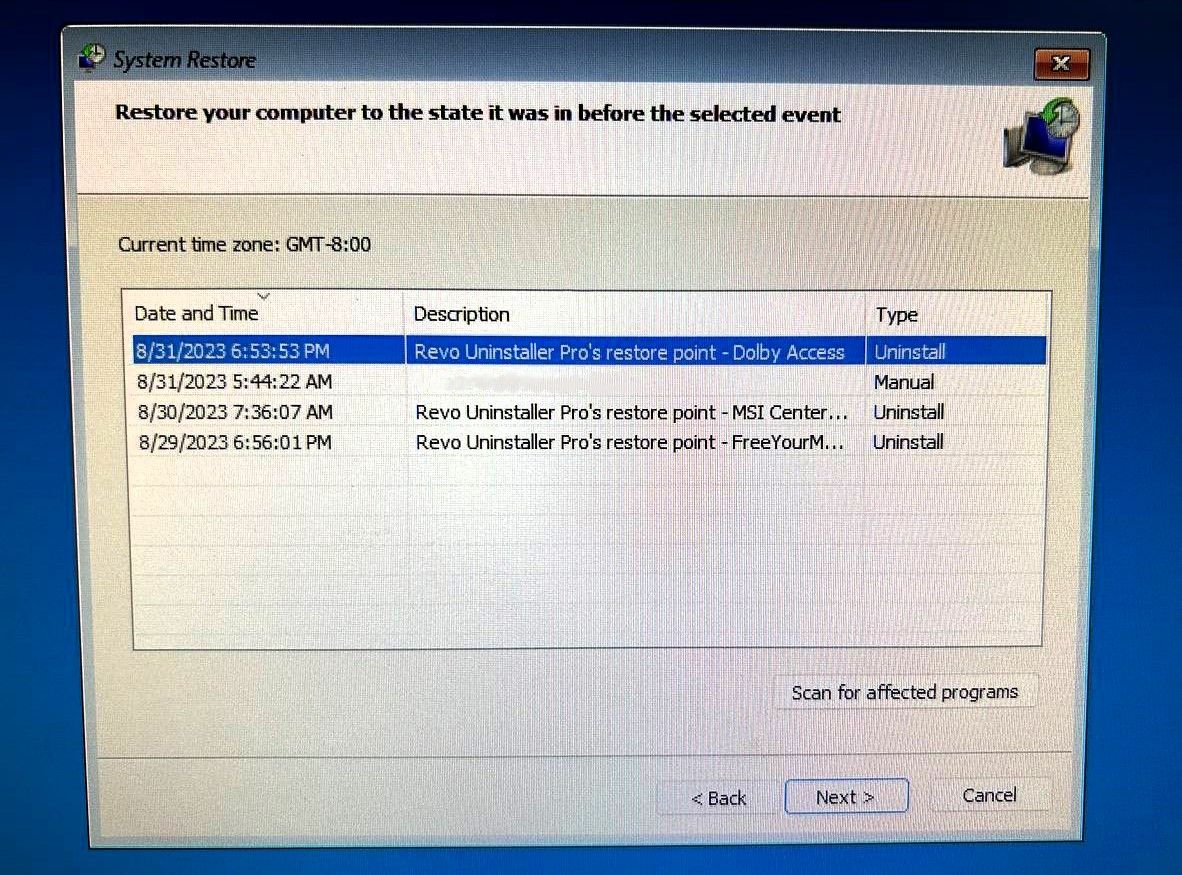
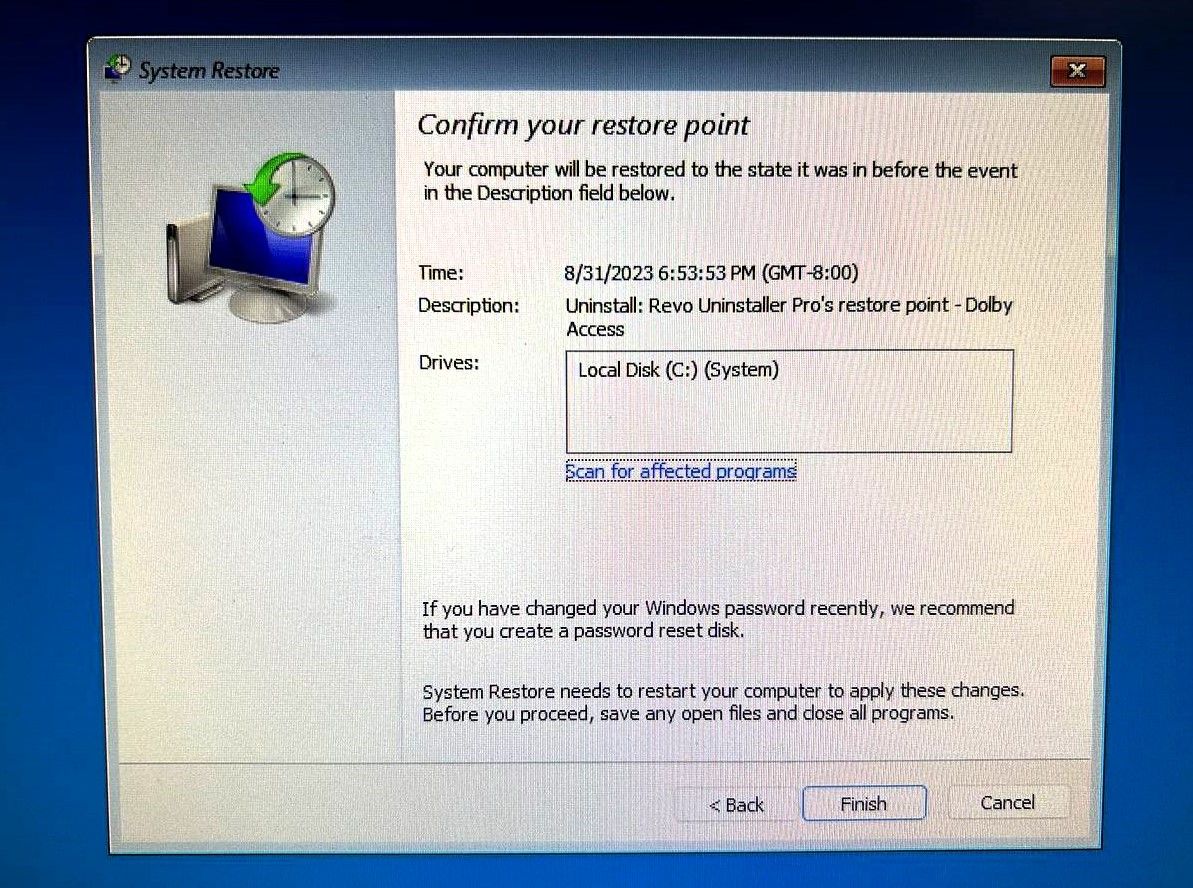
- If you’re concerned that this may remove a vital application you’ve installed recently, click on Scan for affected programs on the next screen, and you’ll see the programs that will go missing after the restoration.
-
Click Finish to continue and let Windows finish the process.


Hopefully, you can boot into Windows again when the process is done.
4. Check for Missing or Corrupt System Files
Windows may have trouble booting if one or more system files are corrupt or missing. You can fix the issue with the System File Checker (SFC) utility.
Here's how to use the SFC utility using the Command Prompt:
- From the error screen, navigate to Advanced options > Command Prompt.
-
First, run the DISM (Deployment Image Servicing and Management) tool on the Command Prompt window to download Windows's system files for booting correctly. Here's the command for that: DISM.exe /Online /Cleanup-image /Restorehealth
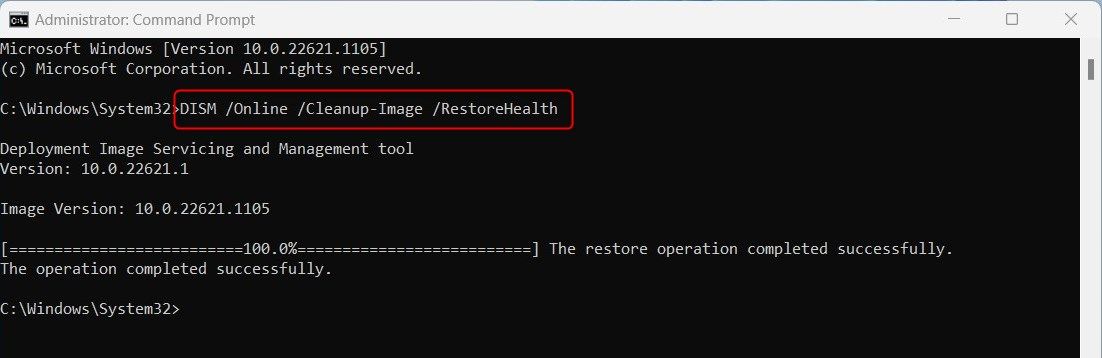
- Next, run the System File Checker utility using this command: sfc /scannow
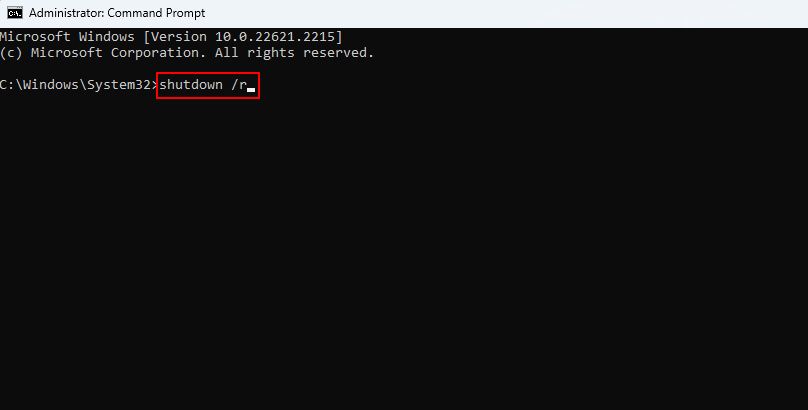
-
The SFC tool scans your PC for missing or corrupt system files. Once it finishes scanning and repairing the system files, use this command to restart your PC automatically: shutdown /r


5. Repair the Boot Configuration Data
In Windows parlance, BCD stands for boot configuration data. It’s the information that the Windows runtime environment relies on to instruct the Windows boot loader about where it needs to search for the boot information.
If none of the previous fixes worked for you, fixing your system's BCD might be worth a shot in case one or more files have become corrupt or gone missing.
You can repair the boot configuration data using the below steps:
-
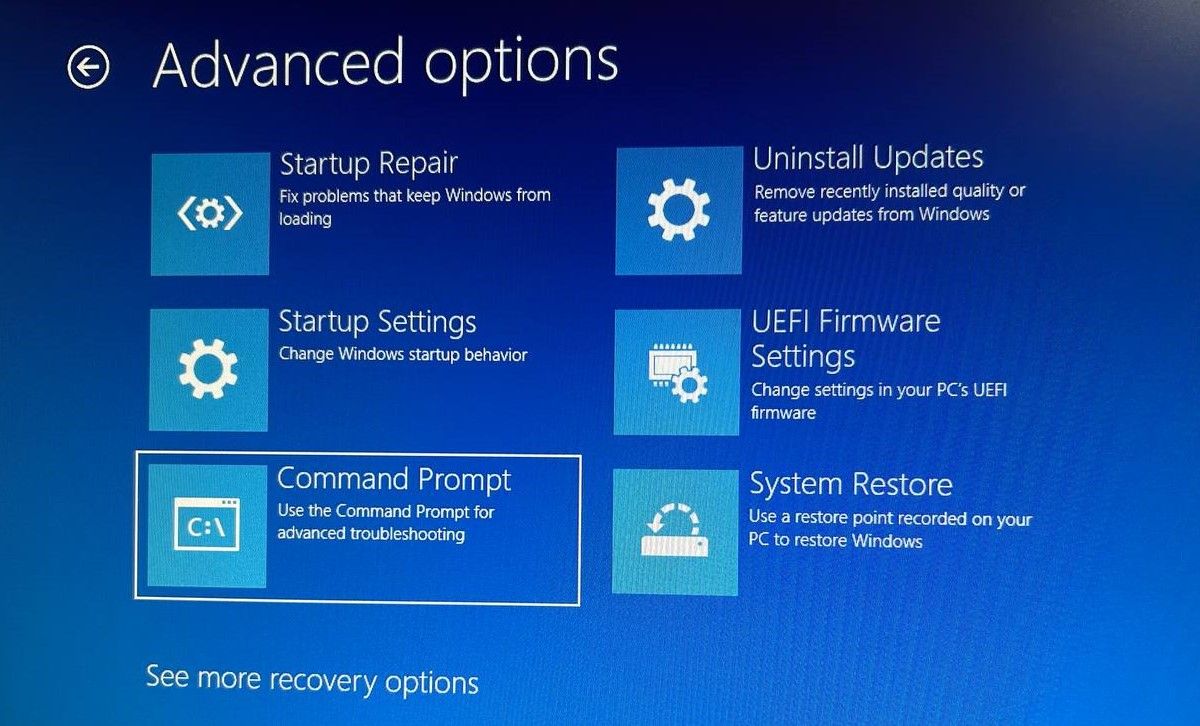
Go to Advanced Options > Command Prompt from the error screen.
-
In the Command Prompt, run the following command: bootrec /rebuildbcd
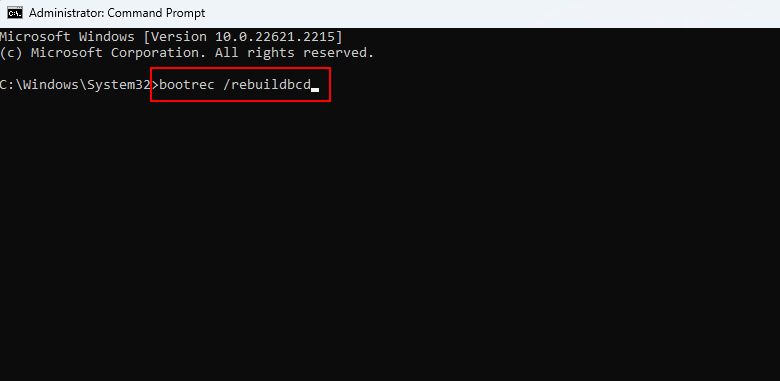
- If the bootrec command identifies one or more Windows installations, press Y or A to add all of them to the boot list. Next, run all the following commands:


        bcdedit /export c:bcdbackup
attrib c:bootbcd -h -r -s
ren c:bootbcd bcd.old
bootrec /rebuildbcd
If you face an error with the commands, ensure to type each of them one by one. Once done, press Y and Enter. At last, once the boot configuration data is fixed, restart the PC.
6. Repair the Master Boot Record
Master Boot Record (MBR) is the first sector on your HDD. Simply, it helps your system identify your OS's location so that it can boot into your PC’s random access memory. If it's corrupted, your computer will find it hard to boot normally.
To fix the MBR, go to Advanced options > Command Prompt and use the following command to initiate the repair process:
chkdsk /r

If this doesn’t fix the error, run the following commands one by one:
        bootrec /rebuildbcd
bootrec /fixmbr
bootrec /fixboot
Restart your computer and see if this fixes the “Your PC did not start correctly” error.
7. Delete Recent Windows Updates
If you start to encounter an error following an update, you’ll need to uninstall the recent updates. We assume you can't boot into the desktop because of the blue screen. So, we recommend booting into the Safe Mode first. Once you're in Safe Mode, follow the steps on how to uninstall the recent updates article.
Alternatively, you can also go to Advanced Options > Uninstall Updates. Select the updates that are the most recent ones and then uninstall them.

If you've managed to fix the "Your PC did not start correctly” issue, check out our explanation of all the Advanced Startup options for future troubleshooting purposes.
8. Reset Your PC
As a last resort, you might try resetting your PC. Resetting the PC essentially reinstalls the entire OS. After the reset, you'll need to reinstall all third-party apps, and all settings will revert to default. That's precisely why it's a last resort. If you've tried everything else, see how to reset a Windows computer to fix the error.
Got Your Windows Up and Running?
Hopefully, one of these fixes worked for you, and your PC normally boots into Windows. If you’re still having trouble booting into Windows, don’t gloom; all you need to do is spend some more time troubleshooting.