One of the go-to methods for diagnosing any critical error in Windows is to boot into Safe Mode. Safe Mode disables all non-essential drivers and third-party software so that your computer can boot without any interference.
But what if your computer can't boot into Safe Mode at all? Your computer may get stuck at the Startup Options screen or simply crash whenever you try to boot into Safe Mode. Fortunately, there are a plethora of fixes you can try to resolve this error.
1. Use DISM and SFC to Repair System Files
If you have tried fixing a startup error before, you have probably used the Deployment Image Servicing and Management (DISM) tool. This tool detects and repairs any problems in the Windows disk image. Leaving the technical jargon aside, you can use DISM and System File Checker (SFC) in conjunction to resolve many system errors.
Before you hop in, however, always remember to run DISM before SFC because SFC uses the system image for repairs.
The DISM tool can be run using the Command Prompt:
- In the Start menu search bar, type cmd and right-click on Command Prompt > Run as Administrator.
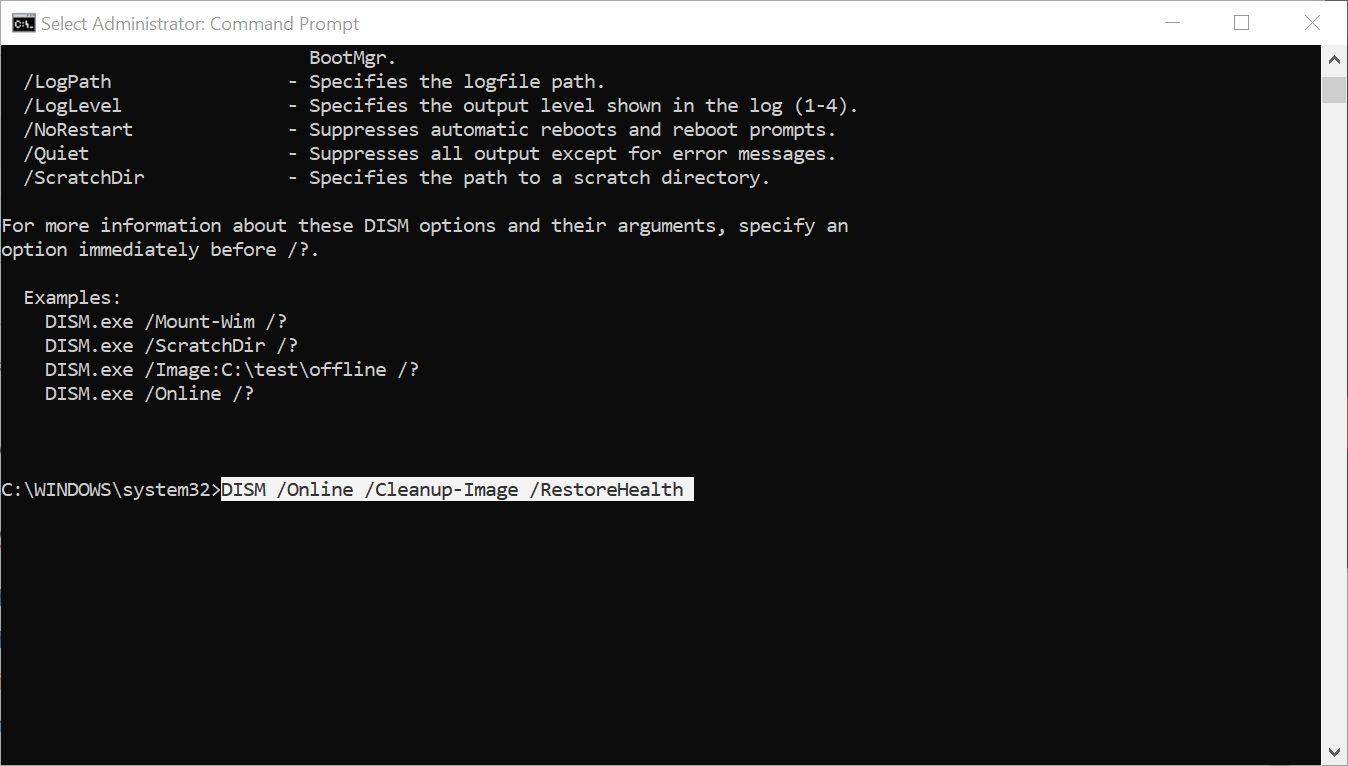
- In the Command Prompt console, type DISM /Online /Cleanup-Image /RestoreHealth and hit the Enter key.
- Wait for the repair process to complete. Don't panic if the process appears to be stuck; the repair procedure does take some time to complete.
System File Checker (SFC) is an in-built Windows utility that automatically detects and repairs corrupt or missing Windows system files. You should always perform an SFC scan first when diagnosing many Windows errors, including if Windows can't start up in Safe Mode. This is because most system errors are the result of corrupt or missing Windows files.
You can run SFC via the Command Prompt:
- In the Start menu search bar, type cmd. Then, from the search results, right-click on Command Prompt > Run as Administrator.
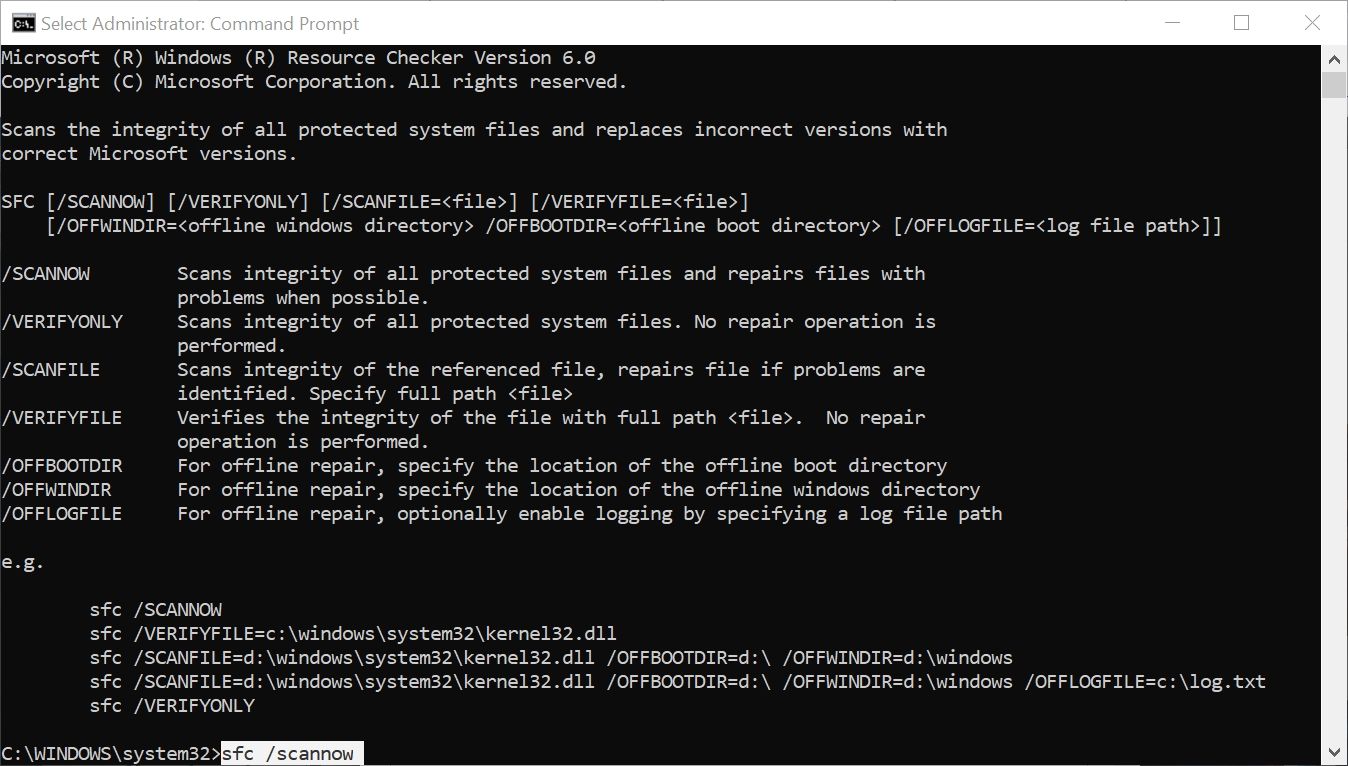
- In the Command Prompt console, type sfc /scannow and press the Enter key.
- Wait for SFC to scan your system for corrupt or missing Windows files. This process can take a while, so be patient.
After running DISM and SFC, reboot your computer and try booting it in Safe Mode. If it still doesn't work, move on to the next section.
2. Use the Windows Startup Repair Tool
The Windows Startup Repair tool is another Windows utility that deals with boot issues, even if Windows itself won't boot. The utility is competent and will most likely fix any boot issues you may have, including problems with Safe Mode. There are multiple ways to access Windows Startup Repair, but if you can boot into your PC normally, you can access it using Settings.
Access Windows Startup Repair Using Settings
- Click on the Start button, then click on Settings. It's the little cog icon on the left of the Start menu.
- On the Settings dashboard, click on Update & Security.
- On the new Window, click Recovery on the left navigation bar.
- Now, under Advanced startup, click on Restart now.
- Your computer will boot into a blue screen with various options.
- Here, click on Troubleshoot > Advanced options > Startup Repair.
- Choose the user account, enter the password, and click on Continue to begin Startup Repair.
Access Windows Startup Repair While Booting Up
If you can't reach the Settings menu on your PC, you can still access the Windows Startup Repair tool by forcing the computer to shut down several times.
- Power on your computer.
- As soon as the manufacturer's logo appears, press and hold the power button until your PC shuts off.
- Again, press the power button and repeat step two.
- After 2-3 attempts, your computer will boot into the blue screen mentioned in Step 5 of the section above.
- Follow Steps 6 and 7 from the section above.
After Startup Repair completes its job, reboot your computer and try booting into Safe Mode again.
3. Clear the CMOS
The Complimentary Metal-Oxide-Semiconductor (CMOS) stores the configuration settings of your computer on its motherboard. It is powered by the CMOS battery, which is also a physical part of your motherboard. If you remove this battery and reinsert it, the CMOS is cleared, and all BIOS settings are restored to their default preferences.
Fortunately, you may not need to open up your PC to perform this trick. Some motherboards allow you to reset the settings from the BIOS menu, meaning you don't need to remove the CMOS battery whatsoever.
Clear the CMOS Using the BIOS Menu
- Click on the Start button and open Settings.
- Navigate to Update & Security > Recovery.
- Under Advanced Startup, click on Restart now.
- Your computer will reboot into the same blue screen mentioned earlier.
- Now, go to Troubleshoot > Advanced options > UEFI Firmware Settings.
- Click on Restart.
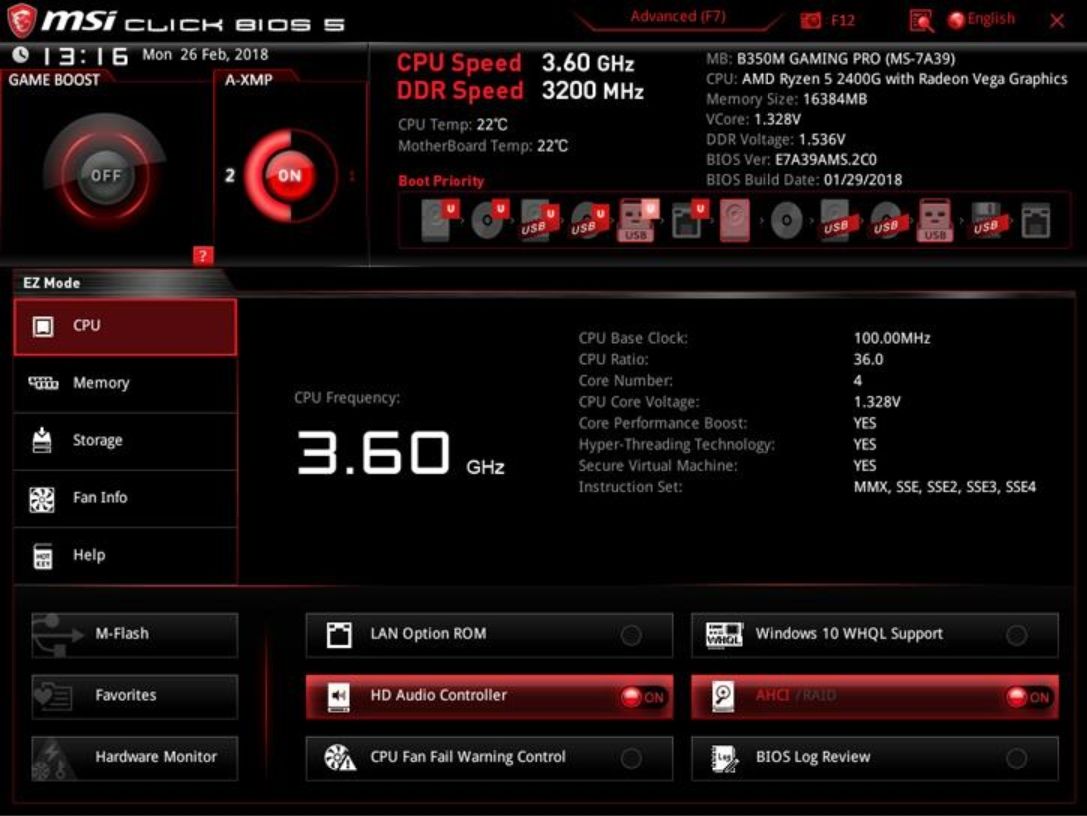
- Your computer will reboot into the BIOS menu.
- Here, look for options such as reset to default, default settings, etc. The option's name will differ across manufacturers.
- Once you've reset your BIOS to its default settings, reboot your computer.
Clear the CMOS by Reseating the CMOS Battery
If you don't find the option to reset your BIOS from the above menu, you can still achieve the same results by reinstalling the battery. However, you should only use this method if you're comfortable with handling computer hardware.
- Open your PC's case.
- Look for the CMOS battery on your motherboard. It should look like a standard battery, similar to what you see in watches.
- Remove the cell and reinsert it.
- Reboot your computer. The CMOS should now be at its default settings.
After clearing the CMOS, try rebooting into Safe Mode.
4. Reset Your Computer
If none of the other methods are working, then you should probably reset your computer. Unfortunately, when you reset your PC, all your settings are lost, and Windows reinstalls itself. However, you can choose to retain your personal files, so you don't lose everything.
If you'd like to do this, Windows 10 allows you to reset your PC via the Settings:
- Click on the Start button and go to Settings.
- On the Settings dashboard, select Update & Security.
- Click on the Recovery option in the navigation bar on the left.
- Under Reset this PC, click on Get started.
- Now you can choose to keep your personal files or remove them. Regardless of which option you choose, Windows will remove all apps and settings from your computer.
- Wait for the process to complete.
There are other methods to factory reset your PC, so be sure to give them a try if you need to do a fresh clean.
It Is Now Safe to Boot Into Safe Mode
If your computer struggles to boot into Safe Mode, don't fret. There are plenty of methods you can try, and hopefully, one of the above tricks helped you get Safe Mode back again.
Having the ability to boot into Safe Mode is important since it helps you get around many other errors. But it is also important to understand what Safe Mode is and how to use it to its full potential.


