Microsoft’s Visual Studio Code, otherwise known as VS Code, is one of the best free code editors. The app is a popular choice for most developers as it is relatively easy to use and has unique features that make programming a little less laborious and repetitive.
If you're interested in checking out VS Code for yourself, here's how to get it working on a Windows PC.
What Makes VS Code Stand Out?
Despite the steady influx of top-class code editors, there are a couple of reasons VS Code remains one of the most popular and functional options.
Firstly, Visual Studio Code is free and multi-functional, which means it is compatible with the other primary PC operating systems, namely Linux, Ubuntu, and macOS. This allows you to seamlessly transition from using it from one operating system to another without running into any significant trouble, save for minor OS-based differences.
Another advantage of using VS Code is that it has a massive collection of features that smoothen the process of writing, viewing, and running code. This includes syntax highlighting and auto-completion. It also possesses an integrated code repository and an in-built debugger which significantly hastens the process of bug detection.
In addition, due to it being the most popular text editor, many open-source developers are constantly making and updating VS Code Extensions, which makes it more attractive than its closest competitor Atom. GitHub initially developed Atom, then was acquired by Microsoft, making Atom a distant relative of Visual Studio Code.
To make things even more interesting, Microsoft recently announced that you can now start coding in your browser with Microsoft Visual Studio Online. This means you can now write and run programs on the go, picking up your work on any other system with an internet connection whenever your Personal Computer is unavailable.
This development also means that team members in different locations can now collaborate on a project and see the results of their work in real-time, further raising the already sky-high allure of programming with VS Code.
How to Download and Install VS Code on Windows
Installing Visual Studio Code is straightforward and easy to complete if you adhere to the following steps:
1. Go to the Official Microsoft Visual Studio Code Website
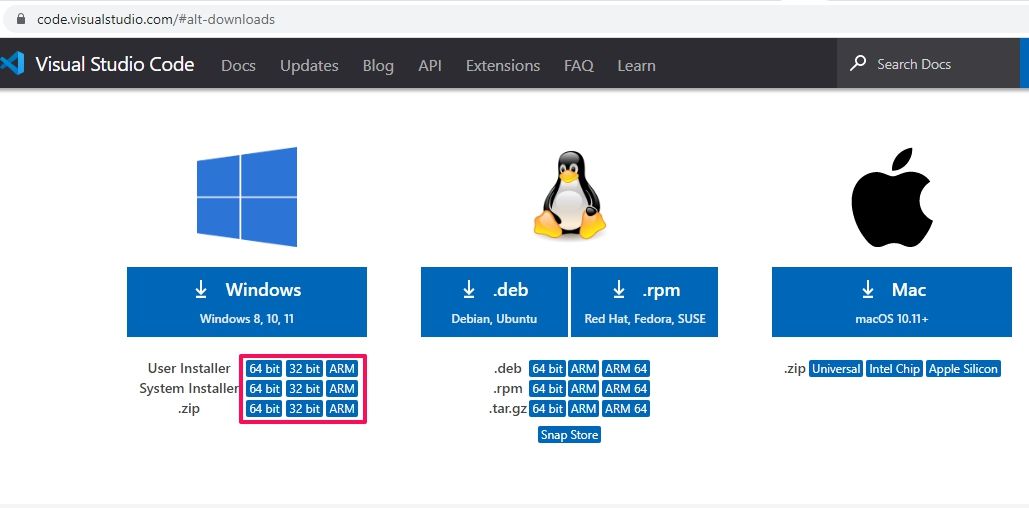
Log on to the Visual Studio Code website, and click on the dropdown arrow beside the Download for Windows button. After this, you will be presented with different options. Click on the one best suited for your PC, and the download should begin automatically.
If you are unsure which version to download, we recommend that you check your PC specs to determine which would be a perfect fit for your system. After that, click on the version you want to download, and it will begin downloading automatically.
2. Run the Installer and Select Your Destination Folder
Once the download is completed, start up the installer. Accept the license by agreeing to the terms and conditions on your screen and click Next.
The Select Destination Location specifies where all the files relating to VS Code will be located on your computer. The default location is the Program Files folder on your PC's Local Disk. To change the location, click Browse and choose a new directory.
Note that Visual Studio Code has a minimum storage space requirement. As such, you must have enough storage space to install the application. If you do not have enough space, delete some applications or multimedia files and empty your recycle bin, then attempt to rerun the installer.
Repeat this task until enough storage is available to complete the installation, and then click Next.
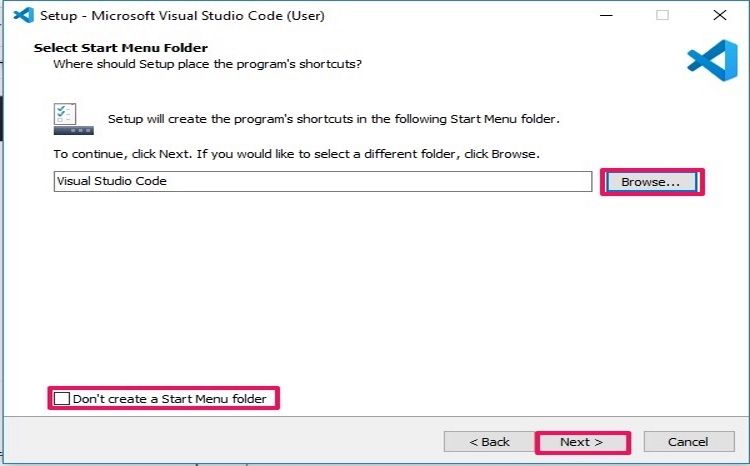
3. Select the Start Menu Folder
This is to create a folder in the Start Menu containing a VS Code shortcut icon to enable you to access the application with just a click on the Windows button after the installation is completed.
You can change the shortcut's potential location by clicking Browse. Pick a location of your choice and click Next. If you decide not to make a shortcut for the application, tick the box labeled Don't Create a Start Menu Folder.
After making your selection, click Next to proceed to the next stage of the installation.
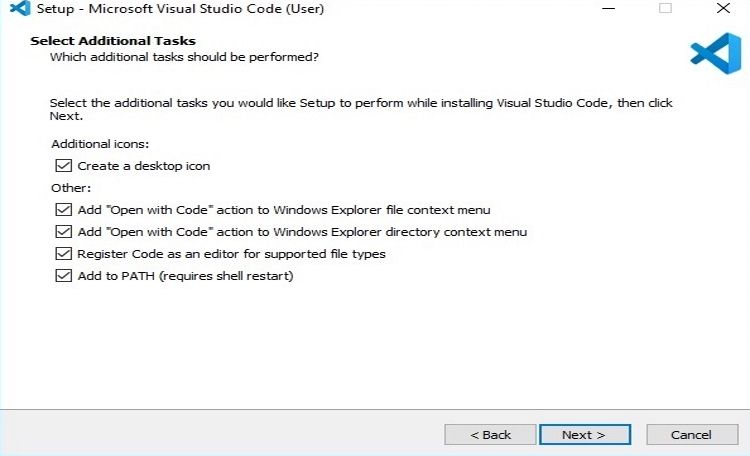
4. Selecting Additional Tasks
This tells the installer whether it should include extra functionality in the application.
We recommend that you tick the box labeled Create a Desktop Icon to create an icon on your home screen to ensure quick access to the application. However, leaving this box unselected won't affect the quality of your work or the app's overall functionality.
After ticking the other boxes according to your preference, click Next.
5. Complete the Installation
The tricky part is behind you. Just sit back, wait for the installation process to end, and click Finish. After this, launch the application, and your Microsoft Visual Studio Code should be ready to use.
Getting Started With VS Code
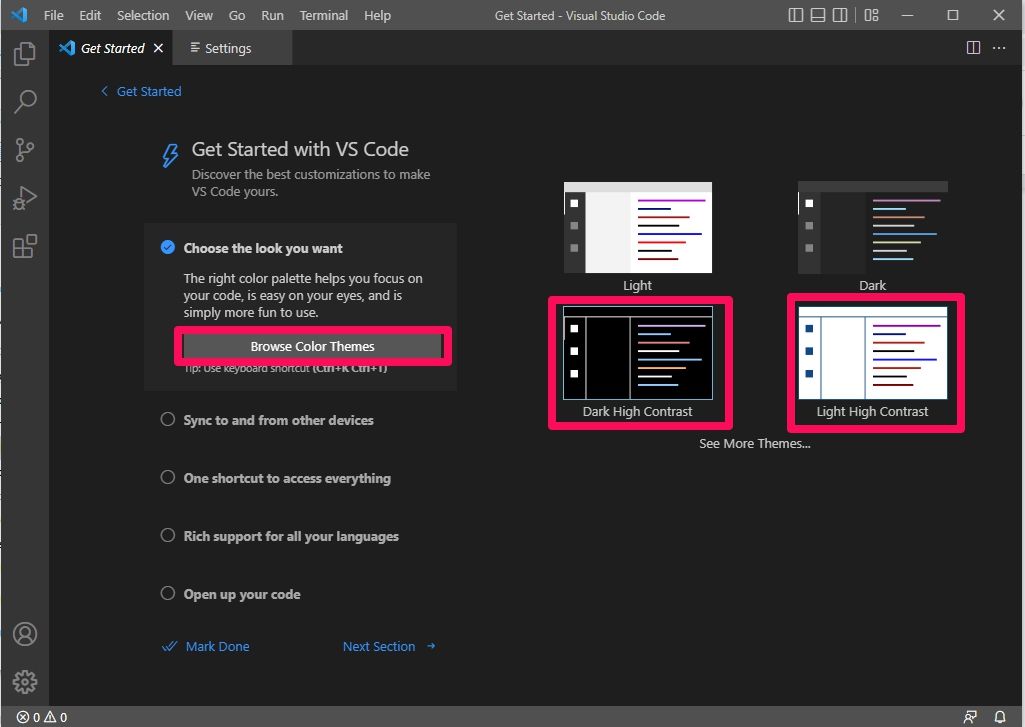
Once you have successfully installed Visual Studio Code, you should personalize it. On starting the application for the first time, you will see a Get Started With VS Code page. This is the starting point of your personalization, and we will provide you with some customization tips.
1. Choosing Your Color Theme
Like any modern app, you can configure VS Code in various color themes based on your preferences. Click on Browse Color Themes to view the different themes available. This will display a dropdown list; you can use the direction keys on your keyboard to preview and left-click to apply them.
We recommend that while trying to find your feet as a newbie developer, you should choose a high-contrast color theme to prevent you from getting overwhelmed or confused by the color scheme.
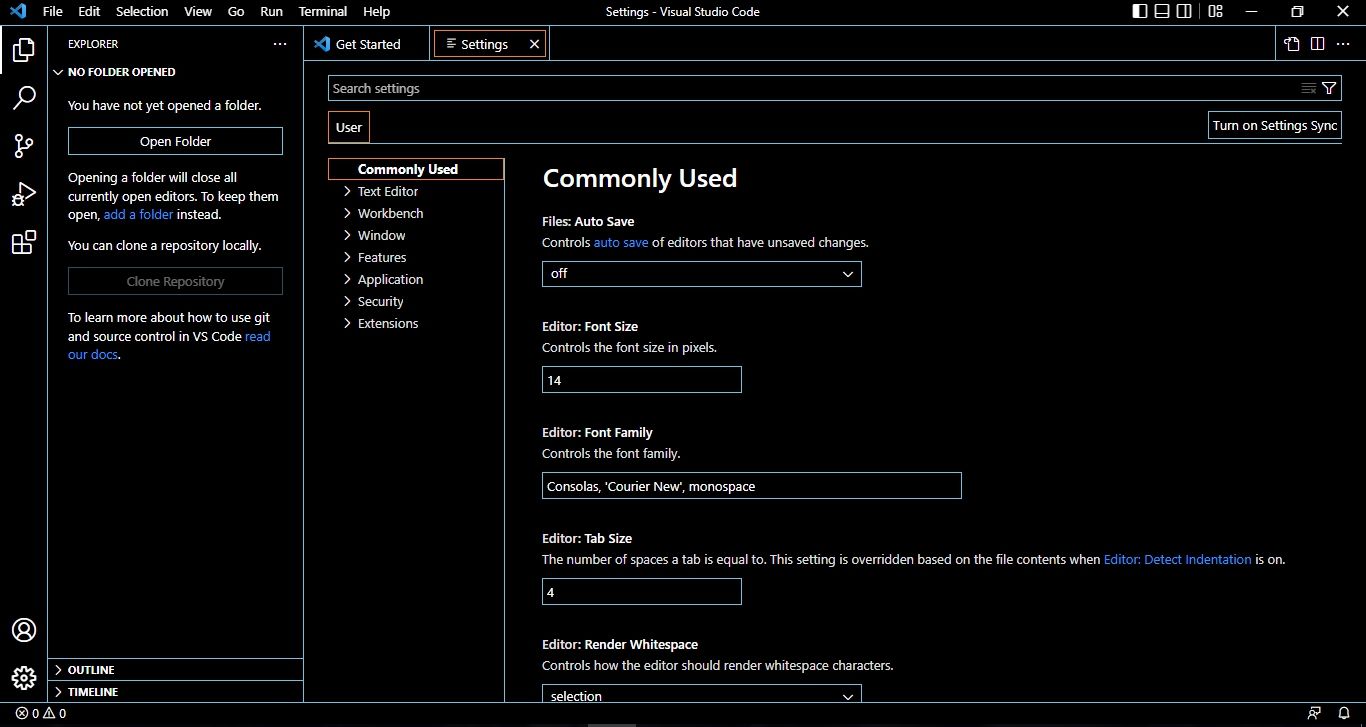
2. Customizing Settings
The developers have taken their time to collate the most frequently used settings to help you enjoy the benefits of VS Code. The better you get as a programmer, the more you will be able to customize the settings. For now, let us stick to the basics.
Click on Settings in the second open tab on your VS Code. You can also open settings by clicking on the bottom Icon on the vertical panel to the left of your screen and clicking on Settings once a list opens.
Follow this up by clicking on Commonly Used, which will be the first item contained in a vertical list slightly to the left of your VS Code menu. Swipe through the contents displayed on your screen and modify them to your taste.
3. Using Command Lists
There are some essential keyboard shortcuts for Visual Studio Code you should learn. This will increase your efficiency and aid you in your journey to mastery.
Some of the most useful ones are Shift + Alt + Up and Shift + Alt + Down P, which enable you to copy and paste single lines of code. You could also try Ctrl + Shift + to display the command palette while you program.
4. Adding Extensions
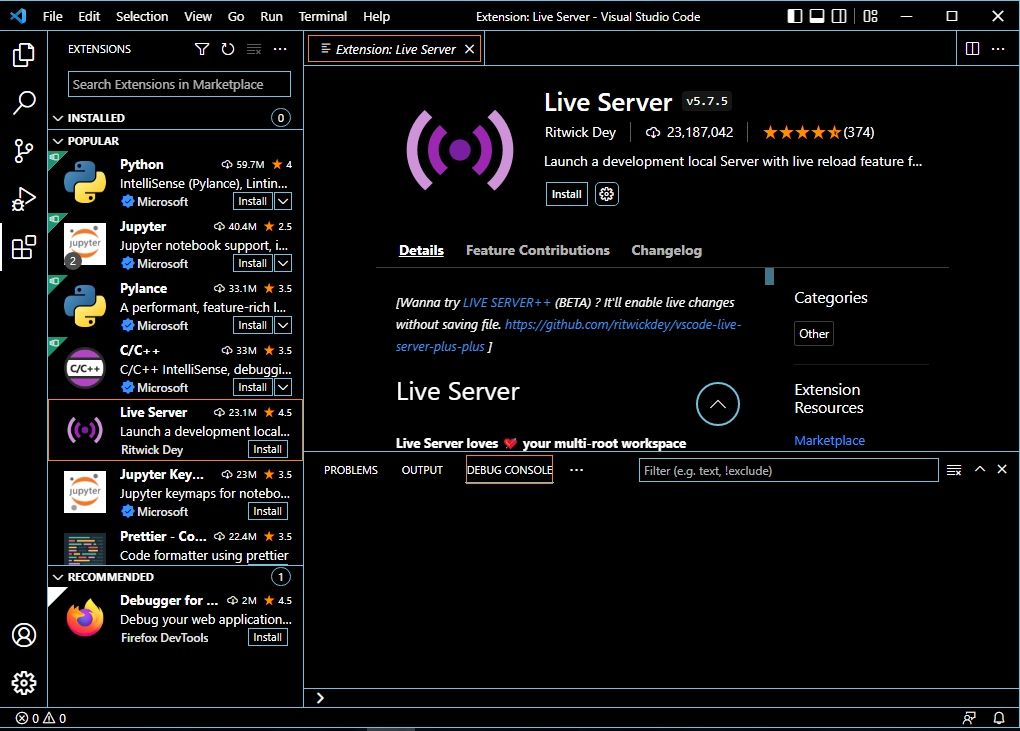
Due to the open-source nature of Visual Studio Code, developers are constantly developing plug-ins. Extensions have a wide range of uses, with some simply beautifying the format of your code.
In contrast, others have more practical uses, such as the Python Extension, which helps you debug, refactor, and navigate the python programming language efficiently.
Consequently, we recommend exploring the app's extension marketplace to find extensions that align with your interests.
Taking Your Next Steps in VS Code
Like learning to program, mastering the intricacies of Visual Studio Code can only come from constant practice. The more experience you gain as a developer will also directly influence your level of adeptness in the VS Code environment.
As learning never ends, we urge you to keep up with new developments in the VS Code ecosystem. This ranges from new features and extensions to settings, as they will improve your overall programming experience and boost your efficiency.


.jpg)
