VirtualBox lets you run many operating systems in a virtual environment without affecting your host system files. It is a great hypervisor platform perfect for trying out any operating system without installing it alongside your host operating system. But many users face an issue while connecting a USB device to their VirtualBox Virtual machine.
VirtualBox does support USB devices out of the box but requires an extension pack to enable USB 2.0 and USB 3.0 devices. If you see the ‘Failed to Attach the USB Device’ error every time you try to connect a USB device, don’t fret. We will list out the possible reasons why you see the error code along with multiple fixes to resolve the issue.
Reasons for the "Failed to Attach the USB Device" Error
Here are some possible reasons for the VirtualBox USB devices error.
- The USB drive is corrupt or the USB port is not working.
- You haven’t installed the correct VirtualBox extension pack on your system.
- You are running an outdated version of VirtualBox.
- You haven’t added the USB device to the virtual machine using USB settings.
Now, you know the possible reasons why VirtualBox throws an error code when you connect a USB device. Here are the following methods you can try to fix the error code and successfully connect the USB device to the virtual machine.
How to Fix the "Failed to Attach the USB Device" Error in Windows
Now that we know what's potentially causing the issue, let's explore the fixes.
1. Restart VirtualBox
Before you move on to other advanced fixes, restart the VirtualBox application. If restarting the app doesn’t work, restart Windows. It will restart all the processes and services including the ones VirtualBox needs to function properly. Now, connect a USB device and try to attach it to a virtual machine in VirtualBox. If it still doesn’t show up, move to the next fix.
2. Check the USB Device on the Host System
Before trying to attach the USB device to the VirtualBox virtual machine, first check if it shows up on your host system. Launch the File Explorer and go to This PC and check if the USB drive appears there. If you don’t see the USB drive, do as follows:
-
First, open Device Manager. There are many different ways to open the Device Manager, but a quick way is to press Win + R to launch the Run command box. Type devmgmt.msc and press the Enter key to launch the Device Manager.
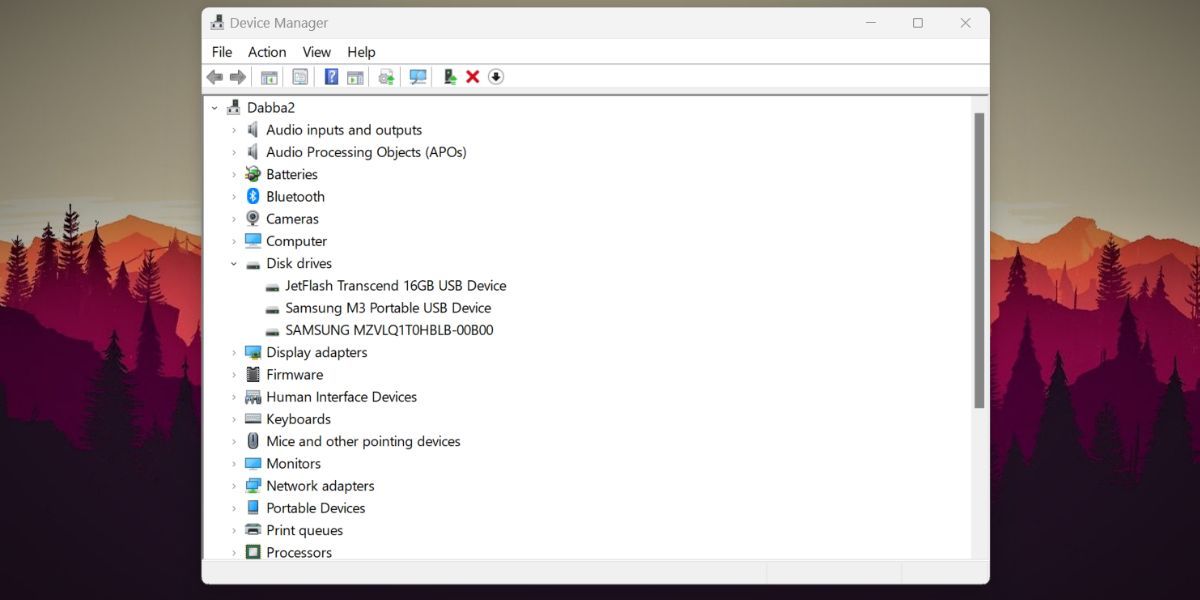
- Navigate to the Disk Drives option and click the arrow icon to expand the section.
- Find the USB drive you connected to the host system. If it is not present in the list, pull it out and reconnect it to another USB port on your system.

If the USB port on your system malfunctions, the USB drive won’t show up in Device Manager or File Explorer. But if the USB drive doesn’t appear in the device manager even after changing the port, it could have a hardware malfunction. In that case, try connecting another USB drive to VirtualBox virtual machine.
3. Install the VirtualBox Extension Pack
VirtualBox can only attach USB 1.0 devices to a virtual machine. You need to install the extension pack to add USB 2.0 or 3.0 devices. Here’s how to do it.
- Open VirtualBox on your system and navigate to Help > About VirtualBox. Note the version currently installed on your system.
- Launch any web browser on your system and go to the official VirtualBox download page.
- Click on the build number which is present on your system. Scroll down and download its corresponding extension pack.
-
Now, open VirtualBox. Navigate to File > Tools > Extension Pack Manager.
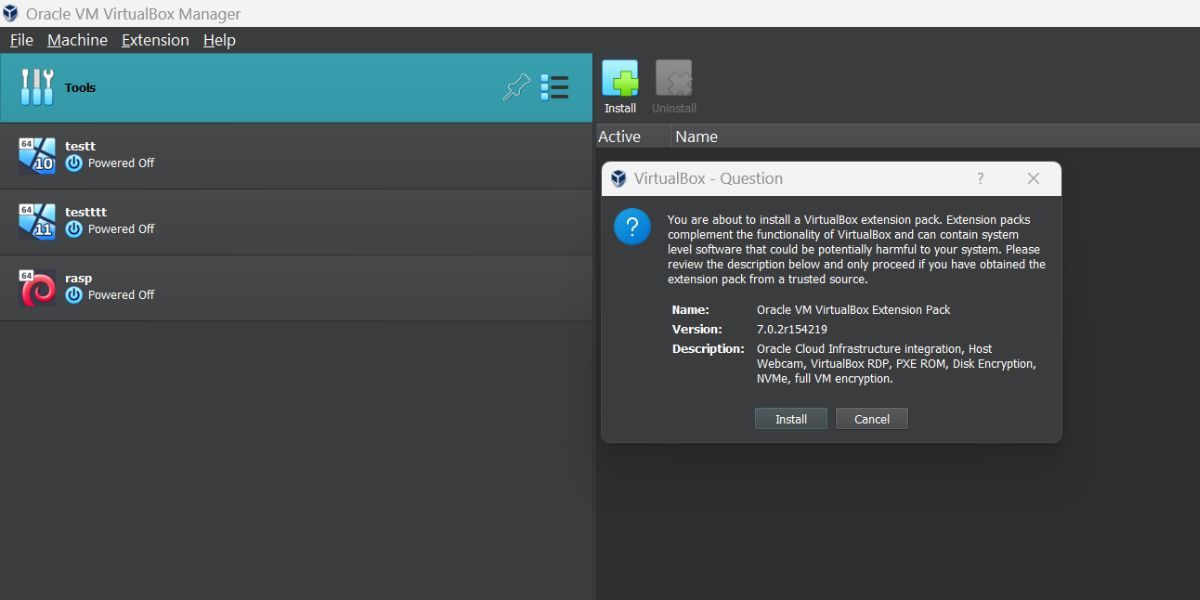
- Click on the Install icon and select the extension pack file you downloaded in step 3.
- Click on the Install button, accept the EULA and click on the I Agree button.
- Wait for the extension pack to install.
- Run the virtual machine and try to connect the USB device to it.

4. Update VirtualBox
An outdated version of VirtualBox can encounter errors. So, you need to update VirtualBox to fix the underlying bugs and get access to new features offered by the developers. Here’s how to update VirtualBox on Windows.
- Launch VirtualBox on your system. It will automatically notify you if a newer version is available. You can go to Help > About VirtualBox and check the current version info there.
- Then, navigate to Help > VirtualBox Web Site. It will redirect you to the official website.
- Click on the Downloads section and download the latest version. Also, download the corresponding extension pack.
- Close the VirtualBox app and end all associated processes using Task Manager.
- Run the downloaded executable file and follow the on-screen instructions to install it on your system. Also, install the extension pack as illustrated in Method 3 above.
- Now, try to connect the USB device to the virtual machine using the settings menu.
5. Configure the USB Controller in Virtual Machine Settings
A mismatch in the USB controller settings can also produce the VirtualBox error. If you want to add a USB device to the VirtualBox virtual machine, you must select the correct USB controller option in the USB settings.
- Open VirtualBox and click on the virtual machine to which you want to add the USB drive.
- Click on the Settings icon on the top. Then click on the USB option in the list.
- Firstly, click the Enable USB controller checkbox to enable the USB device attaching feature to the virtual machine.
-
Then, select the USB 2.0 or 3.0 controller option located below the Enable USB controller option.
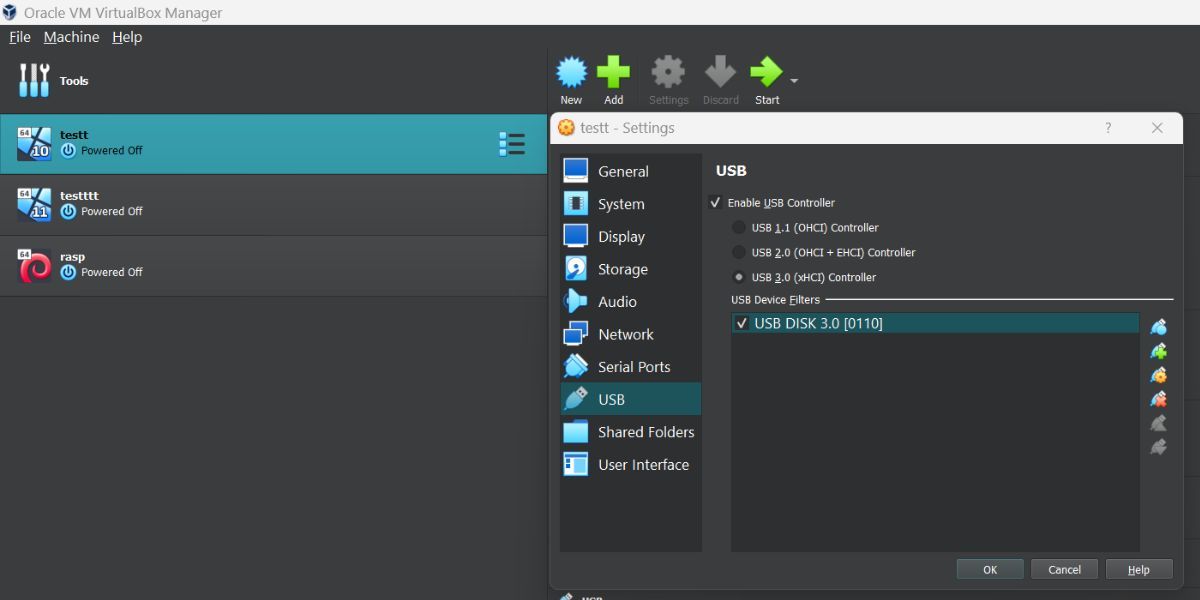
- Now, click on the Add new USB filter and pick the USB device you want to connect to the virtual machine.
- Click on the OK button and close the settings window. Start the virtual machine and check if the error pops up now.

6. Reinstall the VBox USB drivers
Corrupt or missing VBox USB drivers on your system could cause the Virtual Box error code. Reinstalling the USB drivers can fix the driver issue and allow USB devices to connect with the virtual machine.
- Launch File Explorer on your Windows system. Visit the following path: C:\Program Files\Oracle\VirtualBox\drivers\USB
- Navigate to the Device subfolder and find the VBoxUSB.inf file.
- Right-click on the file and select the Install option.
- Now, navigate to the Filters subfolder and locate the VBoxUSBMon.inf file.
- Right-click on the file and select the Install option.
- Close Virtual Box and restart your system. Connect the USB device to the virtual machine and check whether the error code pops up.
7. Reinstall VirtualBox
If all the above methods don’t solve the ‘Failed to Attach the USB Device’ Error code, consider reinstalling the VirtualBox app on your system. Here’s how to do it.
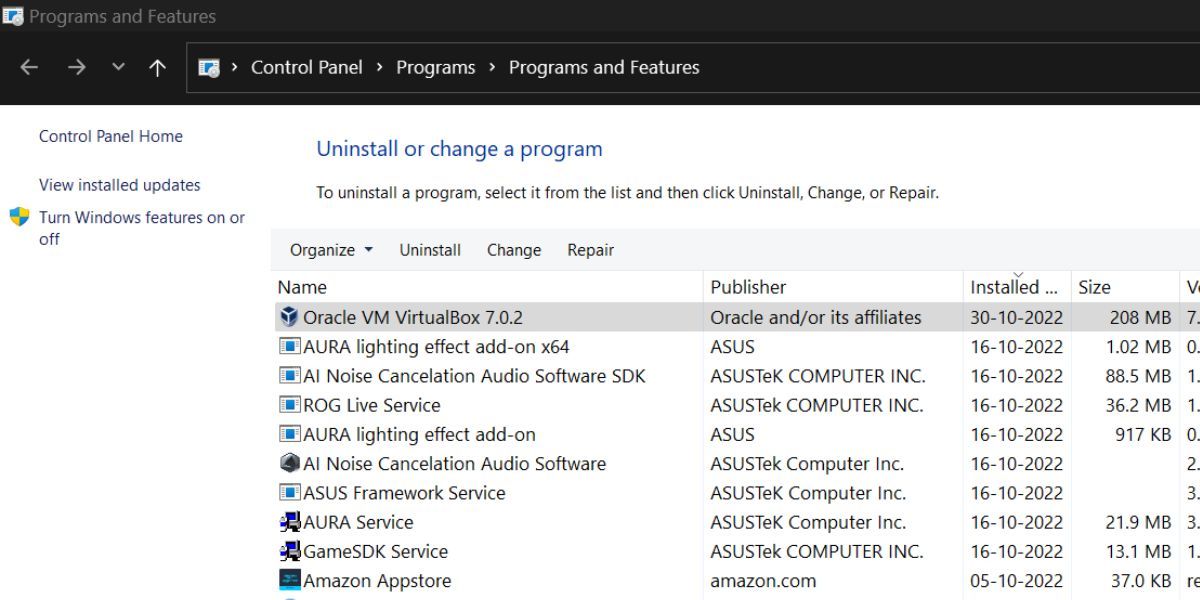
- Press the Win + R key to launch the Run command box (see how to open Windows Run for more ways). Type appwiz.cpl and press the enter key. The Programs and Features window will launch.
-
Locate VirtualBox from the list of installed programs and double-click on it.
- UAC will pop up. Click on Yes to continue.
- Follow the on-screen prompts to uninstall VirtualBox from your system.
- Now visit the official VirtualBox website and download the app and the corresponding extension pack.
- Open the download location and run the setup file. Follow the on-screen prompts to install and then install the extension pack as described in method 3.
- Now, attach a USB device and start the virtual machine to check if the error code occurs or not.

Easily Connect USB Devices to Your Virtual Machine Once More
VirtualBox needs the extension pack to enable connectivity for USB 2.0 and 3.0 devices. Check your USB devices for errors and verify that they mount properly on the host system. Reinstall USB drivers if you face the error again. Lastly, remove VirtualBox from the system and do a fresh installation.