
Windows Terminal is an incredibly powerful tool for managing and configuring the computer system. With it, users can execute commands and scripts to accomplish tasks faster than ever before. However, if you're new to using the Terminal, making sure it always opens as an administrator can be tricky.
In this article, we'll show you how to set up Windows Terminal so that it always launches with administrative rights. This will ensure your commands are executed correctly and provide extra protection against malicious activities on your computer.
What Makes the Windows Terminal So Important?
Windows Terminal is a modern, feature-rich application designed to easily access command line tools and shells like PowerShell, CMD, and Azure Cloud Shell. It provides a simple, easy-to-use interface that allows you to access and execute commands faster than ever before.
Not only that, but you can change the terminal theme on Windows so it better suits your tastes. You can even group multiple tabs together, so you can run different shells in one window. For these reasons and more, Windows Terminal is an indispensable addition to any computer setup.
1. How to Always Open the Windows Terminal as Administrator Using Settings
The first method is to adjust the Settings within Windows Terminal itself. To do this, follow these steps:
- Right-click on Start and select Terminal from the power user menu.
- Then click the down arrow in the top-left corner and select Settings.
- On the left side of the screen, select Defaults from the Profile section. This will open up a new window where you can view all your current configuration options.
-
A Run this profile as administrator option can be found on the right side of the page. Click on the toggle switch to enable it.
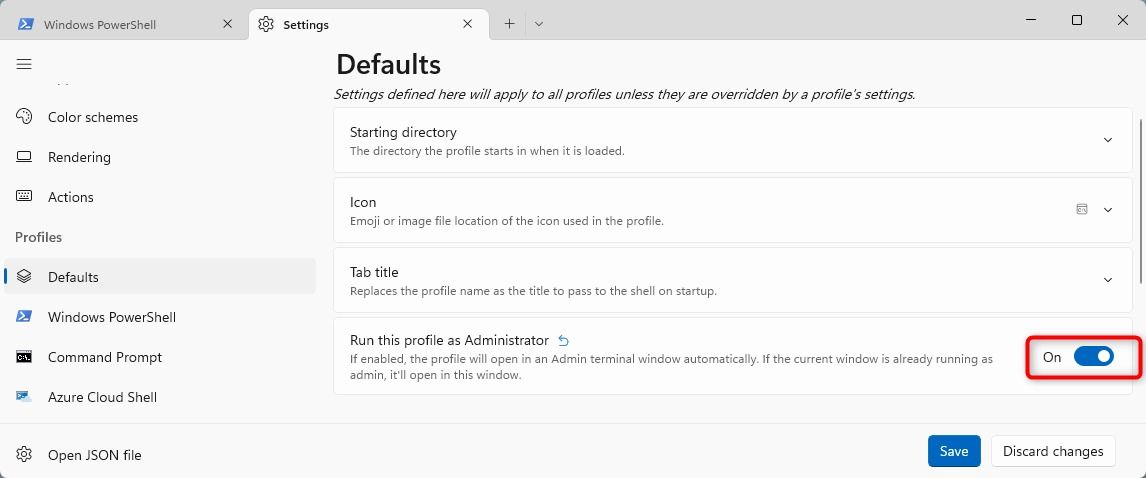
- Then click Save to apply the changes.

Once you complete the above steps, the terminal will open automatically in the admin terminal the next time you open it.
2. How to Always Open the Windows Terminal as Administrator With Desktop Shortcut
If you use Windows Terminal frequently, you might want to create a desktop shortcut instead. A desktop shortcut will ensure that with one click of the mouse, you can open the terminal with full administrative rights. To create a desktop shortcut for Windows Terminal, follow these steps:
- Go to your computer's desktop and right-click on it.
- From the menu that appears, select New > Shortcut.
-
The next step is to specify the location of the shortcut. To proceed, type the following path in the search field and click Next.

%LocalAppData%\Microsoft\WindowsApps\wt.exe -
Give the shortcut a name, such as Windows Terminal.
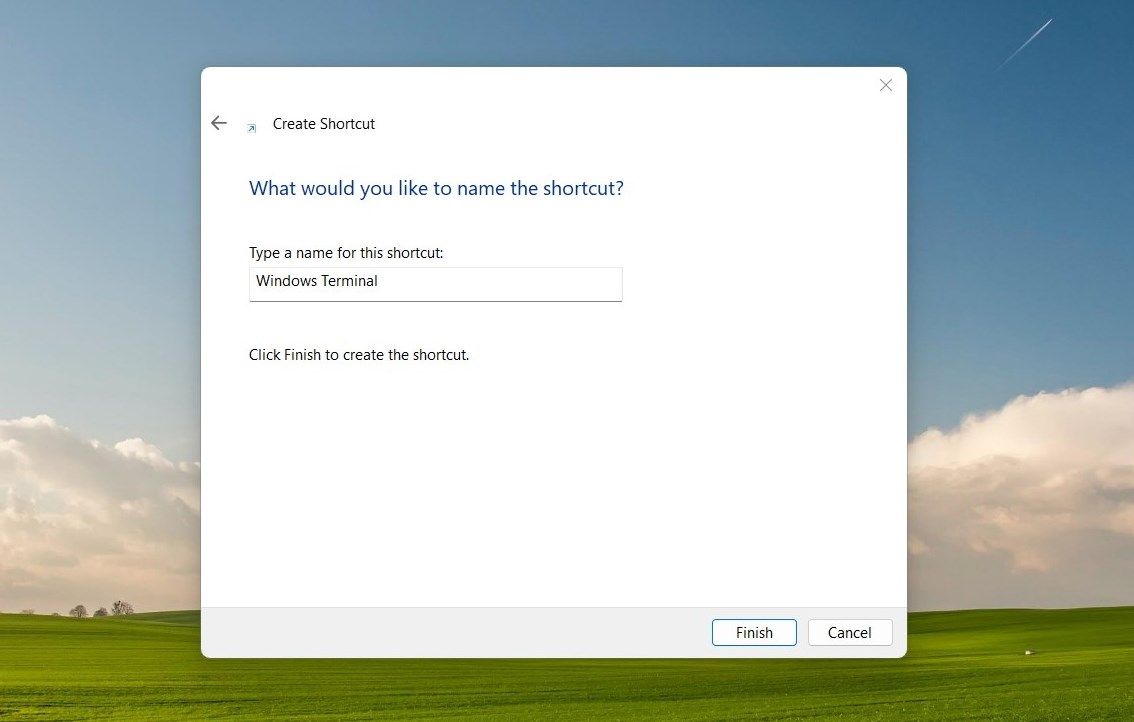
- Finally, click Finish to create the shortcut.


After creating the shortcut, you can find it on your desktop.
Now that you've created the desktop shortcut, you can double-click on it to open the Windows Terminal. But, to run it as an administrator, there is still something you need to do. The process goes as follows:
- Right-click on the shortcut icon and select Properties from the context menu.
- Make sure you're on the Shortcut tab in the Properties window, then click Advanced.
-
Select the Run as administrator checkbox and click OK.
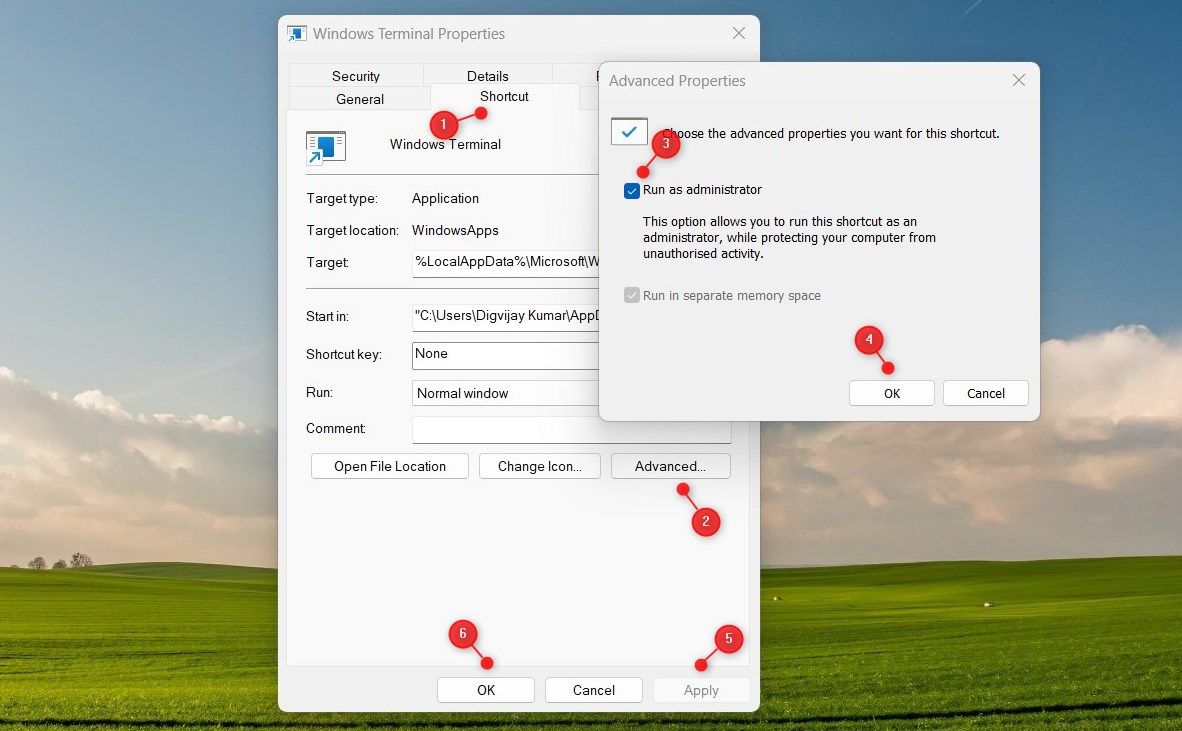
- On the Properties window, click Apply > OK to save your changes.

Now, whenever you need access to an elevated Windows Terminal, double-click the shortcut icon on your desktop.
Windows Terminal Now Opens With Admin Rights
You can always open the Windows Terminal as an administrator using two methods here, one through Terminal Settings and the other via Desktop Shortcut. Try them out and let us know which one you prefer.