.jpg?q=50&fit=contain&w=1140&h=&dpr=1.5)
Are you having trouble shutting down your Windows device because the Task Host window appears? It might also say "Task Host is stopping background tasks," which means you have to either wait for it to finish or close it manually. What causes this error?
In this article, we will explain why this window acts as a hurdle in the shutdown process and some solutions to resolve it.
Why Does the Task Host Window Prevent a Windows Shutdown?
The Task Host window prevents the shutdown of your computer if there is an issue with Windows' automatic updates or if you try to shut it down while a critical installation or a program with unsaved data is running. It is also possible that some system settings, such as Fast Startup, can contribute to the problem.
Now we know the cause, let's discuss some solutions that have the greatest likelihood of resolving the issue. If you apply them all, you should be able to shut down your computer easily once more.
1. Make Sure That No Critical Installations or Programs With Unsaved Data Are Running
Be sure that none of the programs you tried to install but forgot about are still running on your computer. You will likely encounter the issue if you try to shut down your computer midway through an installation. The same applies if you're trying to power off your computer without saving some of your unsaved data from an app.
Consequently, go back from this window, let the installation complete or close it, save any unsaved data, close the app, and shut down your device.
When closing running programs or apps with unsaved work fails, you should rule out issues related to Windows Update. The following few fixes will help you achieve that.
2. Uninstall Any Recent Windows Updates and Reinstall Them
The next step is to uninstall any recent updates that got automatically installed to ensure they are not causing the problem. Our guide on uninstalling updates in Windows 10 and 11 will show you how. Remove updates like KB5012170 from the recently installed updates list as they are known to cause the problem.
Once deleted, you will need to reinstall them. To do this, press Win + I and select Windows Update from the left sidebar. Then, click Check for Updates, and all available updates will be installed automatically.

3. Complete Any Pending Updates
Ensure there are no pending updates that you haven't installed, especially if you've paused Windows' automatic update.
So, press Win + I and select Windows Update from the left sidebar. Click the Resume updates button if updates have been paused, and Windows will install the pending updates automatically.

If you don't see such an option, the Windows Update service isn't paused. So, click Check for Updates, and all available updates will be installed automatically.
4. Install Failed Updates Manually
There are times when the Windows Update service fails to install specific updates. A failed update can also contribute to the problem under discussion. Ensure Windows Update did not fail to install any updates; if it did, manually install them from the Microsoft Update Catalog.
To check failed updates, press Win + I to open the Settings app and select Windows Update from the left sidebar. Next, click Update History. Take note of the name of the failed update and check our guide on manually installing updates from the Microsoft Update Catalog.
5. Run the Windows Update Troubleshooter
If the above three fixes don't help fix the issue, you should run the Windows Update troubleshooter, which automatically looks for problems with Windows Update and automatically fixes them.
Follow the below steps to run the Windows troubleshooter:
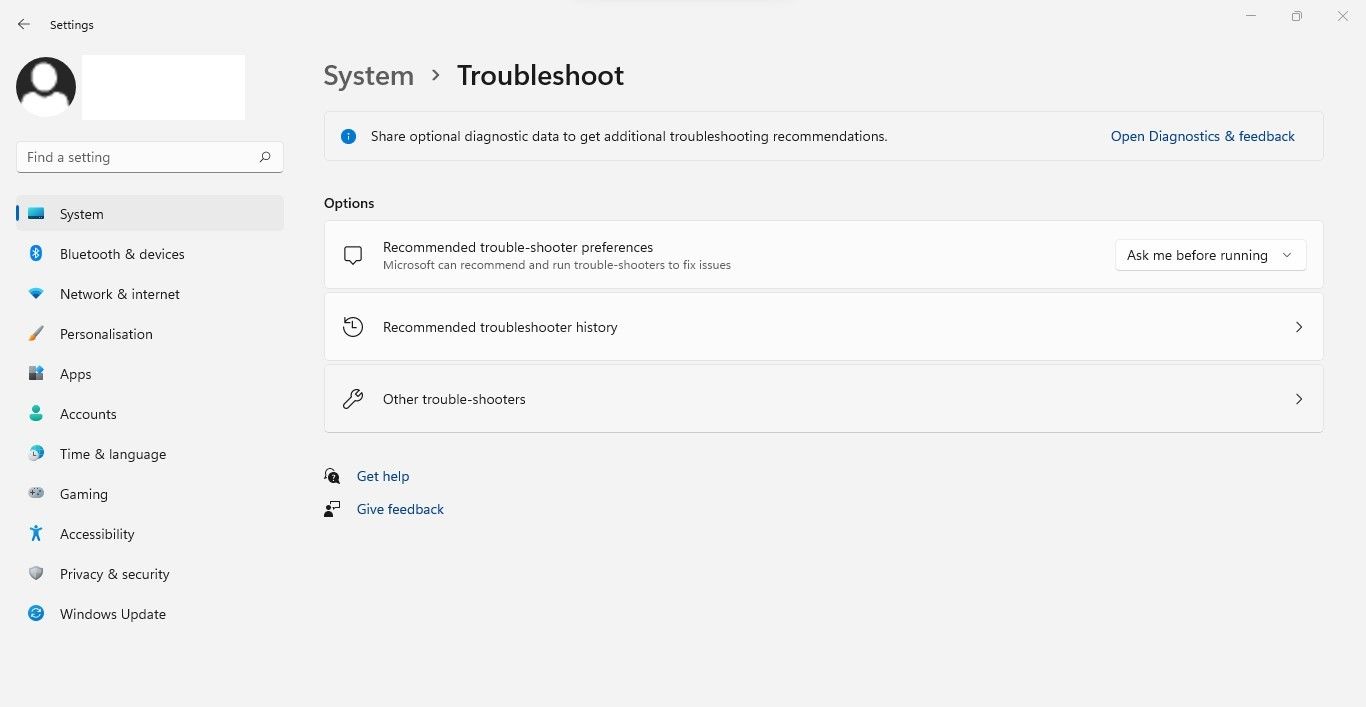
- Right-click on the Windows Start button and go to Settings.
- In the left sidebar, select the System tab.
- In the right pane, click Troubleshoot.
-
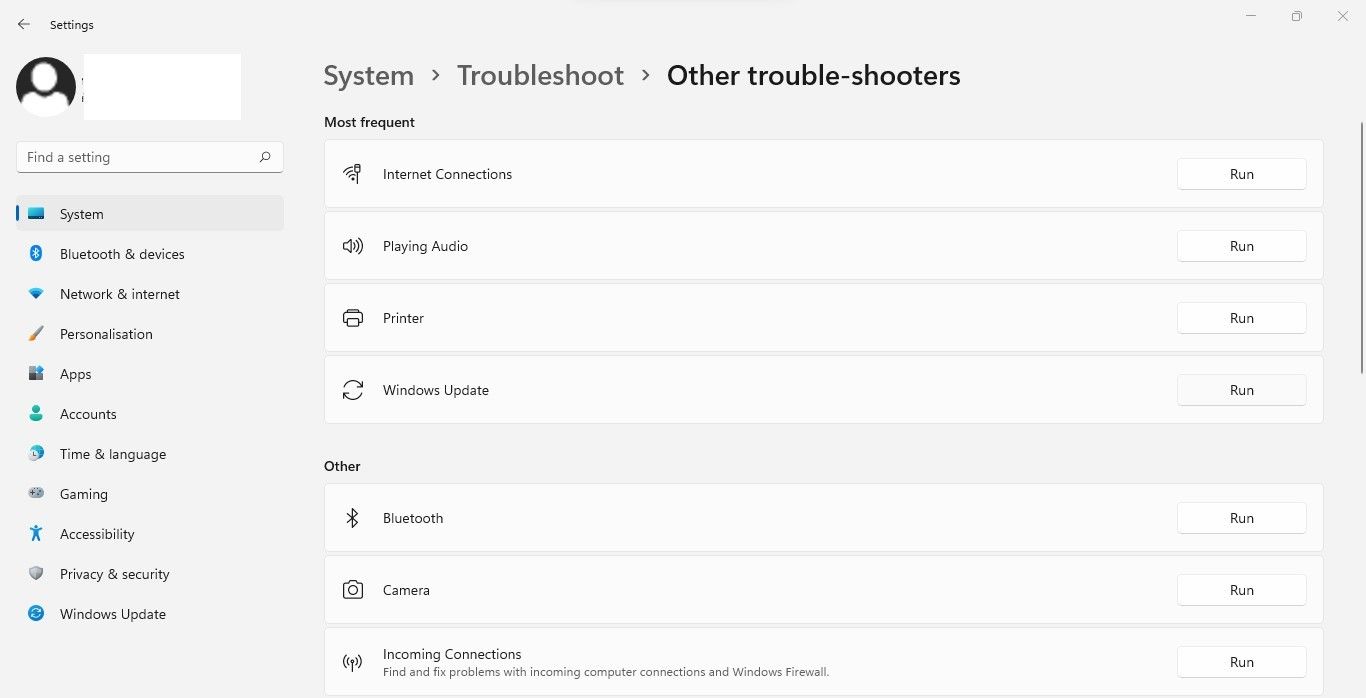
Then click Other trouble-shooters.
-
Right next to Windows Update troubleshooter, click Run.


6. Turn Off Conflicting Third-Party Services
Microsoft Update components and third-party services have been known to conflict from time to time. Therefore, they might be responsible for the situation under discussion. Thus, disabling these services may help resolve the issue. Follow these steps to disable them:
- Open the System Configuration window by typing "System Configuration" in the Windows Search box.
- Go to the Services tab.
-
Check the box for Hide all Microsoft services.
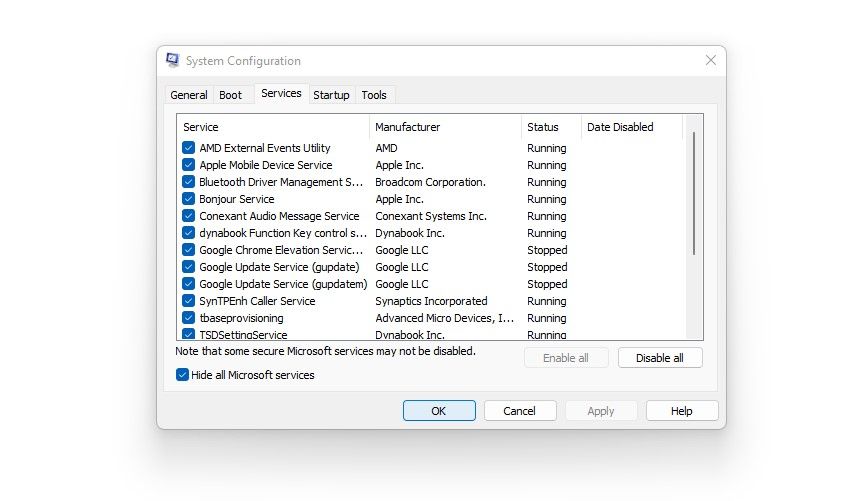
- To disable all, click Disable all, click Apply, and then OK.
- When the next prompt appears, click Restart and see if the problem persists.

Hopefully, this fix will prevent the error we're discussing from occurring in the future.
7. Disable Fast Startup
The Fast Startup feature in Windows keeps your device in hibernation when you shut it down. This means that your device doesn't fully shut down. By disabling this feature, your computer will shut down completely, which may help fix the problem.
Follow the below steps to disable Fast Startup:
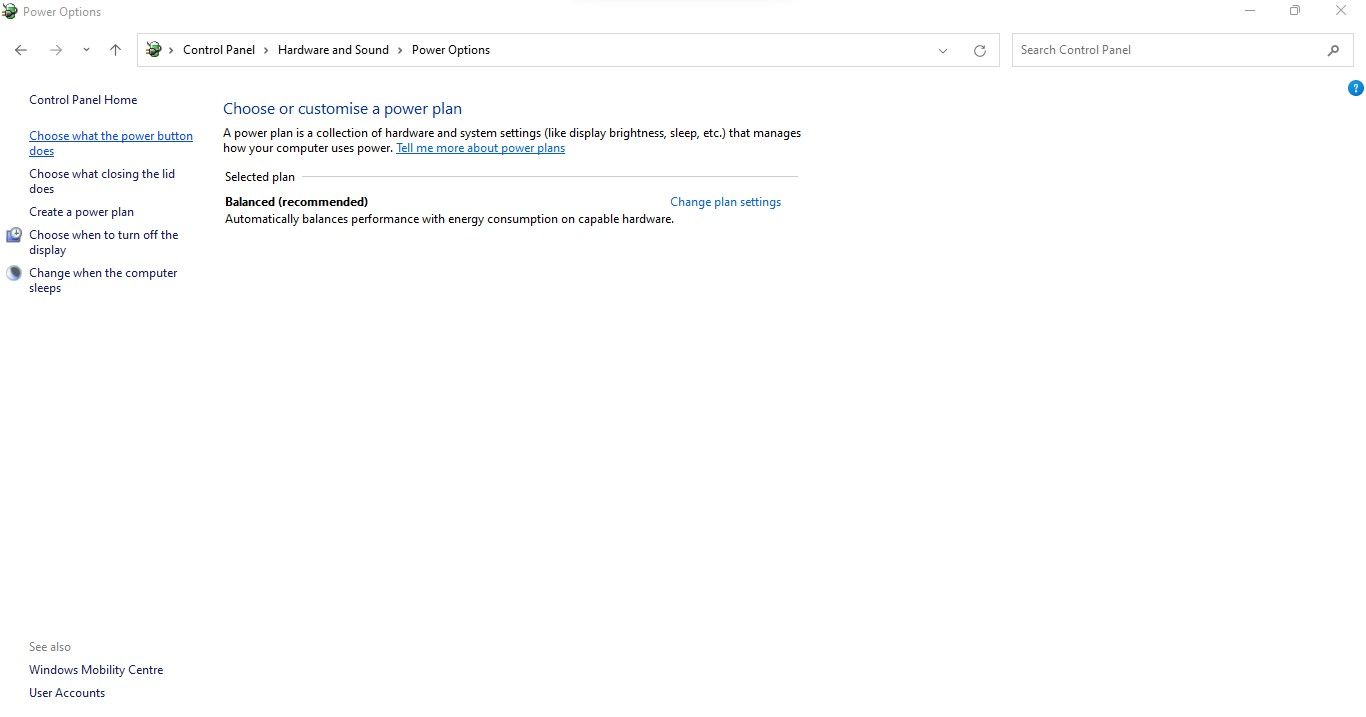
- Open the Control Panel app by searching for it in Windows Search.
- Go to Hardware and Sound > Power Options.
-
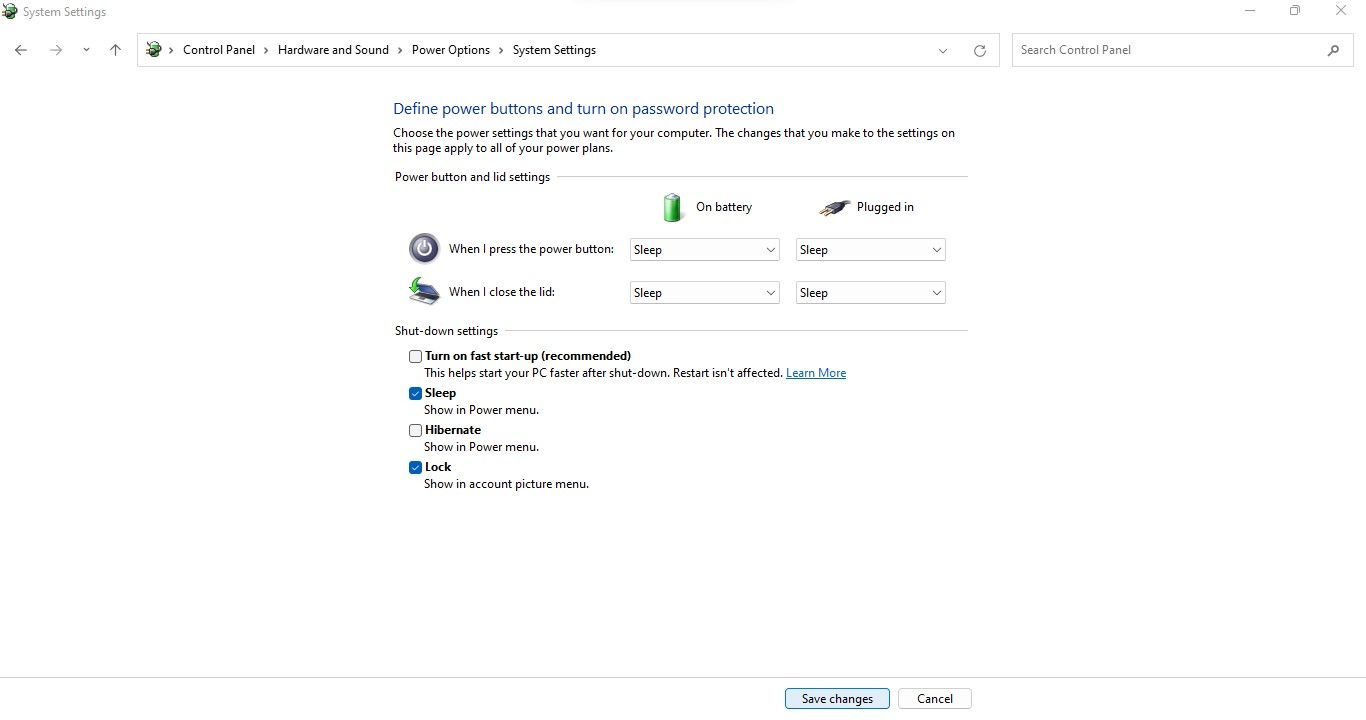
In the left sidebar, click Choose what the power button does.
- Click Change settings that are currently unavailable.
- Uncheck the box for Turn on fast start-up (recommended).
-
Click Save changes.


8. Tweak Sign-In Options Settings
Despite being less likely, disabling automatic setup after an update in the Windows Sign-in options settings might help fix the problem. Follow these steps to apply this fix:
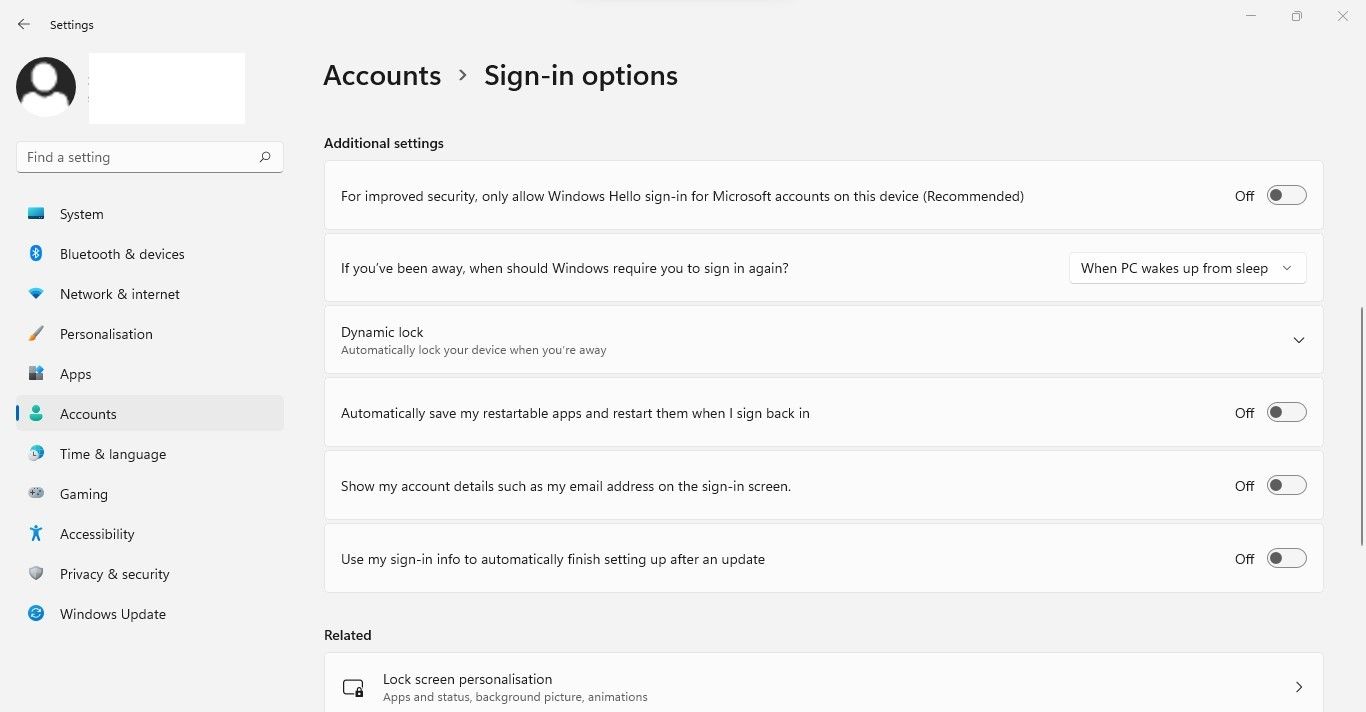
- To open Settings, press Win + I.
- In the left sidebar, click Accounts.
- In the right pane, click Sign-in options.
-
Turn off the toggle next to Use my sign-in info to automatically finish setting up after an update under Additional settings.

9. Disable WpnUserService in the Registry Editor
If none of the fixes have worked, disable WpnUserService in Registry Editor. WpnUserService supports both local and push notifications on Windows. When you disable it, you'll no longer receive push notifications like the one we're talking about.
To disable it, follow these steps:
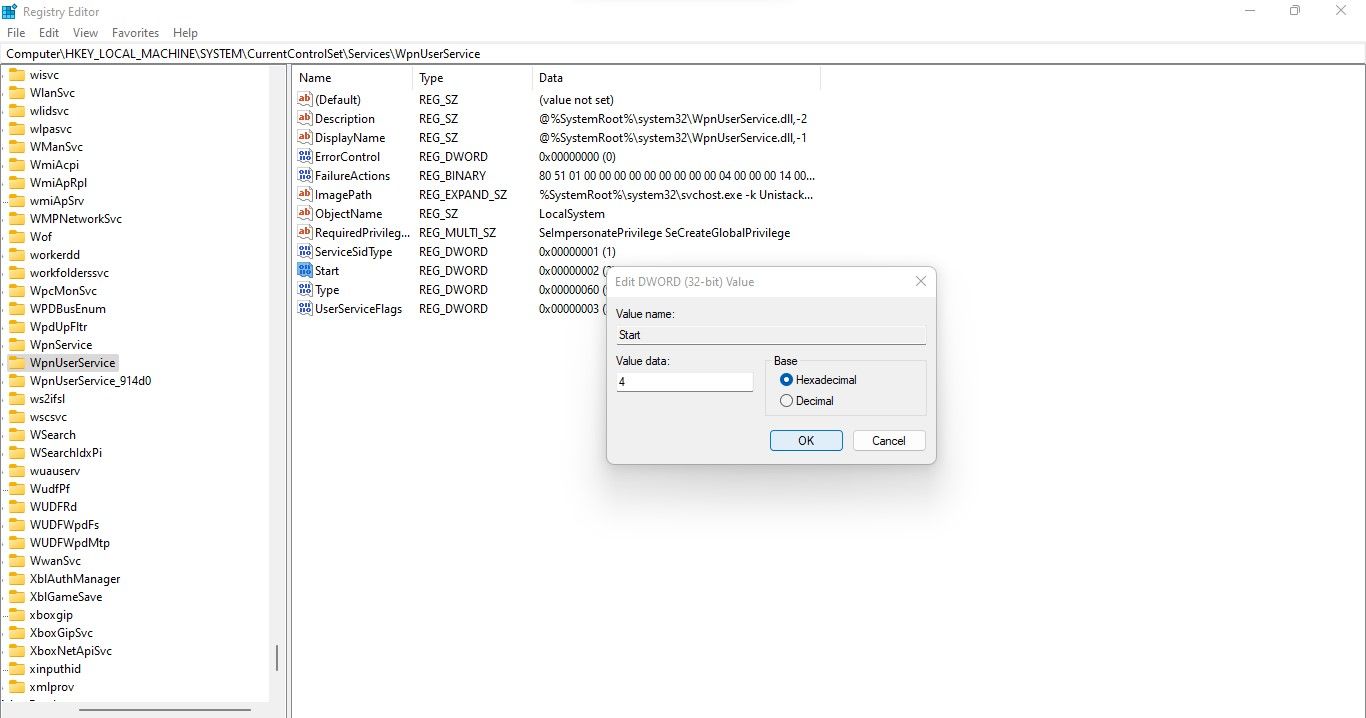
- Open the Registry Editor by searching for "Registry Editor" in Windows Search.
-
In the Registry Editor navigator, paste the following path:
Computer\HKEY_LOCAL_MACHINE\SYSTEM\CurrentControlSet\Services\WpnUserService - Click on the DWORD value named Start.
-
In the Value data field, enter 4.

It is important to note that this fix will only disable notifications; the background process (or an issue with Windows Update) resulting in this notification will continue to run. Regardless, you'll accomplish your goal: to shut down your computer without receiving this notification.
Ease the Process of Shutting Down Your Computer
Hopefully, following the fixes in this article will help you fix the issue and shut down your computer safely. If you still encounter problems with your PC not shutting down properly after applying the above fixes, it might be an issue with the Shutdown process itself.