You can always rely on the System Restore tool when you want to restore your device to a previous state. The tool helps undo any recent changes on your Windows device and sends it "back to the past" when it worked properly.
But while using this tool, you might bump into the “System Restore Did Not Complete Successfully” error. What causes this issue, and how do you resolve it? Let’s dive in and explore all the possible solutions to this problem.
1. Pick a Different Restore Point
Restore points often run into issues and become faulty or corrupted. So, one of the easiest solutions to this problem is to pick a different restore point. If you've set up a daily restore point system, going back one more restore point shouldn't cause a lot of data loss.
Now, here are the steps on how you can choose a different restore point:
- Type Create a restore point in the Start Menu search bar and select the Best match.
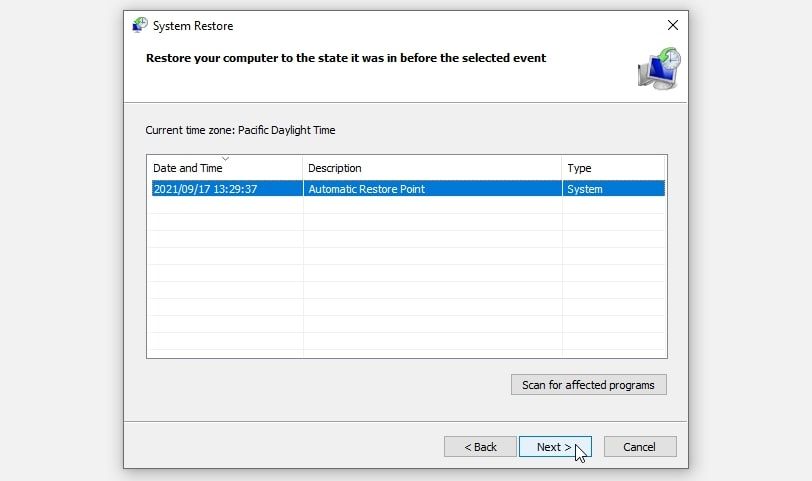
- Navigate to the System Protection tab and then press the System Restore button. Click Next to continue.
- Pick the most recent restore point from the list and click Next to continue. From there, follow the on-screen instructions to finalize the process.
2. Configure the System Protection Settings
The restore point could fail if the System Protection settings are disabled. So, you could easily tackle this issue by tweaking the System Protection settings.
- To get started, type Create a restore point in the Start Menu search bar and select the Best match.
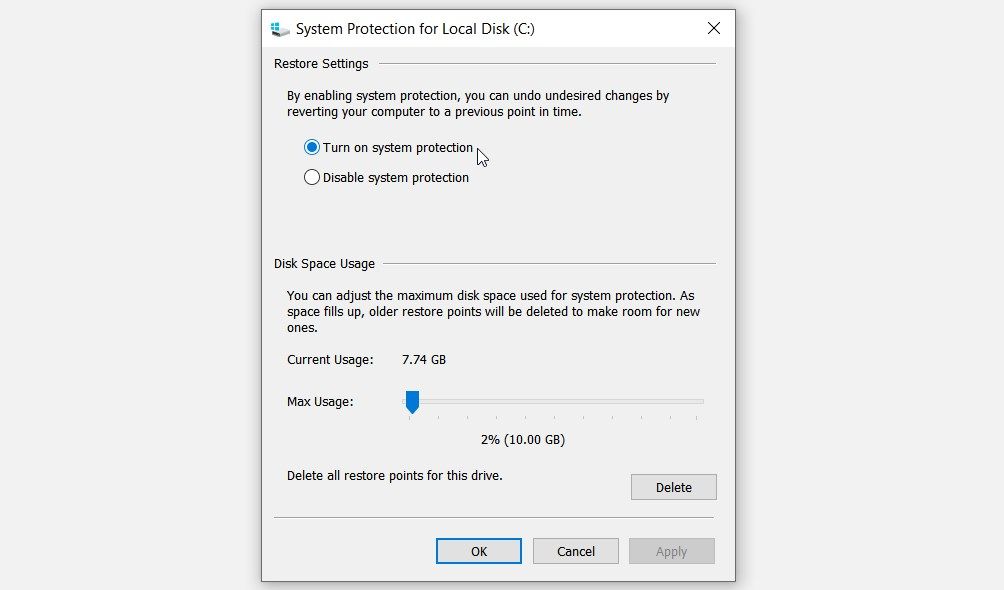
- Navigate to the System Protection tab and click the Configure button.
- Next, select the Turn on system protection option. From there, click Apply and then click OK.
- Restart your device to apply these settings.
3. Run the System Restore Tool in Safe Mode
In other instances, you could tackle the issue by running the System Restore tool in Safe Mode. Here’s how:
- Press Win + R to open the Run command dialog box.
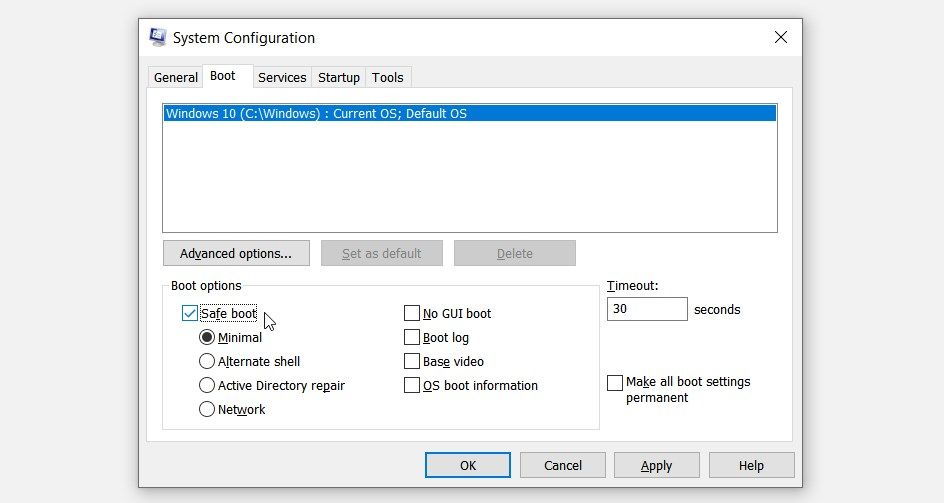
- Type msconfig and press Enter to open the System Configuration window.
- Navigate to the Boot tab and then check the Safe boot option.
- Press Apply and then press OK to apply these changes.
Restart your PC to boot into Safe Mode.
Next, select your restore point by following these steps:
- Press Win + R to open the Run command dialog box.
- Type sysdm.cpl and then press Enter to open the System Properties window.
- Navigate to the System Protection tab and click the System Restore option. Click Next to continue.
- Select the most recent restore point and click Next. Finally, follow the on-screen instructions and then restart your device.
4. Enable the System Restore Services
The “System Restore Did Not Complete Successfully” error sometimes pops up when the Restore Services are disabled.
To resolve this problem, enable the System Restore Services through these steps:
- Press Win + R to open the Run command dialog box.
- Type services.msc and press Enter to open the Services window.
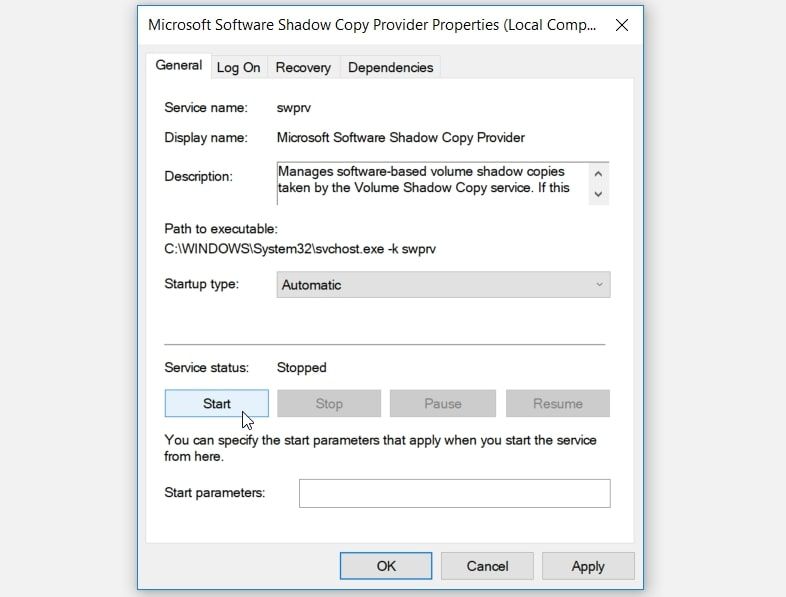
- Locate the Microsoft Software Shadow Copy Provider Service and then double-click on it.
- Next, click the Startup type drop-down menu and select Automatic from the options.
- Click the Start button under the Service status option. Finally, press Apply and then press OK to apply these changes.
When you finish, apply the same steps to enable the Volume Shadow Copy service.
5. Enable the System Restore Tool Via the Local Group Policy Editor
This error message often appears simply because the System Restore tool is disabled. To tackle the problem, enable the tool via the Local Group Policy Editor through these steps:
- Press Win + R to open the Run command dialog box.
- Type gpedit.msc and press Enter to open the Local Group Policy Editor.
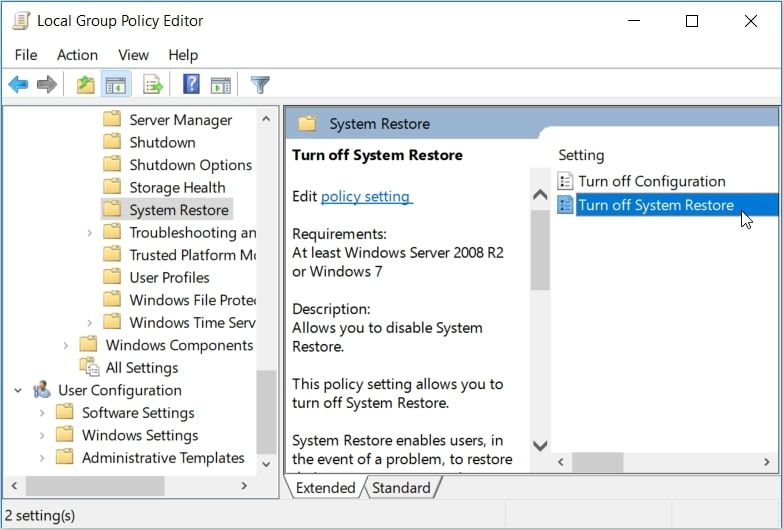
- Navigate to Computer Configuration > Administrative Templates > System > System Restore.
- Locate and double-click the Turn off System Restore setting option on the right-hand side pane.
Next, select Not configured or Disabled in the pop-up window. Finally, press Apply, press OK, and then restart your device.
6. Enable the System Restore Tool Via the Registry Editor
The Registry Editor also makes it easy for you to enable the System Restore tool. Now, here’s how you can enable the System Restore tool via the Registry Editor:
- Press Win + R to open the Run command dialog box.
- Type regedit and press Enter to open the Registry Editor.
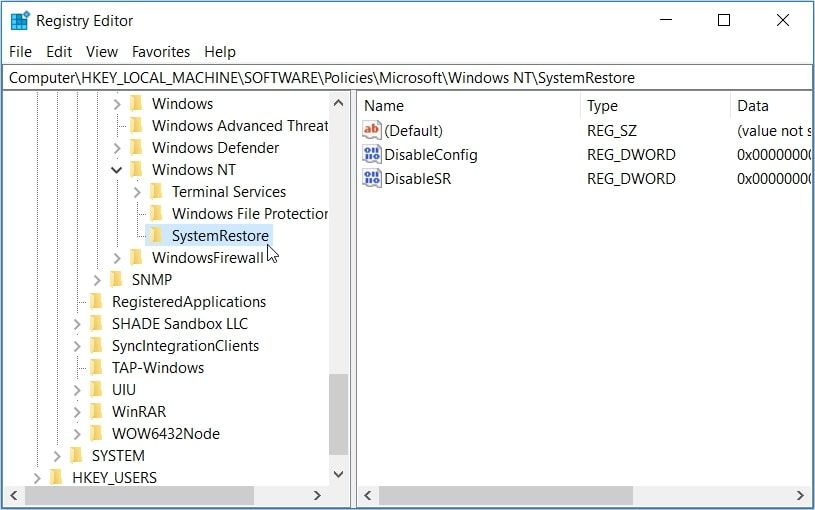
- Navigate to HKEY_LOCAL_MACHINE > SOFTWARE > Policies > Microsoft > Windows NT > SystemRestore.
Click the SystemRestore key and locate the DisableConfig and DisableSR values on the right-hand side pane. From there, follow these steps:
- Double-click the DisableConfig value and set its Value data to 0 (zero.) Click OK to proceed.
- Next, double-click the DisableSR value and set its Value data to 0 (zero.) Finally, click OK, close the Registry Editor, and restart your device to apply these changes.
If the Registry Editor somehow runs into problems, reset the tool to its default settings to avoid further issues.
7. Temporarily Disable the Windows Defender
In some rare instances, the Windows Defender tends to disrupt the System Restore tool. So, you could temporarily disable the Windows Defender to tackle this issue.
- To get started, type Control Panel in the Start Menu search bar and select the Best match.
- Next, click the View by drop-down menu and select Small icons.
- Select Windows Defender Firewall from the menu items.
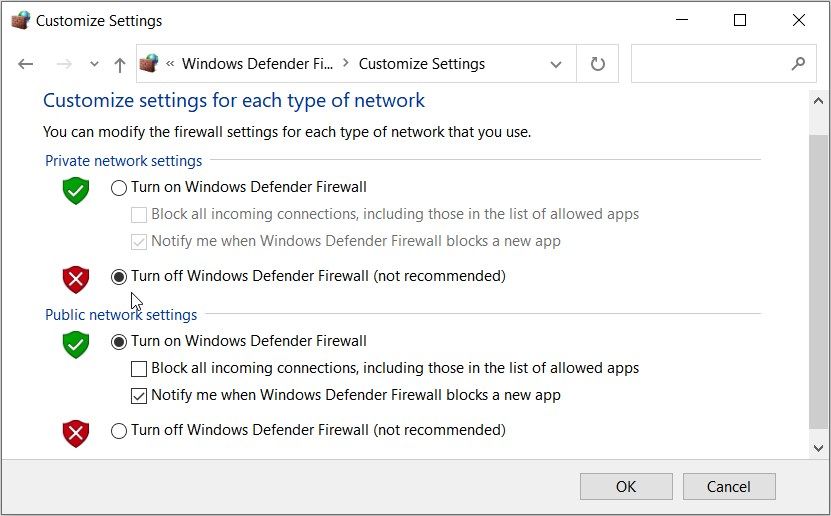
- Click the Turn Windows Defender Firewall on or off option on the left-hand side.
- In the next window, select the Turn off Windows Firewall option. Press OK to apply these changes.
From there, try running the System Restore tool and see if it works. If the problem persists, try temporarily disabling any third-party antivirus programs on your device. When you’re done running the System Restore tool, remember to enable the Windows Defender and your antivirus programs.
8. Try the Clean Boot Option
The issue at hand is sometimes caused by corrupted or faulty third-party apps. To confirm this, you’d need to perform a clean boot.
In case the clean boot option resolves the issue, then there’s a faulty third-party app that’s interrupting the System Restore tool.
To completely get rid of this problem, you could update or uninstall any suspicious third-party app. And if you want to safely delete a suspicious program, use a reliable third-party uninstaller. This approach will remove any junk data that might remain and cause other system issues.
Repair Windows' Issues With the System Restore Tool
The System Restore tool is a handy feature that you can rely on whenever you bump into various system issues. However, this tool often fails and doesn’t perform as expected. In case the tool pops up the “System Restore Did Not Complete Successfully” error, simply apply any of the fixes we’ve covered.

