There's no denying that the Windows Start menu is an essential feature in the day-to-day life of a Windows user. However, there are times when you might want to remove redundant apps from this menu. Conversely, in some instances, you might want to add some missing apps.
But how do you add or remove items from the Start menu? We've got you covered! First, we'll explore the Start menu in detail and then check out how to add or remove items from it.
The Windows 10 Start Menu, Explained

The Start menu allows you to access your apps and system settings. You can easily customize this menu and also create custom Start menu tiles.
To access this menu, press the Win key or click the Windows icon on the taskbar. Alternatively, use the Ctrl + Esc shortcut.
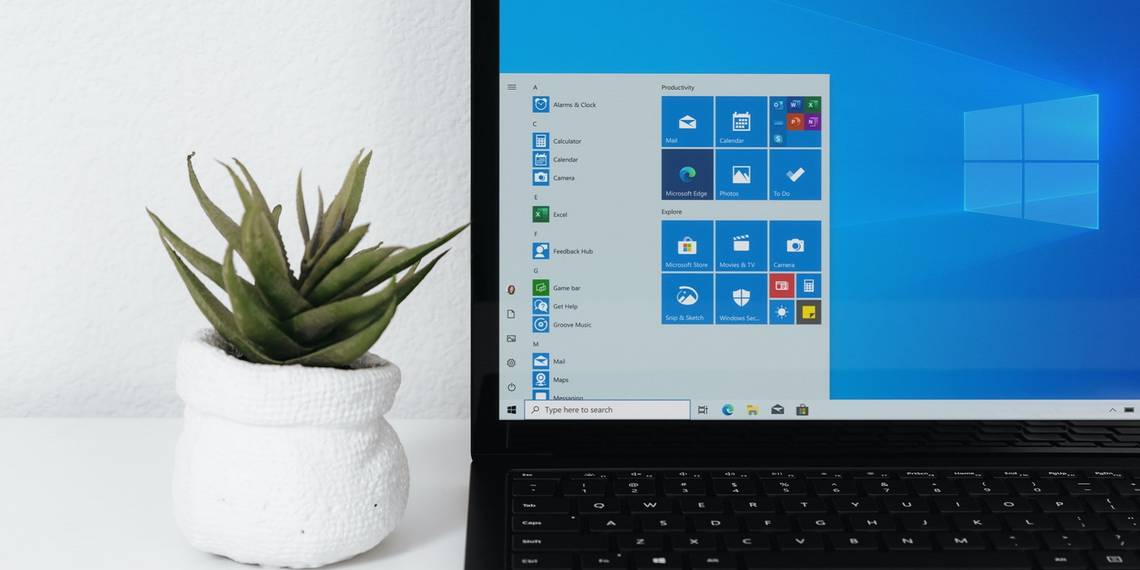
By default, the Start menu comprises app tiles on the right-hand side and an app list in the middle. On the left, you should see a few vertically-aligned widgets (or folders) named "power," "settings," "pictures," and more.
In the middle section (the apps list), you'll likely see additional subsections named "Most used apps" and "Recently added apps."
Now, let's check out how to add or remove items from the Start menu.
How to Add or Remove Widgets and Folders From the Left-Hand Side of the Start Menu
Let's start with the widgets on the Start menu's left-hand side. To add or remove these items, follow these steps:
- Press Win + I to access the system settings. Alternatively, try the various ways to open the Windows settings.
- Select Personalization and then click Start on the left-hand side.
- Click the Choose which folders appear on Start at the bottom option.
- Finally, turn on the buttons for the widgets/folders you want to display on the left-hand side.

Alternatively, follow these steps:
- Press the Windows icon on the taskbar.
- Right-click on one of the widgets/folders on the left (except the "user profile" and "power" options).
- Select Personalize this list from the options.
- On the next screen, turn on or turn off the relevant buttons to add or remove items.
How to Add or Remove Items From the Middle Pane of the Start Menu
Now, let's move to the middle part of the Start menu. The middle part contains the entire list of apps.
You can either display or remove all the items from this section. So, there's no option for adding or removing just one specific thing. However, you can remove particular apps from the "Most used" and "Recently added" subsections.
Here are the steps for adding or removing all the items in the middle part of the Start menu:
- Press Win + I to access the system settings.
- Select Personalization and then click Start on the left-hand side.
- To show the app list, turn on the Show app list in Start menu button. Otherwise, turn this button off to hide the app list.

Now, we'll look at the "Most used" and "Recently added" subsections. It's worth noting that your device automatically adds items to these subsections. However, you can remove any specific item from these categories.
Here's how to remove items from the "Most used" or "Recently added" subsections:
- Press the Windows key or click the Windows icon on the taskbar.
- Right-click on an app from the "Most used" or "Recently added" subsection and select More > Remove from this list. To clear the entire list, right-click on one of the items on the list and select More > Clear list.
And if you want to show or hide the "Most used" or "Recently added" subsections, follow these steps:
- Open the system settings and access the Start settings option by following the previous steps.
- To show the lists, turn on the Show recently added apps and Show most used apps buttons. Alternatively, turn these buttons off to hide these lists.

How to Add or Remove Items From the Right-Hand Side of the Start Menu
By default, the right-hand side of the Start menu comprises categorized tiles. Here's how to remove or add items to this category.
Adding Items to the Start Menu's Tile Section
Here are the steps for adding items to the tile section:
- Press the Win key or open the Start menu using your favorite method.
- Scroll down in the app list and locate your preferred app.
- Right-click on the app and select Pin to Start.

If you've hidden the app list on your Start menu, here's how you can add items to the tile section:
- Type the name of an app in the Start menu search bar.
- Right-click on the Best match result and select Pin to Start.
You can also add items to a specific group in the tile section. Now, we'll show you how to add an item to a new group. From there, we'll explore how to shift the item to an existing group.
Here's how to add an item to a new group in the tile section:
- Open the Start menu and locate your app. Alternatively, search for the app on the Start menu search bar.
- Right-click on the app and select Pin to Start. The app should be placed at the bottom of the tile section.
- To create a new group, scroll above the newly-added tile and click the Name group section. From there, type a group name (for example, type "My Favorite Apps") and press Enter.

To shift an item to a different group, simply drag it and place it in another group.
Want to add multiple tiles to the same folder? Here's what you need to do:
- Open the Start menu.
- Drag a tile and place it on top of another one. This should automatically create a folder.
- To separate grouped items, click the folder to access all the items within it. Finally, shift the grouped tiles and place them anywhere between the other tiles.
Removing Items From the Start Menu's Tile Section
Here's how to remove items from the tile section:
- Open the Start menu.
- Right-click on an item on the tile section and select Unpin from Start.

Want to remove an item from a folder? Follow these steps:
- Open the Start Menu.
- Click your preferred folder in the tile section. This should expand all the tiles within that folder.
- Right-click on the tile you want to remove and select Unpin from Start.
- Finally, restore the other items to their folder by clicking the downward-pointing arrow on that folder.
To remove an entire folder from the tile section, right-click on it and select Unpin folder from Start.
Adding and Removing Start Menu Items the Easy Way
The Windows Start menu makes it easy for you to access most of the apps on your device. If you want to add or remove items from this menu, simply apply any of the methods we've covered.
Feel like applying even more changes to the Start menu? If so, then you need to check out some cool tips on how to hack and customize the Windows Start menu.