Spotify is a popular app for playing music and podcasts on Windows 11 and 10. However, some Spotify users encounter issues when they try to play songs. One of the most widely reported playback issues for that app has an error message that says, “Spotify can’t play this right now.”
Users can’t listen to music for which that Spotify issue occurs. It’s an error that can affect playback for some or many songs in the app. This is how you can fix the “Spotify can’t play this right now” error on Windows 10 and 11 PCs.
1. Disable Hardware Acceleration in Spotify
Hardware acceleration is enabled by default in Spotify to offload processing tasks to GPUs. However, disabling hardware acceleration in Spotify is a simple potential fix to apply some users have said works. These are the steps for disabling that feature:
- Click the ellipsis (...) menu button in the top left corner of the Spotify window.
- Select the View submenu.
-
Click the ticked Hardware Acceleration option on the submenu.

- Select OK on the window that prompts you to restart Spotify.

2. Update the Spotify App
The “can’t play this right now” error will more likely arise in old, outdated versions of Spotify. Therefore, it’s recommended Spotify users check for app updates. This is how you can update Spotify:
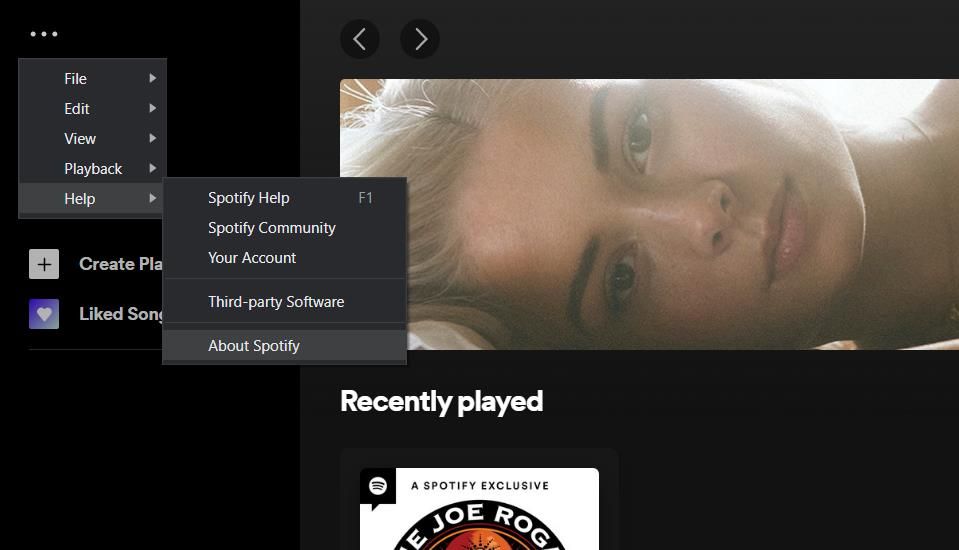
- Open Spotify’s menu by clicking its ellipsis (…) button.
- Move the cursor over the Help submenu.
-
Click About Spotify to check for updates.
- Select the Update Now option for any available update.
- Then restart Spotify.

3. Delete the Local-files.bnk Cache File
A corrupted or overloaded Spotify app cache can cause this playback error on some users’ PCs. Erasing the local-files.bnk file will clear Spotify’s cached data. You can delete the local-files.bnk file in Explorer like this:
- Open the Run dialog from the Power User menu by right-clicking Start and selecting its shortcut.
- Input %appdata% in the Run dialog’s command box.
- Select OK to open a Roaming folder in Explorer.
-
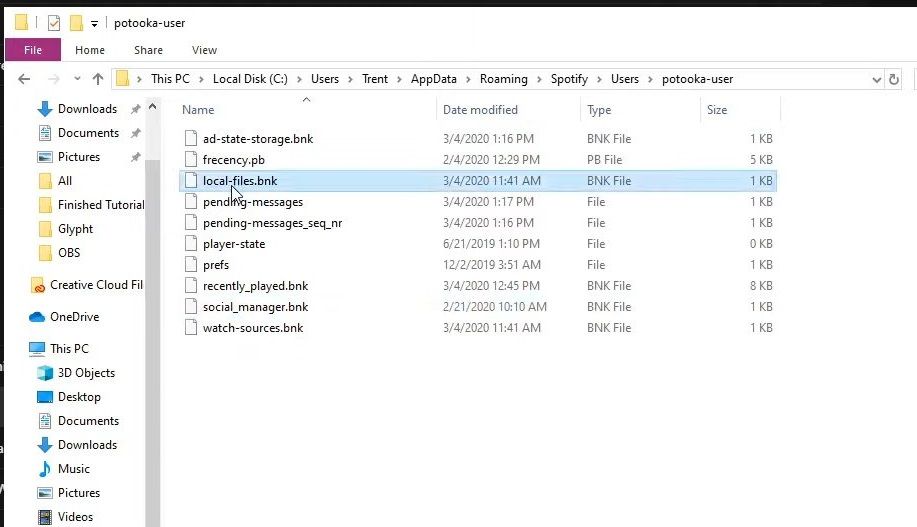
Click the Spotify > Users > xxx-user subfolders to open them. The xxx-user folder will include random characters.
-
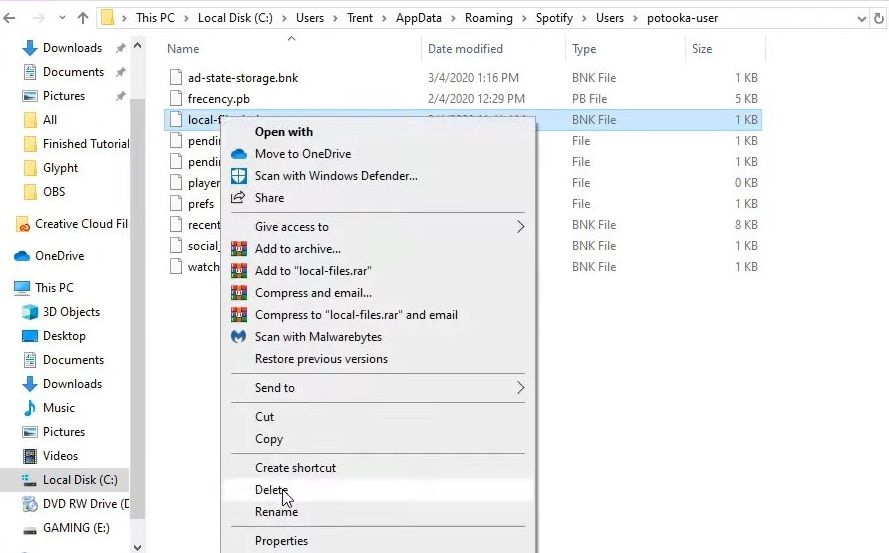
Then right-click the local-files.bnk file and select Delete to erase it.


4. Reduce the Crossfade Songs Setting to Zero
Crossfade is a transitional fading effect for Spotify songs. However, a high setting for that effect can also cause playback errors to arise in Spotify. Try reducing the Crossfade setting’s value to zero in the following steps:
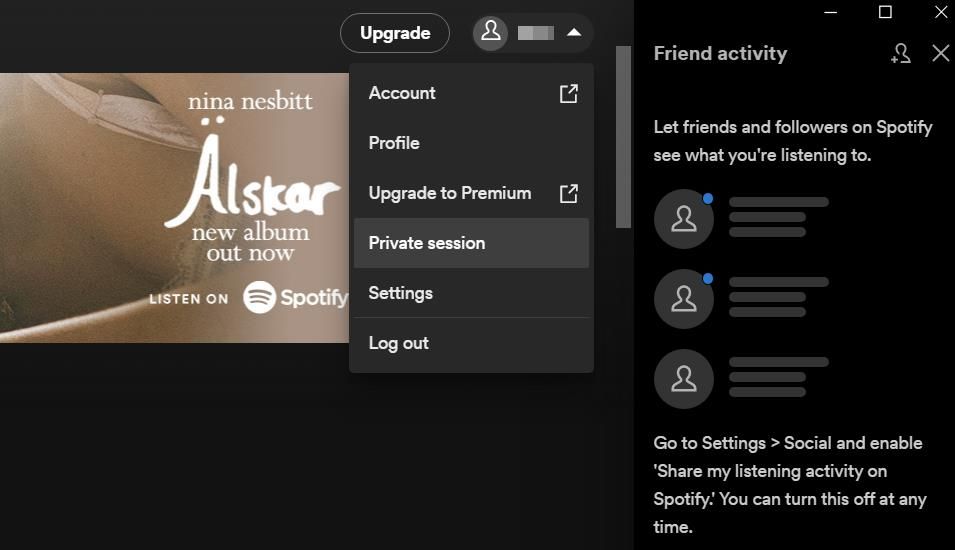
- Click the username button on Spotify.
-
Select the Settings menu option.
-
Scroll down to the Crossfade songs bar setting shown directly below.
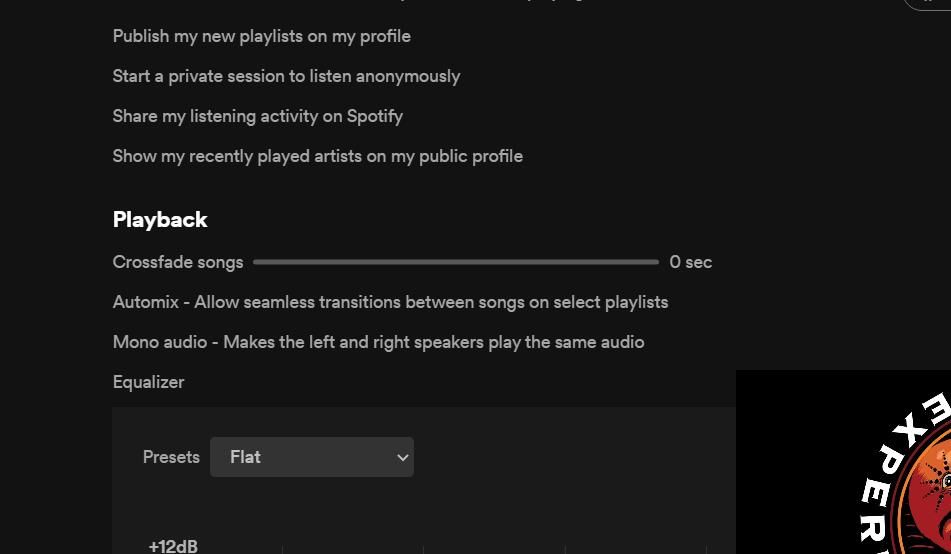
- Drag that bar’s slider to zero. Or you can disable Crossfade by clicking its green toggle switch button.


5. Lower Spotify’s Streaming Quality Setting
The “Spotify can’t play this right now” error may occur because of an overly high streaming setting for your account. You can lower the streaming quality setting in Spotify as follows:
- Click Spotify’s user account button.
- Then select Settings to view the Spotify app options.
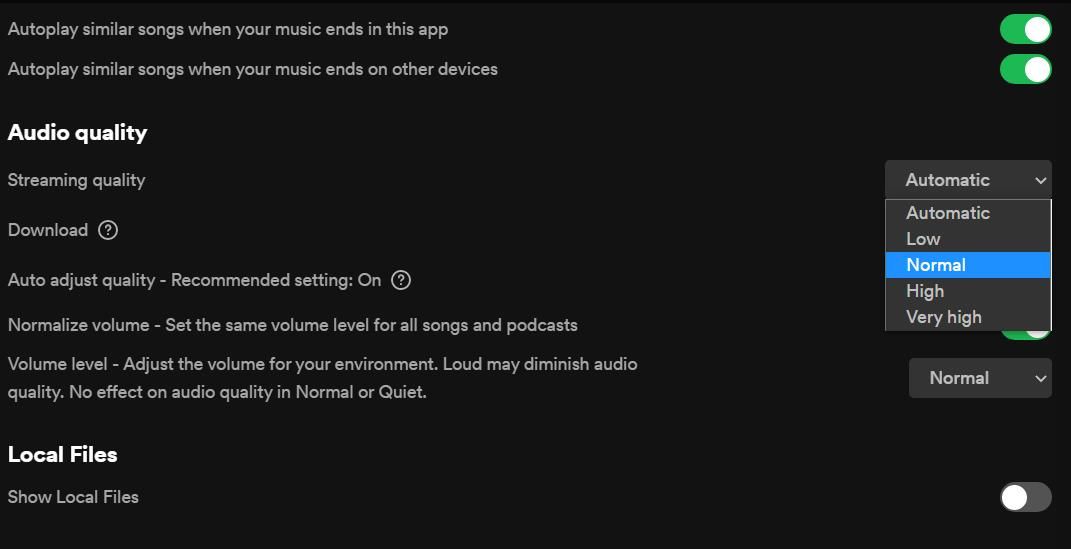
- Click the Streaming quality drop-down menu.
-
Select the Automatic option on that menu. Or select an option lower than the current quality setting.
- Restart Spotify by closing and reopening the app.

6. Change the Default Format Setting for Your PC’s Speakers
It has been confirmed by some Spotify users that changing the output format for speakers can resolve this playback error. Adjust the default format either way by increasing or decreasing the Hz setting, but lowering it may be preferable. This is how to change the output format for speakers in Windows 11 and 10:
Windows 11
For Windows 11:
- Press Start by clicking the right mouse button to select a Settings shortcut.
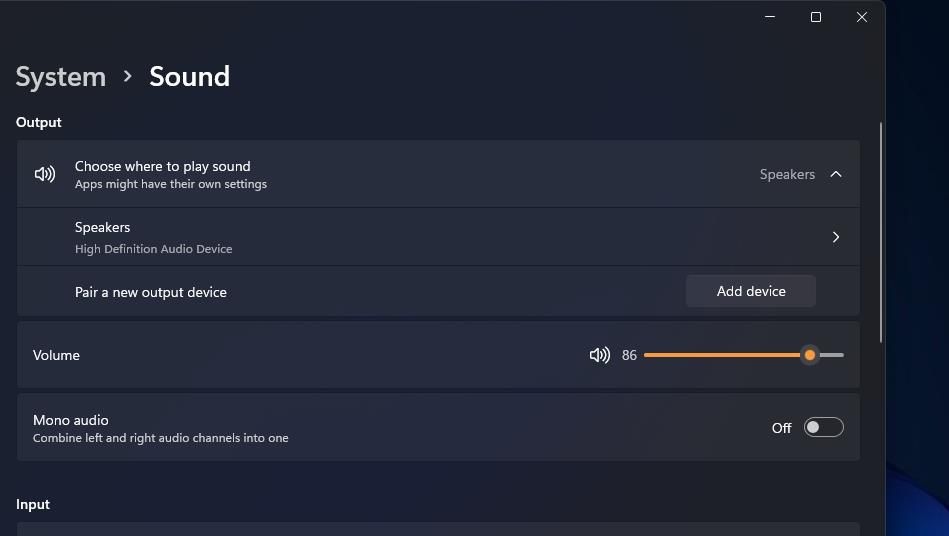
- Select the Sound navigation option.
-
Click Speakers to reach the Format setting.
-
Then click the Format drop-down menu to select a lower or higher Hz output setting.


Windows 10
For Windows 10:
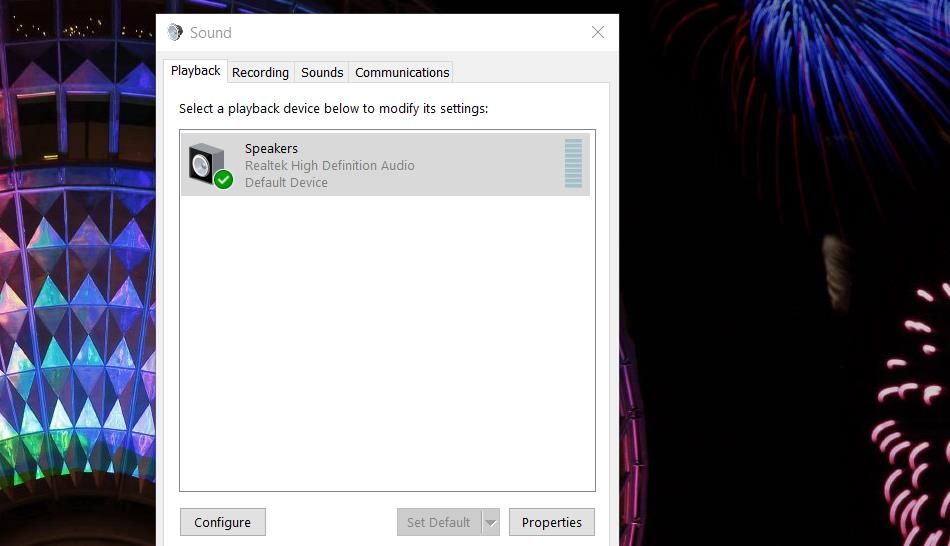
- Right-click the volume control (speakers) system tray icon to select Sounds.
- Click the Playback tab if it’s not selected.
-
Select your default speakers there, and press the Properties button.
- Click the Advanced tab on the Speakers Properties window.
-
Change the Hz setting on the Default Format drop-down menu.
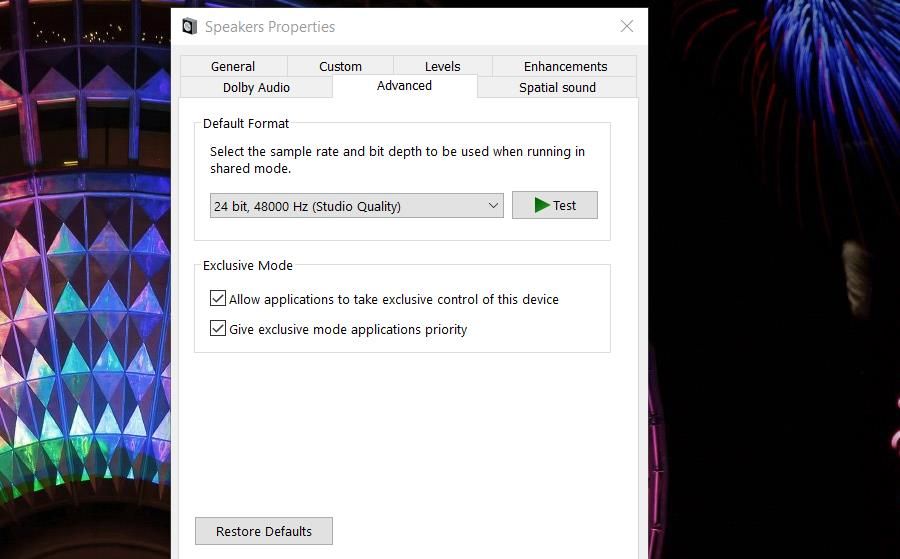
- Select the Speakers Properties window’s Apply option.
- Then select OK to close Speakers Properties.


7. Set the Output Device Setting for Spotify to Default
Make sure the Output device setting for the Spotify app is set to default. Some Spotify users have said they’ve fixed Spotify’s playback error by doing that. You can adjust the output option for apps with the Volume Mixer in Windows 11 and 10 like this:
Windows 11
For Windows 11:
- First, launch the Spotify app so that you can configure its output in Volume Mixer.
- Open sound options in Settings as covered for the first two steps of resolution six.
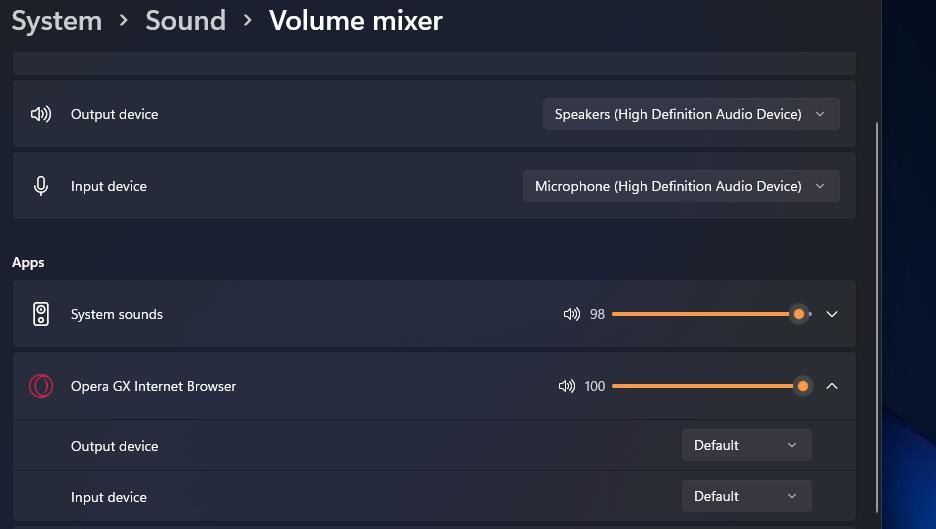
- Select Volume mixer to bring up its options.
- Click the Spotify app in Settings.
-
Then select the Default option on the Output device drop-down menu.

Windows 10
For Windows 10:
- Make sure the Spotify app is open.
- Open Settings by clicking the cog icon on Windows 10’s Start menu.
- Click the System Settings category.
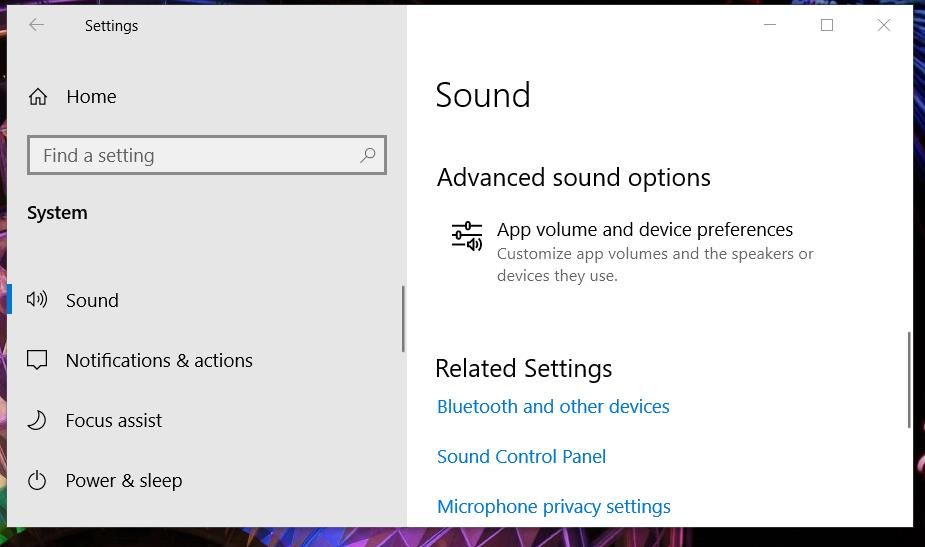
- Select Sound on the sidebar.
-
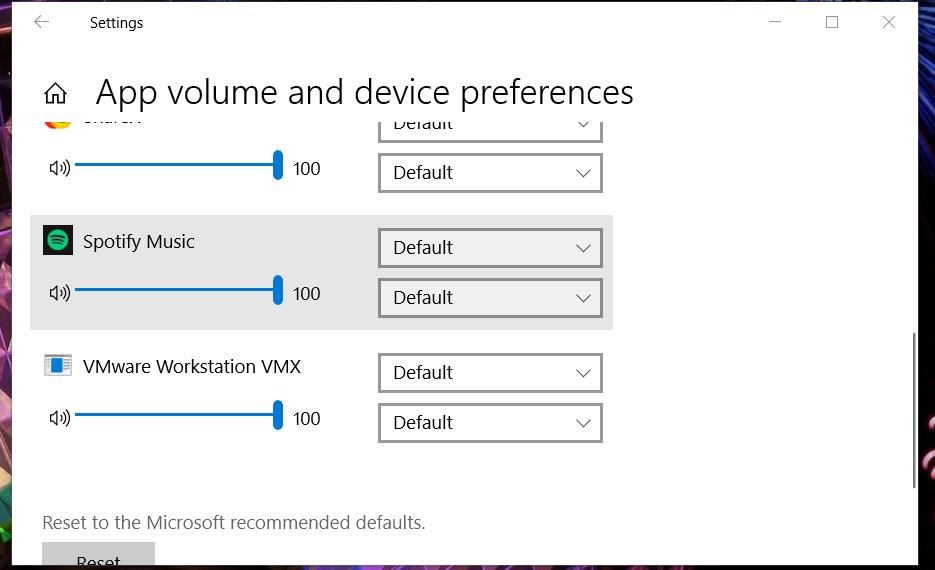
Click App volume and device preferences to open Volume Mixer in Settings.
-
Set the Output Input drop-down menus for Spotify to Default.


8. Reinstall the Spotify App
Reinstalling Spotify is the last resort resolution if you can’t fix its playback error with other methods. It won’t take long to reinstall that app from MS Store since it only weighs in at about 292 megabytes. This is how you can uninstall and reinstall Spotify with Settings and MS Store:
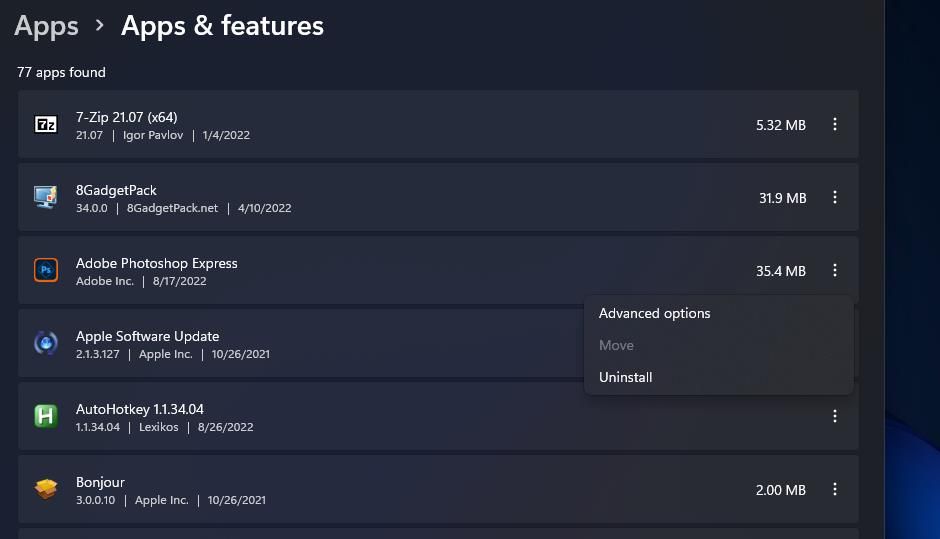
- Press Win + S, and type in Apps & features inside the search box.
- Select Apps & features to bring up its Settings page.
-
Next, click the three-dot button for Spotify to select Uninstall. In the Windows 10 Settings app, select the Spotify app and press Uninstall.
- Click Uninstall in the small confirmation box.
- Bring up the search utility again, and input Microsoft Store in the text box.
- Click Microsoft Store to open that app’s window.
- Type Spotify in the app search box near the top of the MS Store window.
- Select Spotify in the app search results.
-
Click Get to reinstall Spotify.


Dance to the Music Again With Spotify
Those are eight of the best fixes for the “Spotify can’t play this right now” error. Many users have resolved that playback issue with them. So, maybe one of those resolutions will also get you back into the Spotify groove again.