An IP address is a collection of numbers that identify a specific device when it is connected to a network. Different devices have unique IP addresses, and computers use them to interact with one another over the internet.
But, when the IP addresses of two or more devices are similar, the network can not differentiate between them. When using the internet, this causes the "Windows has detected an IP address conflict" error.
Here's how to resolve the IP address conflict error on Windows 10 and 11 with some simple steps.
1. Refresh Network Settings Using CMD
If you don't set up your PC's network settings correctly, IP conflicts can happen. IP conflicts usually cause your Internet connection to stop working at random. You can look up what an IP conflict error is to better understand it.
To fix this, follow these steps to refresh the network settings on your PC:
1. Run Command Prompt as an Administrator.
2. Copy and paste the following commands into the Command Prompt:
        <code>ipconfig /flushdns

ipconfig /registerdns

NETSH winsock reset catalog

NETSH int ipv4 reset reset.log

NETSH int ipv6 reset reset.log

exit

3. The Command Prompt will then close on its own. Now, restart your PC to make sure the changes take effect correctly.
If the problem is still not fixed, move on to the next steps for more advanced ways to fix the IP conflict error.
2. Change DNS Servers
The DNS (Domain Name System) server is an internet directory that helps web browsers connect to different websites. If you want to learn more, we have already discussed everything about DNS in great detail.
If you've configured DNS server settings incorrectly, or your current server is experiencing issues, it can result in an IP conflict error. Thankfully, you can resolve this issue by changing the DNS server address.
To change the default DNS server in Windows, follow the steps below:
- Open the Settings app by pressing the Win + I key combination.
-
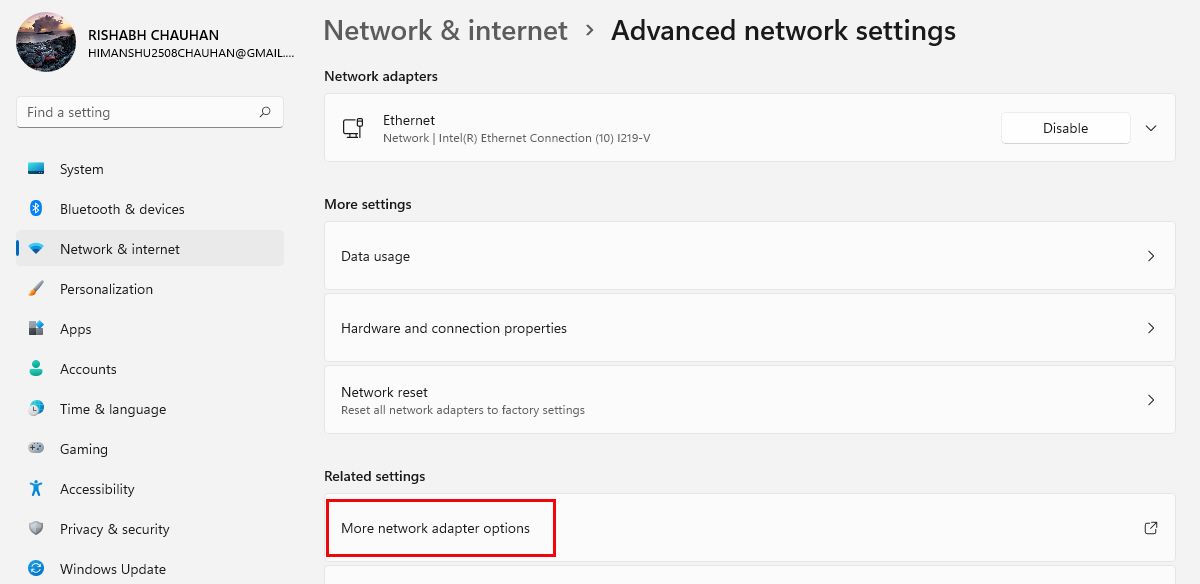
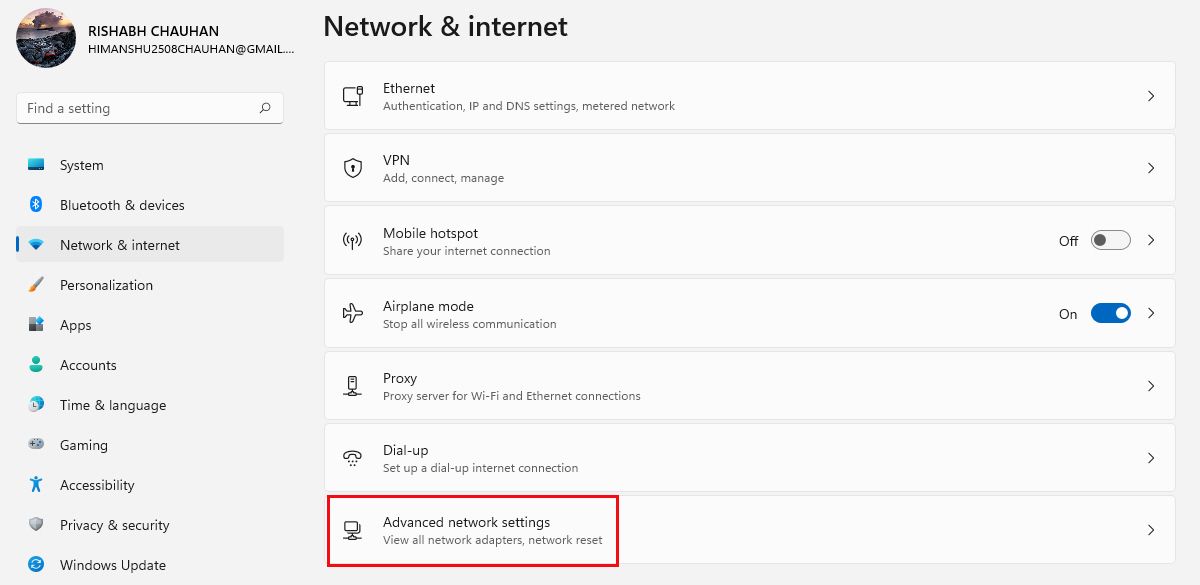
Navigate to Network & internet > Advanced network settings > More network adapter options.
-
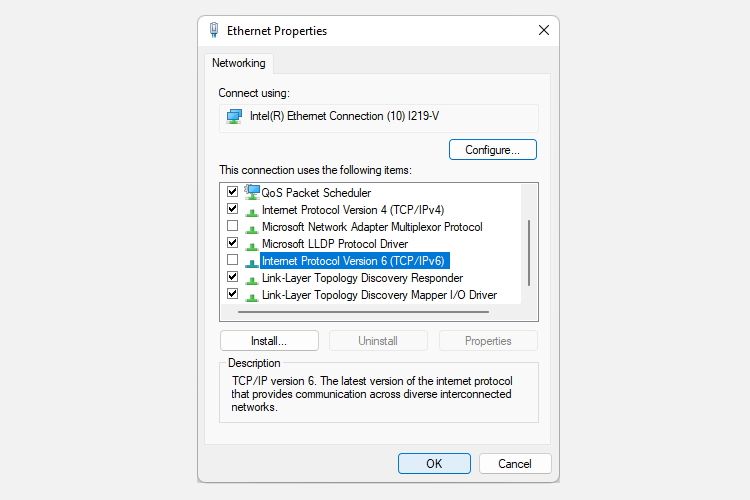
Right-click your Internet connection and select Properties from the context menu.

- Select Internet Protocol Version 4 (TCP/IPv4) and double-click on it.
- Click the "Use the following DNS server address" option.
-
Type 8.8.8.8 in the Preferred DNS server field and 8.8.4.4 in the Alternate DNS server field.
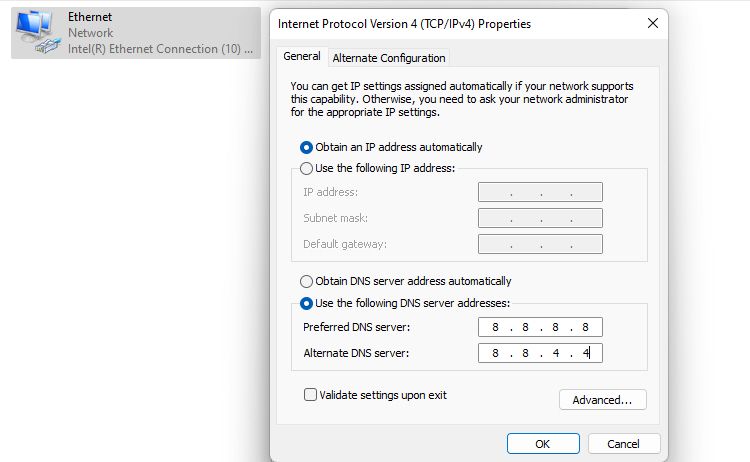
- Finally, click the OK button to save the changes.


We've used Google Public DNS as a DNS server for this tutorial. To improve online security, you can also use any of the best DNS servers available.
3. Renew Your IP Address
Usually, a device can keep using the same IP address forever. Technical failures, however, can result in IP clashes and other issues that prevent the networking system from operating properly. When this happens, you might want to consider renewing your PC's IP address.
When you renew a Windows computer's IP address, the underlying IP connection is also reset. This usually fixes some common issues with IP addresses.
Here's how to use the Command Prompt to renew the IP address:
1. Open the Command Prompt window as an Administrator.
2. Type the below-given command once and hit Enter:
ipconfig /release
3. Now, type the following command and press Enter to get a new address:
ipconfig /renew

All done. When you hit the Enter key, you'll be disconnected from the Internet for a few seconds. When the command is completed, you'll be back online, and a new line with an IP address will show up on the Command Prompt screen.
Besides, if you get an error code instead of a newly assigned IP address, you need to use the Windows troubleshooter.
4. Modify IPv6 Connectivity
If you're unable to use any service that requires internet, modifying the IPv6 connectivity settings could fix the problem. Before you move on to the steps, you should check to see if your Internet service provider supports IPV6. You can verify it by running a quick test on the Test IPv6 website.
After confirming, perform the following steps to turn off IPv6 on your network:
- Right-click on the Start menu icon and go to Network Connections.
-
Now, click Advanced network settings > More network adapter options.
- Right-click on your network connection and select the Properties option.
-
After that, uncheck or deselect Internet Protocol Version 6 (TCP/IPv6).
- Finally, click OK to save the changes.


5. Perform a Winsock Reset
If you can't connect to the Internet, you can use the Command Prompt utility to reset Winsock. In simple terms, Winsock makes it possible for Windows programs and apps to connect to the internet.
By resetting Winsock, any network-related settings made by other networking programs like VPN clients, third-party browsers, or antivirus software will be lost.
To reset Winsock using a Command Prompt, follow the instructions below:
1. Log in as an administrator and open the Command Prompt. You can use one of the many ways to open a Command Prompt on Windows.
2. Type the command given below, then press the Enter key:
netsh winsock reset

3. Restart your computer now, and then verify if the internet problem persists.
6. Restart Your Router

Your router gives your computer a distinct IP address when you connect to it through an ethernet cable or WiFi.
But, sometimes it may fail to do so, and then you'll receive the "Windows has detected an IP address conflict" or "Windows was unable to retrieve an IP address" errors. A router restart or reboot may be helpful in such situations.
Here's how you can perform a quick router restart:
- Locate your router's power button on the back.
- Press the router's power button to turn it off.
- Wait for a minimum of two minutes.
- You can now power ON the router by pushing the power button again.
This will refresh your router's DHCP server. The DHCP server is responsible for network management and assigning fresh IP addresses to all router-connected devices.
If restarting your router does not help, you must reset it. Do note that once you reset your router, all the configured network settings will also be erased. If you're ready to move forward, we have a guide on how to reset a router to help you.
Get Your Internet Working Again
In conclusion, you can fix the error "Windows has detected an IP address conflict" by changing your IP address, restarting your router, or updating your PC's network configuration.
The conflicting IP address error is typically caused by minor network configuration issues on your PC. It is also possible that your router assigned the same IP address to two or more devices due to a glitch or technical error.
We would never advise a beginner to configure a router's settings on their own. Not only will it disrupt network connectivity, but it can also cause major home network problems.