If you frequently take screenshots on your PC, you're probably aware of the Win + Shift + S shortcut. Pressing those keys pops up the Snip and Sketch tool (or the Snipping Tool if you're on Windows 11), allowing you to quickly take a screenshot and save it on your computer.
If you tried using the shortcut to no avail but nothing happened, there are a few reasons why this may be the case. Let's explore the causes behind a faulty Win + Shift + S shortcut and how to fix them.
1. Turn On the Clipboard History
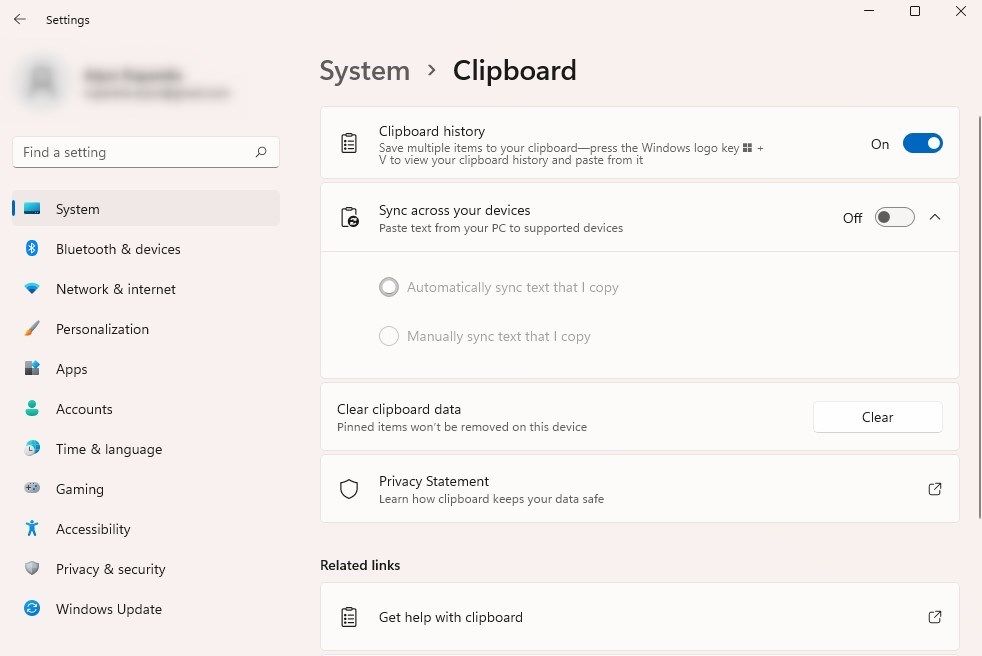
The Snipping Tool saves screenshots to your clipboard first. You can save the screenshots to your computer after the image has been copied to your clipboard history. So, if you've disabled clipboard history, the Snipping Tool won't work.
You can fix this from the Settings app. Press Win + I to launch the Settings app and navigate to System > Clipboard. At the top of the window, you'll see the Clipboard history option and the option enable or disable to its right. Make sure the option is toggled on and then exit the Settings app.
Try using the shortcut now to see if it worked.
2. Unplug and Replug In Your Game Controller
While this may sound way too simplistic to be a real solution, it works in many cases. If your game controller is connected to your PC, unplug it and then plug it back in. See if the screenshot shortcut works once you've done this.
3. Use the Print Screen Key Instead
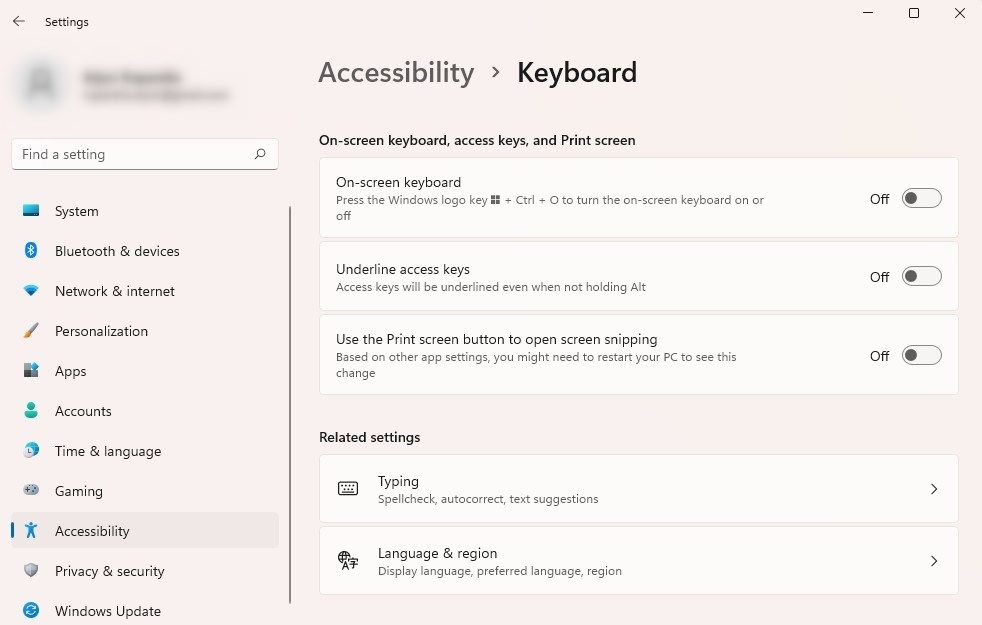
You can also change the shortcut for launching the Snipping Tool. Instead of Win + Shift + S, Windows allows you to set the PrtScr key as a shortcut from the Settings app.
Press Win + I to launch the Settings app and navigate to Accessibility > Keyboard. Scroll down and find the option called Use the Print screen button to open screen snipping. Turn on the button next to that option.
Exit the Settings app and try using the PrtScr button. You should be able to use the Snipping Tool for screenshots now.
4. Reset or Reinstall the Snipping Tool
Resetting the Snipping Tool will revert it to its original state. In case something you did later messed up with the app's settings, a reset should fix the issue.
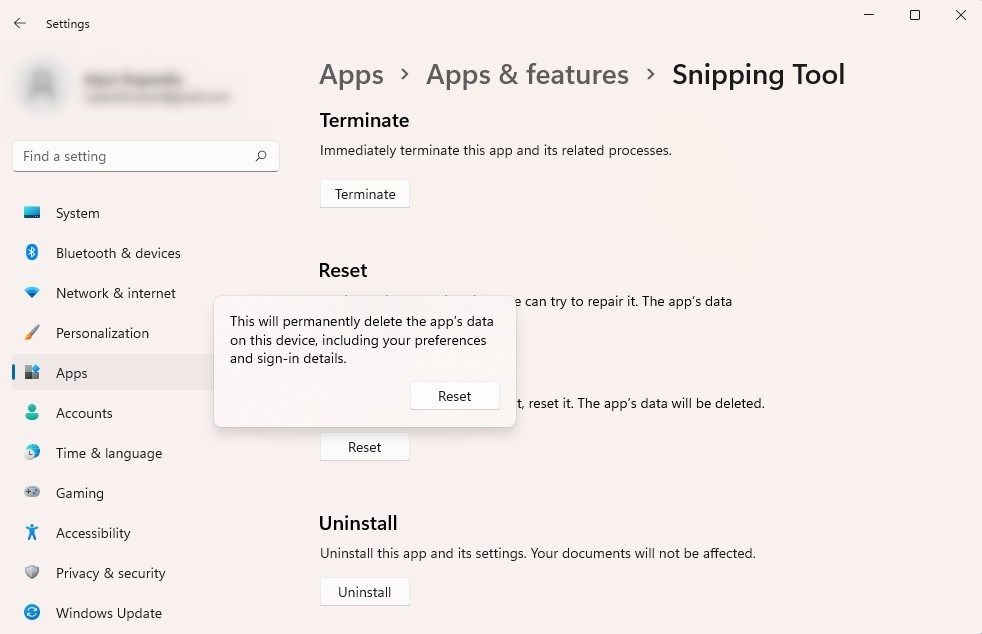
Press Win + I to launch the Settings app and navigate to Apps > Apps and Features. Search for Snipping Tool in the list of apps. Click on the vertical ellipsis to the right and select Advanced options.
Scroll down to the next screen and click on the Reset button. You'll see a hovering message. Click Reset again.
Let the reset process complete and see if you can use the Snipping Tool now.
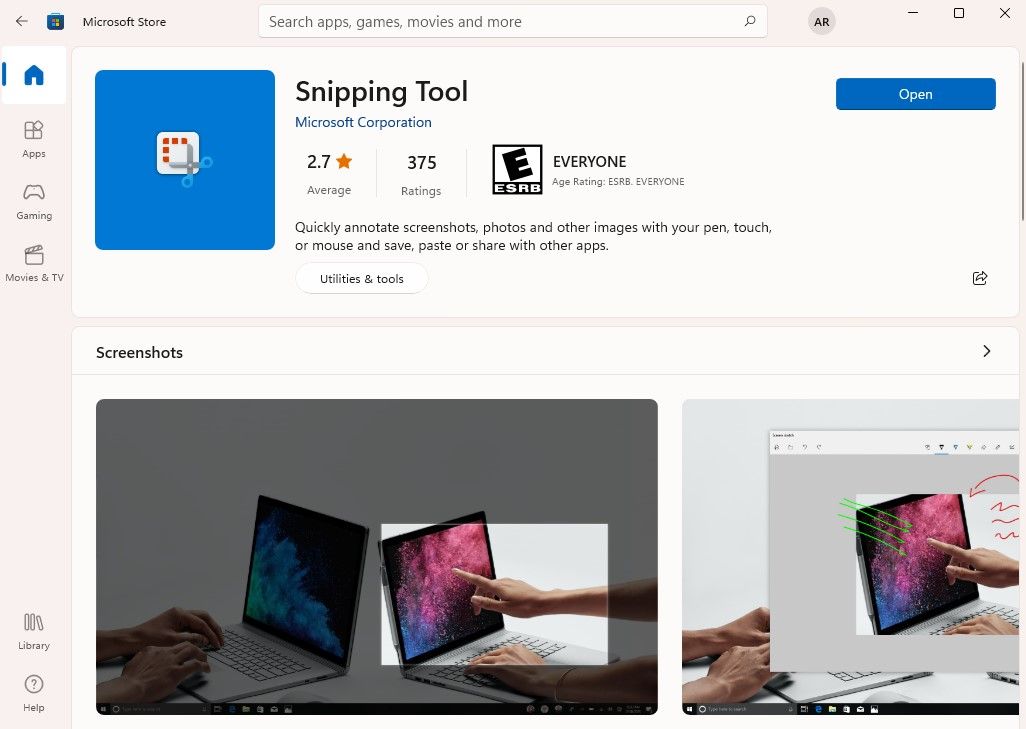
If the reset doesn't help, you might also want to try reinstalling the Snipping Tool. You can do this by clicking the Uninstall button just below the Reset button. Once it's uninstalled, launch the Microsoft Store by searching for microsoft store in the Start Menu. Search for Snipping Tool or use the direct link to download the Snipping Tool. Select the Get button to install the app and see if the shortcut works now.
5. Check the Keyboard for Dirt or Damage
Sometimes, the shortcut might not work because your keyboard is dirty. If you don't use the Win key often, there's a good chance that it has gummed up over time.
Try using the Win key for something else. For example, press Win + E and see if that launches the File Explorer. You can also try typing a capital S with the Shift + S shortcut.
If one of these keys won't work, try cleaning the dust from under the keys. If the key still doesn't work or it looks like the key has been physically damaged, try using a different keyboard. If you're able to confirm physical damage, you'll need to invest in a new keyboard.
6. Enable Snipping Tool Notifications
If you've used the Snipping Tool shortcut, you know that once you've selected the area of the screen you want to screenshot, a notification pops up. Clicking the notification allows you to save the image.
But if Snipping Tool notifications are turned off, you might not be able to save the images (though you may still be able to open the Snipping Tool using the Win + Shift + S shortcut).
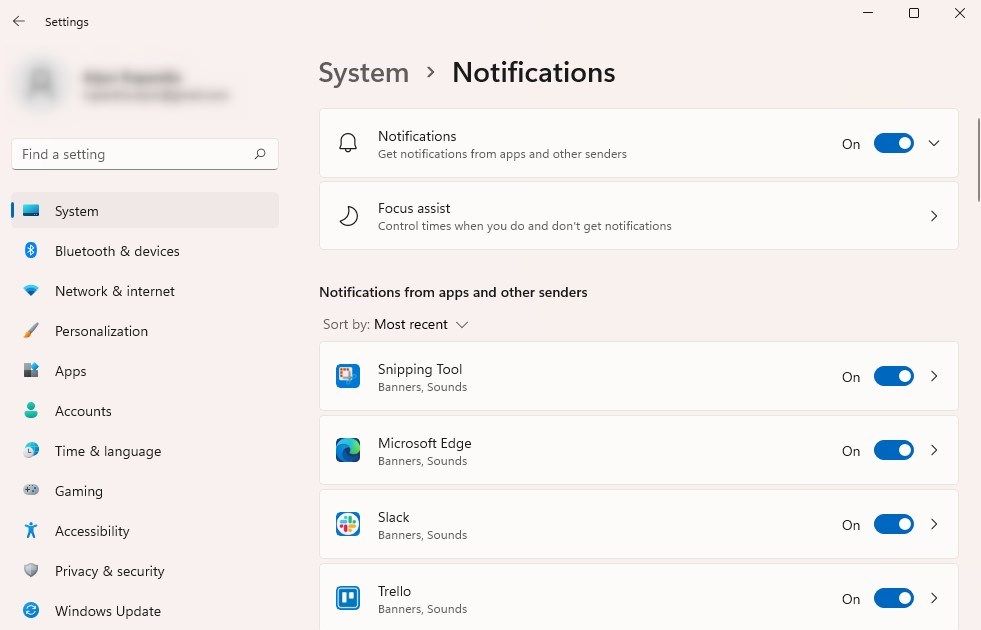
You can enable Snipping Tool notifications from the Settings app. Press Win + I to launch the Settings app and navigate to System > Notifications.
Scroll through the list of apps searching for Snipping Tool. Toggle on the button next to Snipping Tool if it's turned off.
7. Use a Third-Party App
You don't necessarily have to use the built-in Snipping Tool for screenshots. Third-party apps are more robust and provide more features than the Snipping Tool. If Snipping Tool isn't playing ball, now might be a good time to make the switch.
You can select from various free and paid screenshot tools like Snagit, Greenshot, and Screenpresso. Different apps may use a different shortcut for screenshots, though. For example, Screenpresso uses the PrtScr button by default.
The good thing about third-party apps is you get a lot more editing options before you save the image. The Snipping Tool only offers a pen, highlighter, touch-writing, cropping, and rotating. On the other hand, tools like Screenpresso offers an object library including shapes, arrows, and other annotation options. You can also blur images and add borders to the image.
The Many Ways to Capture Screenshots
Hopefully, one of the fixes in this guide helped you resolve the problem, and the Win + Shift + S shortcut will work again. If it doesn't, it's not the end of the world. There are various other ways to take screenshots on Windows.
Third-party apps are particularly helpful if you capture screenshots regularly. They're more efficient and offer a ton of editing options before you save the image file. While there are tons of screenshot apps, not all are worth your time. Be sure to learn about third-party screenshot apps before you start using one.

