Do you share your computer with someone else and not want them to access your Firewall & Network protection settings? If yes, then this is the place where you need to be.
In this article, we'll see how you can hide or show the Firewall & Network protection settings area in Windows Security.
Why It's Important to Hide the Firewall & Network Area in Windows Security
Windows Security is your one-stop security center to protect your personal data and network settings. It is divided into different security sections for better and faster security management.
One of these is the Firewall & Network protection area. This is where you can view the Microsoft Defender Firewall status and the type of networks your device is connected to. You can also use it to block or allow an app through the firewall and reset firewall settings.
Therefore, keeping this area hidden is important, especially if you share your computer with someone else. You must be signed in as an administrator if you want to hide the Firewall & Network area, so check out how to enable or disable the built-in administrator account on Windows if you need to turn it on.
How to Hide or Show Firewall & Network Area in Windows Security Using the Local Group Policy Editor
The Local Group Policy Editor is a utility using which you can manage parts of Windows, enforce specific policies, and automate repetitive tasks like mapping printers. This utility is reserved for the Professional, Enterprise, and Education editions of Windows. Thus, if you are using the Home edition, check out our guide on how to access the group policy editor in Windows Home.
Nevertheless, here's how to use Local Group Policy Editor to hide the Firewall & Network area in Windows Security:
- Press the Win + R hotkeys to open the Run dialog box.
- Type gpedit.msc and press Enter. It'll open the Local Group Policy Editor.
-
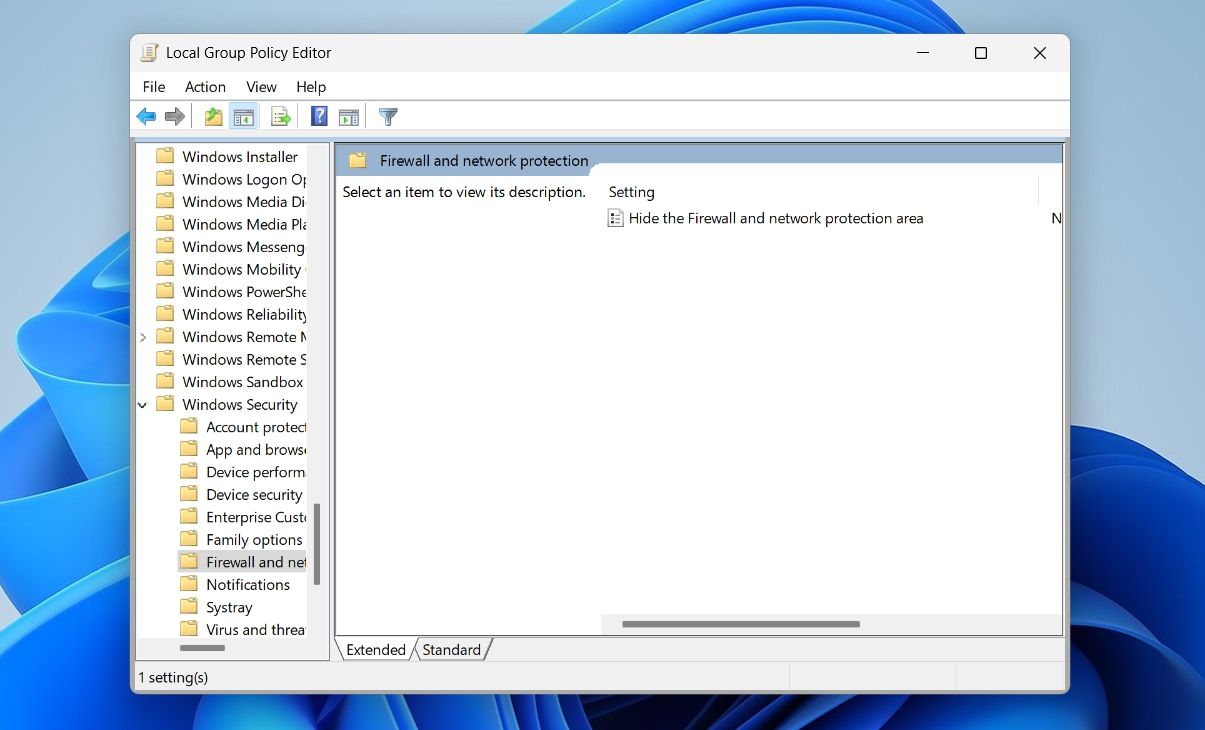
Head towards the following location:
Computer Configuration > Administrative Templates > Windows Components > Windows Security > Firewall and network protection -
Double-click the Hide the Firewall and network protection area to open its edit window.
-
Select the Enabled option.
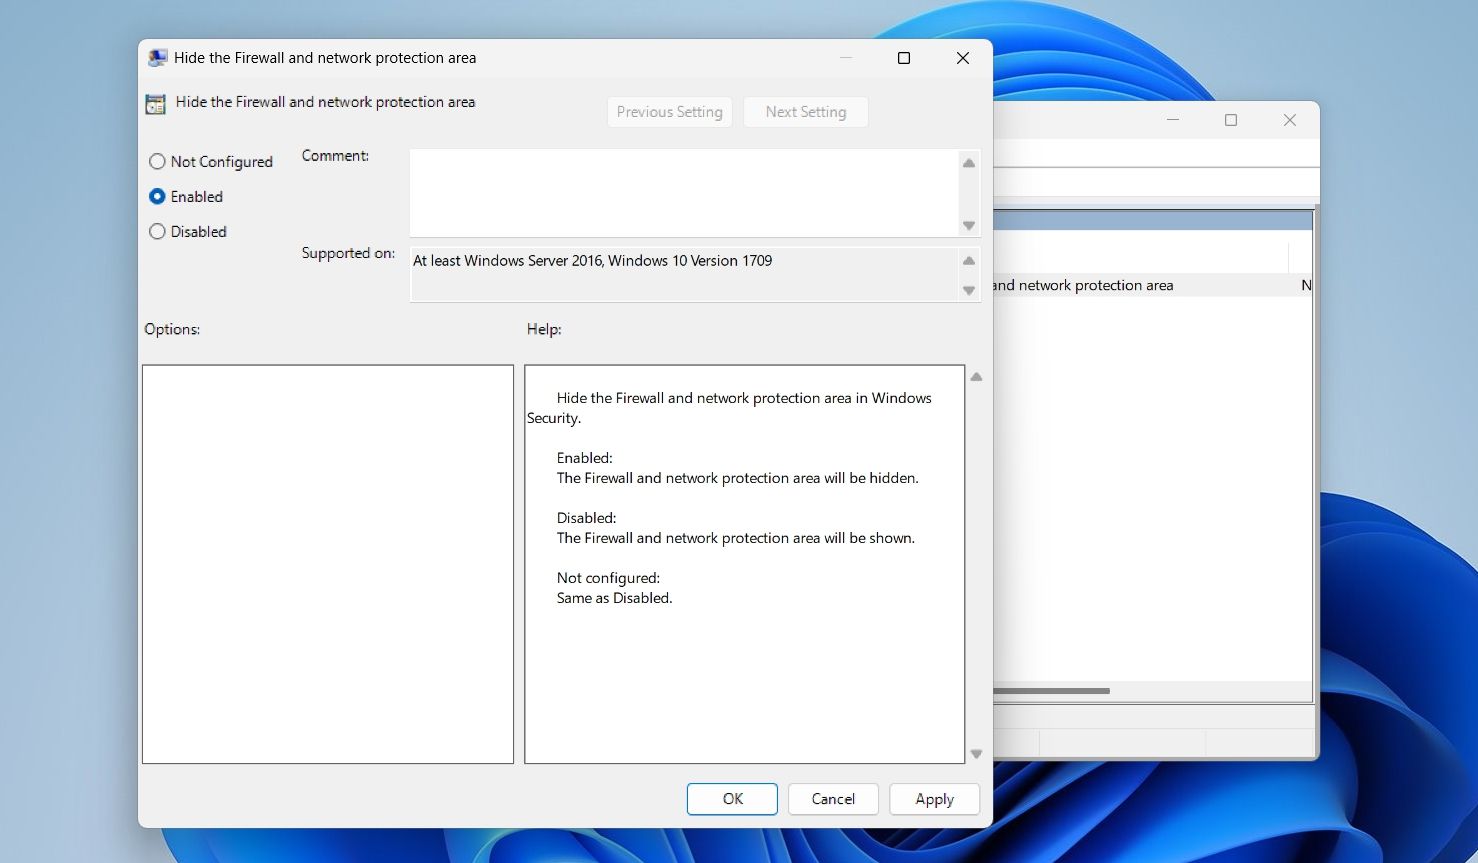
- Click Apply > OK to save the changes.


That's it. You might need to restart your computer for the changes to take effect.
If you want to unhide the Firewall & Network area, open the Local Group Policy Editor again and repeat the above steps. At the very end, select the Disabled option and then save the settings.
Keep Your Network Settings Safe and Secure
It's very important to hide the Firewall & Network protection area if you don't want others to view or change the important settings of your computer. You disable this area using the Local Group Policy Editor, as mentioned above.
Meanwhile, you might be interested to know different ways to open the Windows Security app.