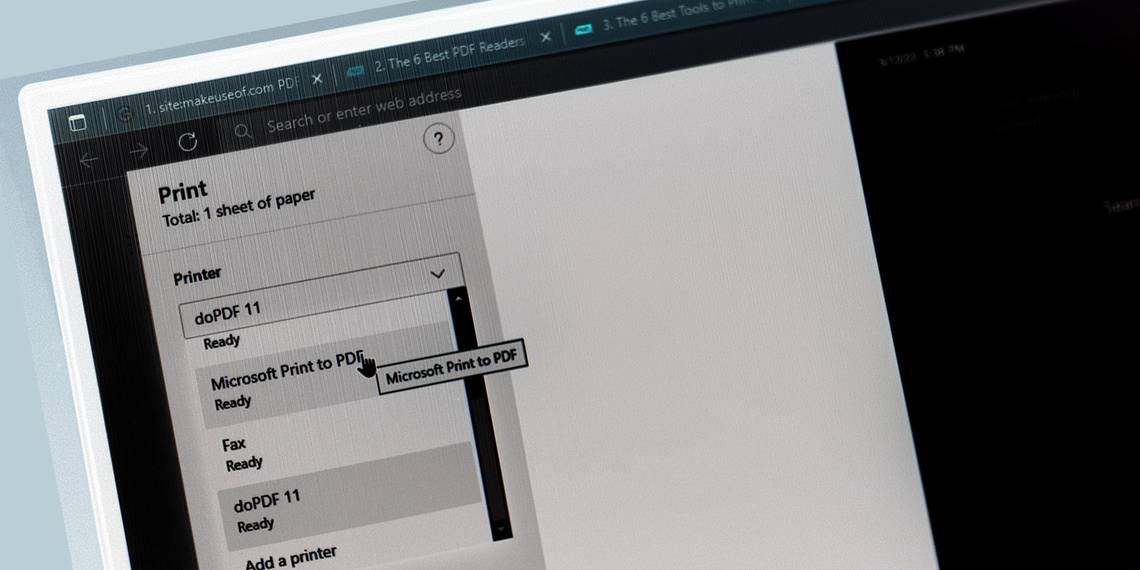
The Print to PDF option in the Windows print menu lets you save documents in PDF format. It is a handy way to convert your traditional word or other text documents to a PDF. However, if you happen to accidentally delete the option or find it missing, it can be confusing as to how to get it back.
You can restore the Print to PDF feature from the Windows Features dialog. If that does not work, you can add it manually or reinstall the printer drivers. We have discussed all these steps in detail below.
1. Add Print to PDF Using the Windows Features Dialog
Windows 11 and 10 come with a set of additional features known as Optional Features. Some of these features come pre-installed, and some are available on demand that you can download and install as per your need.
If the Print to PDF is disabled on your PC, you can enable it from the Windows Features dialog. Here's how you can easily add or remove Optional Features in Windows in just a few clicks.
- Press Win + R to open the Run dialog.
- Type Optionalfeatures and click OK to open the Optional Features dialog. Alternatively, you can also open it from Settings > Apps >Optional Features > More Windows features.
-
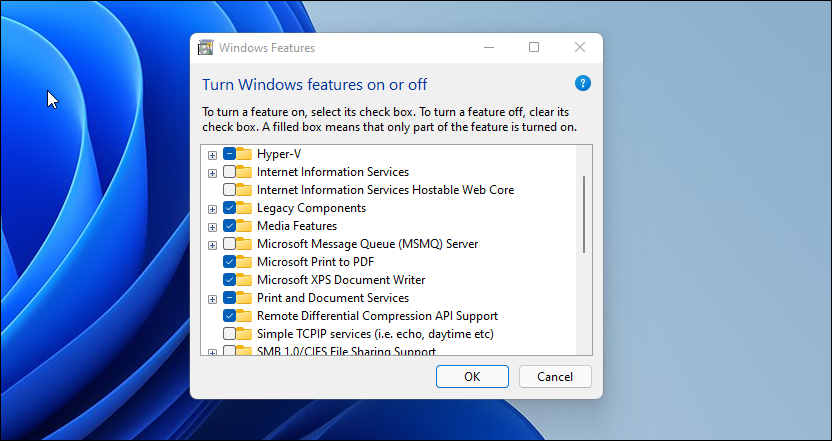
In the Turn Windows features on or Off dialog, locate Microsoft Print to PDF.
-
Select Microsoft Print to PDF and click OK to install the feature.
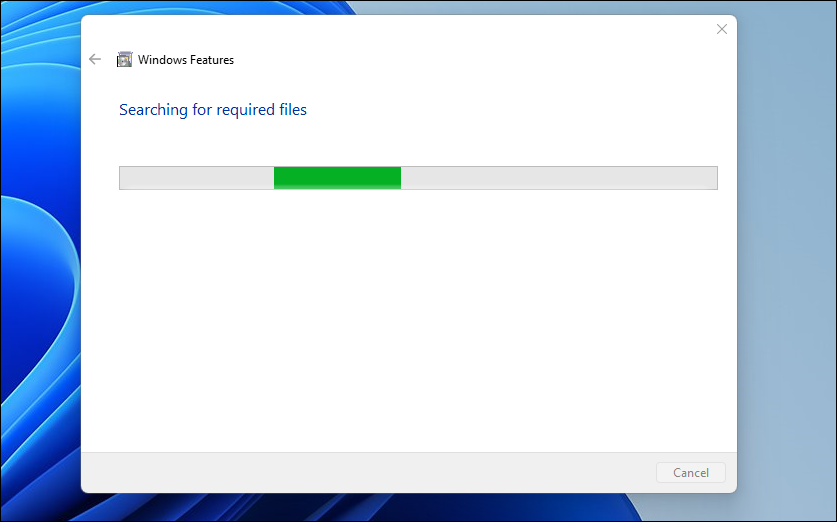
- Once installed, click Close. Now check if the Print to PDF option is restored in the Printer interface.


If the Microsoft Print to PDF option was already enabled/selected, then unselect the option and click OK. This will prompt the OS to uninstall the feature correctly. Once uninstalled, relaunch the Windows Features dialog and then enable the Print to PDF option to install the driver.

If the problem persists, turn off the feature in the Windows Features dialog and restart your PC. After the restart, open Optional Features and enable the feature again to see if that restores the Print to PDF option.
2. Add Print to PDF Using Add Printer Wizard
Another easy way to restore the missing Print to PDF option is to add a new printer from the Settings. When adding a new printer, you can select the Print to File option to add the Print to PDF option.
Follow these steps to add the Print to PDF printer manually:
- Press Win + I to open Settings.
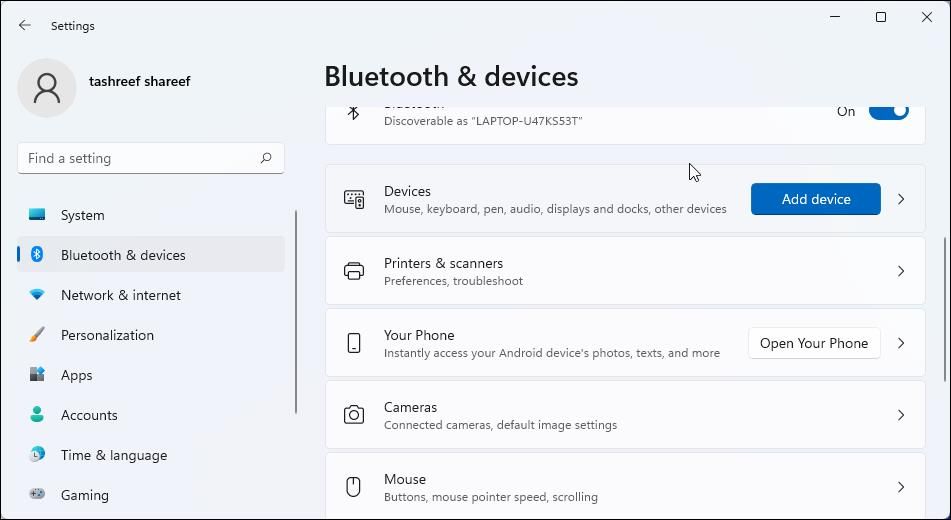
- In the left pane, open the Bluetooth & Devices tab.
-
Scroll down and click on the Printers & Scanners option.
-
Click the Add Device button in the top right corner. Windows will start scanning for connected printer devices automatically.

-
Click Add manually for The printer that I want isn’t listed option.
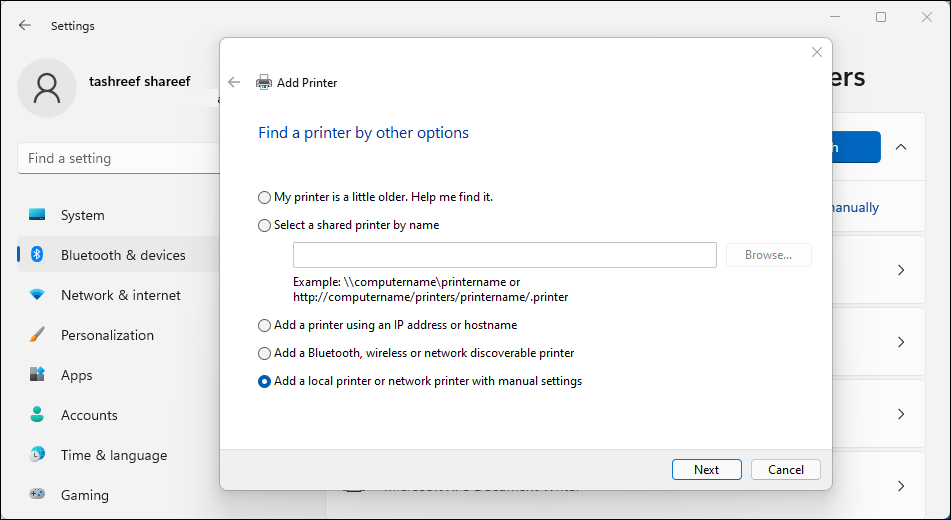
- Select Add a local printer or network printer with the manual settings option in the Add Printer dialog.
-
Click Next.
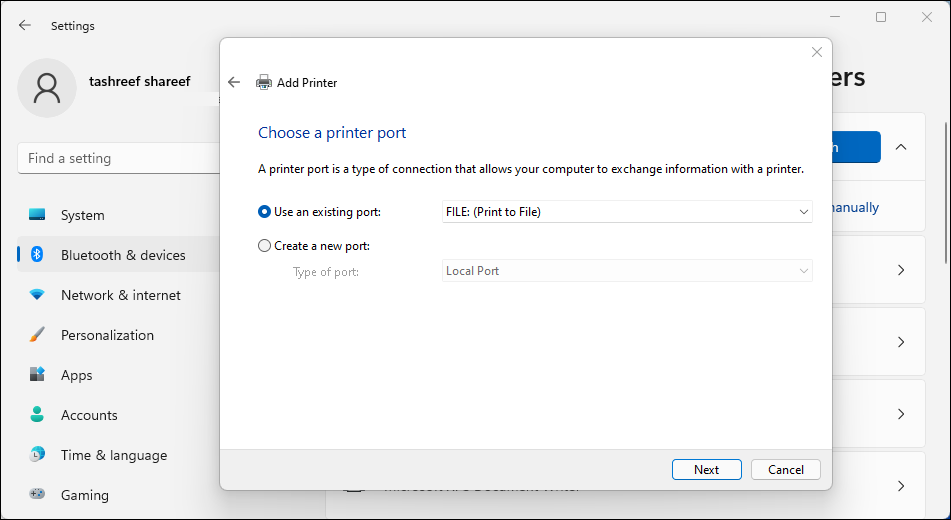
- Select Use an existing port and then click the drop-down. Here, select File: (Print to File). If the Print to File option is missing or doesn’t work, try PORTPROMPT (Local Port) or PDF (Local Port). This also works with the older versions of the Windows 10 operating system.
- Click Next.
- In the Install the printer driver screen, under Manufacturer, select Microsoft. Then in the Printers section, select Microsoft Print to PDF.
- Click Next.
- Next, type a name for your new printer or leave it at the default name and click OK to save the changes.
- Next, open the Print interface and check if the Print to PDF option is available for use.


3. Disable and Enable the Print to PDF Feature Using Command Prompt
If you prefer to use the Command Prompt, you can use the Deployment Image Service Management (DISM) command-line tool to disable or enable the optional Windows features.
Follow these steps to install the Print to PDF feature using the Command Prompt:
- Press Win + R to open Run.
-
Type cmd, then press and hold the Ctrl + Shift key and click OK. This will open the Command Prompt as administrator.
-
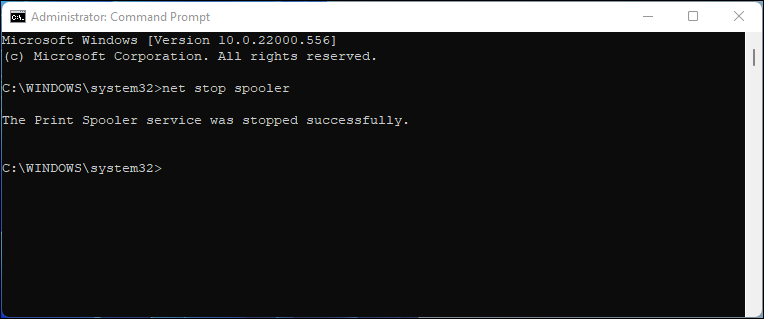
In the Command Prompt window, type the following command to stop the spooler service.
net stop spooler -
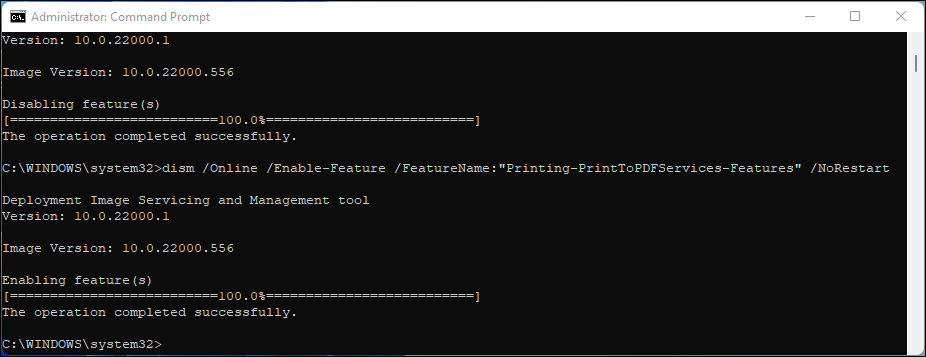
Once the services are stopped successfully, type the following command to disable the Print to PDF feature:
dism /Online /Disable-Feature /FeatureName:"Printing-PrintToPDFServices-Features" /NoRestart -
Once the Operation is complete message appears, type the following command and press enter to enable the feature again:
dism /Online /Enable-Feature /FeatureName:"Printing-PrintToPDFServices-Features" /NoRestart -
If successfully installed, you will see the Operation completed successfully message.
- Now you should be able to save documents in PDF format using the Print to PDF feature in Windows.


4. Reinstall Print to PDF using PowerShell

You can also enable the Print to PDF feature using the Enable-WindowsOptionalFeature cmdlet in PowerShell.
To restore Print to PDF using PowerShell:
- Press the Win key on your keyboard to open Windows search. Then type powershell, right-click on Windows PowerShell, and select Run as administrator.
-
In the PowerShell window, type the following command to disable the Print to PDF feature.
Disable-WindowsOptionalFeature -online -FeatureName Printing-PrintToPDFServices-Features -
Next, type the following command to enable Print to PDF using PowerShell:
Enable-WindowsOptionalFeature -online -FeatureName Printing-PrintToPDFServices-Features - Once executed, you will see the Online status as True and the RestartNeeded status as false.
That’s it. Close the PowerShell window and launch your document app. Press Win + P to open the Printer interface, and now you should be able to access the Print to PDF feature. If not, perform a restart to apply the changes and try again.
5. Use doPDF to Save Documents as PDF

doPDF is a third-party PDF converter app for Windows. It comes with a Microsoft Word add-on offering Print to PDF integration for the Office applications. But it is also compatible with other apps such as your web browser and other document editors that the offer print functionality.
It works similarly to the native Print to PDF feature but opens the Save dialog in the app. From here, you can select the save location and save the file.
To save documents as PDF using doPDF:
- First, download the doPDF installer to your PC.
- Run the installer and follow on-screen instructions to complete the installation.
- Once installed, open the document editor or web browser to print the document.
- Press Ctrl + P to open the Print interface.
- Click on Printer and select doPDF from the list of options.
- Next, click Print, and it will open the doPDF print dialog.
- Choose your file location and click OK to save the changes. Additionally, you can change the file quality font options, set the default folder, and choose post save action.
Download: doPDF (Free, $39.99 Premium)
Restore the Print to PDF feature in Windows 11 and 10
Print to PDF is a handy feature to save documents as PDF without using third-party converters. If the option is missing on your Windows computer, you can enable it again from the Windows Features dialog or use other troubleshooting steps in the article.
In addition, you can also use third-party apps like doPDF to replace the built-in Print to PDF functionality. These apps also offer additional features, including PDF editing, conversion, multiple file format support, and more.