
It’s frustrating when an app or program on Windows starts behaving strangely. On most occasions, you can get the app or program to work again by simply restarting it. However, if that doesn’t work, you may need to repair the app.
There are a couple of ways you can go about repairing an app or program on Windows. You can either use the Settings app or resort to the classic Control Panel to repair your app or program. In this post, we’ll walk you through both methods.
1. How to Repair Apps and Programs Using the Settings App
The Settings app on Windows allows you to manage all your apps and programs from one place. You can use it to control app permissions, change default apps, and do other things. Further, if an app or program isn't working as expected, the Settings app also lets you repair it.
To repair an app or program on Windows 11:
- Open the Start menu and click the gear-shaped icon to launch the Settings app.
- Use the left pane to switch to the Apps tab.
- Click on Installed apps.
- Scroll through the list or use the search bar to locate the app you want to repair. Click the three-dot menu next to it and select Advanced options.
-
Scroll down to the Reset section and click the Repair button.
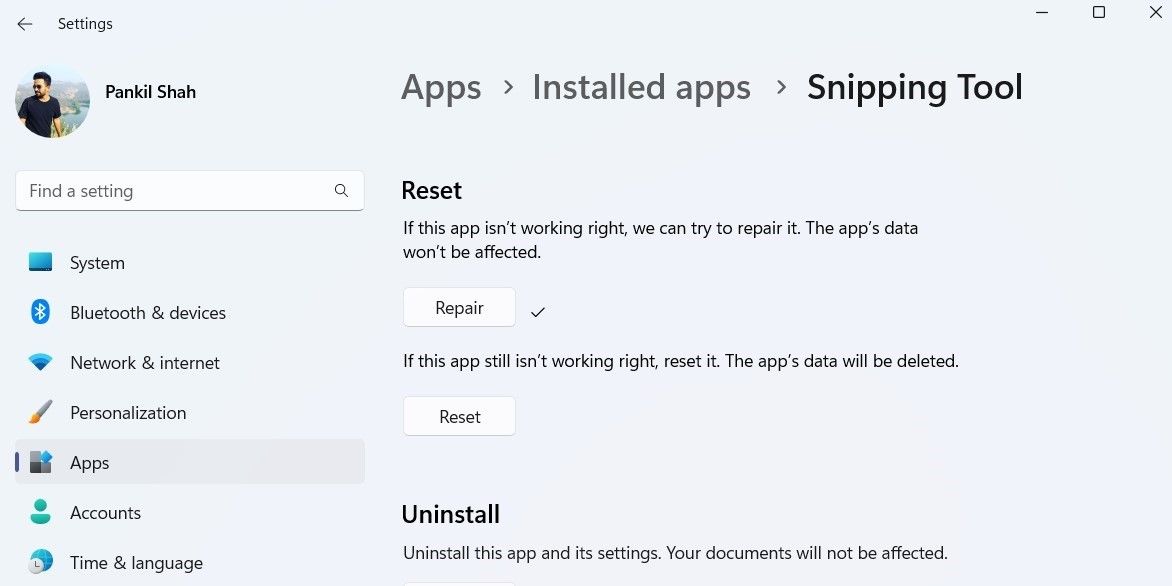

Windows 11 will start repairing your app. You should see a checkmark next to the Repair button once the process is complete.
The steps for repairing an app or program aren’t much different for Windows 10. Here's how you can go about it.
- Press Win + I to open the Settings app.
- Click on Apps.
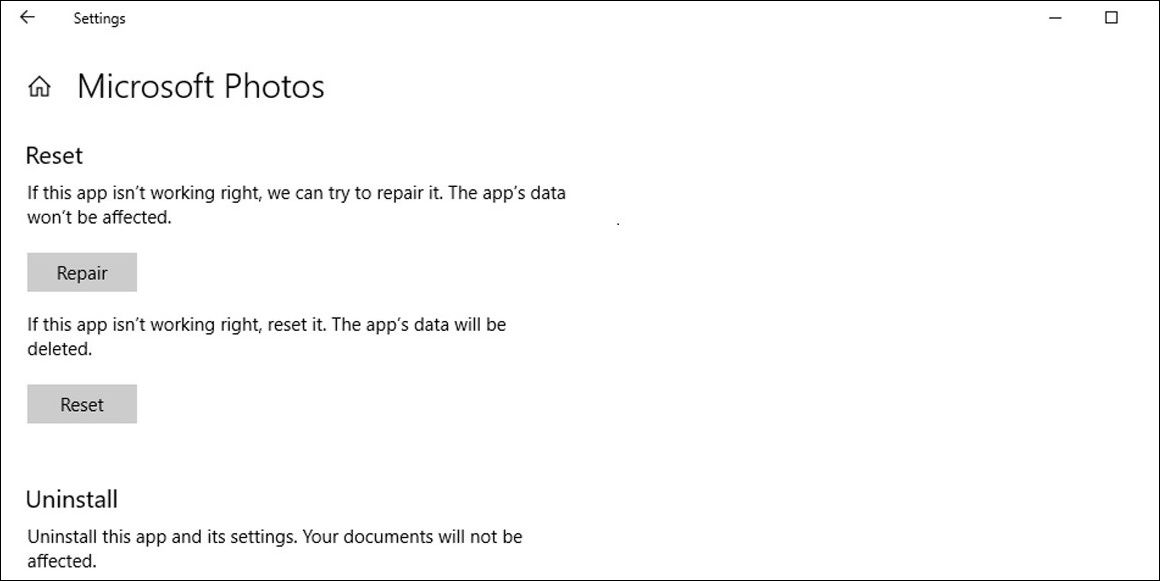
- In the Apps and features tab, locate the app you want to repair.
- Click the Advanced options link under the app.
-
Click the Repair button.

You can use the Settings app to repair both Windows Store apps and traditional desktop programs. However, if you continue to face issues even after repairing the app, you should try resetting it from the same menu.
It's important to note that you may not see the Repair or Reset option for all your apps and programs. In that case, your only option is to uninstall the app and reinstall it. If you need help, check our guide on how to uninstall apps on Windows and follow the steps outlined there.
2. How to Repair Apps and Programs Using Control Panel
Another way to repair apps and programs on Windows is through the Control Panel.
Control Panel has been a part of Windows since version 3.0. It can help you remove software, manage user accounts, and repair a variety of system-related issues. So, if you’re having trouble repairing an app or program from the Settings app, you can use Control Panel to do the same.
The following steps will work for both Windows 10 and Windows 11 computers.
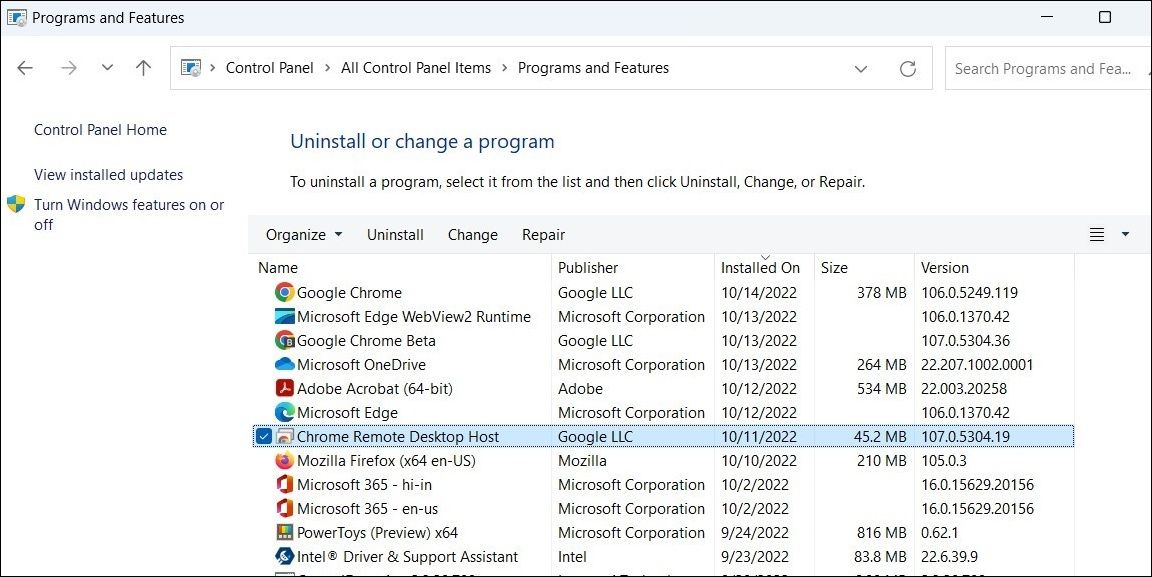
- Click the magnifying icon on the taskbar to open the search menu.
- Type control panel in the search box and select the first result that appears.
- Use the drop-down menu in the top right corner to select Large icons.
- Click on Programs and Features to view a list of all the desktop programs on your computer.
- Scroll through the list and select the program you want to repair.
-
Click the Repair button at the top. If the Repair button is not available, click the Change button instead.

From there, follow the on-screen instructions to repair the app or program.
Repairing Apps and Programs on Windows
Hopefully, Windows was able to repair your app or program, and it’s working as expected. If you continue to face issues, however, there could be a problem with your system. In that case, you can use a free Windows repair tool to fix your computer.