The performance of your computer is extremely important when it comes to enjoying video game’s the way they were meant to be played. Things like slow frame rates and high ping can ruin the gaming experience. And when it comes to competitive online play, your computer's performance could be the difference between winning and losing.
If you find the performance of your computer lagging when playing video games, there are a couple of things you can do to improve it. We’re going to discuss five Registry hacks that can give your PC a performance boost in the gaming department.
But First, Before You Edit the Windows Registry...
While looking for registry hacks to improve your PC’s performance, you may get suggestions to use a Registry cleaner. We advise you to not bother with registry cleaners, as they provide no noticeable performance improvement and may even mess up the registry.
Furthermore, we advise that you create a system restore point. This will create a snapshot of the state your computer is in at that time. In the event something goes wrong while editing the registry, you can use the system restore point you created to return your PC to a previous working state.
5 Registry Hacks to Improve Gaming Performance on Your Windows PC
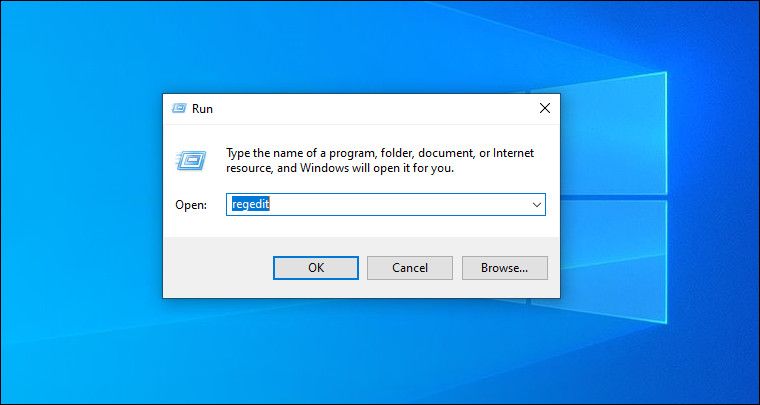
To carry out these hacks, you’re going to need to launch the Windows Registry Editor. The easiest way to do that is to press Win + R to open Windows Run. In the text box, type regedit and then click OK. Then, click Yes on the UAC prompt to open the Registry Editor.
Now you can go ahead and use the Registry Editor to make gaming smoother on your Windows PC with the tweaks below.
1. Disable Fast Startup
Fast Startup may make your Windows PC load faster, but it also prevents it from fully shutting down. During a shutdown, the feature logs out every user, closes all the programs, and puts the rest of the system in a hibernation state before finally turning off the computer.
Coming out of this hibernation state when booting up can cause some processes to misbehave, which can make your PC slower than normal. This is not good for gaming, as this can negatively impact a game’s frames per second (FPS).
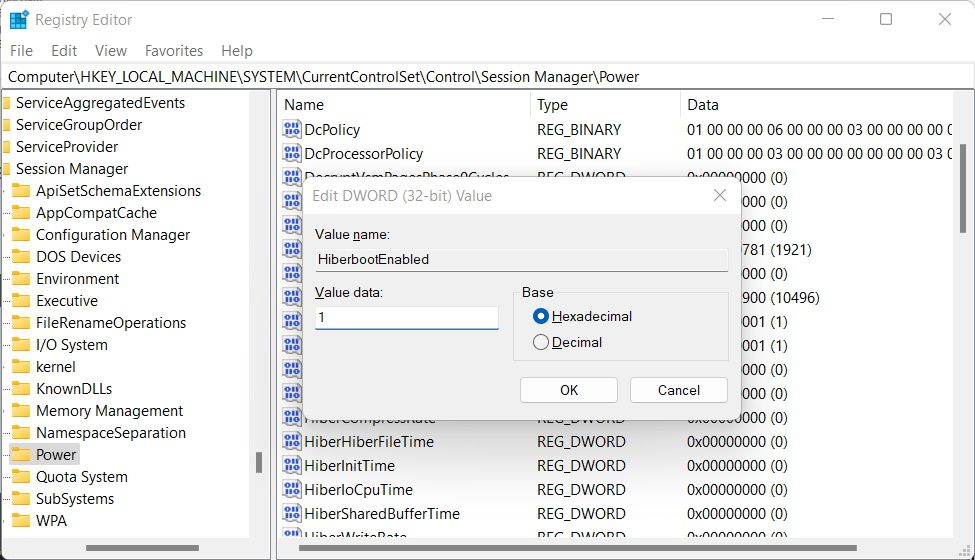
To disable Fast Startup, open the Registry Editor and navigate to HKEY_LOCAL_MACHINE > SYSTEM > CurrentControlSet > Control > Session Manager > Power. Double-click the HyperBootEnabled entry, change Value data to 1, and click OK.
Be advised that disabling Fast Startup will increase the boot time for your Windows machine. However, it could be worth it if you get the best gaming performance out of it.
2. Disable Power Throttling
Power Throttling causes the CPU to slow down so it doesn’t consume too much battery power. Unfortunately, this can come with a small but noticeable performance loss.
Particularly, when it comes to gaming, a throttled CPU can limit the potential of the GPU, creating what is known as a bottleneck. That’s because the GPU is running at a speed higher than what the CPU can handle, which can negatively impact a game’s frame rate.
To disable Power Throttling, open the Registry Editor and navigate to HKEY_LOCAL_MACHINE > SYSTEM > CurrentControlSet > Control > Power > PowerThrottling. Double-click the PowerThrottlingOff entry, change Value Data to 1, and click OK.
In some cases, you can go to the Power key in the Registry Editor and not find the PowerThrottling key inside it. If that’s the case, you can disable Power Throttling through the Local Group Policy Editor as well.
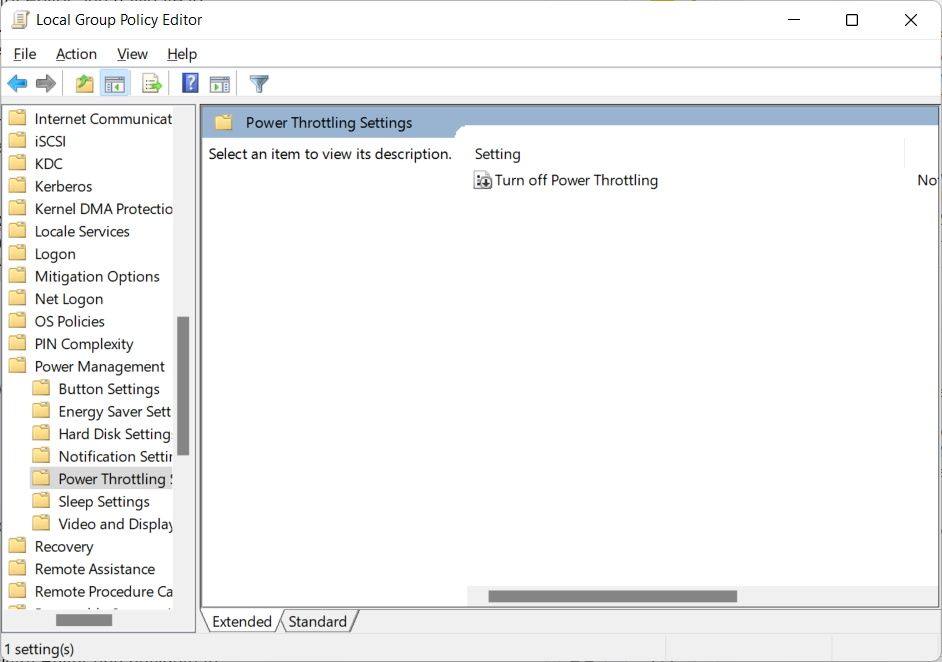
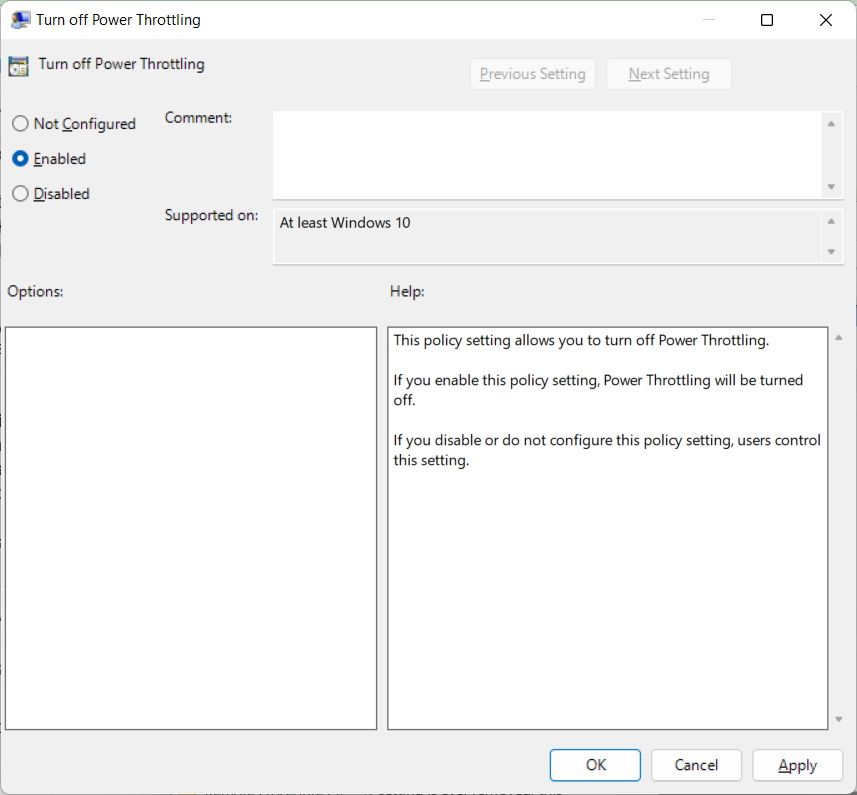
To do that, press Win + R, type gpedit.msc in the text box, and hit the Enter key. In the Group Policy Editor, navigate to Computer Configuration > Administrative Templates > System > Power Management > Power Throttling Settings. Then, double-click the Turn off Power Throttling policy.
Click on the Enabled radial button and then click OK to close the dialog box to apply the policy.
This will disable Power Throttling, meaning Windows will no longer throttle the CPU, among other things, when trying to conserve battery power.
3. Disable Nagle’s Algorithm
Windows uses Nagle’s Algorithm to reduce the number of packets sent over a network by combining them into a larger one. This can cause problems when the packets are small, meaning it will take longer to build them up enough to be sent as one large chunk.
While this technology initially sounds useful, it can increase the ping of some online games. As such, if you’re experiencing high ping in a game, disabling Nagle’s Algorithm can help.
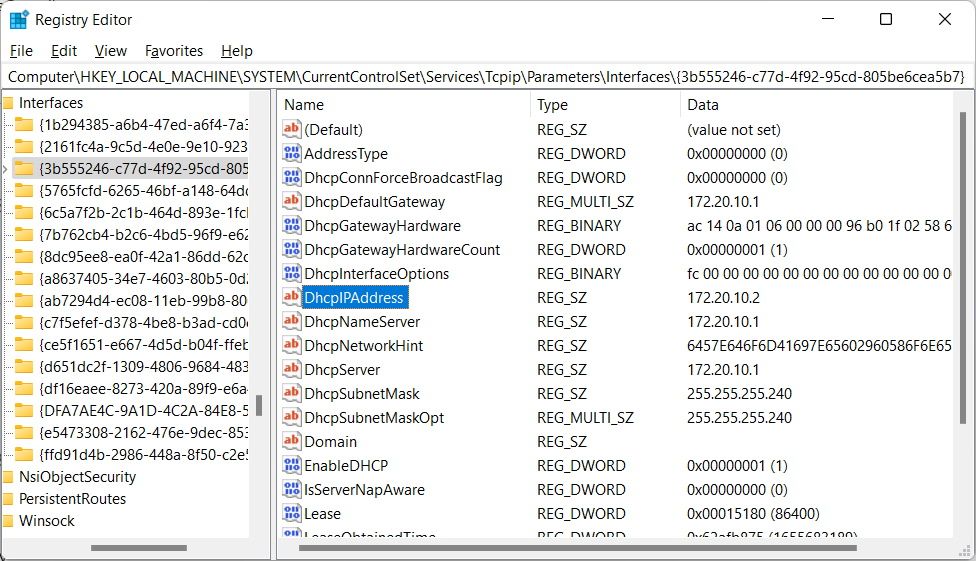
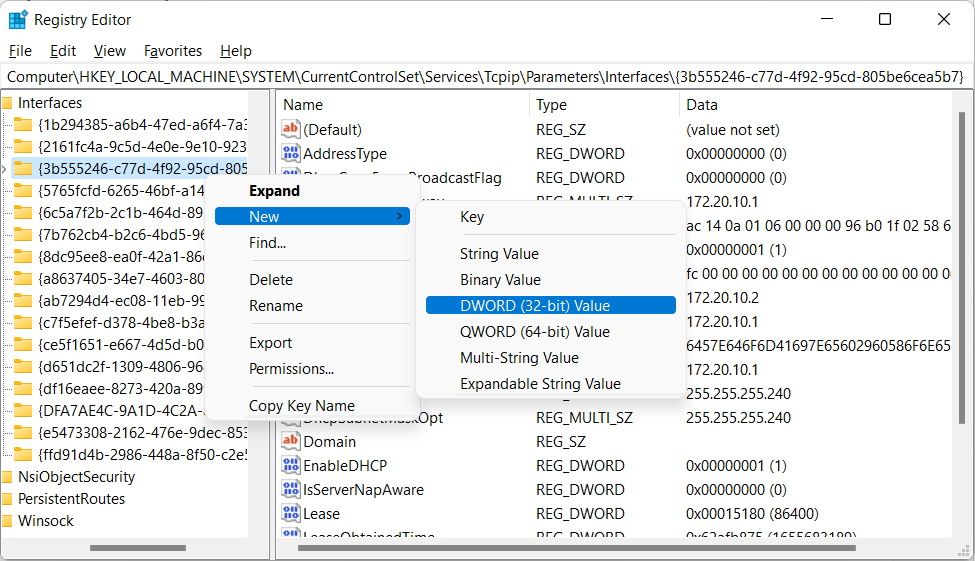
To do that, open the Registry Editor and navigate to HKEY_LOCAL_MACHINE > SYSTEM > CurrentControlSet > Services > Tcpip > Parameters > Interfaces. The goal here is to find the interface (those keys named with different characters in between curly brackets) for the connection you’re using. So, go through each one and look at the value for the DhcpIPAddress entry.
The value for this entry should match your internet connection's IPv4 address.
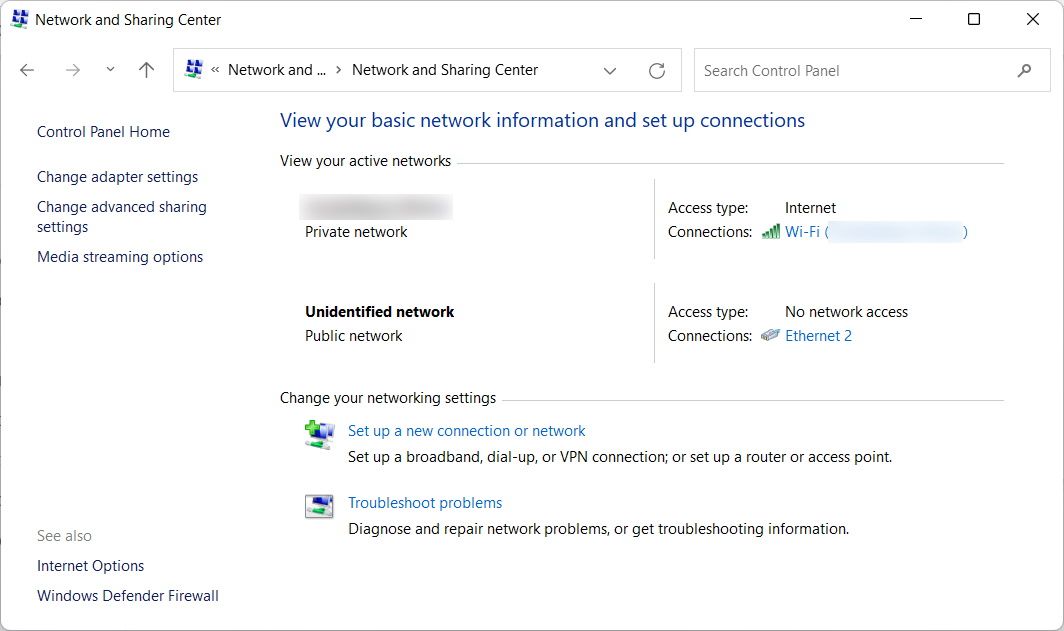
To get the connection’s IPv4 address, press Win + S to open Windows Search. Then, type control panel in the search box and click on Control Panel in the search results.
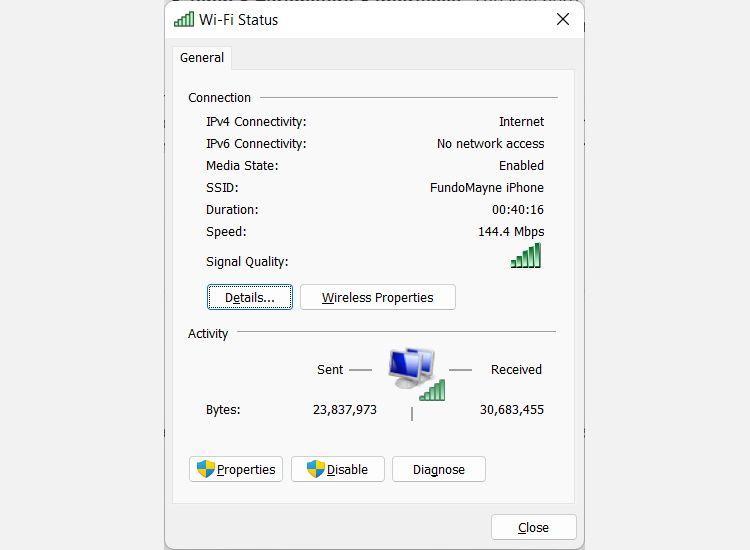
In the Control Panel, head to Network and Internet > Network and Sharing Center and click on the link next to Connections for the internet connection you're gaming with.
Click the Details button.
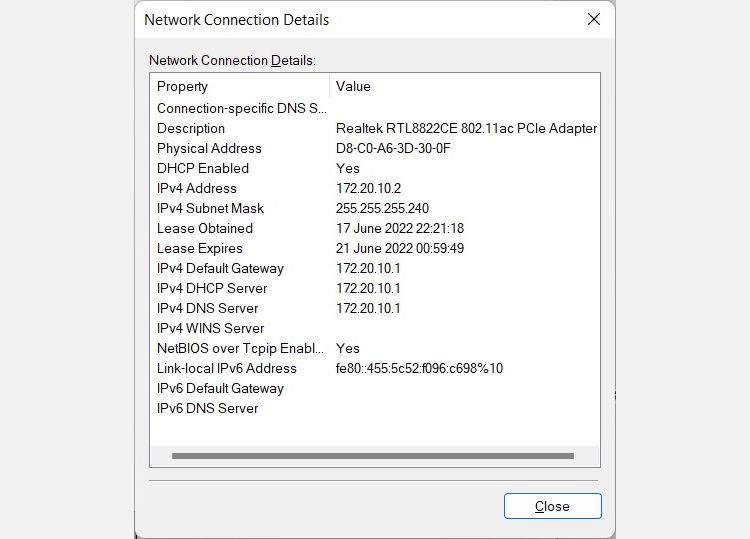
Check the IP address next to IPv4 address.
Once you find a match, right-click the interface and select New > DWORD (32-bit) Value.
Name this new entry TcpNoDelay. Then, create another one the same way and name it TcpAckFrequency. Double-click on them one by one and change Value Data to 1 for both entries.
4. Disable Network Throttling
To keep the internet connection stable on your PC, Windows will sometimes throttle your network, which can reduce its speed. For online gaming, this can result in a higher ping. You can rectify that by disabling Network Throttling.
To do that, open the Registry Editor and navigate to HKEY_LOCAL_MACHINE > SOFTWARE > Microsoft > Windows NT > CurrentVersion > Multimedia > SystemProfile. Double-click the NetworkThrottlingIndex entry, change Value Data to ffffffff, and click OK.
5. Prioritize Gaming Tasks
Windows has a service known as Multimedia Class Scheduler service (MMCSS). Its job is to ensure that multimedia applications, such as games, get priority access to more CPU power when they're performing time-sensitive tasks. And with a couple of Registry tweaks, you can tell MMCSS to give games a much higher priority.
To do this, launch the Registry Editor and navigate to HKEY_LOCAL_MACHINE > SOFTWARE > Microsoft > Windows NT > CurrentVersion > Multimedia > SystemProfile > Tasks > Games. Here, we are going to change the Value data of the following entries (double-click to open them):
- GPU Priority: Change it to 8.
- Priority: Change it to 6.
- Scheduling Category: Change it to High.
Enjoy Improved Gaming Performance on Your Windows PC
Tweaking the Registry to get the results you want is not that hard, but you need to know what you’re doing. Try out some of these Registry hacks, and see which ones give your PC the improved gaming performance you’ve been looking for. If they don’t work or cause problems just return the entries to their original values.


