
Are you tired of constantly clicking through dialogue boxes asking for permission to access PowerShell as an administrator? Wouldn't it be nice if you could just run this command line tool with a single click? Well, now you can.
This guide will show you how to always run Windows PowerShell as an administrator without taking any additional steps. However, before we dive into the solution, let's take a moment to describe this powerful tool to those who are unfamiliar with it.
Windows PowerShell: What Does It Do?
Windows PowerShell is a powerful command-line tool designed for system administrators to help automate tasks and configure systems. It provides an array of commands that can be used to perform various operations, such as managing files and folders, creating scripts and applications, and much more. However, in order for the full potential of Windows PowerShell to be realized, it must be run as an administrator.
In this guide, we will provide the steps necessary to always open Windows PowerShell as an administrator on Windows. This will enable users to unlock the full range of features and capabilities offered by Windows PowerShell. Additionally, it is important to note that running these commands with administrative permissions can be dangerous, so caution should be exercised at all times.
1. How to Always Open Windows PowerShell as Administrator Using Settings
The most straightforward way to always open Windows PowerShell as an administrator on Windows involves adjusting the PowerShell settings. To do this, follow these steps:
- Press Win + X on your keyboard, then select Terminal from the options list.
- In the top-left corner, click the down arrow and select Settings from the menu that appears.
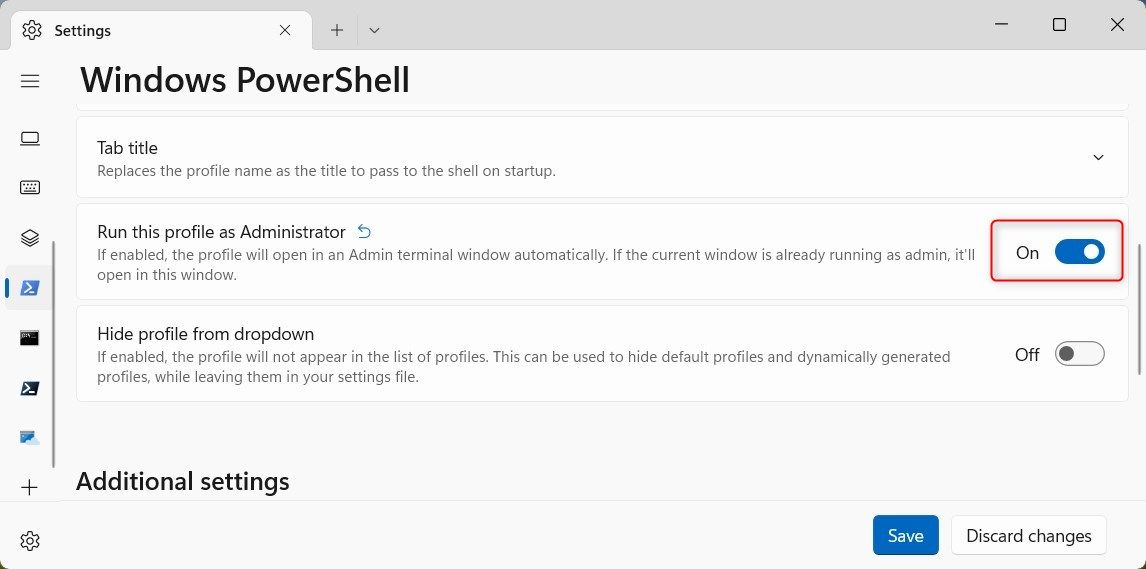
- Select Windows PowerShell from the Profile section on the left.
-
On the right side of the window, turn on the toggle switch next to Run this profile as Administrator option.
- Then click Save to apply the changes.

Once you enable this option, each time you access your profile, it will open in admin mode.
2. How to Always Open Windows PowerShell as Administrator With a Desktop Shortcut
Alternatively, you can create a desktop shortcut on Windows for Windows PowerShell that will always launch it with administrative privileges. This can be helpful for users who often need elevated permissions to access Windows PowerShell, but don't want to go through the extra steps of opening it manually.
To create a desktop shortcut, do the following:
-
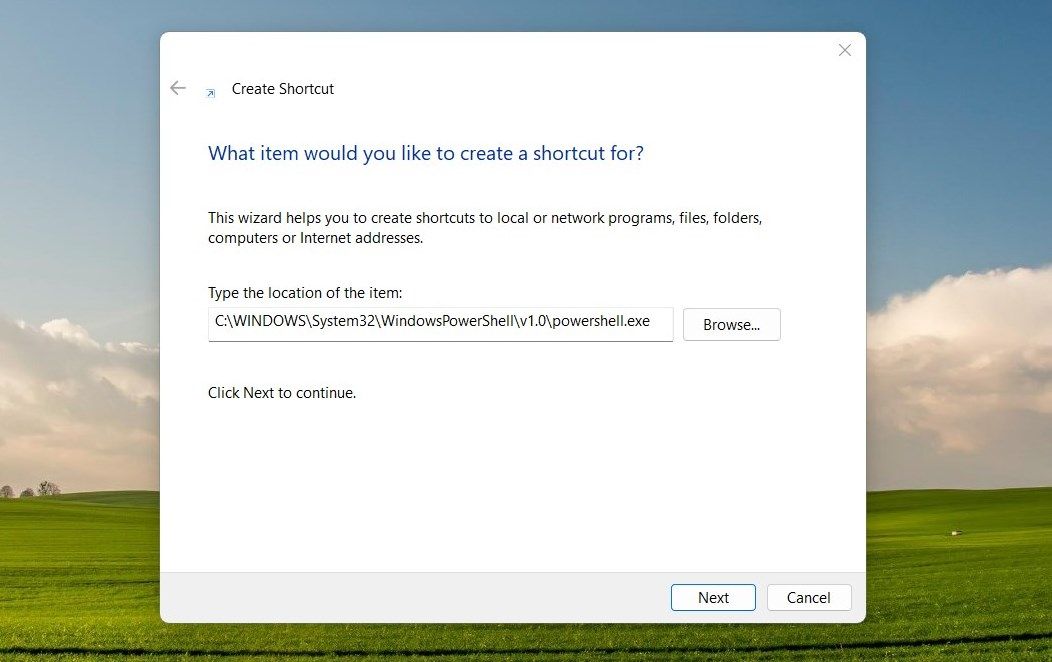
Right-click on an empty space on your Desktop and select New > Shortcut.
-
In the text field, type the following and then press Enter.
C:\WINDOWS\System32\WindowsPowerShell\v1.0\powershell.exe
- Click Next and give this shortcut a meaningful name such as "Run PowerShell as Administrator".
- Then hit Finish to complete the process. You will see that your new shortcut has been created on the Desktop.

The desktop shortcut you created will now open Windows PowerShell when you double-click it. However, there are still a few things you must do to make it work as an administrator. The steps are as follows:
- Afterward, right-click on the shortcut and select Properties.
- In the Properties window, make sure you're on the Shortcut tab.
- Then click Advanced to open the Advanced Properties window.
-
Next, check the Run as administrator box and click OK.
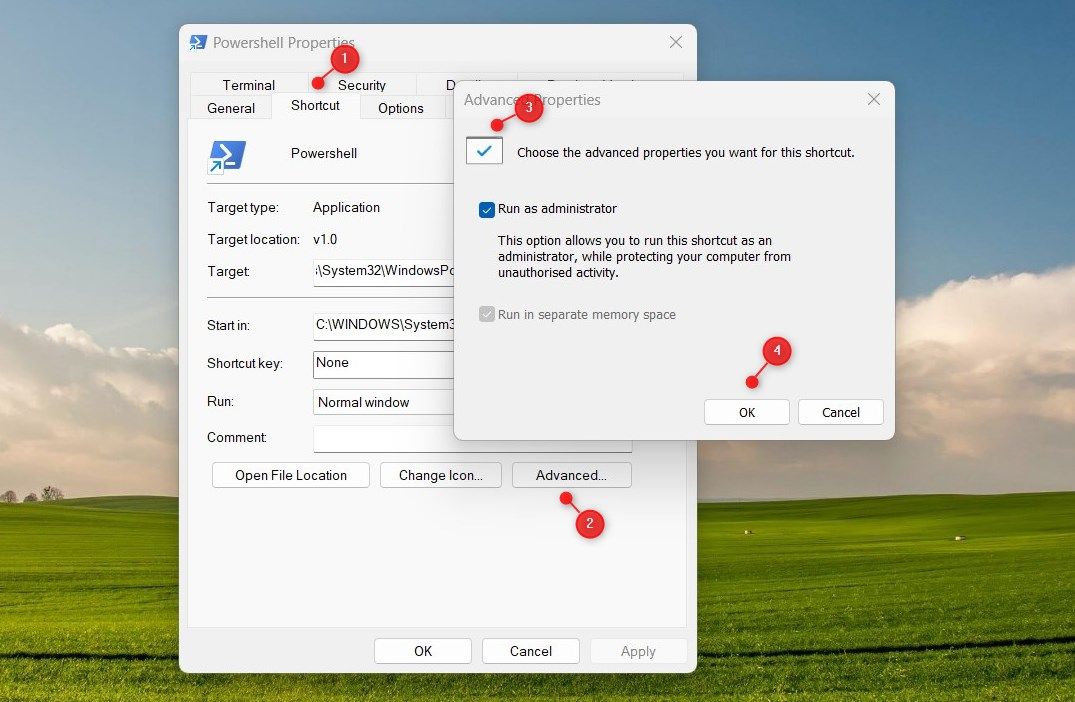
- Lastly, click Apply > OK in the PowerShell Properties window.

That's all! Now when you double-click the shortcut icon, it will launch Windows PowerShell with administrative privileges.
PowerShell Now Always Opens With Admin Rights
We have covered two methods in this article for opening PowerShell with administrator rights at all times. The first method involves changing settings in PowerShell, while the second is through a shortcut placed on the desktop. Let's try them out.