.jpg?q=50&fit=contain&w=1140&h=&dpr=1.5)
As you work on your computer day in and day out, there are so many files and folders that pile up on your system. You would be deleting old and unwanted files—it reduces the clutter and creates more storage space.
Usually, you'll select the file and use the delete button, which sends the file to the Recycle Bin. But to permanently delete the file, you'll have to delete it again from the Recycle Bin.
But what if you could permanently delete files from the Windows context menu with a click? It can be done, and let's explore how.
How to Add a "Permanently Delete" Option to the Context Menu via the Registry Editor
You use the right-click context menu to open, save, copy, paste, share, and delete files. Unfortunately, this Windows context menu doesn't have a "Permanently Delete" option to delete files for good with a single click. However, you can create that option in the context menu.
Yes, you can skip the Recycle Bin to delete files permanently. To do so, you'll have to use the Registry Editor.
The Registry Editor is a Windows tool where you can view and change the settings in the system registry. Though, you should be cautious while editing the Registry Editor. Only follow the steps given below and leave other files untouched.
Also, it would be a good idea to enable automatic registry backups. If you make an incorrect entry or something goes wrong, you can restore Windows to normal with a good backup.
Let's now go through the steps to add the Permanently Delete option to the right-click context menu.
-
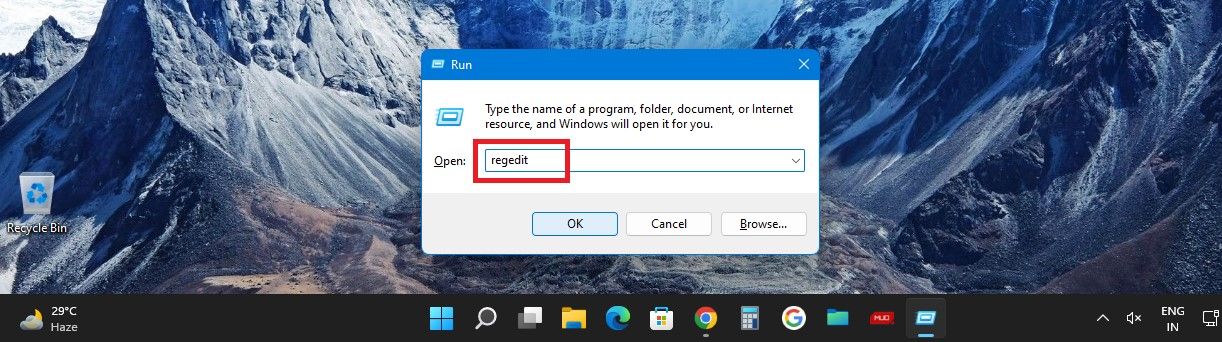
Open Registry Editor by searching for it in Windows Search, and click Registry Editor under Best match. Or press the Win + R keys together to open the Run box, type regedit in the Open box, and hit Enter.
- Click Yes on the UAC prompt.
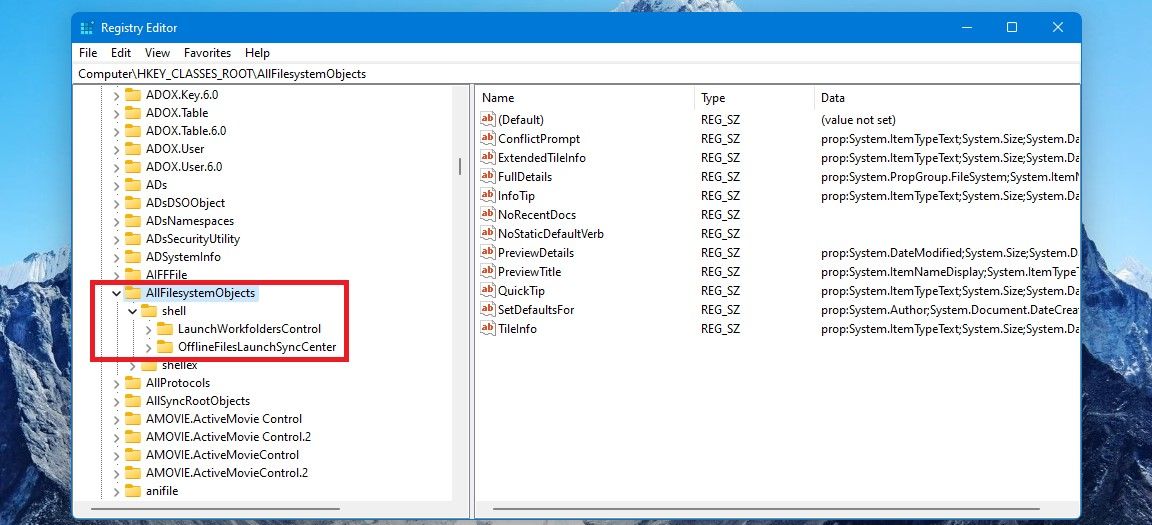
- Then on the left pane, navigate to Computer > HKEY_CLASSES_ROOT > AllFilessystemObjects
-
Expand AllFilesystemObjects and then expand the shell key under it.
-
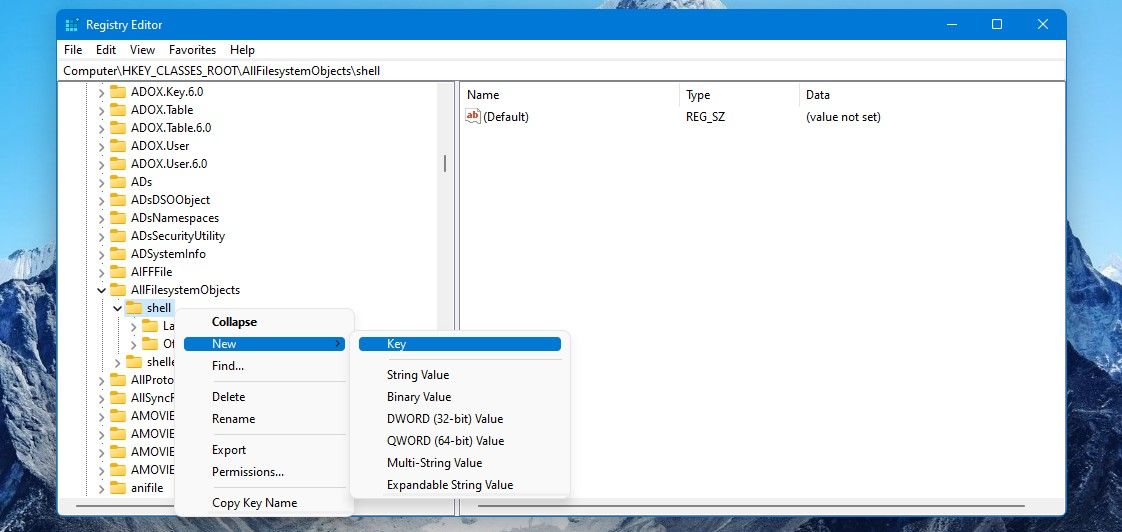
Right-click on shell,and in the menu that opens select New and then Key to add a new key.
-
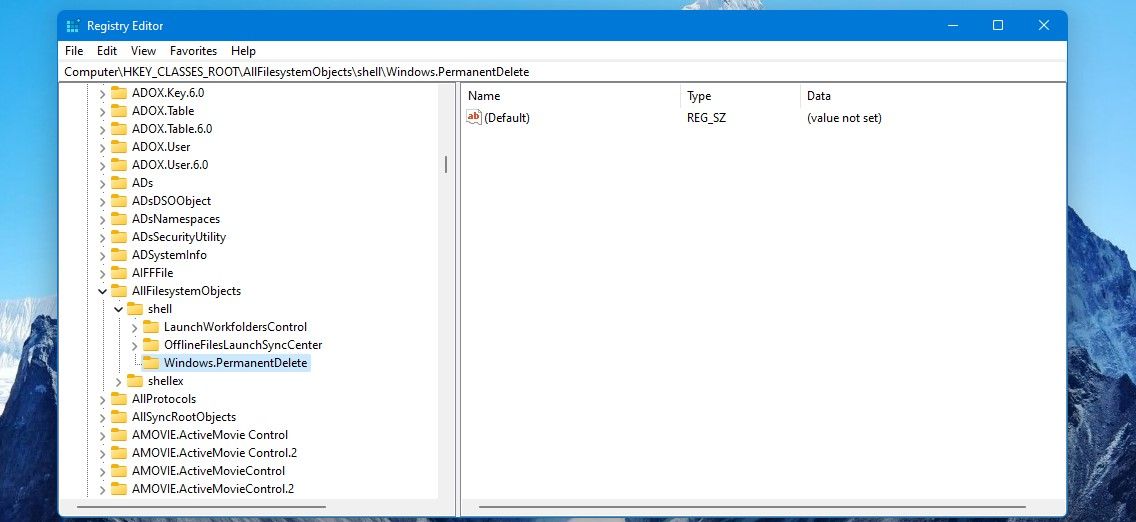
Name this new key under shell as Windows.PermanentDelete—just the way it is written without any space, or copy it from here and paste it.
Now you need to create four string values under the Windows.PermanentDelete key.
-
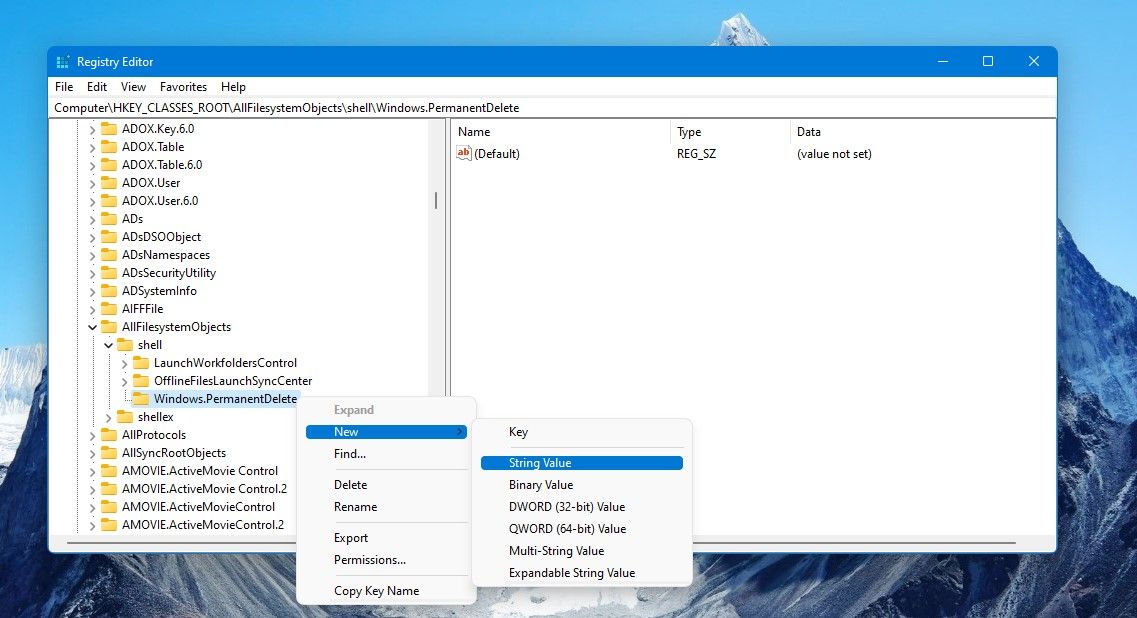
For the first string, right-click on Windows.PermanentDelete key on the left pane or right-click on an open space on the right pane. Select New and then String Value.
-
A string will be created on the right pane. Name it CommandStateSync. In case you are unable to name it at first, you can always right-click it and select Rename.

-
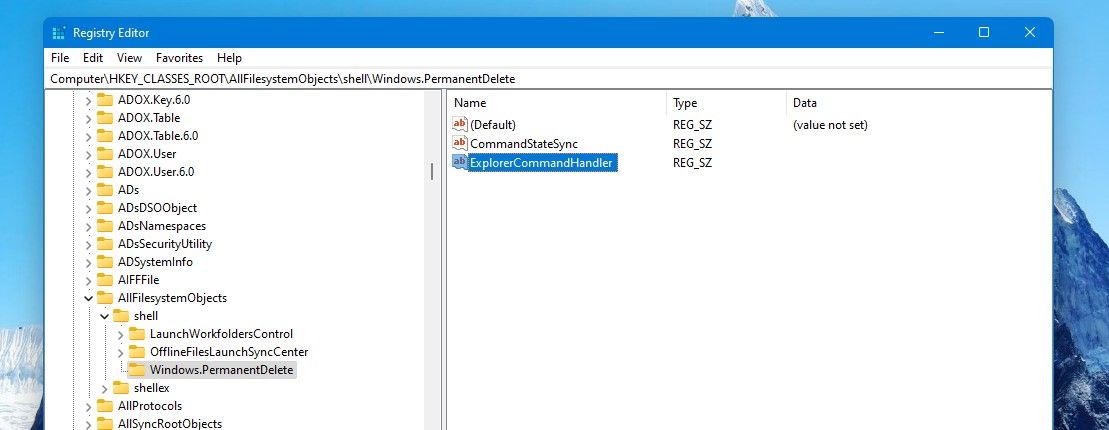
For the next string, right-click on a blank space, and choose New > String Value.Name this ExplorerCommandHandler.
-
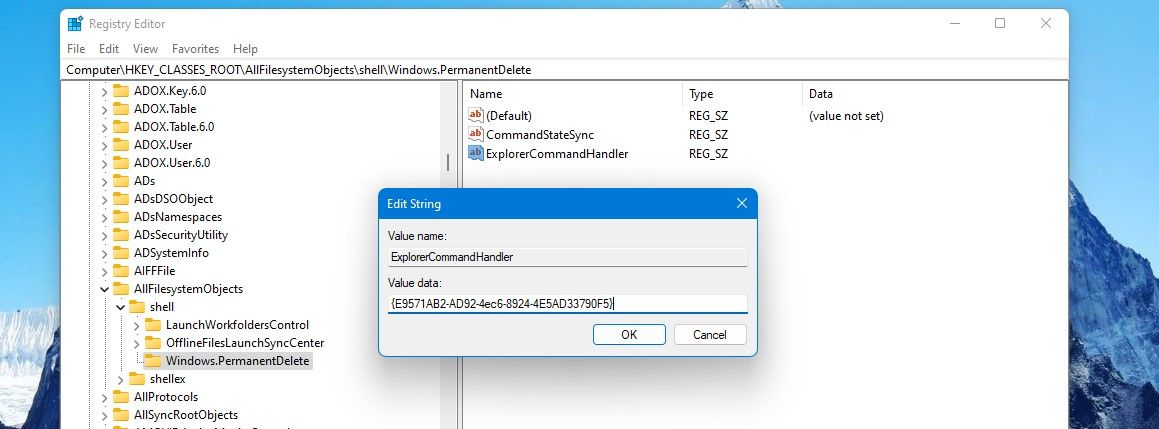
Then double-click on it to open the Modifier Window. Now and copy the following value and paste it into the Value data box: {E9571AB2-AD92-4ec6-8924-4E5AD33790F5}.Then click OK or enter.
- Create the third string like you created the earlier two strings: New > Key and name it Icon.
-
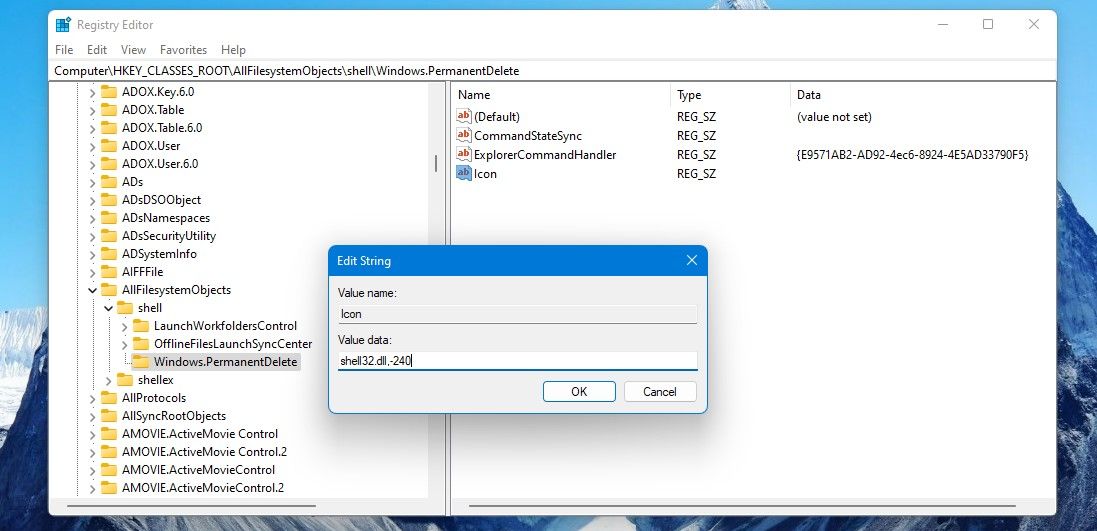
Double-click the Icon string to open the Modifier Window, and copy and paste the following value into the Value data box: shell32.dll,-240. Click OK or enter.
This Icon string will add the Red Delete Cross icon next to the Permanently Delete text in the context menu.
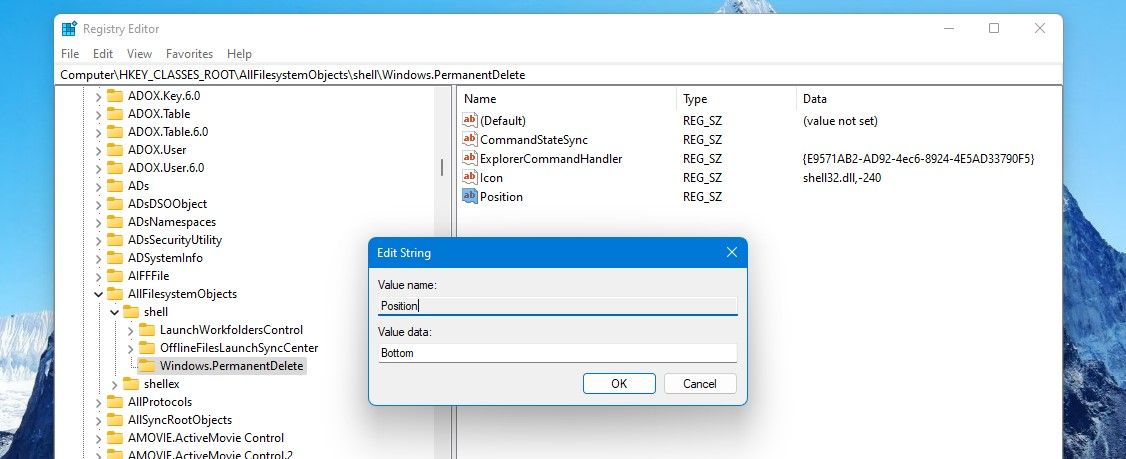
- Finally, create the last string and name it Position.
-
Double-click the Position string to open the Modifier Window and type Bottom in the Value data box. Click OK or enter.
This Position string determines the placement of the Permanently Delete option in the context menu. We have put the value data as Bottom so it will appear towards the bottom of the context menu.


Now all the registry tweaks to enable the "Permanently Delete" option are complete.

You can close the Registry Editor and check for the "Permanently Delete" option in the context menu by right-clicking a file or folder.
If you've edited the Registry correctly as explained above, you will see the Permanently Delete option—as in the screenshot below.

This screenshot is on Windows 11, so after right-clicking the file, you also need to click Show more options. Only then you will see the Permanently Delete option in the context menu. And when you click "Permanently Delete" you will get a prompt to confirm the deletion.
Also, you can see the Permanently Delete option appears towards the bottom as we had given the Value of its Position as Bottom. And it has a Red Delete Cross too.
To make the "Permanently Delete" option appear on top, you can open the Registry Editor and navigate to Computer > HKEY_CLASSES_ROOT > AllFilessystemObjects. Then expand the shell key under it and click on Windows.PermanentDelete.
You will see the String Values of Windows.PermanentDelete on the right pane. Double-click on the Position string and in the Value data box, change the value from Bottom to Top. Then click OK or enter.

Now the "Permanently Delete" option will appear on the top of the context menu—for you to permanently delete files from there with a click.

Moreover, if you're interested to customize the context menu further, you can check out some of the best shortcuts to add to the right-click menu. And if you like using Notepad for quick editing, you could also add the Open with Notepad option to the Windows context menu.
How to Remove the "Permanently Delete" Option From the Context Menu
If you change your mind and don't want the Permanently Delete option on the context menu anymore—you can easily remove it.
Open the Registry Editor and navigate to Computer > HKEY_CLASSES_ROOT > AllFilessystemObjects. Then expand shell under it and click on Windows.PermanentDelete.
Then simply right-click Windows.PermanentDelete and select Delete. You'll get a prompt to confirm whether you want to delete this key and all its values so just click on Yes to delete it.

Check and you will see that Permanently Delete is no longer on the context menu. The steps above to add and remove the "Permanently Delete" option will work on Windows 10 as well.
If you miss the old context menu of Windows 10, you'll be glad to know that you can bring the old context menu back to your Windows 11 PC.
Permanently Delete Files and Folders From the Context Menu
It's handy having a one-click option to delete files and folders permanently. And if it's on the context menu, which you always use, can make things easy and save time as well. So work smarter by adding and using the Permanently Delete option in the Windows context menu.