
The Epic Games Launcher is a digital distribution platform for all your games bought or downloaded from the Epic Store. However, you might sometimes notice the launcher consuming a lot of system resources.
So, here are all the effective solutions to fix the Epic Games Launcher's high CPU usage on your Windows PC.
What Causes the Epic Games Launcher to Have a High CPU Usage?
Epic Games Launcher is a lightweight application and requires limited resources to run without any issue. But if it's consuming high CPU processing power, below are the main reasons behind this deed.
- Epic Games Launcher's high CPU consumption can result from an in-app bug or glitch.
- If the system doesn't feature the latest graphics driver update, you're most likely to face the problem in the question.
- The launcher will consume a lot of CPU memory due to the compatibility issue with other installed applications.
- Lastly, corrupt cache files can also be the main reason behind the problem.
Thankfully, it's pretty easy to fix high CPU usage on Windows PC. Just try the solutions below to get rid of the problem.
1. Restart Your System
First things first, close the launcher and restart the system. As it turns out, the problem can result from a temporary system glitch. And the best thing to do in this situation is to go through the restart process.
So, restart the system, and open the launcher. Check if it's still consuming a lot of CPU power.
2. Download the Latest Windows Update
Most applications, including Epic Games Launcher, will consume high CPU processing power due to the outdated Windows version. So, you will have to download the latest Windows update to fix the issue. Here's how.
- Open Settings using Win + I.
- Choose Windows Update from the left pane.
- Click on Check for Updates.
Windows will check for and download any pending updates.
3. Change the Power Plan on Your System
The latest Windows OS lets you optimize the device based on power use and performance. For instance, the Power efficiency mode improves the battery backup by reducing the overall system performance.
You need to change the power plan to Best performance to use applications like Epic Games Launcher. Here's how to do it.
- Open Settings.
- Under the System tab, choose Power & battery.
- Click on the drop-down icon next to Power mode.
-
Select the Best performance option from the context menu.
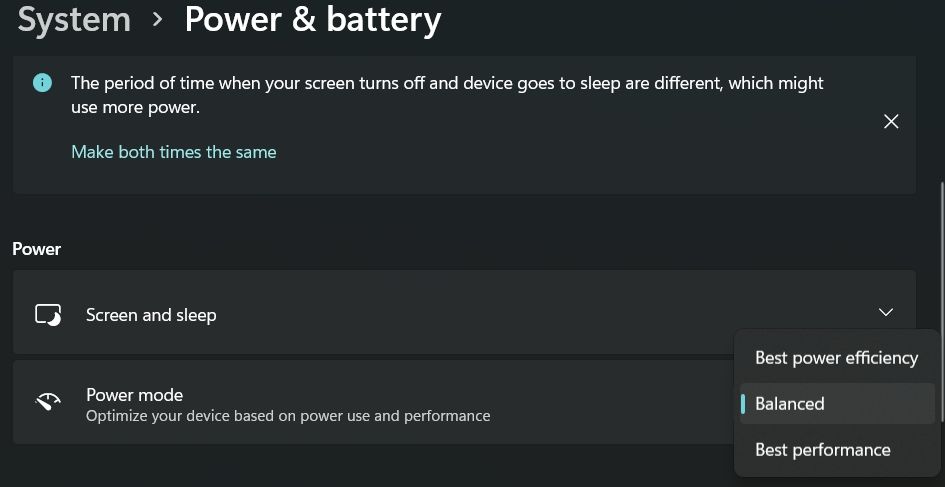

Next, relaunch the Epic Games Launcher and check if it is still consuming a lot of CPU power.
4. Update the Graphics Driver
Applications like Epic Games Launcher require the system to feature the latest graphics driver update to run without issues. If this isn't the case, you will face different problems, including high CPU consumption.
You can download the latest graphics driver update by following the below steps.
- Open Device Manager by pressing Win + X and choosing Device Manager from the context menu.
- Double-click on Display adapters to expand the menu.
-
Right-click on the installed graphics driver and select Update Driver.
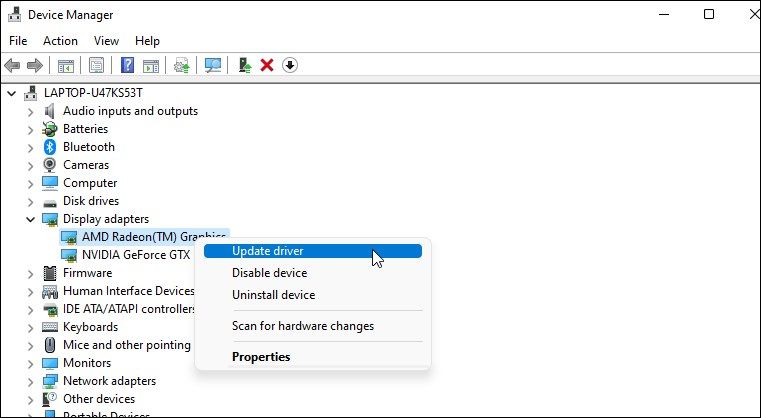
- Click on Search automatically for drivers.

Windows will now search for and install the best available driver. Once done, reboot the system and check for the problem.
5 . Clear the Epic Games Launcher Webcache Subfolder
Similar to any other application, Epic Games Launcher stores cache data as well. The cache data helps the application to offer a faster and smoother user experience. But on the negative side, corrupt cache data can cause different issues, including high CPU consumption problems.
To eliminate the issue, you will have to clear the Epic Games Launcher cache data. Here's how to do it.
- Press Win + X and choose Run from the context menu.
- Type %localappdata% and click on the OK option to confirm.
-
Click on View > Show, and checkmark Hidden items from the context menu.
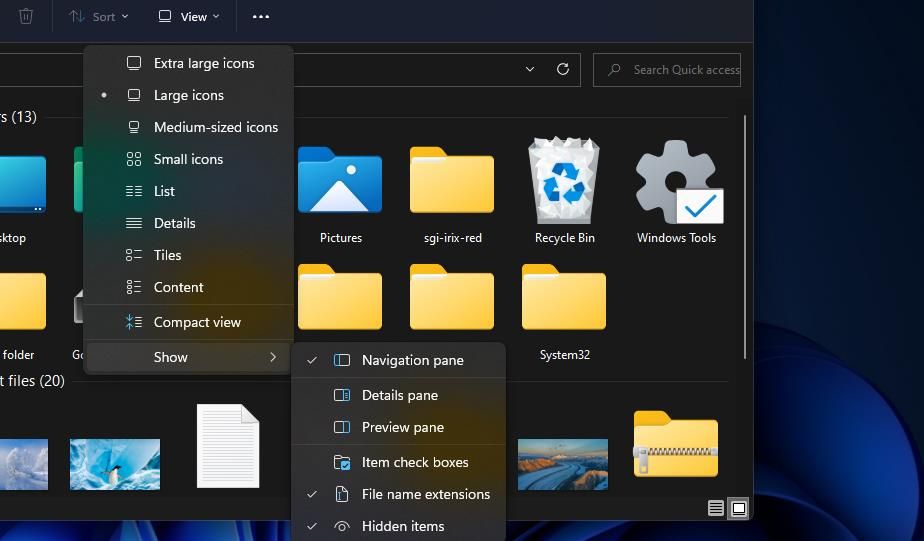
- Next, open EpicGamesLauncher > Saved folder.
-
Right-click on the webcache folder and choose Delete from the context menu.
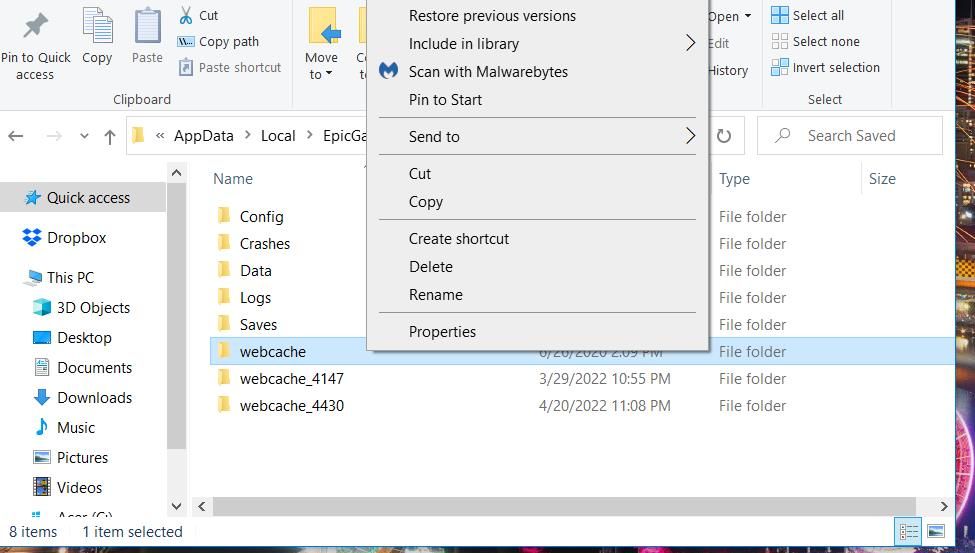
- Delete the webcache_4147 folder as well if you can find it.


Now, reboot the system and launch the application again. Check if it's still using up a lot of CPU.
6. Repair the Epic Games Launcher
The high CPU usage of Epic Games Launcher can result from a temporary in-app bug. In this case, you will have to repair the application to fix the problem.
Below are the steps to repair Epic Games Launcher via Program and Features.
- Open the Start menu, type Control Panel, and press Enter.
- Choose Uninstall a program.
-
Right-click on Epic Games Launcher, and choose Repair from the context menu.
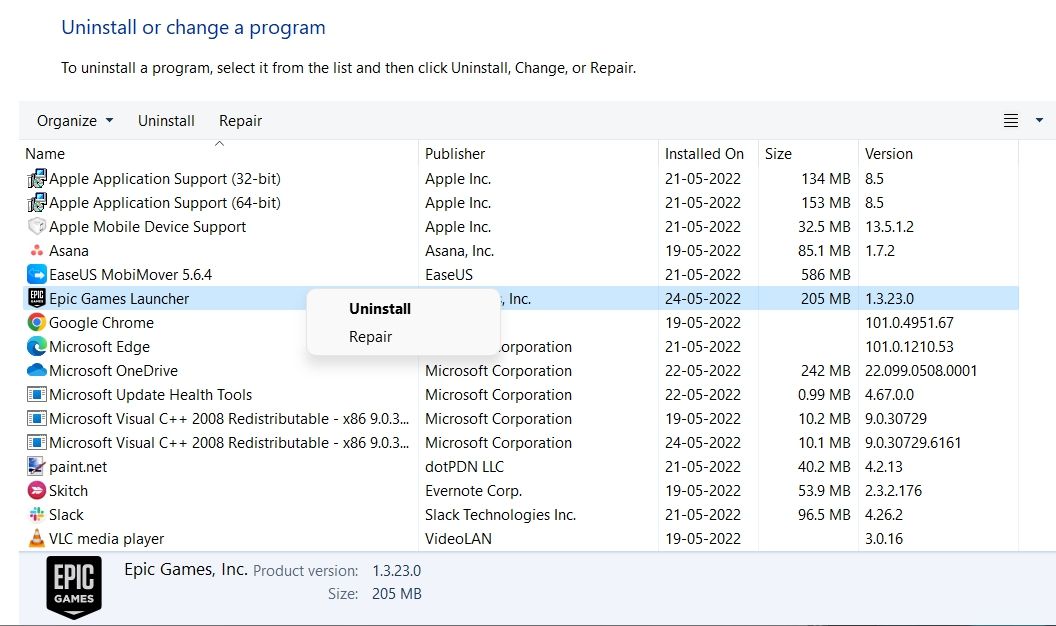
- Click on Yes to the User Account Control (UAC).
- Follow the on-screen instructions to repair the launcher.

7. Download the Latest Epic Games Launcher Update
Like any other application, Epic Games Launcher constantly receives new updates. Each update features performance improvement and minor bug fixes. So, you must consider downloading the latest update to fix the high CPU consumption problem.
Follow the below steps to download the latest Epic Games Launcher update.
- Open the Epic Games Launcher.
- Click on the initials present in the top-right corner.
- Choose Settings from the context menu.
-
Click on Install Now option under Epic Online Services.
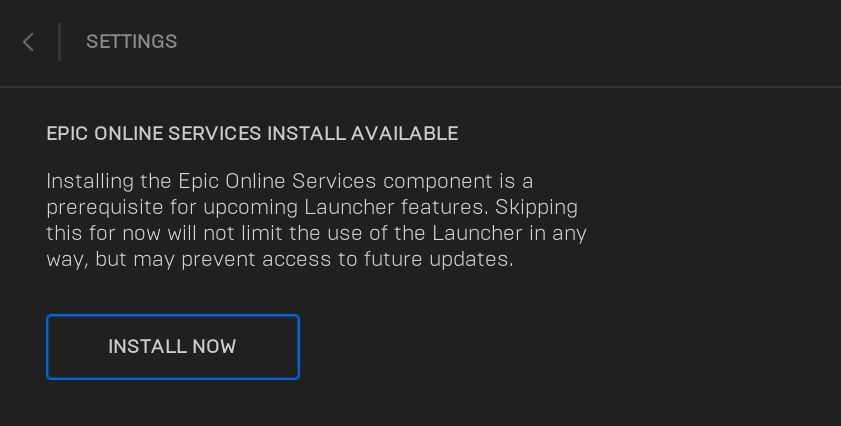
- Click on Yes to the UAC that pops up.

Epic Games Launcher will take a few seconds to download the update.
8. Disable the Microsoft Defender Firewall
The problem can result from Microsoft Defender Firewall as well. You will have to disable the Firewall temporarily to fix the issue. Here's how to do it.
- Open Start Menu, type Windows Security and press Enter.
- Choose Firewall & network protection from the left pane.
- Click on Private network.
-
Disable the toggle under Microsoft Defender Firewall.
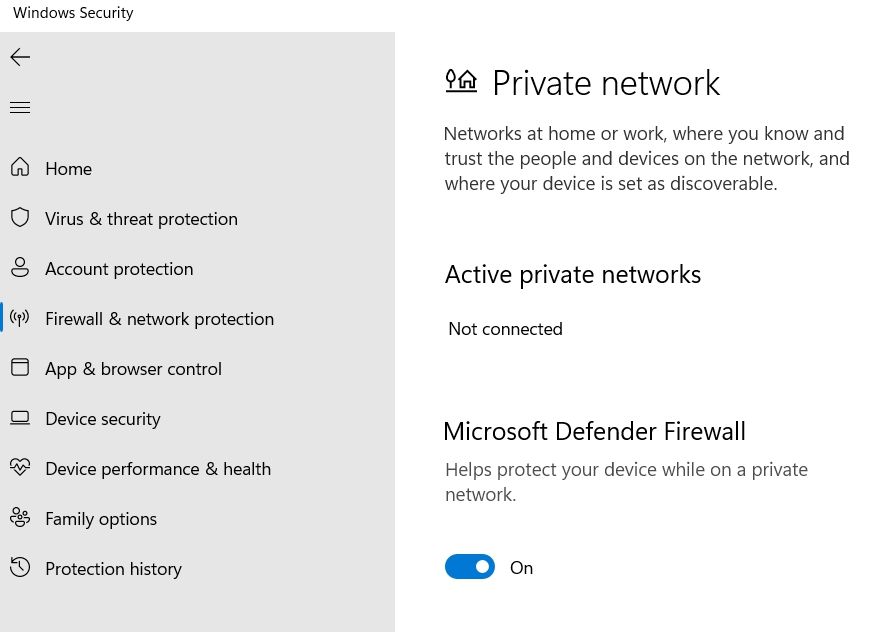

Launch the Epic Games Launcher, and check if there's an improvement in its CPU consumption. If not, re-enable the firewall by repeating the above steps.
9. Reinstall the Epic Games Launcher
If none of the steps was helpful, consider reinstalling Epic Games Launcher as a last resort. Here's how to do it.
- Open the Control Panel and select Uninstall a Program.
- Right-click on Epic Games Launcher and choose Uninstall from the context menu.
- Select Yes to confirm your selection.
- Open the Epic Game Launcher download page.
-
Click on the Download Epic Games Launcher option.


After downloading, install the launcher on your system.
The Epic Games Launcher's High CPU Usage Issue, Fixed
Hopefully, the solutions were helpful in resolving the issue. While Epic Games Launcher is the go-to place to enjoy Epic Games, it can sometimes consume a lot of CPU resources. You can eliminate the problem by making some in-app changes.