It can be confusing when you buy a new storage drive and install it onto your computer, only to find that it's not showing up in the OS. Or, maybe you have a big hard drive that you want to break up an allocated drive in multiple volumes in order to keep things neat and tidy or install a different operating system. Whatever the reason might be, there's a lot of reasons why you might want to partition your storage drive in Windows.
But how are you exactly supposed to do this? Today, we're going to show you how you can partition your hard drive in Windows.
How to Partition a Drive From Unallocated Space in Windows
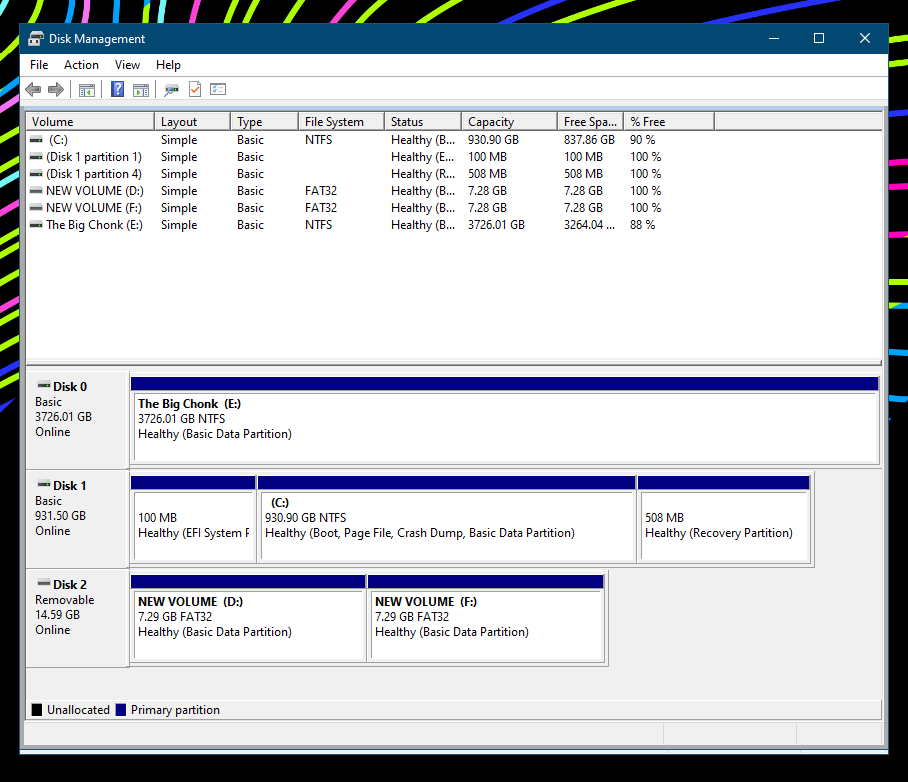
First up, we're going to use Windows' Disk Management Tool to create a whole new partition from unallocated space. This mostly needs to be done only after you're buying a new hard drive or solid-state drive since you can't use it until you manually allocate a partition on it.
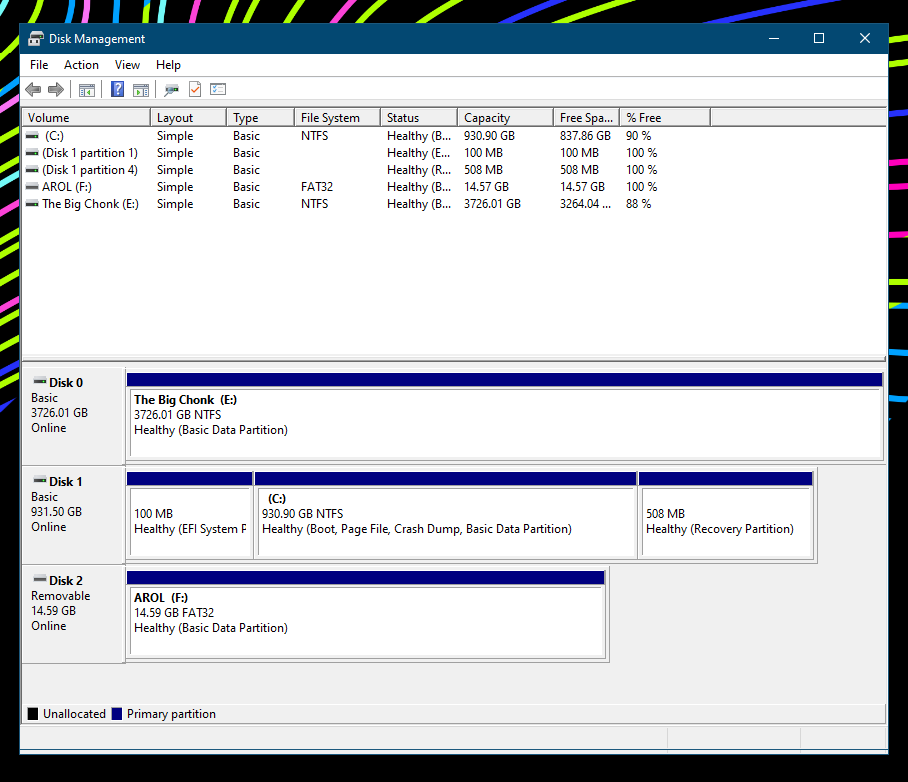
First, you'll need to head over to the Disk Management tool. On Windows 10 and lower (for the purposes of this tutorial, we're using Windows 10), you will be able to find it on Windows Search and the Control Panel as "Create and format hard disk partitions."
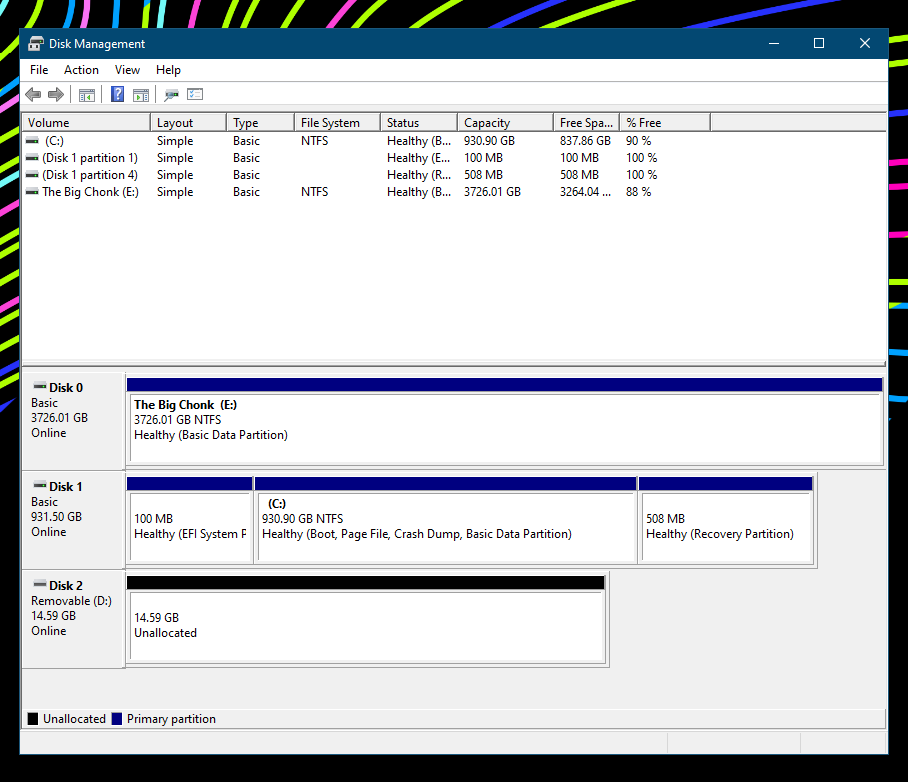
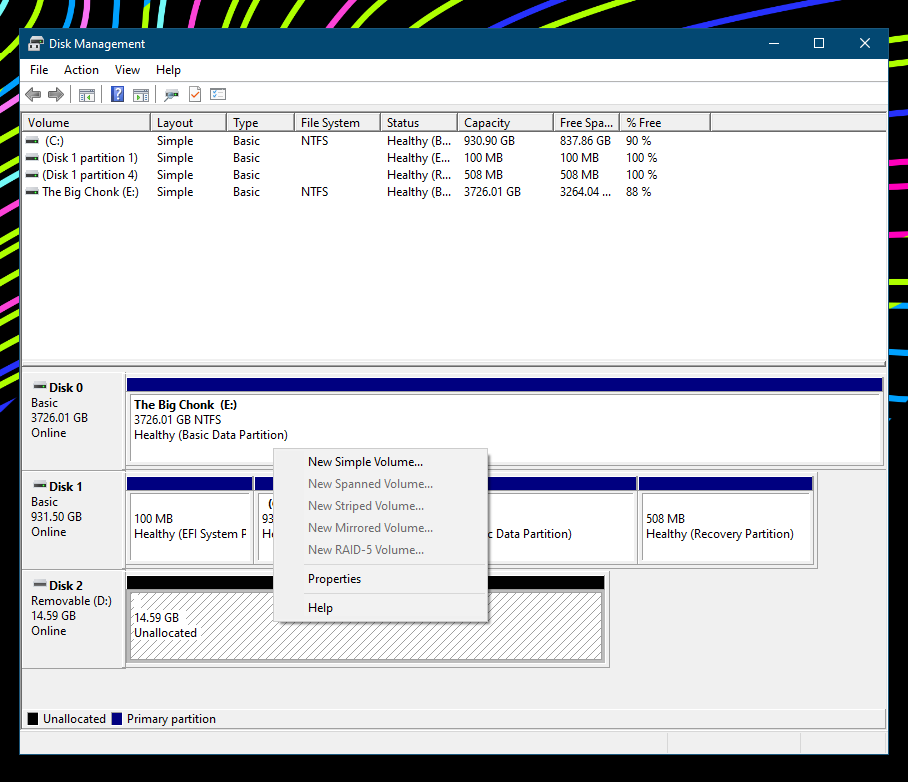
Once you open the program, you will be able to see it under the list of disks, where you'll see the drive with its capacity listed as "unallocated space." You're going to want to fix that. Right-click on the drive and click on New Simple Volume to get the drive set up. From there, the New Simple Volume Wizard will open, which will walk you through the process of getting a volume created on your drive.
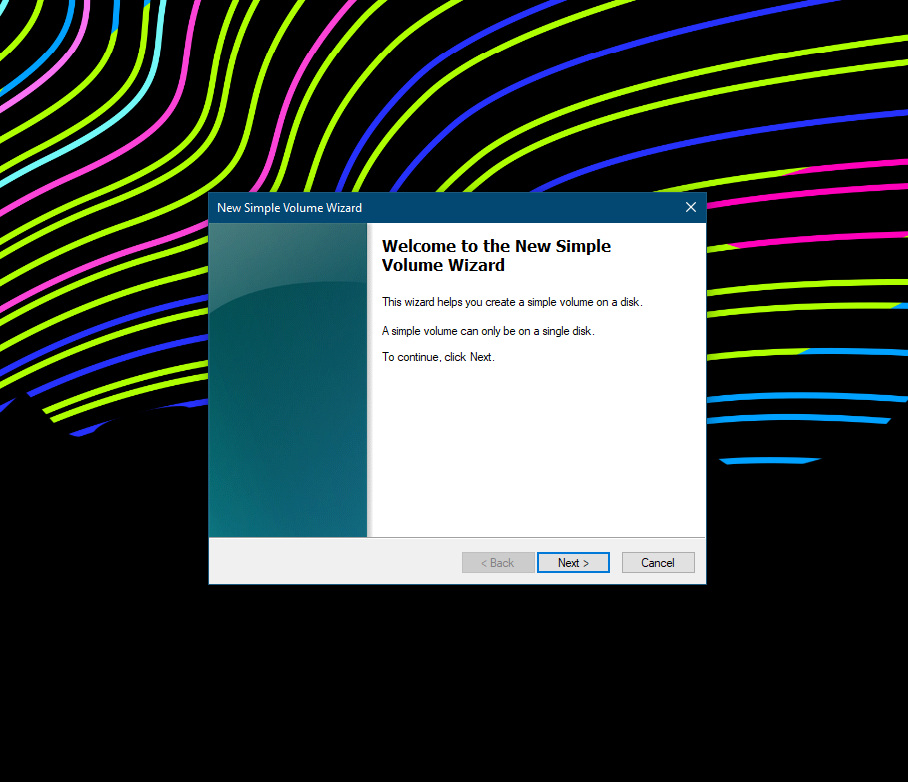
If you want to use it as a normal drive, you probably don't have to change anything. Set the simple volume size to the max (it should already be in the max by default), assign it a drive letter (this really doesn't matter a lot, so just assign it whatever you want or leave it default), then check whether you want to format the drive first or not—although it's highly recommended that you do.
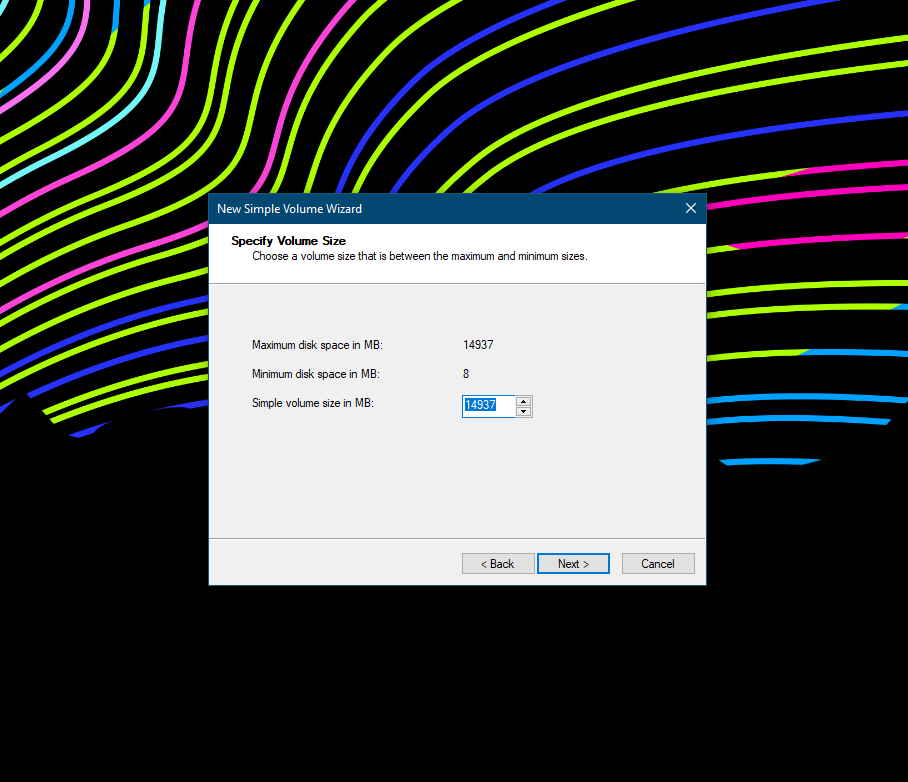
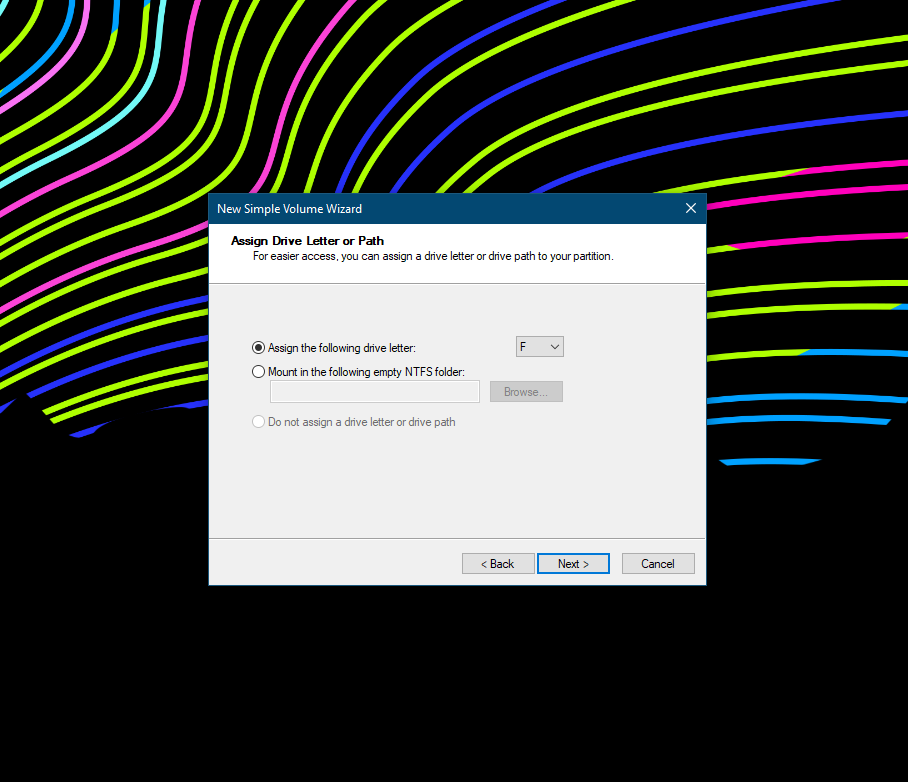
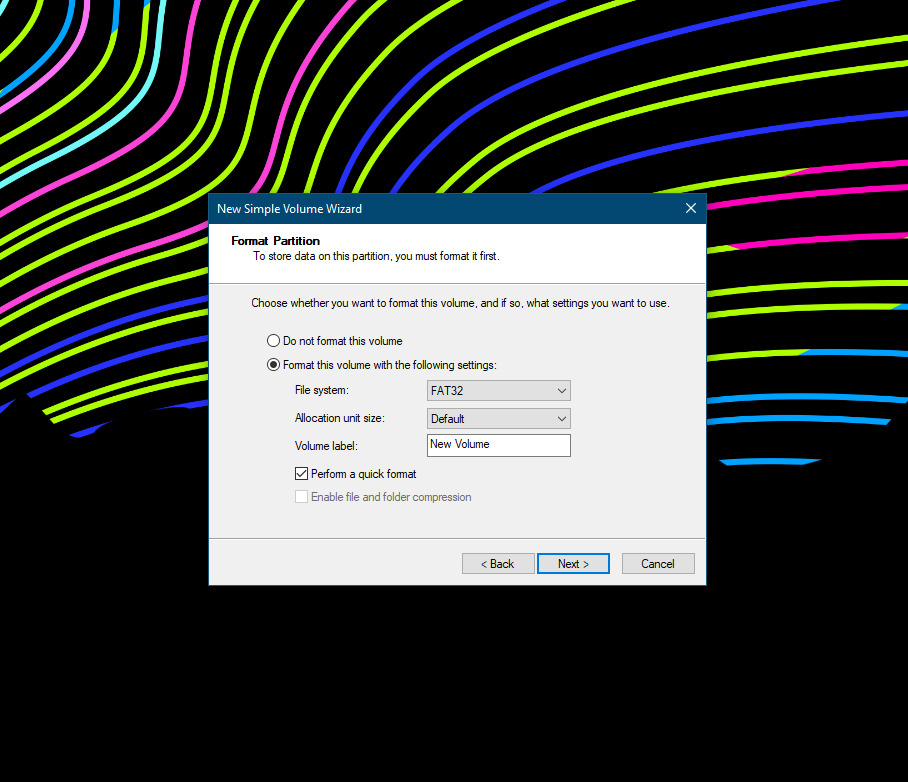
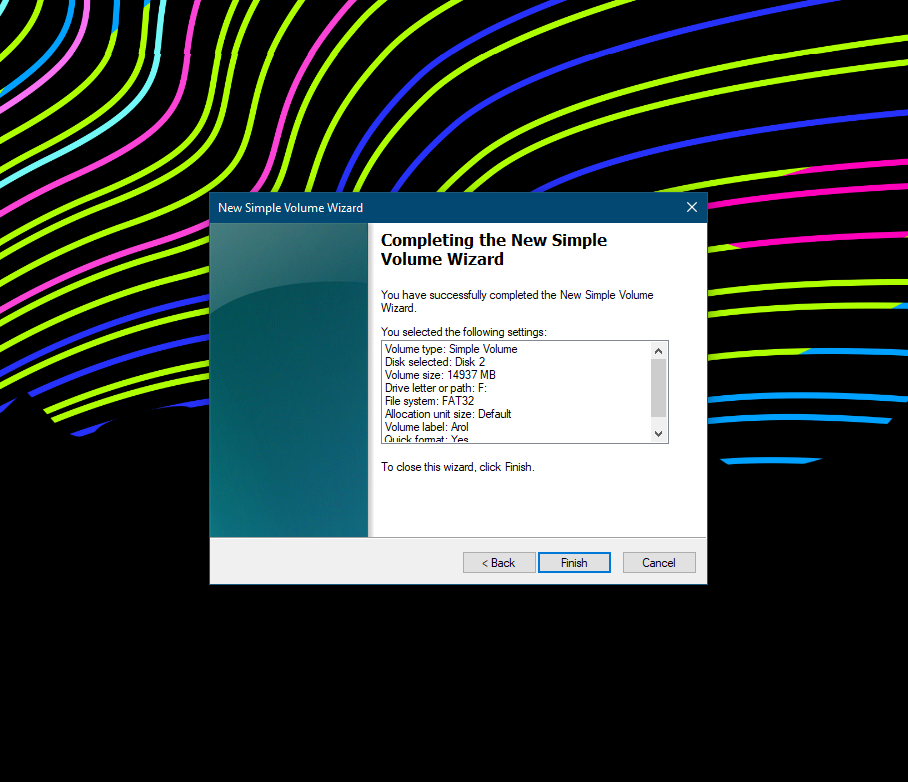
Choose the file system and the drive's volume name, click Next, and now you're done. The drive should now show up as an allocated partition instead of unallocated space, and Windows should be able to see it and write files to it as it does with other drives in your PC.
How to Partition a Drive From Existing Allocated Storage in Windows
If you want to split your drive in two and have two different partitions in it, that's also something you can do, even if you previously allocated that space on your drive. The process for that, however, is a little bit more complicated.
First off, we're going to have to shrink the already allocated partition. This will make the current drive partition smaller and unallocate some space for the other partition in the process.
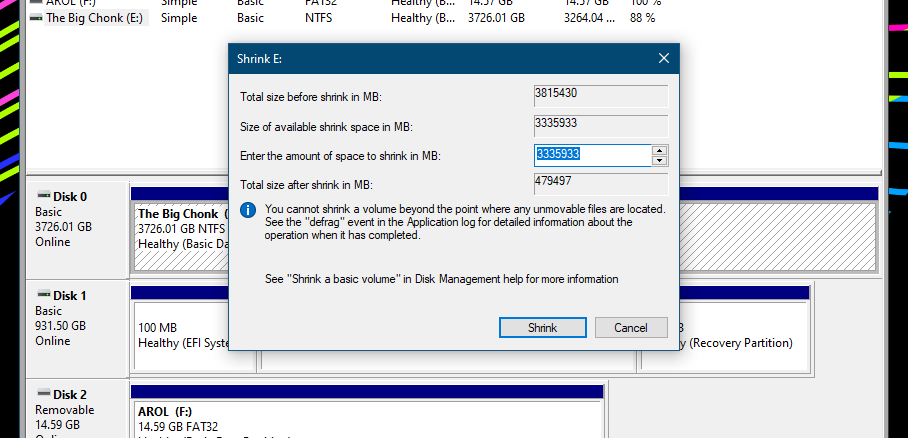
To do this, just go to your trusty Disk Management tool, right-click on your drive, then click on Shrink Volume. Then, you'll have to shrink the volume enough depending on how big you want the second partition to be.
If, for example, I have a 4TB drive and I want to split it into two different 2TB volumes, I'd simply shrink the current volume down to 2TB.
The dialog gives you numbers in megabytes, not gigabytes, so make sure to take that into account while calculating. 1GB is 1,000 MB, while 1TB is 1,000,000 MB. Once you have a rough figure, you can proceed to shrink the volume down to whatever size you want by putting in the amount of space you want to remove from the volume.
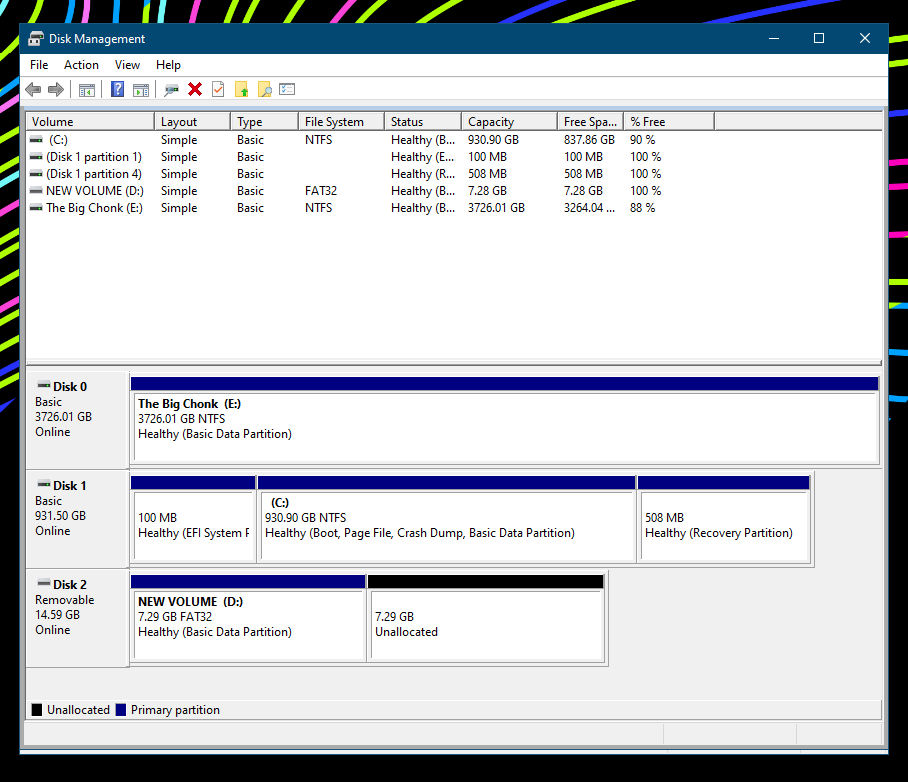
Once you've formatted the drive, you'll now see a chunk of "unallocated space" right next to your volume. This is the space you're going to use for your new partition. Follow the steps we mentioned above to partition a drive from unallocated storage in order to create a new partition out of that newly unallocated space, and you're good to go.
Why Would I Want to Partition My Drive?
There are many scenarios where knowing how to partition drives can come in handy, and there's also a lot of pros and cons to it. As we mentioned above, getting a new hard drive or solid-state drive and setting it up on your computer requires you to partition your drive before actually using it.
This is because all of these drives are shipped with unallocated space instead of coming pre-partitioned, as they expect you to either set up your drive yourself (given that you need to install them inside your computer anyway) or install an operating system on it (the Windows installer can do this process during setup).
Thumb drives, on the other hand, usually come pre-partitioned, as you can just take them out of their packaging, plug them into your PC, and transfer files straight away since their focus is simplicity.
Another reason why you might want to partition your drive is that you might want two or more partitions within a single drive. The reasons for doing this could vary. Multiple partitions can allow you to run multiple operating systems: you can dual-boot Windows 10 and a distribution of Linux for having the best of both worlds, or you can dual-boot different Windows installs.
Another reason could be to better organize your data. Partitioning provides you with, effectively, multiple logical volumes, and as a result, you will be able to organize your data on each partition in a much cleaner manner. You can choose to utilize one for your operating system's essential files, one for your personal data, and one for your work stuff, and so on and so forth. You can also choose to use a partition for data backups, although for that last one you'd probably want to get a new, separate drive instead.
Let's Get Partitioning
Even if you're not into having multiple partitions on your drive, we all need to be at least a little familiar with the concept of partitioning, as chances are we'll need to do it at some point. Either if you're setting up your drive for the first time or you have other uses for it, now you have the tools and the knowledge you need.

