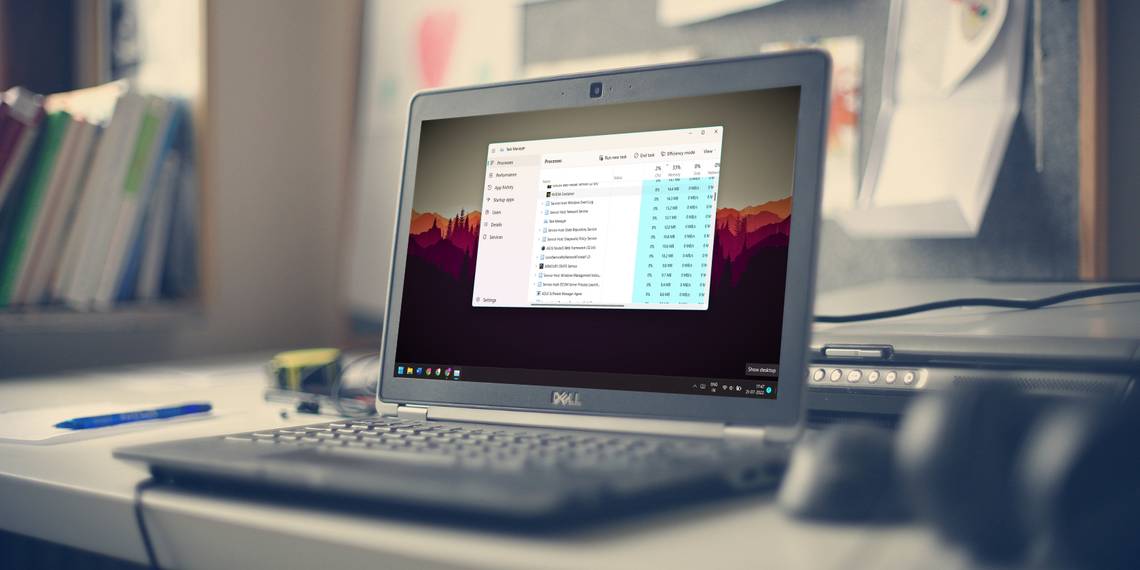
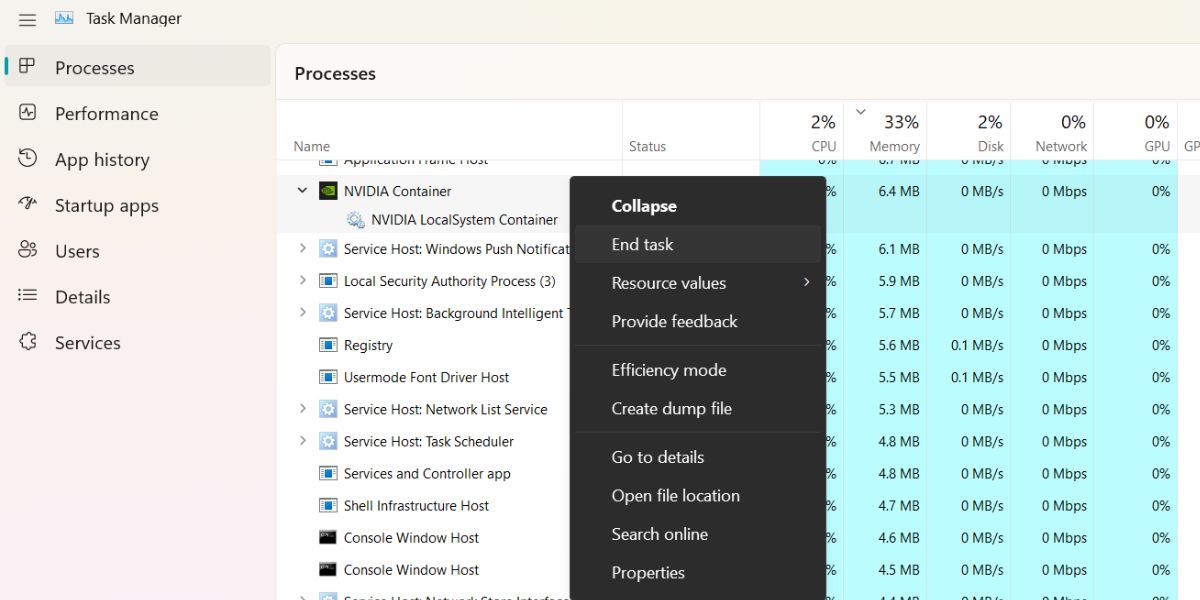
Nvidia makes great GPUs; there's no doubt about that. But there is a problem that plagues a lot of systems with Nvidia GPUs, which is when the Nvidia Container process takes up a lot of your CPU. For high-end gaming rigs with resources to spare, it isn't a big problem. But low-medium gaming systems may struggle when the Nvidia Container begins consuming your CPU's resources.
If you also face the high CPU usage problem by the Nvidia Container process, don't fret. We will list all the possible reasons why the Nvidia Container is chugging your CPU power. Moreover, you will learn multiple methods to fix this problem.
The Main Reasons for the Nvidia Container's High CPU Usage
Here are a few reasons why Nvidia Container is consuming a lot of CPU resources on your system:
- A new Nvidia driver update may be unintentionally causing high CPU usage.
- Additional software like Nvidia GeForce Experience can also contribute to high system resource usage.
- The Nvidia Telemetry Container could be causing problems within the system.
- Non-useful Nvidia Container processes are running in the background.
How to Fix Nvidia Container's High CPU Usage on Windows
Pinpointing the exact cause of high CPU usage by Nvidia Container processes is cumbersome. Instead, try out the following methods to free up your CPU resources.
1. Install Older Nvidia Drivers
New driver updates can be troublesome for your system. If you notice that the high CPU usage is after you updated your GPU drivers, then it is best to revert to an older version. It will involve uninstallation of existing GPU drivers, and then manually downloading and reinstalling older drivers.
To install an older Nvidia driver, do as follows:
- Press Win + R to launch the Run command box. Then type devmgmt.msc in the text input area and press the enter key.
- Device Manager will open. Scroll down and expand the Display Adapters section by clicking on the arrow icon.
-
Right-click on the Nvidia GPU device and select Uninstall Device option from the context menu.
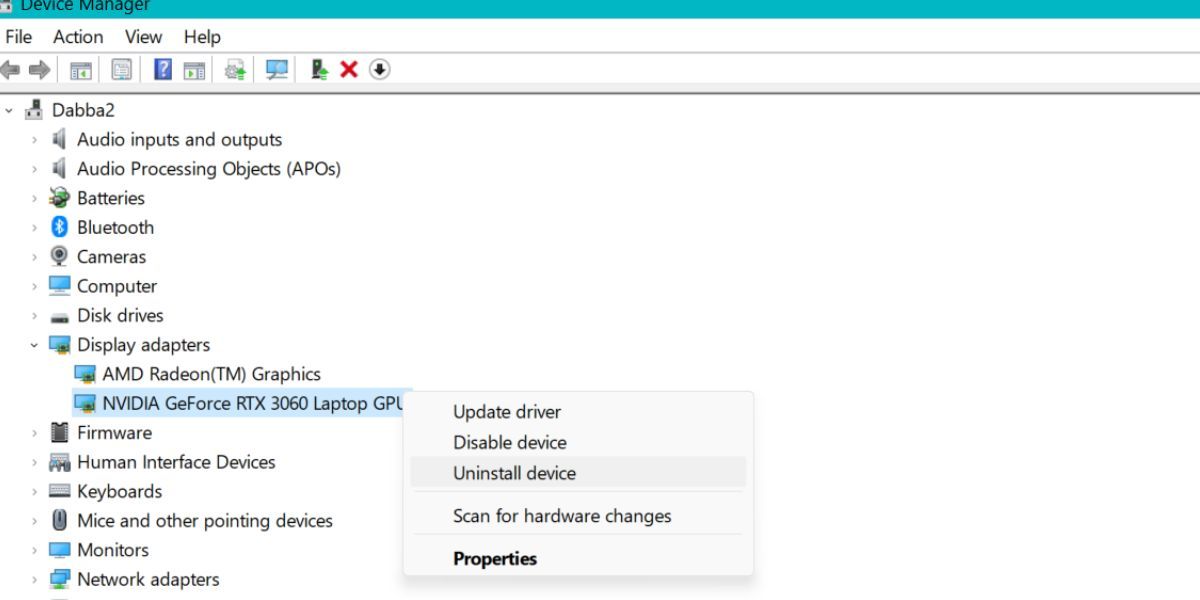
- Follow the onscreen prompts to remove the device.
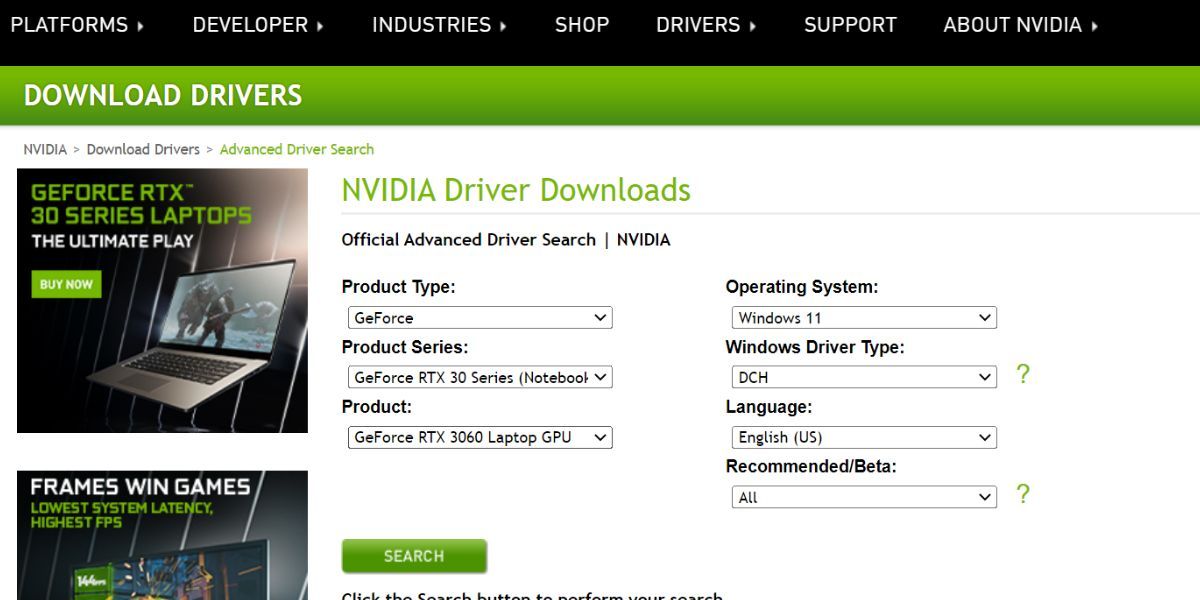
- Now, open any browser and go to the official Nvidia Drivers Download page for old drivers.
- Input your GPU model, type, and OS details and click on the Search button.
-
You will see all the previously released drivers for your GPU model. Pick a slightly older one and download it.
- Go to the file download location. Right-click on the downloaded driver file. Select the Run as administrator option from the context menu.
- UAC will pop up. Click on the Yes button and begin the installation.
- Choose Express as the installation type. Your screen may flicker many times while installing the driver.
- After the installation finishes, exit the setup window.
- Now, restart your system. Open Task Manager and check if Nvidia Container is still gobbling up your CPU resources.


2. Disable the Nvidia In-Game Overlay
The Nvidia GeForce Experience app gives you an in-game overlay feature, handy for recording and sharing gameplay on the fly. While it is a handy feature, you shouldn't keep it active if you don't need it. Moreover, it will create a new process named Nvidia Share which will consume more CPU resources.
To disable the in-game overlay, perform the following steps:
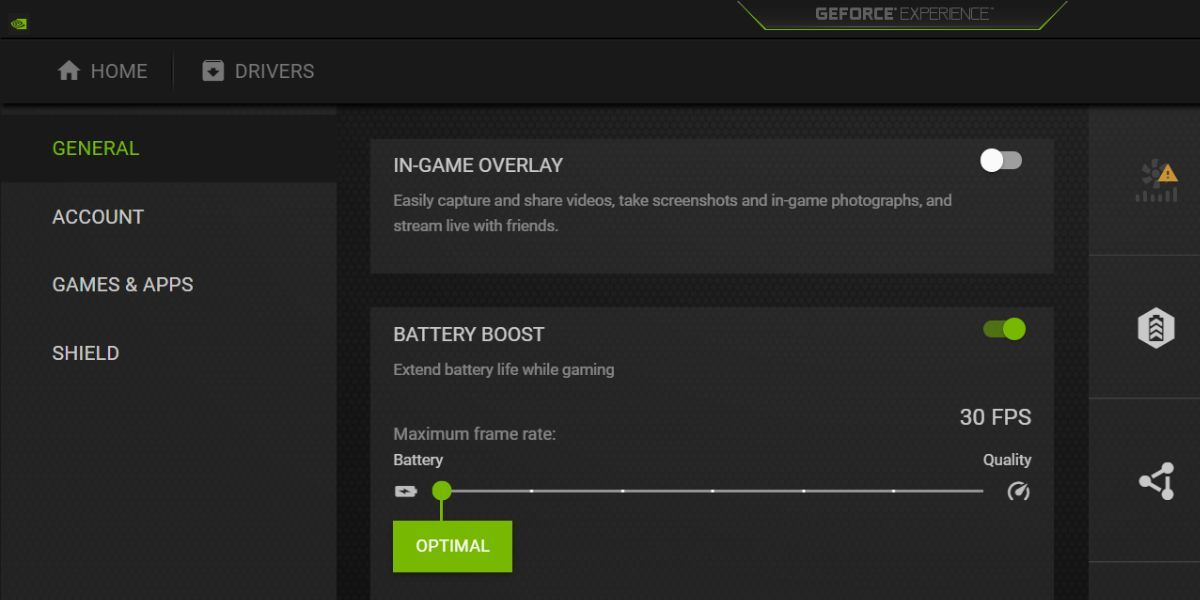
- Press the Win key and type GeForce Experience. Click on the first search result to launch the app.
- Find the gear icon in the top-right corner and click on it. The settings page will open.
- Scroll down to find the In-Game Overlay section. Check whether the toggle is active or not.
-
If it is active, click on it to disable the feature. Exit the Nvidia GeForce Experience app.
- Now, check if the problem of high CPU usage still persists.

3. Uninstall GeForce Experience
The Nvidia GeForce Experience app is a useful utility, but not every gamer needs it. Your games will run just fine, even if you uninstall the app. In fact, uninstalling it will get rid of some Nvidia processes that consume your CPU's resources, freeing up more for your games to use. Check out the guide on GeForce Experience for more information.
To uninstall GeForce Experience, do as follows:
- Press Win + R to launch the Run command box. Now type appwiz.cpl in the text box and press the enter key.
-
Programs and Features windows will open. Find the Nvidia GeForce Experience app from the list of installed programs.
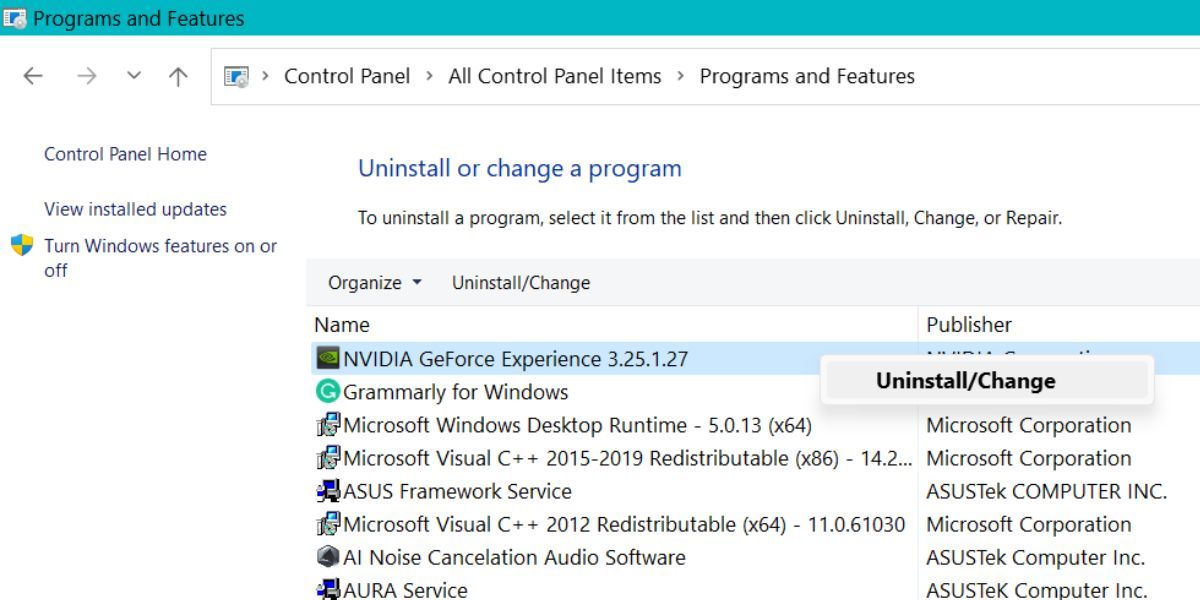
- Double-click on the Nvidia GeForce Experience app. UAC will pop up. Click on the Yes button to proceed to the uninstallation.
- The Nvidia uninstaller will reconfirm your decision. Click on the Uninstall button to continue.
- Close the window after uninstallation completes. Now, restart your system.
- Launch the Task Manager and check if Nvidia Container is still draining your CPU resources. If you see no change, move to the next step.

4. Restart the Nvidia Services
All Windows applications and services can encounter errors during runtime. Restarting them gives them a quick refresh and lets them work as normal once again.
To restart Nvidia's services, do as follows:
- Press Win + R to open the Run command window. Input services.msc in the text area and press the enter key.
- Services utility will launch. Locate all the processes with the term "Nvidia" in them.
-
Right-click on one such service and click on the Restart option in the context menu.
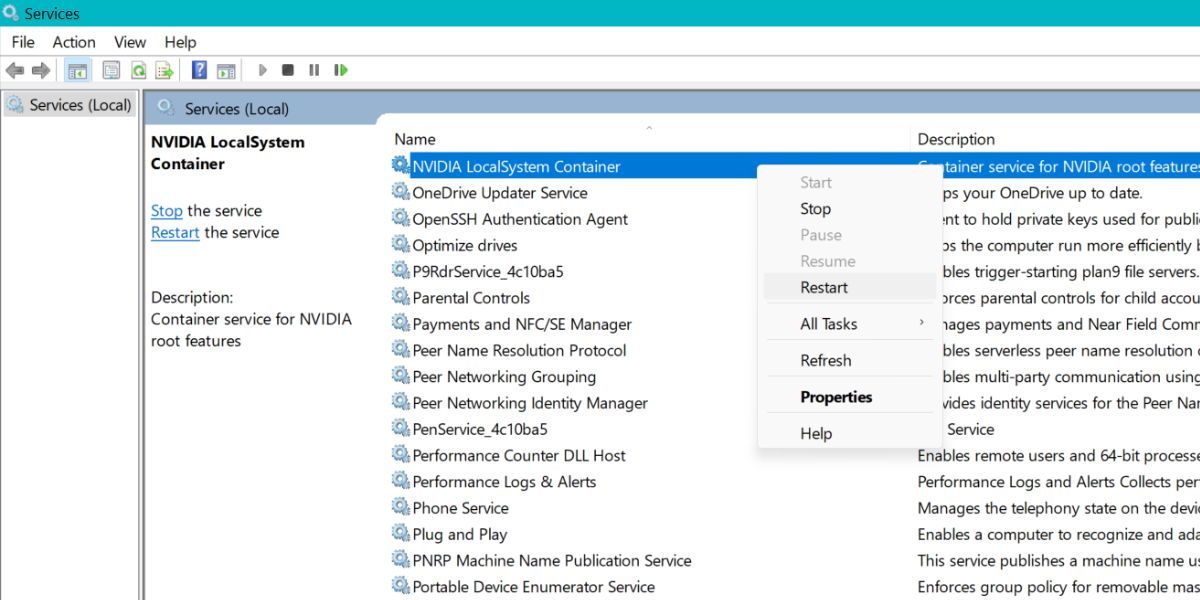
- Repeat the same for all the Nvidia-related processes. After restarting all the Nvidia services, exit the Services utility.
- Now, reopen Task Manager and check if CPU usage has gone down.

5. Disable Any Nvidia Scheduled Tasks Using the Task Scheduler
If restarting the services didn't do the trick, you can try disabling some of Nvidia's tasks using the Task Scheduler. These tasks run automatically in the background and devour your CPU resources. Disabling them won't hamper the nominal functioning of your GPU.
To disable Nvidia's tasks using the Task Scheduler, repeat the following steps:
- Press Win + R to open the Run command window. Input taskchd.msc in the text area and press the enter key.
- Now, go to the top-left area and click on the Task Scheduler Library option. It will list all the scheduled tasks running on your system.
- Find all the tasks with the initials "Nv" or "Nvidia" in their name.
-
Right-click on them and select Disable option from the context menu. Repeat the step for all the Nvidia-related tasks.
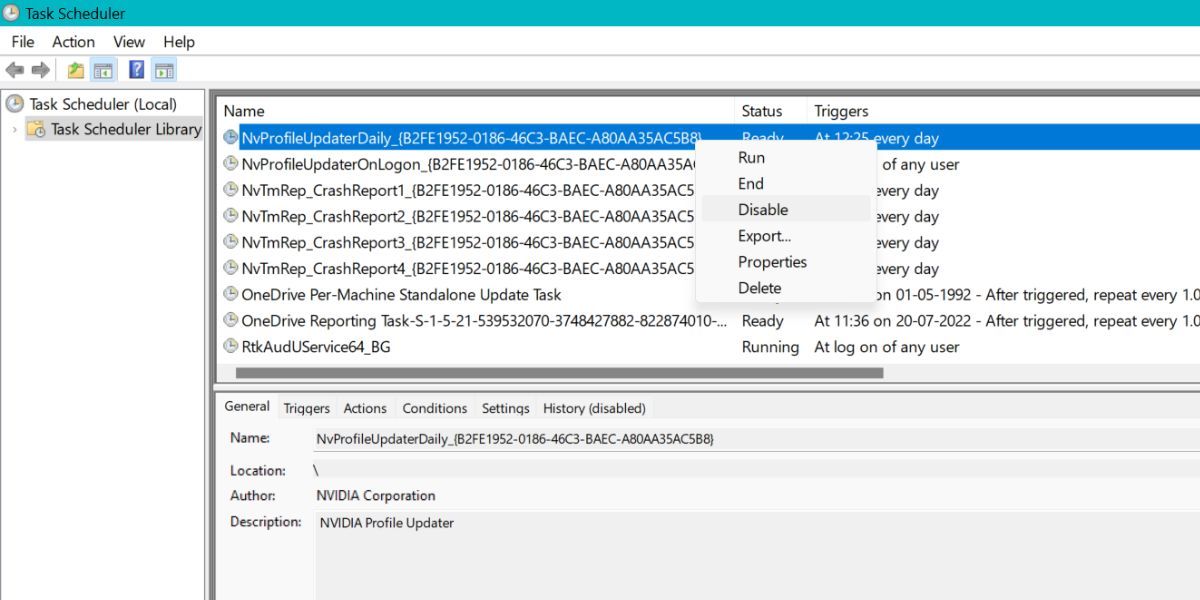
- Now, reboot your system. Launch the Task Manager and check if the Nvidia container still consumes a lot of CPU resources.

6. Disable the “Nvdisplay.container.exe” Process Completely
the Nvidia Display Container LS process controls some display tasks. But you can disable it, which may fix the issue and let you continue using your GPU without an issue.
To disable “nvdisplay.container.exe”, perform the following steps:
-
Launch File Explorer and go to the following path:
C:\Program Files\NVIDIA Corporation\Display.NvContainer\plugins\LocalSystem\ - Click on the DisplayDriverRAS folder and press the Shift + Del key to delete the folder.
-
Then, go to the following directory and repeat the deletion process on the DisplayeDriverRAS folder:
C:\Program Files\NVIDIA Corporation\ -
Now, open Task Manager and end the Nvidia Display Container LS process. Reboot your system.

7. Delete the _NvGSTPlugin.dll File
Many users managed to solve the high CPU usage by deleting a DLL file from the Nvidia driver folder. Repeat the following steps:
- Open the Services utility and find the NVDisplay.Container.exe service. Right-click on the service and select the Stop option.
-
Press Win + R to open the Run dialog box. Type the following path and press Ctrl + Shift + Enter keys simultaneously:
C:\Windows\System32\DriverStore\FileRepository\nvamig.inf_amd64_b05947f9052e5fd2\Display.NvContainer\plugins\Session
-
Right-click on the _NvGSTPlugin.dll file. Press the Shift key and click on the Delete button.
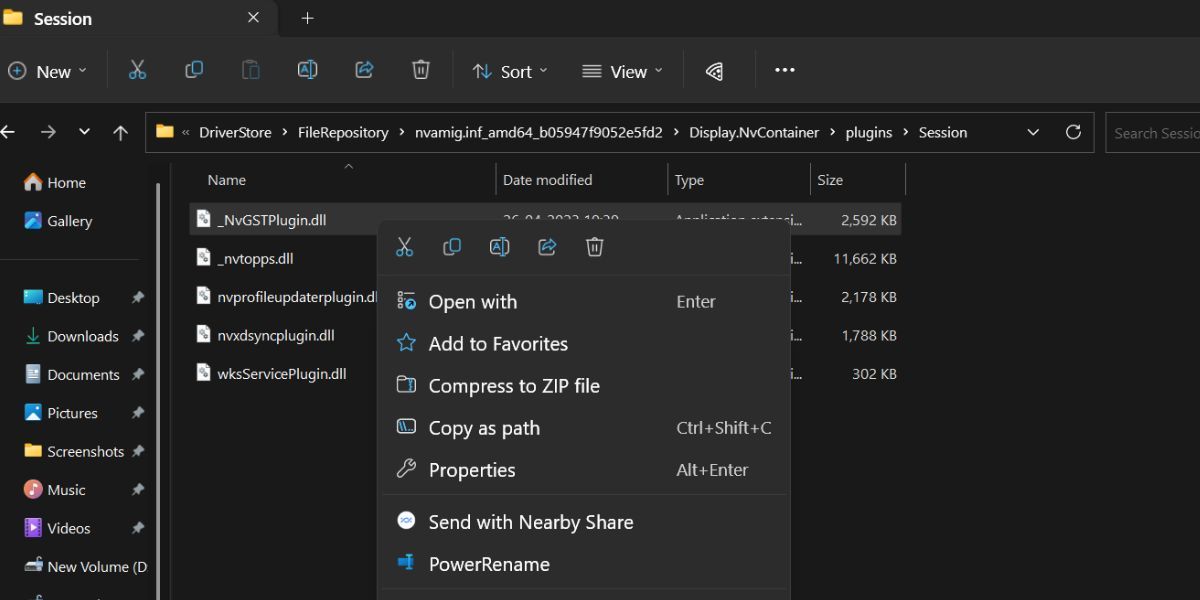
- Then, click on the Yes button.

Prevent the Nvidia Container From Hogging Your CPU
These were all the possible fixes that you can try to free your CPU resources from Nvidia Container processes. We recommend you try older drivers and disable the in-game overlay feature.
If that doesn't work, disabling useless services and ending Nvidia container processes can do the trick. In addition, remove Nvidia GeForce Experience from your system if you never use it.