
Windows 10 and 11 features an eye-saving feature called Night Light. Click on it in the Quick Settings, and your display will show warmer colors instead of those harsh whites. It is a useful feature to filter out blue light when using your PC after hours.
Unfortunately, when you click on Night Light in the quick settings, sometimes it just won't work. If the Night Light has stopped working for you, here's how to troubleshoot it on your Windows computer.
1. Check the Night Light's Strength

The Night Light comes with customizable strength, letting you set how strongly you want the effect to be. If you have set it too low, you will hardly notice when the Night Light turns on.
As such, it's a good idea to check if you have set the Night Light strength to the right level. To change Night Light Strength:
- Press the Win + I to open the Settings panel.
- In the right pane, click on Display.
- Click on Night light under the Brightness & color section.
- Make sure Night Light is turned on. If not, click the Turn on now button.
- Next, drag the Strength slider to adjust the warm color tone. Set it to what you are comfortable with, and the Night Light should start working again.
Additionally, try restarting your PC to see if the Night Light is malfunctioning due to a temporary glitch. Restart your PC and check if the Night Lights start working again.
2. Update Your Graphics Drivers

Night Light can stop working after performing a Windows upgrade or installing new updates. If so, check if you have the latest graphics card drivers installed. Missing or outdated graphics card drivers can cause programs or features related to the display to malfunction. Follow these steps to update your graphics drivers on Windows.
- Press the Win + X to open the WinX menu.
- Click on Device Manager on the Access Menu.
- In Device Manager, expand the Display adapters section.
- Right-click on your graphics card device and select Update.
- In the Update window, select Search automatically for updated driver software. Windows will download and install all the pending driver updates for your display device.
Once installed, restart your PC, and the Night Light feature should start working again. If Windows doesn't find any driver updates, you can also try other methods to update the graphics driver on Windows.
3. Reinstall the Graphics Driver

If you are using the latest graphics driver version, try deleting and reinstalling the driver to fix common problems with the driver. Here's how to do it.
- Open Device Manager and then expand the Display adapters section.
- Right-click on the display device driver and Uninstall device.
- In the confirmation window, click on Uninstall to confirm the action. Leave the Delete the driver software for this device option unchecked.
Once uninstalled, restart your PC. After the restart, Windows will automatically install missing drivers for your graphics device.
4. Reset Night Light Settings via Registry Editor

You can manually reset the Night Light setting in the Registry Editor. This is useful if none of the above fixes help you resolve the problem. Also, helpful if the Night Light option is greyed out in Settings.
To reset Night Light settings:
- Press Win + R to open Run.
- Type regedit and click OK to open Registry Editor. Click Yes if prompted by User Account Control.
-
In the Registry Editor, navigate to the following location:
HKEY_CURRENT_USER\Software\Microsoft\Windows\CurrentVersion\CloudStore\Store\DefaultAccount\Cloud -
Under the Cloud key and locate the following keys:
default$windows.data.bluelightreduction.settingsdefault$windows.data.bluelightreduction.bluelightreductionstate
- Right-click on the first key and select Delete. Repeat the same for another key as well.
- Once you have deleted both the keys, close Registry Editor.
- Restart your PC and set up Night Light to start using it again.
If you encounter an error when deleting the registry keys, you will need to take ownership of the registry keys and try again.
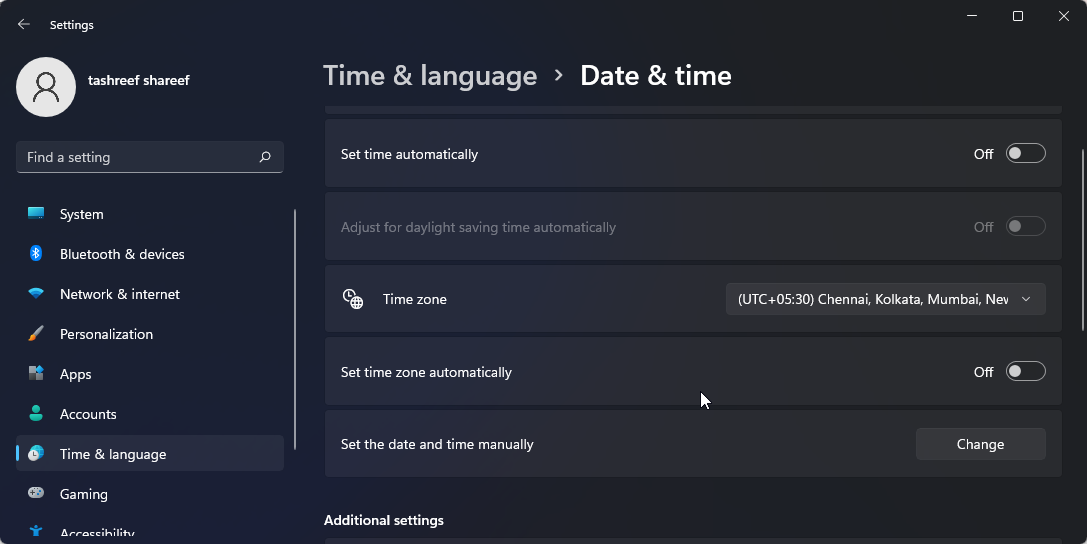
5. Check Your PC's Date and Time Settings
You can schedule Night Light to turn on and off automatically during set hours. However, incorrect date and time settings can cause a delayed start or turn-off.
To confirm, check the date and time in the Taskbar (bottom right corner). If it needs a correction, here is how to change the date and time on your system.
- Press Win + I to open Settings.
- Click on Time & Language in the left pane.
- Then, click on Date & time.
-
Toggle the switch for Set time automatically and Set time zone automatically to turn it Off.
-
Click the Change button for Set the date and time manually. Then, make the changes and click on Change.
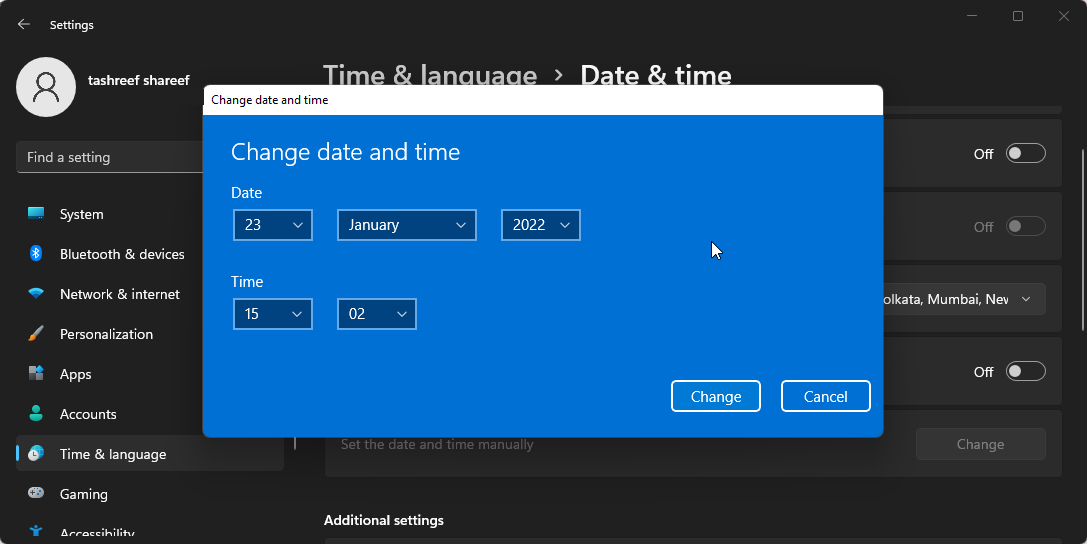
- Once done, make sure to enable the Set time automatically and Set time zone automatically options.


6. Turn On Location Service

Night Light feature can benefit with the location service turned on your system. This is again important if you have scheduled Night Light to work on set hours. If you prefer to enable Night Light manually, you can leave the location service turned off.
To turn on Location for your system:
- Press Win + I to open Settings.
- Open the Privacy & Security tab in the left pane.
- In the right pane, scroll down to the App permissions section.
- Click on Location.
- Toggle the switch for Location services to set it to On. Once done, try to use the Night Light feature and see if it's working.
7. Update Windows

Earlier versions of Windows reportedly had a Night Light bug that could stop it from working properly. Check if a new update is available for your version of Windows to see if that helps you fix the problem.
To update Windows, go to Settings > Windows Update and click on Check for updates. Then, download and install pending updates and check for any improvements.
8. Use Third-Party Night Light Alternatives
While you wait for the bug to be fixed, consider using a Night Light alternative. Third-party apps like f.lux and SunsetScreen allows you to change the color of your screen to warm. You can further customize them to adapt to the hours of the day.
F.lux, in particular, is a highly customizable utility if you use your system throughout the day. Here's how you can make the most out of F.lux.
Bringing Night Light Back to Life
Night Life is a handy feature and saves you from the hassle of using a third-party blue light filter app. Depending on whether the option is grayed out, not working, or partially working, follow one of the methods in the article to resolve the issue.