
Did you notice the MoUSO Core Worker Process running in the Windows Task Manager? Has it raised alarm bells since it hasn't been seen before? Is it consuming too much RAM and CPU, which is causing concern? Would you like to disable it but aren't sure if it's safe?
No matter why you're interested in learning more about the process, this article will cover all you need to know. Additionally, if it's consuming a lot of your resources, we'll show you solutions for fixing it.
The MoUSO Core Worker Process: What Is It?
The term USO in the process name stands for Update Session Orchestrator. According to Microsoft documentation, it is one of the Windows 10 built-in components of Microsoft's Unified Update Platform (UUP), Microsoft's update model introduced in Windows 10.
MoUSO Core Worker Process manages the order in which updates are downloaded and installed on the operating system. Simply put, this process controls which updates are downloaded and installed first.
By default, the MoUSO Core Worker Process only begins its processing when Windows searches for an update. However, sometimes it remains active for a long time without apparent reason. This results in excessive CPU or RAM consumption, resulting in your computer hanging. This is where it becomes problematic.
Following are some fixes you can use if the MoUSO Core Worker Process uses too much CPU and RAM on your computer.
1. Verify the Authenticity of the Process
The first thing to do is to confirm that the executable file is from Microsoft rather than a Trojan installed by a cybercriminal. The hackers commonly use the same names as the original processes, making it difficult to identify them.
To verify the authenticity of any executable file, follow the below steps:
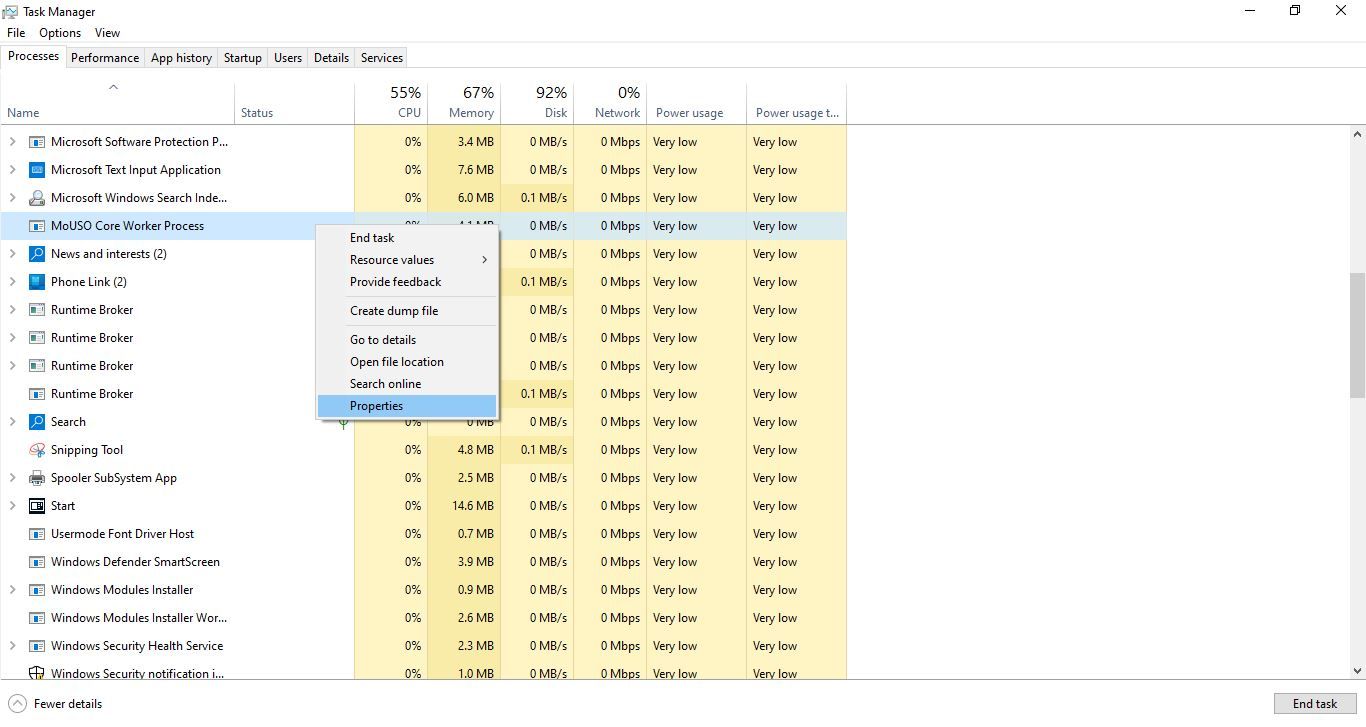
- Right-click the Windows Start button and select Task Manager.
-
Right-click on MoUSO Core Worker Process and select Properties.
-
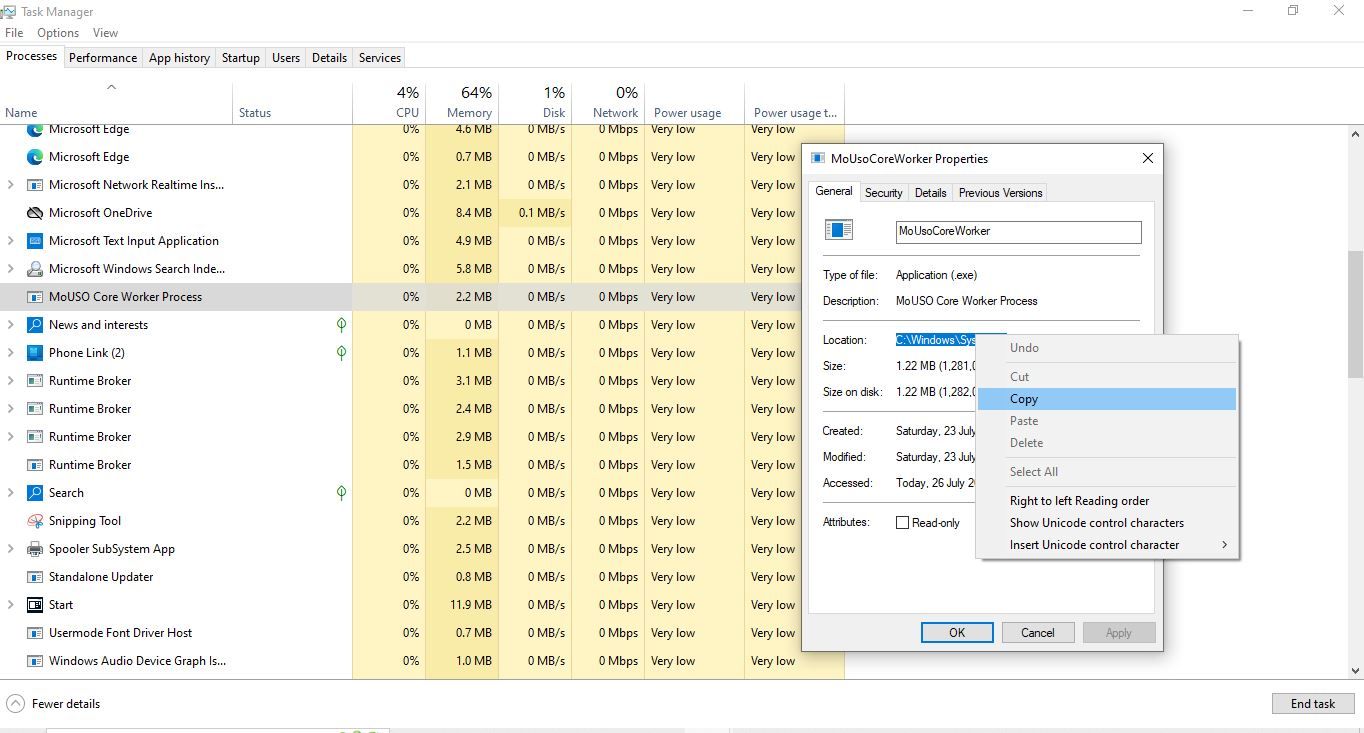
Under the General tab of the Properties window, copy the path next to Location.
- Paste the copied path into the address bar of File Explorer.
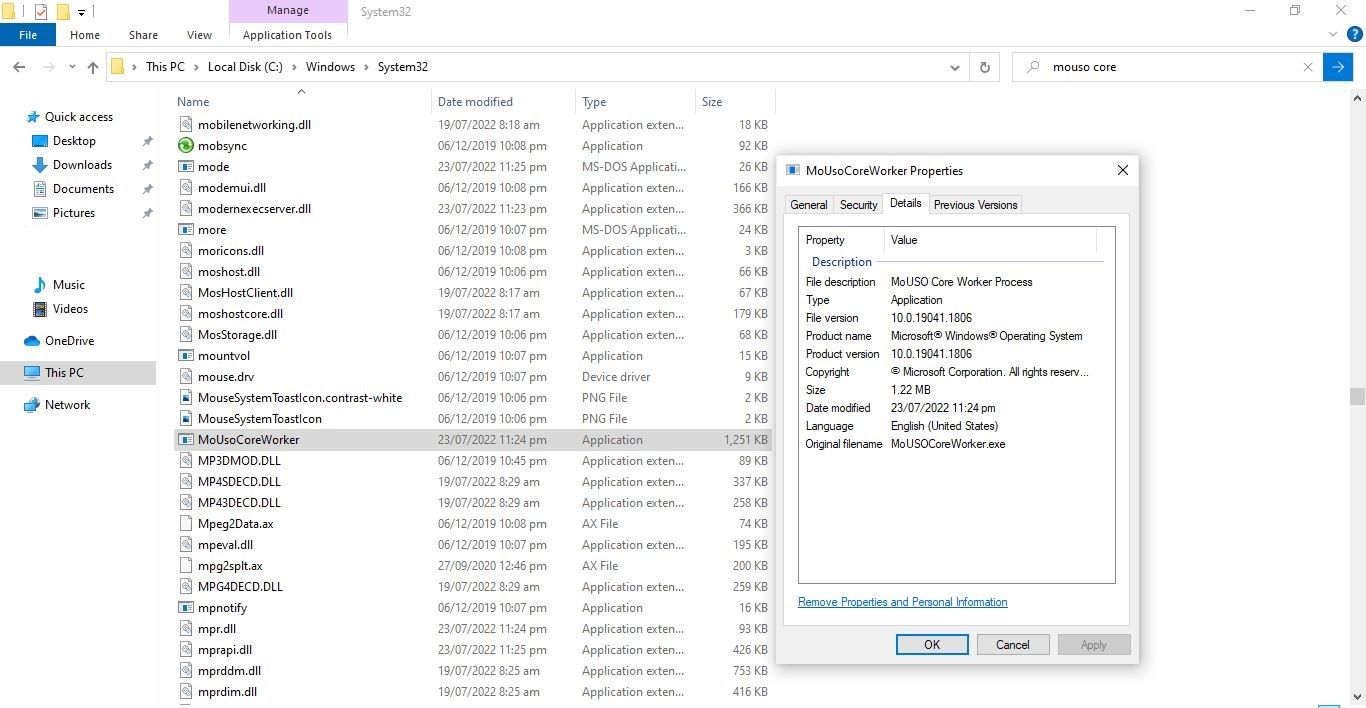
- Find the executable file for the process.
- Right-click it and select Properties.
- In the Properties window, navigate to the Details tab.
-
Confirm that "Microsoft Corporation. All rights reserved" is written next to Copyright.


2. Restart the MoUSO Process
The old-school approach of restarting the program to fix issues may also work here. Therefore, you should give a fresh start to the process before implementing any major fixes. You can restart the process by following the below steps:
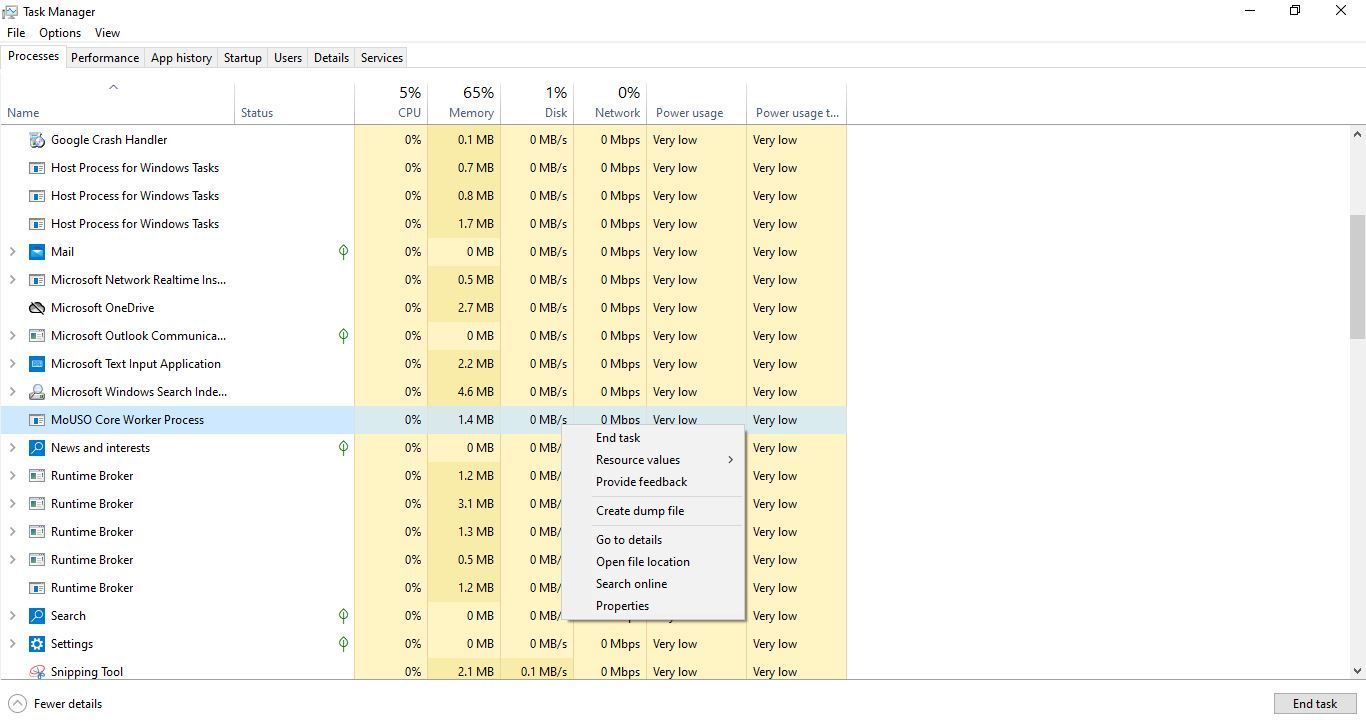
- Right-click on the Windows Start button and select Task Manager.
-
Right-click the MoUSO Core Worker Process and hit End task.

Restart your computer to give the process a fresh start. If restarting the process fails to lower CPU or RAM consumption, try the following fix.
3. Check for Available Updates and Install or Pause Them
Manually installing the available updates will reduce the burden on the MoUSO Core Worker Process. Consequently, it will reduce the process's resource consumption. So, check for updates and let Windows install them. It is also essential to check for and install the optional Windows updates if they are available.
If installing automatic and optional updates doesn't fix the issue, pause the Windows updates and see if that helps.
4. Run the Windows Update Troubleshooter
A handy Windows Update troubleshooter included in Windows can help you resolve any issues related to Windows updates. Therefore, run the troubleshooter to see if it helps identify the problems and fix the high resource consumption.
Follow the below steps to run the troubleshooter:
- Right-click the Windows Start button and select Settings.
- Go to Update & Security.
- Select the Troubleshoot tab in the left sidebar.
- In the right-hand pane, click Additional troubleshooters.
- Select Windows Update under Get up and running.
-
Click on Run the troubleshooter.


Check if the Windows Update troubleshooter has identified any problems and reduced resource consumption.
5. Disable Delivery Optimization
Delivery Optimization allows Windows users to download new updates or parts of updates from other PCs on the same network. This makes new updates more accessible.
However, since the USO Core Worker Process manages Windows updates and their installation, the extra burden of downloaded updates from other machines can make the process incredibly resource-intensive.
To rule out this possibility, disable Delivery Optimization. For this, go to the Windows Settings app > Update & Security > Advanced Options > Delivery Optimization. If it is on, turn the toggle next to Allow downloads from other PCs to the left to turn it off.

6. Restart Relevant Windows Update Services
Restarting services in the Windows operating system has a good chance of resolving common issues. Windows Update and Update Orchestrator Service are the most relevant services to restart to resolve the issue.
You can restart the Windows Update service by following the steps below:
- Open the Services app by searching for "Services" in the Windows search bar.
- In the right-hand pane, locate the Windows Update service.
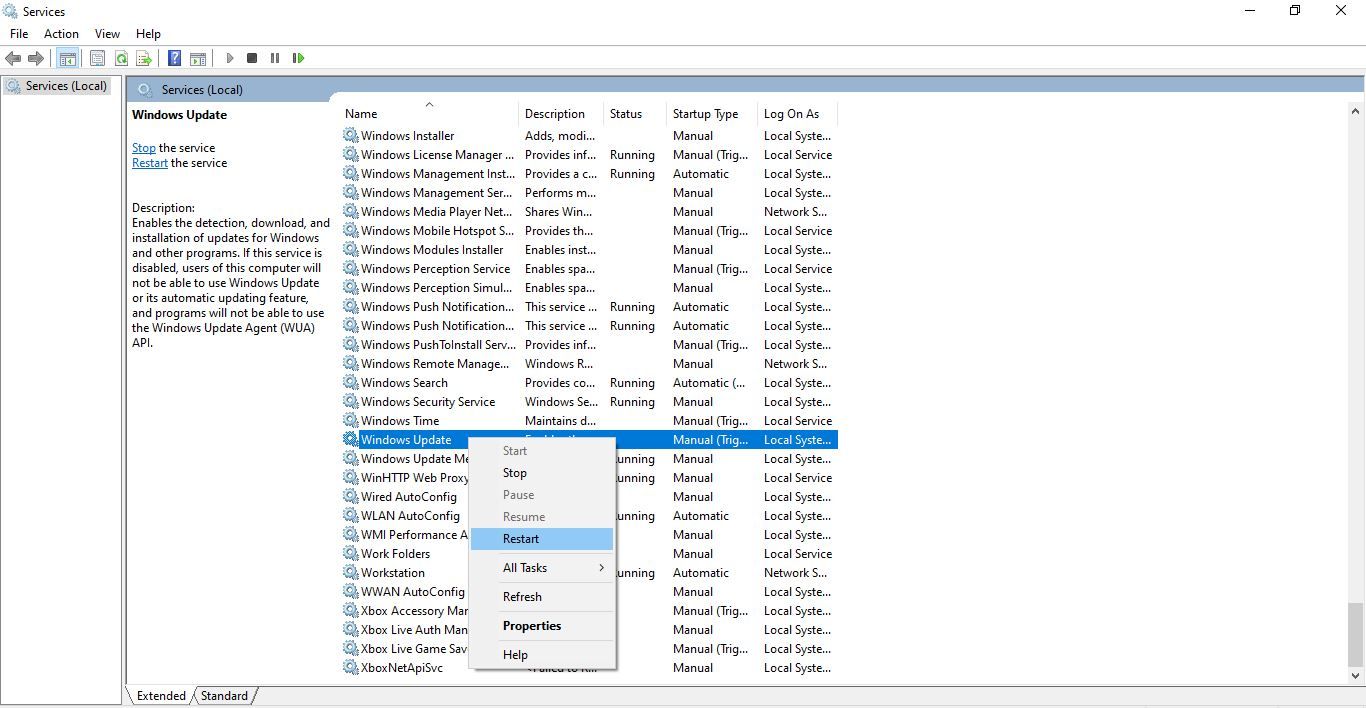
-
Simply right-click it and hit Restart.

Next, restart the Update Orchestrator Service by following these steps:
- In the Services app, locate Update Orchestrator Service.
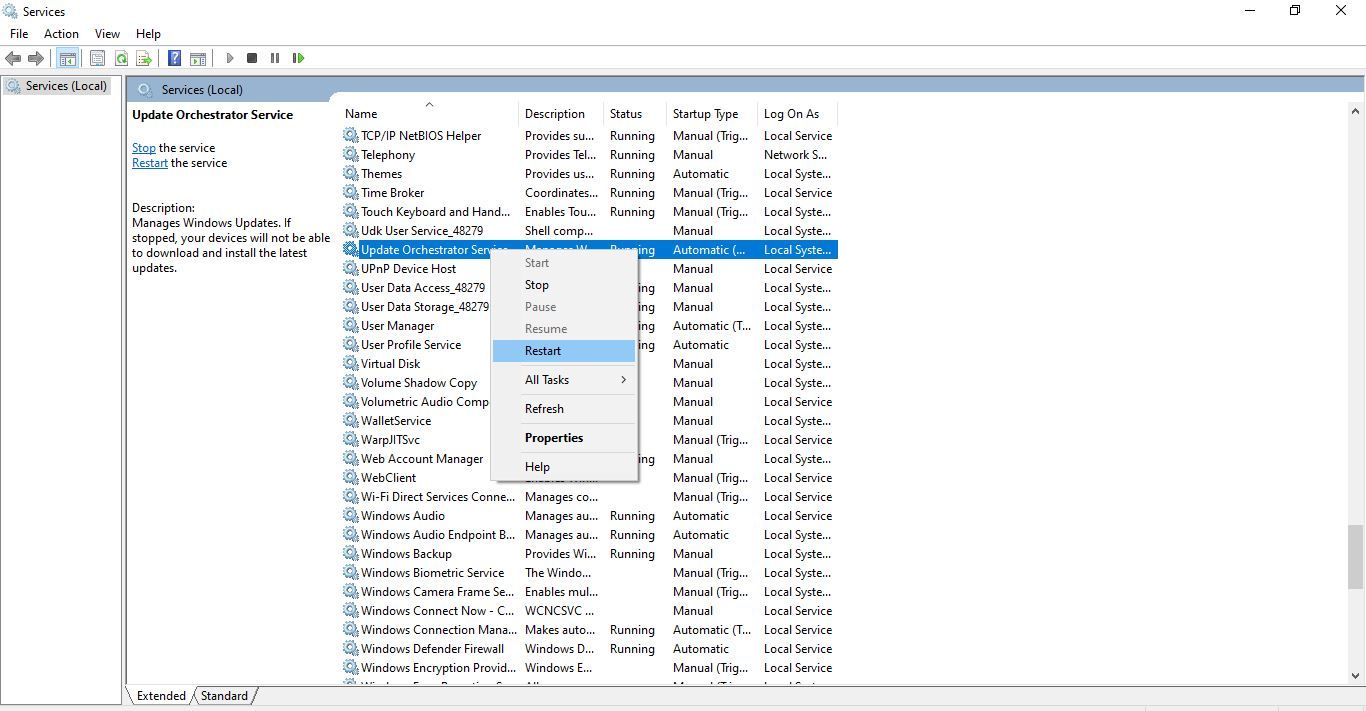
-
Right-click on it and hit Restart.

Is the process still consuming too much power? Then it's time to disable the service.
7. Disable the Update Orchestrator Service
As a last resort, disable the Update Orchestrator Service to terminate the MoUSO Core Worker Process. Follow the below process to disable it:
- Open the Services app.
- Within the Service app, locate the Update Orchestrator Service.
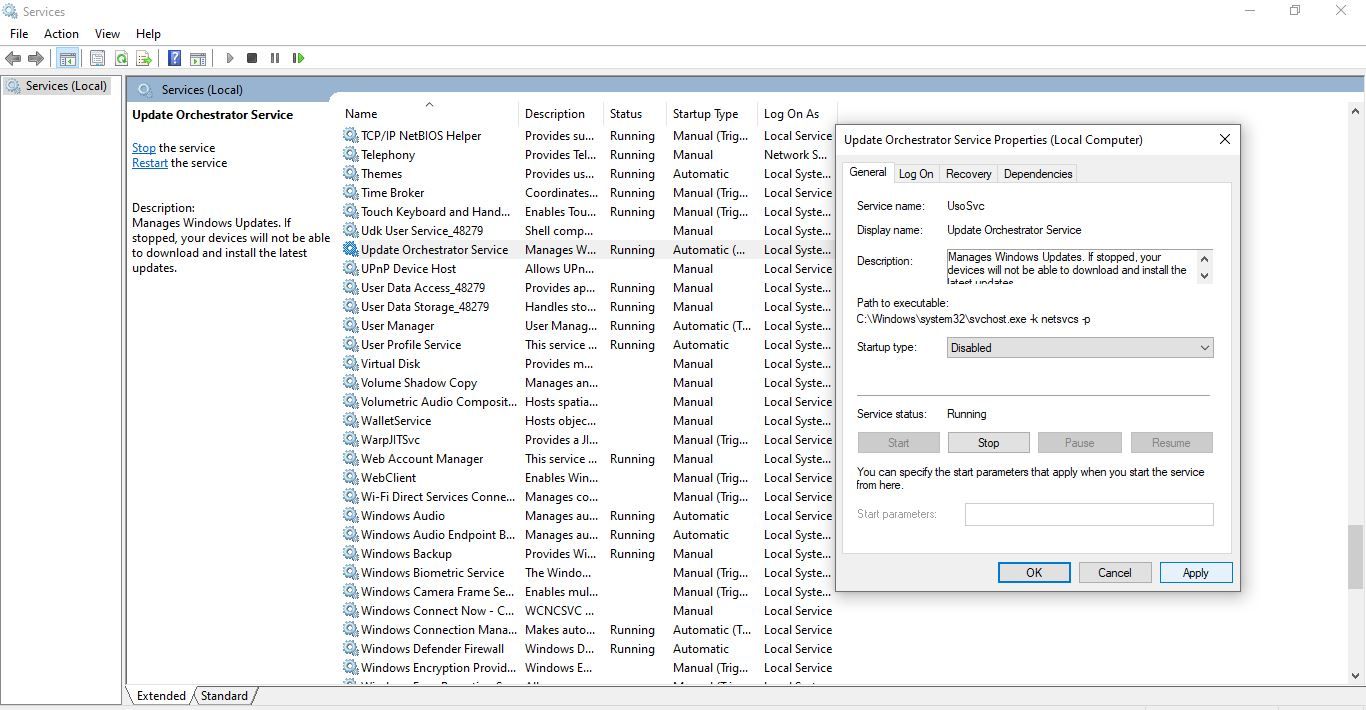
- Right-click on it and select Properties.
- Select Disabled from the dropdown next to Startup type on the General tab.
-
Once you've done that, click Apply and then OK.

Disabling this service should stop the MoUSO Core Worker Process. If it doesn't work, you can go back to Task Manager and end it there. Disabling the service will prevent it from running in Task Manager ever again.
While disabling MoUSO Core Worker Process will reduce resource consumption, it will also stop looking for new updates, which may adversely affect the performance of your device.
Reduce the MoUSO's Core Worker Process' Resource Consumption
After reading our guide, you will hopefully have a clearer picture of the MoUSO Core Worker Process. Moreover, if it's consuming a lot of memory or CPU, now you know how to reduce it. If they cannot lower it, disable it to help your computer run smoothly.