
The default Windows mouse pointer works for most people, but you can always customize it to your liking. Enabling mouse pointer trails is just one of many ways to make your mouse pointer stand out.
You can enable or disable mouse pointer trails from the Settings app, Control Panel, or the Registry Editor. Let's go over all three methods one by one.
1. Enable or Disable Mouse Pointer Trails Using the Settings App
The Settings app provides an easy way to configure most system settings on Windows. You can use it to enable or disable mouse pointer trails on Windows. Here's how to go about it.
- Right-click on the Start icon and select Settings from the list.
- Use the left pane to navigate to Bluetooth & devices tab.
- Click on Mouse.
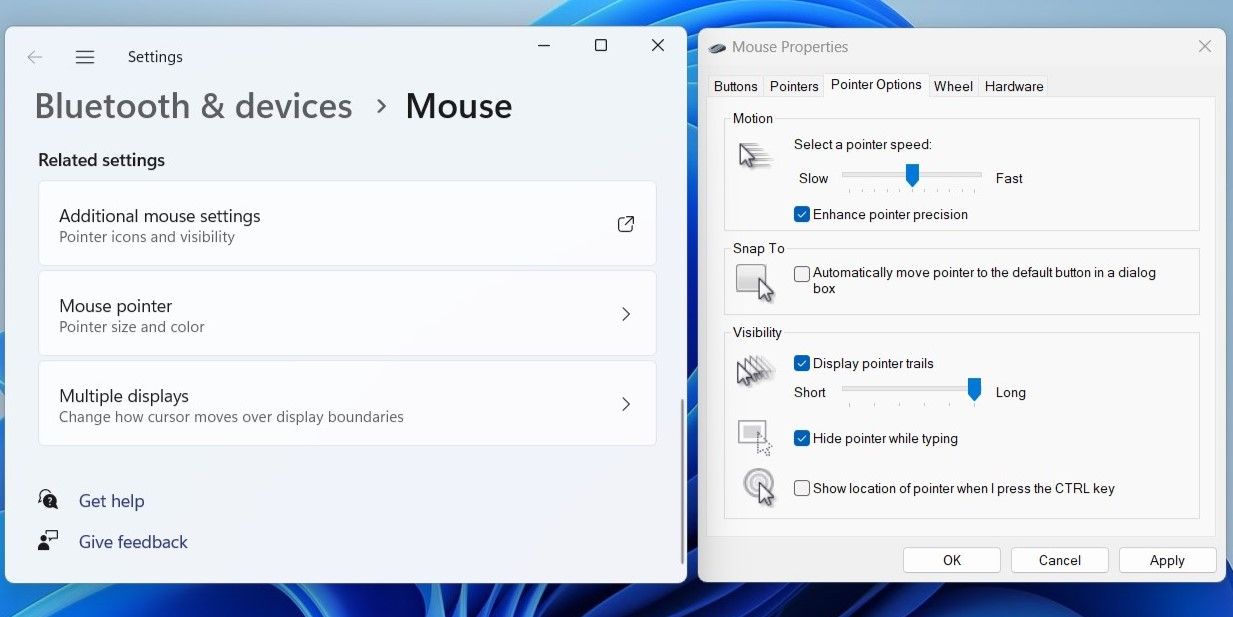
- Under Related settings, click on Additional mouse settings.
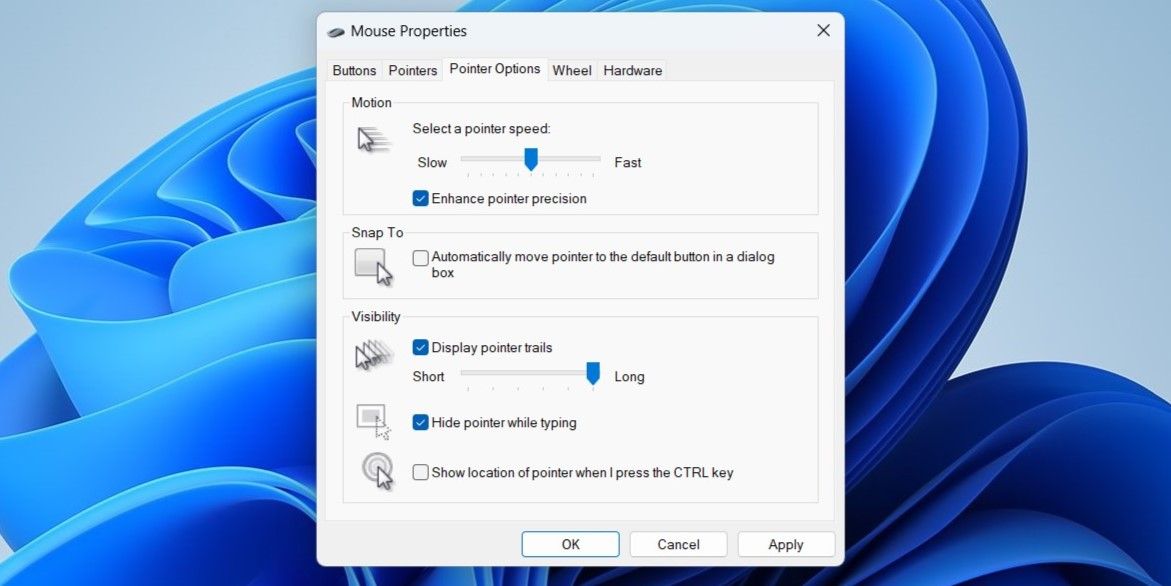
- In the Mouse Properties window, switch to the Pointer Options tab.
- Check or uncheck the Display pointer trails box to enable or disable mouse pointer trails.
- Use the slider to adjust the length of mouse pointer trails.
-
Click Apply followed by OK.

Tired of people adjusting the mouse pointer settings on your device without your consent? Check out how to block access to the mouse pointer settings on Windows.
2. Enable or Disable Mouse Pointer Trails via Control Panel
Using Control Panel is an old-school way of making changes to your system. Enabling or disabling mouse pointer trails using Control Panel is just as easy. Here are the steps you need to follow.
- Press Win + R to open the Run dialog box.
- Type control in the box and press Enter. This will open Control Panel.
- Use the drop-down menu in the top right corner to change the view type to Large icons.
- Click on Mouse.
- Under the Pointer Options tab, use the Display pointer trails to enable or disable pointer trails.
-
Click Apply followed by OK.

3. Enable or Disable Mouse Pointer Trails Using the Registry Editor
If you’re feeling adventurous, you can also enable or disable mouse pointer trails by modifying a registry file. As you may be aware, editing registry files is risky. If you’re worried about inadvertently messing up registry files, you should use one of the other two methods.
If you decide to use this method, you should consider backing up all your registry files in case things don’t go as planned. Alternatively, you can create a system restore point. If you need help, refer to our guide on how to create a restore point and follow the steps outlined there.
To enable or disable mouse pointer trails via Registry Editor, use the following steps:
- Click the search icon on the taskbar or press Win + S to open the search menu.
- Type registry editor and select the first result that appears.
- Select Yes when the User Account Control (UAC) prompt appears.
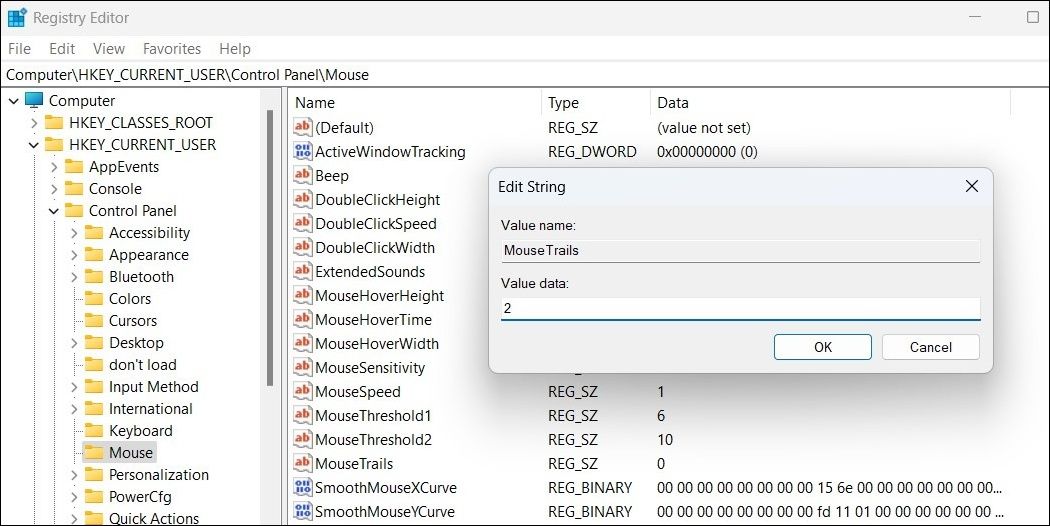
- Use the left pane to navigate to HKEY_CURRENT_USER > Control Panel > Mouse.
- Double-click the MouseTrails in the right pane.
- In the Value data field, enter any value between 2 (short) to 7 (long) to define the length of mouse pointer trails.
- Click OK and exit the Registry Editor.
-
Restart your PC to apply the changes.

If you wish to disable mouse pointer trails, follow the same set of steps above and change the Value data for MouseTrails to 0.
Follow Your Mouse Pointer With Ease
Windows certainly makes it easy to change your mouse pointer's look. Enabling mouse pointer trails should help you track its movements with ease.
Of course, enabling mouse trails isn’t the only way to customize a mouse pointer on Windows. You can also change the mouse pointer color and size on Windows.