
If your computer is heating up and the CPU fan is running loudly, it could mean there is an issue with the Windows Modules Installer Worker process. This process is part of the operating system and handles Windows updates. In some cases, it leads to slow speeds and even system crashes due to high CPU usage.
In this article, we will discuss how to resolve CPU usage issues with Windows Modules Installer Worker.
1. Give It Some Time
If your computer's "Windows Modules Installer Worker" process is using a lot of CPU power, it means that Windows is busy installing updates or doing system maintenance in the background. These tasks may take a few minutes to complete, and the CPU usage should go back to normal afterward.
So if you're not in a hurry, give it some time and let it finishes before trying anything else.
2. Restart Your Computer
If there is no ongoing update process or system maintenance, and CPU usage is still abnormally high, restart your computer. This will kill all running programs, including "Windows Modules Installer Worker" and any other process that might be causing the issue.
To restart your computer, open the Start menu or hit the Windows key. Select the Power icon and click Restart from the menu. Once your computer restarts, see if CPU usage is back to normal.
3. Run the Windows Update Troubleshooter
If restarting doesn't work, run the Windows Update troubleshooter. This tool scans for any issues with Windows Update and automatically fixes them, which might solve the "Windows Modules Installer Worker" high CPU usage issue.
To run the troubleshooter, follow these steps:
- Press Win + R on your keyboard to open the Run command.
- Type Control Panel in the dialog box and hit Enter. This will open the Control Panel.
- Change the Control Panel view to Large icons or Small icons.
-
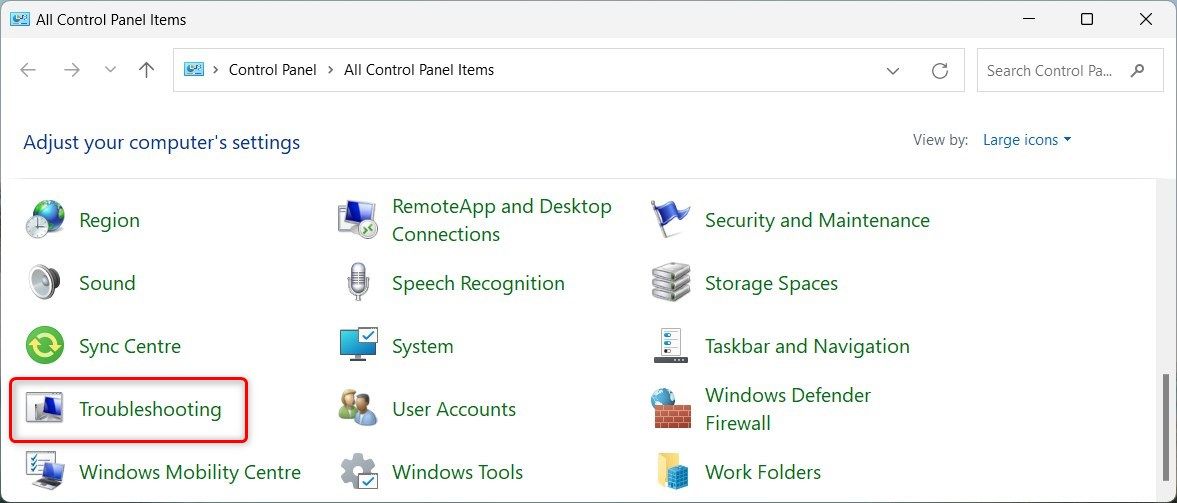
Locate and click on the Troubleshooting option.
-
On the right side, click Other troubleshooters.

-
Click Run next to Windows Update.


The troubleshooter will now run and attempt to fix any Windows Update issues. After the troubleshooter finishes its scan and fixes any problems, see if it solves your problem.
4. Restart the Windows Update Service
Another solution is to restart Windows Update. This will reset the Windows Update settings and possibly fix any issues causing the high CPU usage. Here's how to do it:
- Open the Run command dialog box.
- Type services.msc in the dialog box and hit Enter. This will open the Services console.
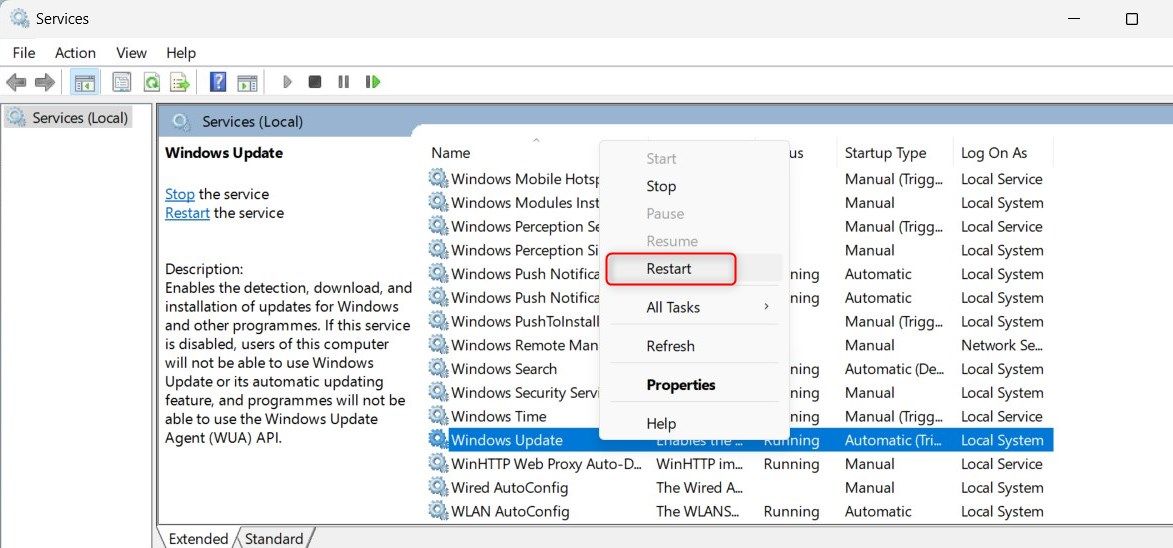
- Look for Windows Update in the list of services.
-
Right-click on it and select Restart from the menu.

Once the service has been restarted, check if the "Windows Modules Installer Worker" process is still using a lot of CPU power.
5. Set Windows Update to Manual Mode
The Windows Modules Installer Worker process sometimes remains active even when there are no updates to install. This usually happens when the Windows Update service is set to Automatic.
To fix this issue, you can change the Windows Update service to manual mode. This will prevent Windows from running the process all the time and reduce CPU usage.
To change Windows Update into manual mode, do the following:
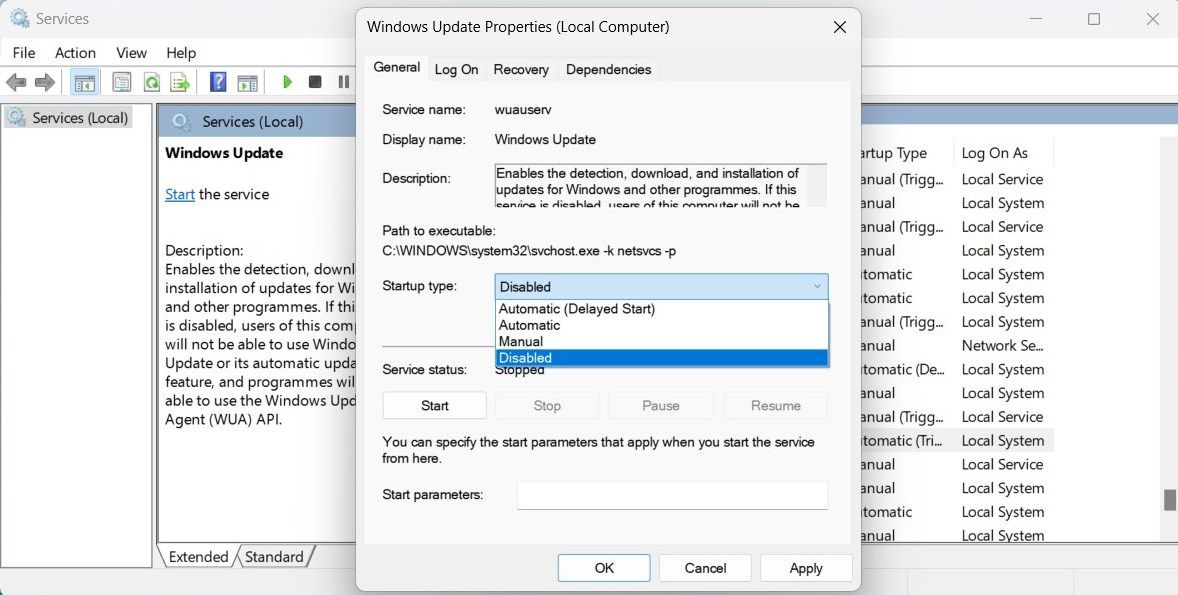
- Open the Services window.
- Scroll down and right-click on Windows Update.
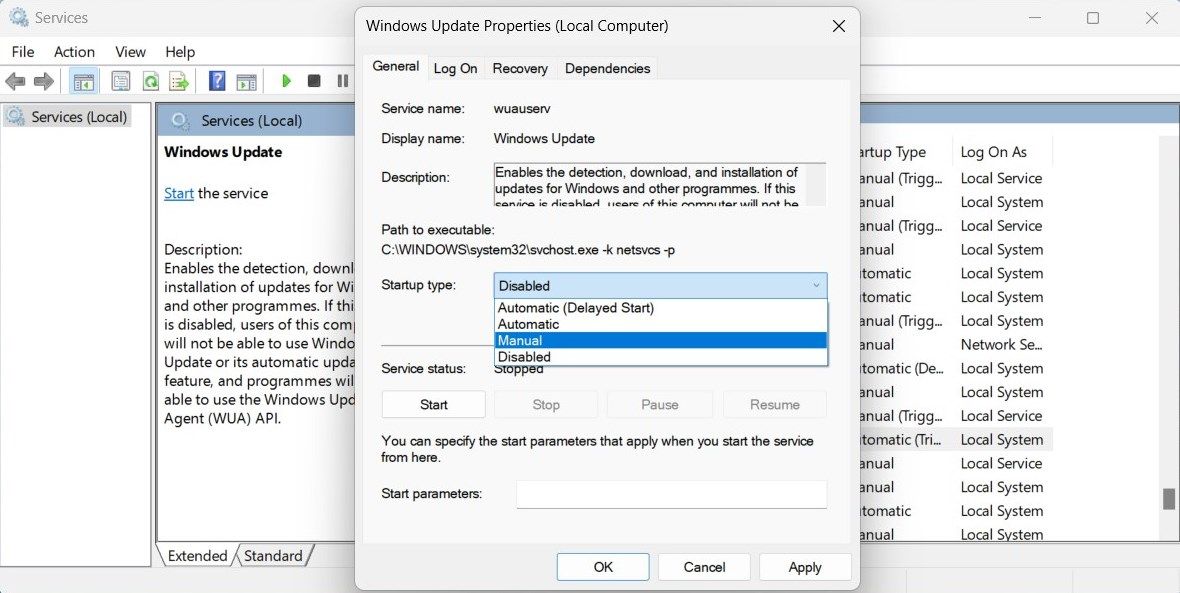
- From the context menu, select the Properties option. You can also double-click on the service to open its Properties window
-
On the General tab, set the Startup type to Manual and click OK.
- Next, locate Windows Modules Installer in the list of services and repeat the same steps.

Once done, restart your computer and see if CPU usage has reduced. If not, try the next solution.
6. Disable Windows Update
If high CPU usage persists, you can disable Windows Update completely. This is not a recommended long-term solution since updates are crucial for security and performance. But if needed, you can disable it for now and check CPU usage.
To disable Windows Update, do the following.
- Click on Start and type Services in the search box.
- Select Services from the results list. This will open the Services window.
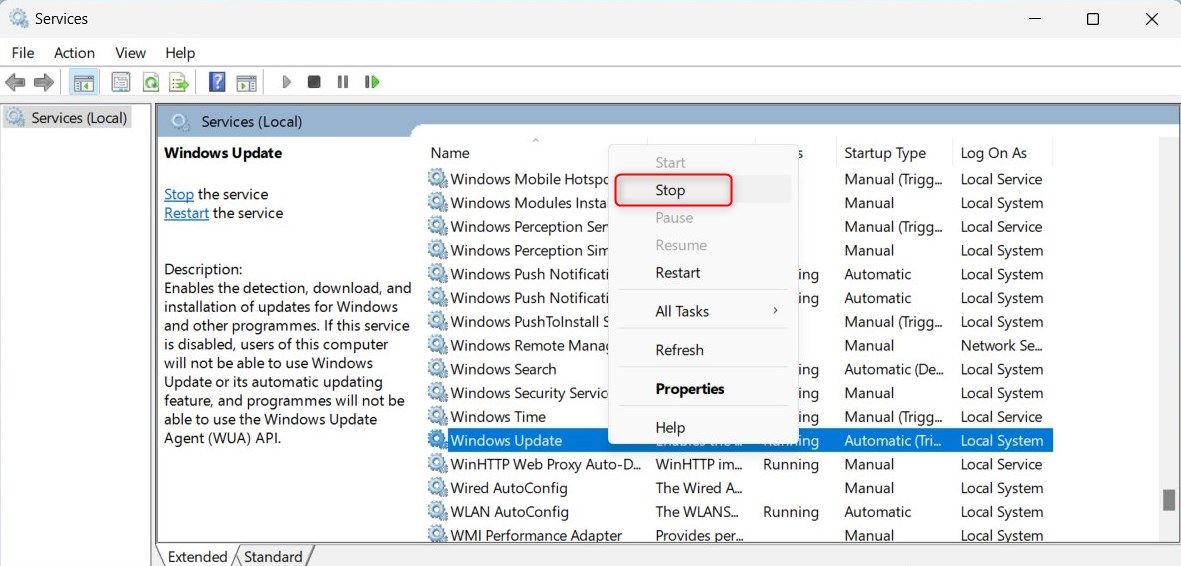
- Look for Windows Update in the list of services.
-
Right-click on it and select Stop from the context menu.
- Upon stopping the Windows Update service, double-click on it to open its Properties window.
-
On the General tab, click Startup type and select Disabled from the dropdown.
- Click Apply > OK to save your changes.


After performing the above steps, close the Services window and restart your computer. Check if the "Windows Modules Installer Worker" process is still using CPU resources. Don't forget to enable Windows Update once you're done troubleshooting.
7. Clear the SoftwareDistribution Folder
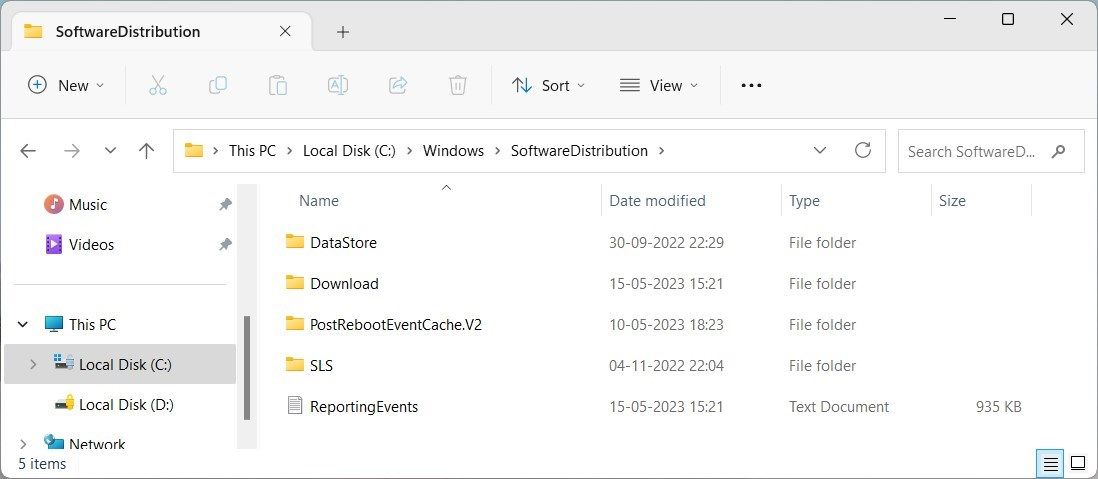
Another thing you can do is delete the Software Distribution folder. This folder holds temporary files used during Windows updates. However, if there are any corrupt or outdated files in this folder, it might cause high CPU usage.
In that case, delete the folder and let Windows recreate it. To clear the SoftwareDistribution folder, follow these steps:
- Run the Command Prompt as an administrator.
-
In the Command Prompt window, type the following commands and hit Enter after each one:
        net stop wuauserv
net stop bits
net stop cryptSvc
net stop msiserver -
Upon executing the above commands, open Windows File Explorer and browse to the following location:
C:\Windows\SoftwareDistribution\
-
In the SoftwareDistribution folder, use Ctrl + A to select all contents then delete them.
- If a pop-up menu asks for permission, click Continue.
-
After deleting the Software Distribution folder, you will need to restart the services you stopped previously. For this, launch the elevated command prompt again and run the following command:
        net start wuauserv
net start bits
net start cryptSvc
net start msiserver

Now close the Command Prompt window and restart your computer. Now check if the Windows Modules Installer Worker process still consumes CPU power.
8. Try Some Generic Windows Fixes
Aside from the solutions above, there are some generic fixes you can try to reduce high CPU usage. This includes disabling unnecessary startup programs and repairing corrupted system files. If you have downloaded any third-party programs, uninstall them and check if that helps.
In addition, check if you have installed any updates recently. Corrupted or incompatible updates can cause high CPU usage issues. If the problem persists after performing these steps, perform a system restore.
Optimizing High CPU Usage on Windows
If Windows Modules Installer Worker is using too much CPU power, you now have solutions to try. Although this process usually utilizes computer resources while installing updates and shouldn't create issues, if you observe that it is using excessive CPU power for an extended period, you can try deactivating services, deleting files from the SoftwareDistribution folder, and implementing common fixes.