The Microsoft Store is an awesome tool that helps you download your favorite games and other apps. However, there are times when you might want to disable this tool.
For example, you could disable the Microsoft Store if other people use it to download apps without your permission. Or, you could disable the tool if it keeps sending you random notifications (no matter how many times you disable those notifications.)
As such, let's explore the solutions for disabling and enabling the Microsoft Store.
1. Use the Local Group Policy Editor (LGPE)
You can apply this method only if you’re using Windows Pro, Education, and Enterprise versions. If you’re using the Home edition, you'd first need to apply some tricks to access the LGPE on Windows Home.
Otherwise, here are the steps for disabling or enabling the Microsoft Store using the LGPE:
- Press Win + R to open the Run command dialog box.
- Type gpedit.msc and press Enter to open the LGPE.
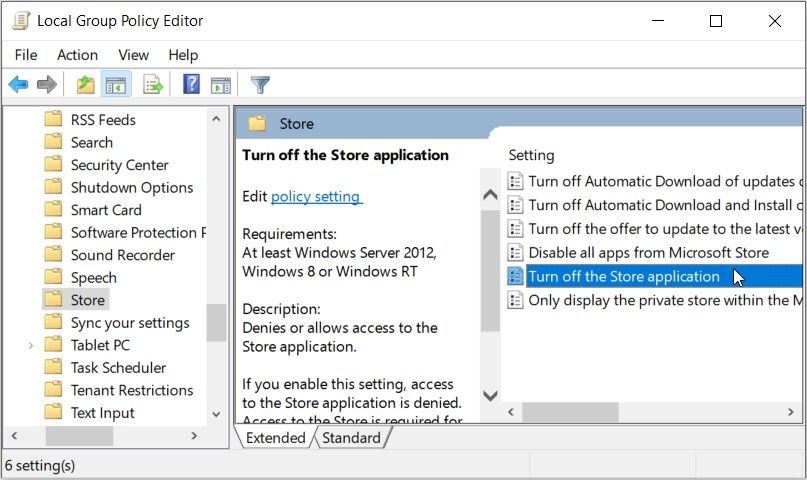
- Navigate to Computer Configuration > Administrative Templates > Windows Components > Store.
- Double-click the Turn off the Store application option on the right-hand side pane.
To disable the Microsoft Store, select Enabled. Otherwise, select Not Configured or Disabled to enable the Microsoft Store app. Finally, click Apply and then click OK to save these changes.
2. Use the Registry Editor
The Registry Editor is an incredible tool that can help you configure various system settings. In this case, we’ll check out how you can use it to disable or enable the Microsoft Store app.
Before you get started, back up the Registry just in case something goes wrong.
Now, here are the steps for enabling or disabling the Microsoft Store using the Registry Editor:
- Press Win + R to open the Run command dialog box.
- Type Regedit in the search box and press Enter to open the Registry Editor.
- Copy-paste the following command into the address bar and press Enter:
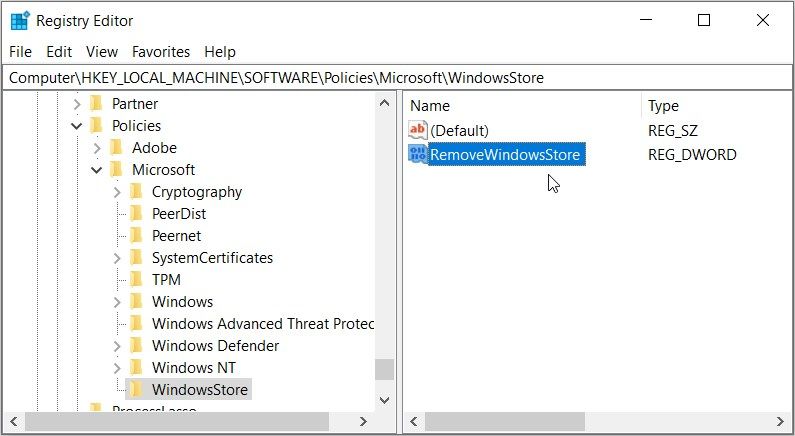
HKEY_LOCAL_MACHINE\SOFTWARE\Policies\Microsoft\
From there, follow these steps:
- Right-click on the Microsoft key and select New > Key.
- Name the new key as WindowsStore and then press Enter.
Next, right-click on the WindowsStore key and select New > DWORD (32-bit) Value. From there, name the value as “RemoveWindowsStore” and then press Enter.
To disable the Microsoft Store, double-click on the RemoveWindowsStore value and set its Value Data to 1. Otherwise, set the Value data to 0 (zero) to enable the Microsoft Store.
From there, press the OK button. Finally, close the Registry Editor and restart your device to save these changes.
3. Use the Software Restriction Policies in the Local Security Policy
The Software Restriction Policies option in the Local Security Policy can help. Here's how you can use this feature to enable or disable the Microsoft Store:
- Press Win + R to open the Run command dialog box.
- Type secpol.msc in the search box and press Enter to open the Local Security Policy.
- Click the Software Restriction Policies option on the left-hand side. Next, right-click on Additional Rules on the right and select New Path Rule.
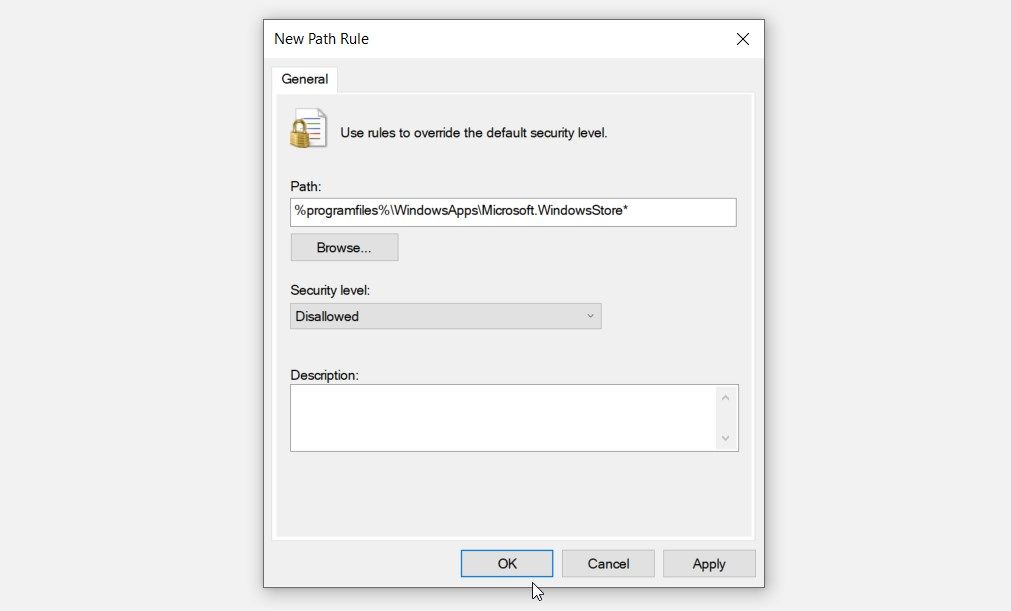
- Type %programfiles%\WindowsApps\Microsoft.WindowsStore* in the Path box.
To disable the Microsoft Store, click the Security level drop-down menu and select Disallowed. Alternatively, click the drop-down button and select Unrestricted to enable the Microsoft Store. Finally, press Apply and then press OK.
4. Use the AppLocker Settings in the Local Security Policy
The AppLocker tool also makes it easy for you to enable or disable the Microsoft Store. In fact, this is a brilliant feature to use in case you want to enable or disable any Windows app.
Here are the steps you need to follow:
- Type Local Security Policy in the Start menu search bar. Next, right-click on the Best match result and click Run as administrator.
- Navigate to Application Control Policies > AppLocker > Packaged app Rules.
- Right-click on a blank space on the right-hand side and select Create New Rule.
- Click the Next button in the Before You Begin screen.
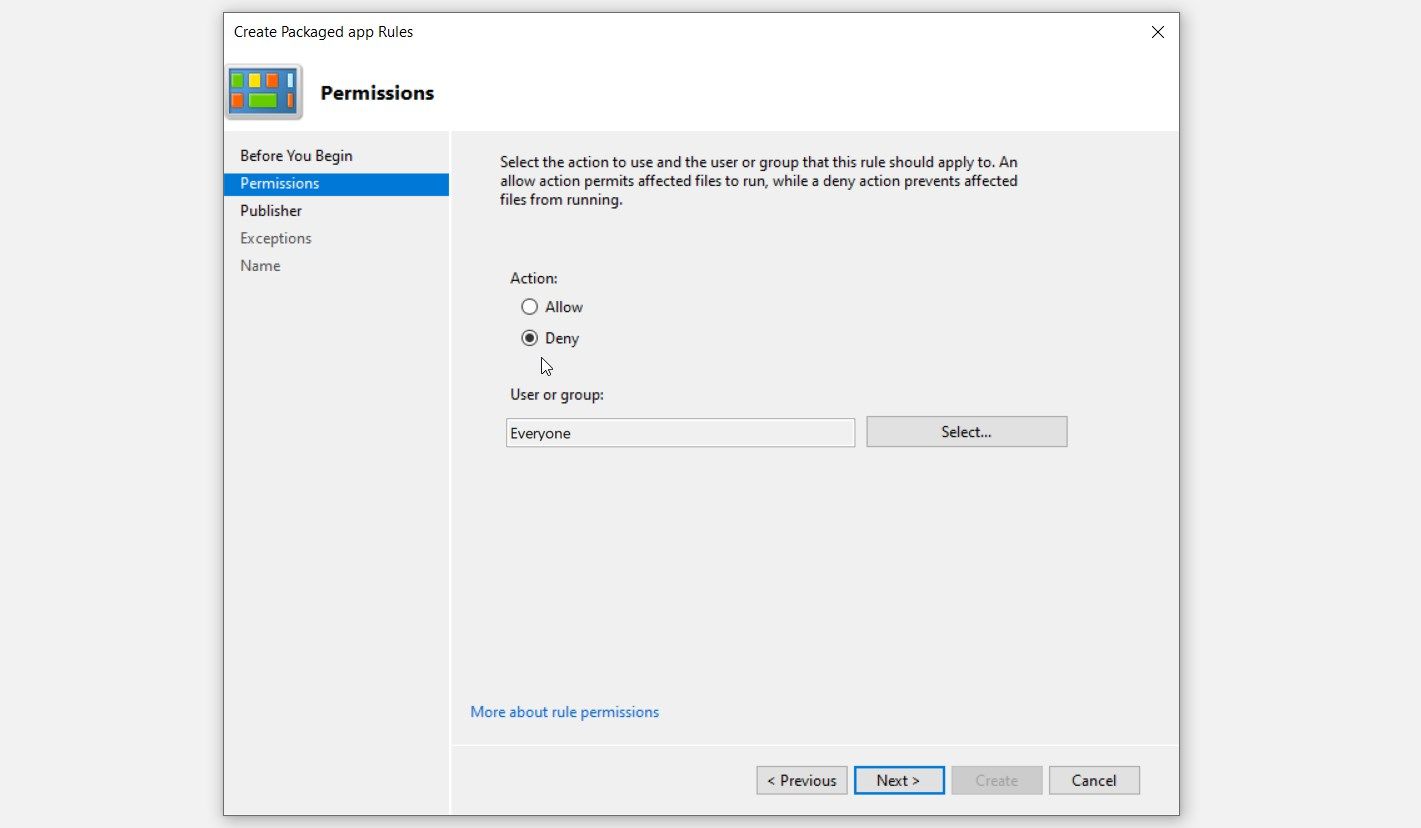
- Check the Deny button in the Permissions screen to disable the Microsoft Store. Alternatively, click the Allow button to enable the tool.
Click Next to continue. From there, follow these steps once you land on the Publisher screen:
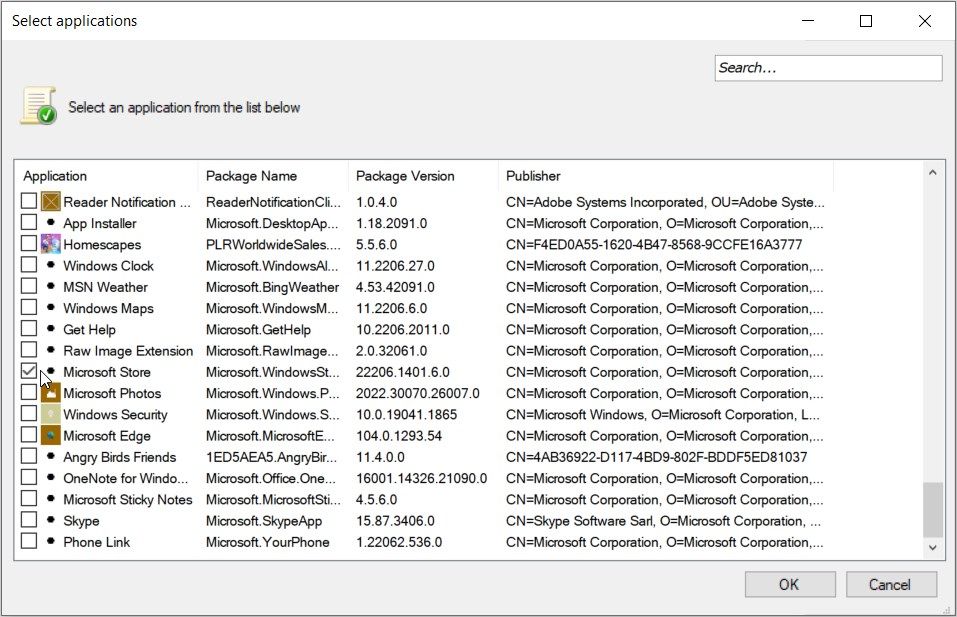
- Check the Use an installed package app as a reference option. From there, click the Select button to search for the Microsoft Store.
- On the next screen, check the Microsoft Store box and then click OK. This should take you back to the Publisher screen.
Click Next on the Publisher screen, and then click Next again when you get to the Exceptions screen.
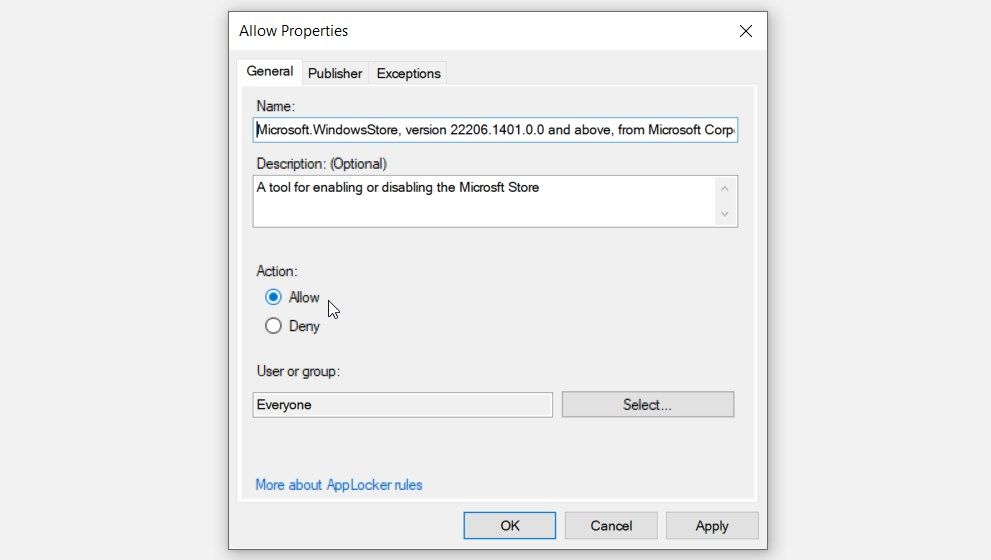
Finally, type a name in the Description: (Optional) box on the Name and Description window. For example, you can type something like “A tool for enabling or disabling the Microsoft Store.” Otherwise, you can skip this step.
Finally, click the Create button.
If you selected “Deny” in the Permissions screen, the Microsoft Store should be disabled. To re-enable the Microsoft Store at a later stage, follow these steps:
- Open the Local Security Policy and navigate to the Packaged app Rules option as per the previous steps.
- Double-click the Microsoft Store option on the right-hand side.
- Navigate to the General tab.
- Check the Allow button to re-enable the Microsoft Store. Finally, press Apply and then press OK to apply these changes.
5. Use the System Settings to Enable or Disable the App From Running in the Background
There are times when you don’t want to completely disable the Microsoft Store. Instead, you might only be interested in stopping the app from sending you tons of notifications.
In this instance, you can disable the tool from running in the background. That way, the app won’t send you notifications randomly.
Here are the steps for disabling the Microsoft Store from running in the background:
- Type Settings in the Start menu search bar and select the Best match. Alternatively, try the various ways to access the Windows settings.
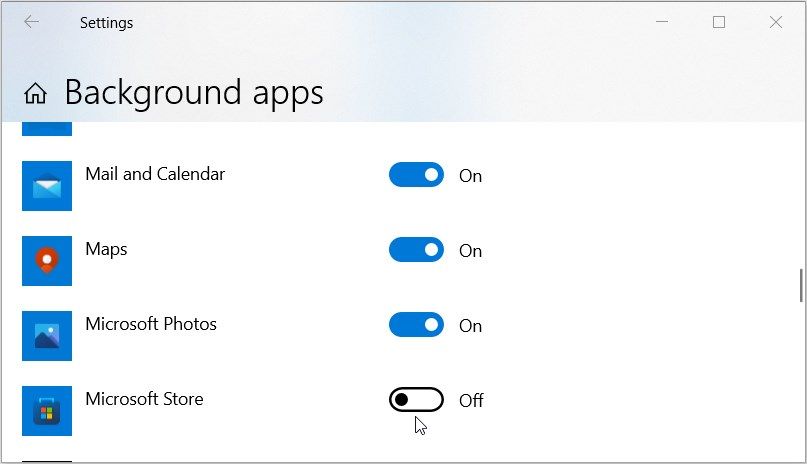
- Select Privacy from the options. Next, scroll down on the left-hand side and then select Background apps.
- Scroll down and locate the Microsoft Store on the right-hand side. To disable the tool from running in the background, turn off the button next to this option. Alternatively, turn on the button to allow the app to run in the background.
Enabling or Disabling the Microsoft Store Isn’t Complicated
Disabling the Microsoft Store prevents others from downloading unwanted apps on your device. Meanwhile, enabling the app can help you get rid of error messages like, "Microsoft Store is blocked."
Now, whether you want to disable or enable the Microsoft Store, try any of the tips we’ve covered. If you can’t run the app while it’s enabled, then you need to try a few other solutions.


