Windows Defender is Microsoft's antivirus built into your Windows PC to protect you from viruses, malware threats, and attacks. It maintains a record of its scans and actions in its Protection History folder.
Though Protection History gets deleted after some time, you might want to have more control to clear it by yourself. So let's see how you can clear Protection History in four ways.
What Is the Microsoft Defender Protection History? Why Should You Clear It?
One of the best antivirus for your PC, Windows Defender keeps getting better with some powerful upgrades. The detections made by Windows Defender appear on the Protection History page—which means you can view actions that Microsoft Defender Antivirus has taken on your behalf. These would be scans done to identify and block malware and other threats. And also the recommendations (highlighted in red or yellow) for actions you should take.
You also have access to all this information in a clear and easily understandable form, including Potentially Unwanted Apps that have been removed, or key services that have been turned off. The Protection History will also show the detections that appear while performing a Windows Defender Offline scan.

Though Windows Defender keeps the history of its detections for 30 days, you can clear it before that time if you need to—for example, when a lot of scan logs have accumulated. Clearing the Protection History would help you make space on your PC and keep Defender running smoothly. Remember, you must be signed in as an administrator to clear the protection history so do check if you have administrative rights.
Now let's see four easy ways to clear Protection History in Windows 10 and 11.
1. How to Clear the Microsoft Defender's Protection History Folder
You can manually clear the Protection History by deleting the contents of the Service folder in the Windows Defender folder using File Explorer. Here's how:
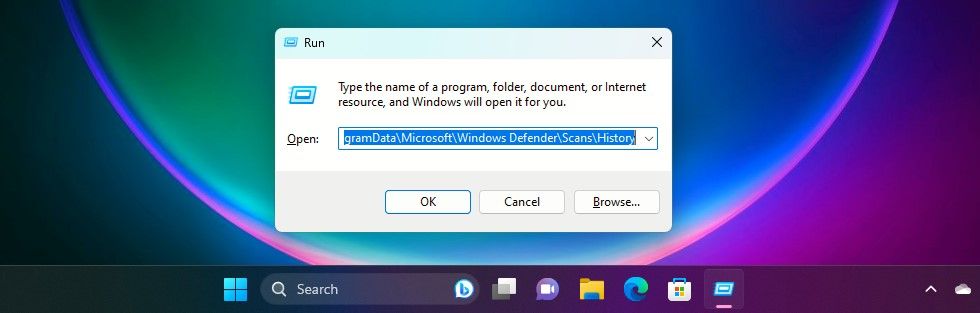
- Press Windows + R keys to bring up the Run box.
-
Copy and paste the path below and click on OK or hit enter: C:\ProgramData\Microsoft\Windows Defender\Scans\History
-
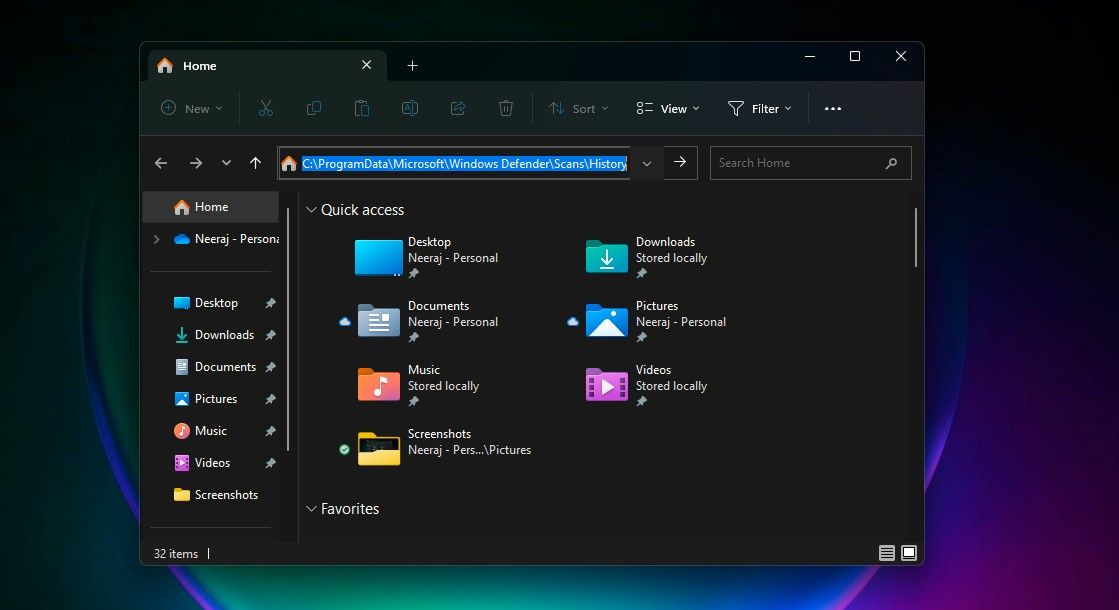
You can also paste the C:\ProgramData\Microsoft\Windows Defender\Scans\History path in the File Explorer navigation bar and then hit enter.
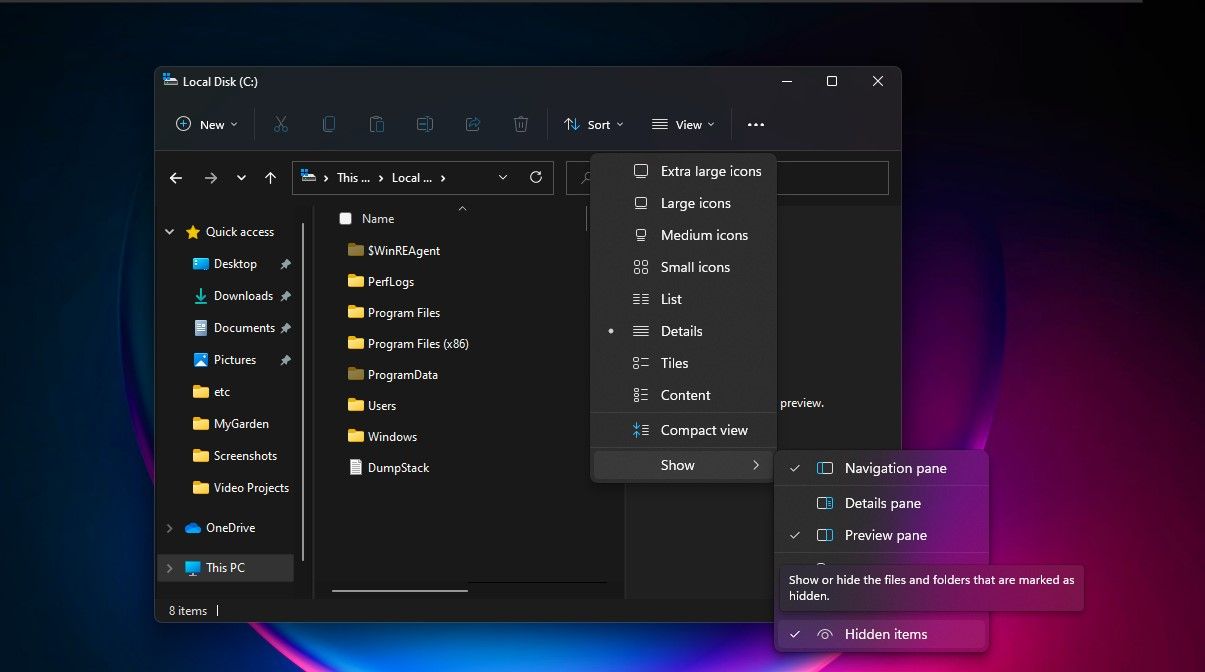
Alternatively, you can navigate to the Defender Protection History folder using the above path in File Explorer. If you don't see the ProgramData folder when you open the Local Drive, select View and then tick the box next to Hidden items.
-
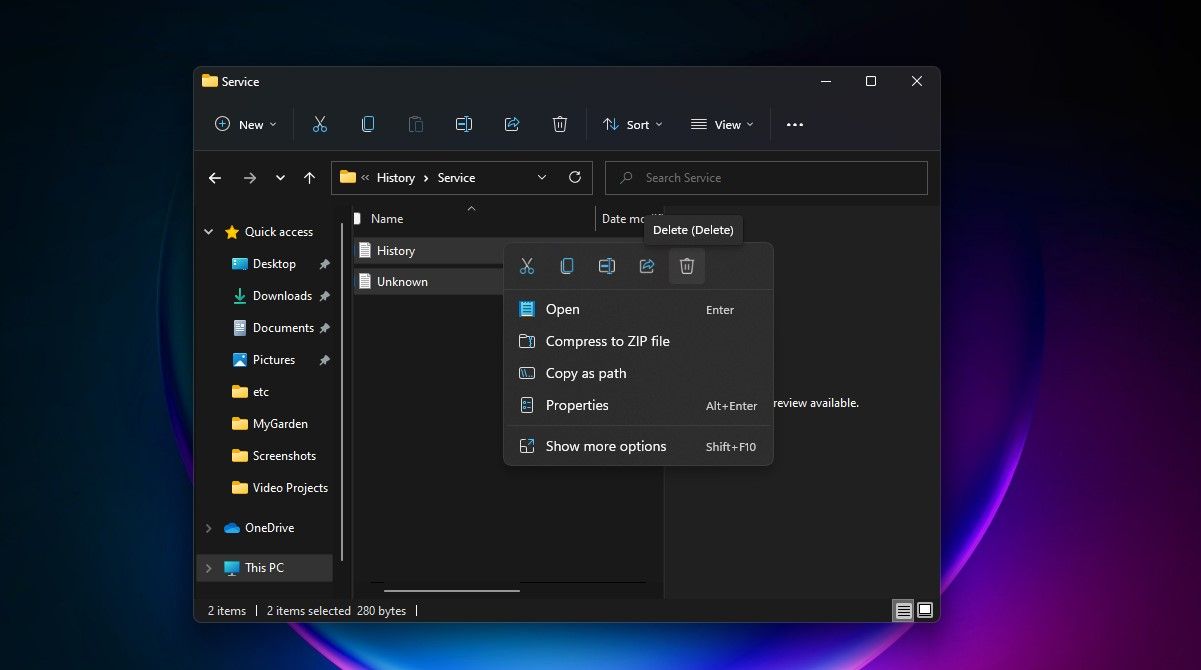
Open the Service folder and select all the files inside it. Right-click and select Delete to clear all the files. Then exit File Explorer.
- Next, search for Windows Security and open it.
-
Under Virus & threat protection click on Manage settings.
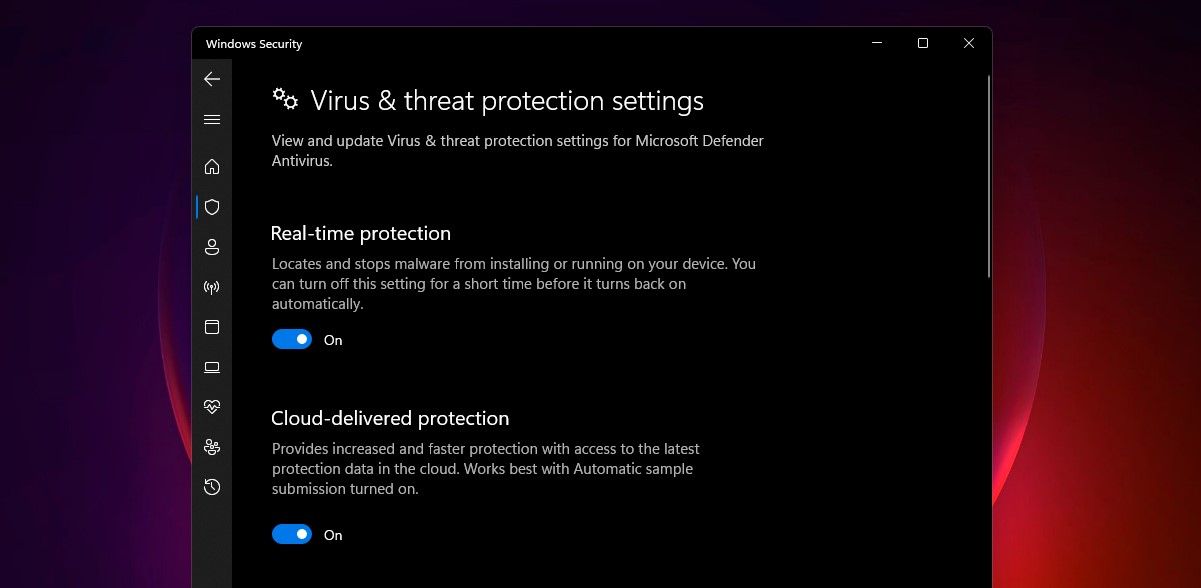
- Finally, toggle the button to Off and then to On again, for Real-Time protection and Cloud-delivered protection.


2. How to Clear the Microsoft Defender Protection History Using the Event Viewer
You can also manually clear the Defender Protection History via the Event Viewer—a useful app to analyze the event logs on your device. Here's how:
- First, do a Windows search for Event Viewer and click on the app result under Best match to open Event Viewer.
- Under the Event Viewer (Local) on the left pane, expand the Applications and Services Logs.
- Under Applications and Services Logs, click on the down arrow next to the Microsoft folder.
- Click on Windows in the left pane to open the list of Windows files on the middle pane.
-
Scroll down through the list of files on the middle pane to find Windows Defender.
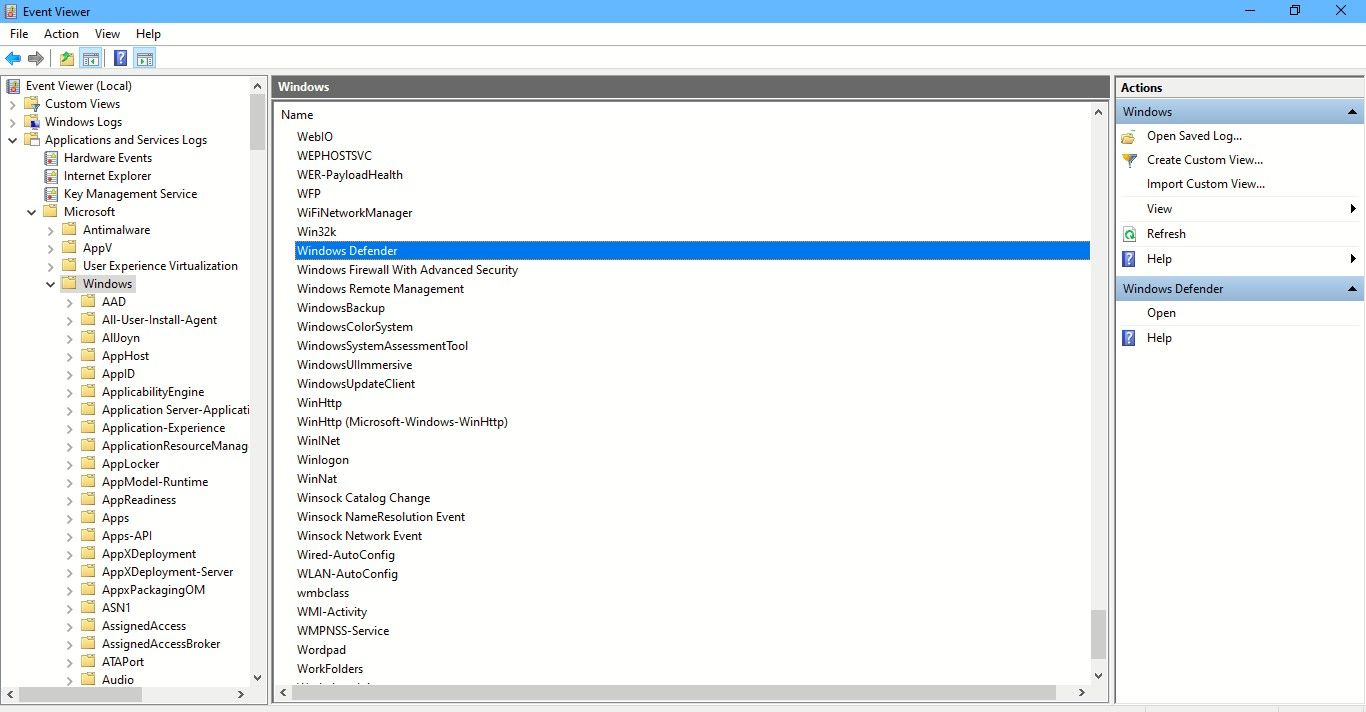
- Double-click on Windows Defender.
-
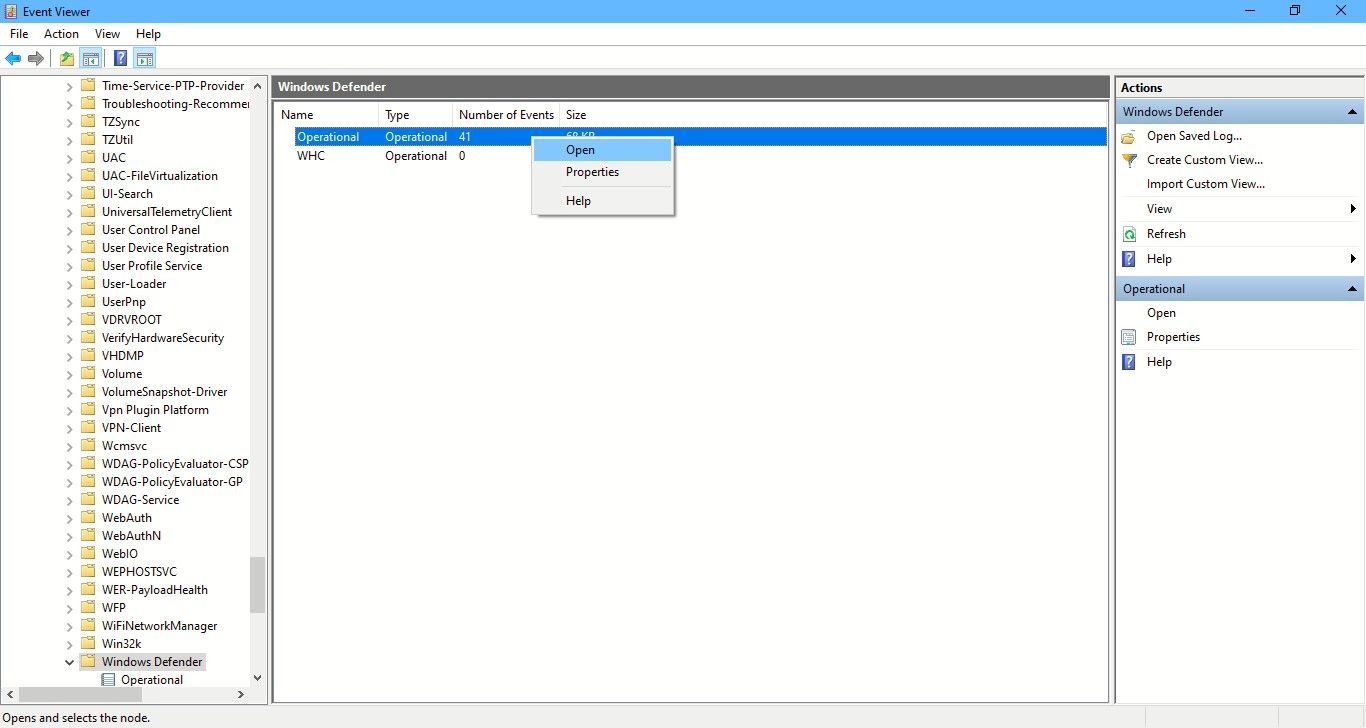
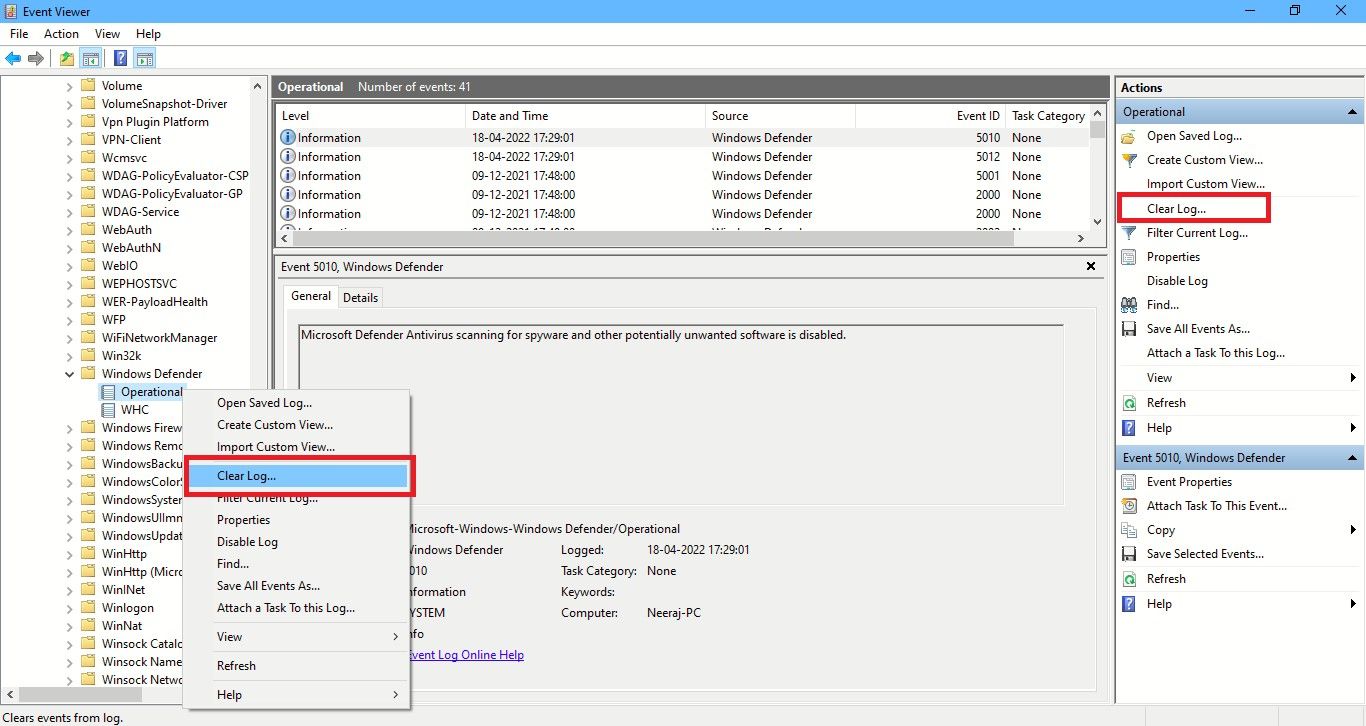
Then right-click on Operational and select Open to view all the past logs.
-
Now you can right-click on Operational in the left pane and choose Clear Log. Or click on Clear Log on the right pane under Actions.
-
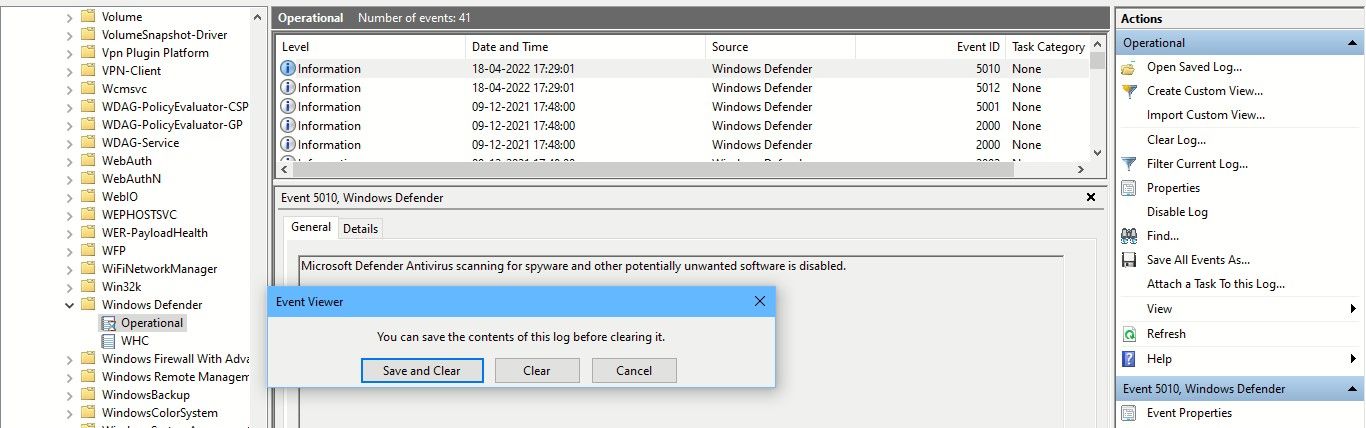
Select Clear to clear the protection history. If you wish to save the protection history logs for future reference before clearing them, select Save and Clear.


3. How to Clear the Microsoft Defender Protection History via PowerShell
What if you want the Protection History to clear automatically after a specific number of days? You can also use a PowerShell command to do that. Let's see how to do this:
- Type PowerShell in the search bar. Right-click on Windows PowerShell under Best match and select Run as administrator. Or choose Run as administrator on the right search pane.
- Click Yes on the UAC prompt that appears.
- The Administrator: PowerShell window will open up. Type or copy and paste the following command and then hit enter:
Set-MpPreference -ScanPurgeItemsAfterDelay 7

The number 7 at the end of the command is the number of days after which the protection history logs will be cleared. Just change that number to specify when you want the protection history to be cleared. And it will be cleared automatically.
4. How to Clear the Microsoft Defender Protection History Using the Group Policy Editor
If you have a PC with Windows 10 Pro, Windows 11 Pro, or a higher version, you can also use the Group Policy Editor to clear the Defender Protection History automatically. Though there are solutions to access the Group Policy Editor on Windows Home too. But let's see how to clear Protection History via Group Policy Editor in Windows Pro and higher versions:
- Press Win + R keys to open the Run box. Type gpedit.msc to open the Local Group Policy Editor. Or just type gpedit in the search bar and click on Edit Group Policy under Best match to open it.
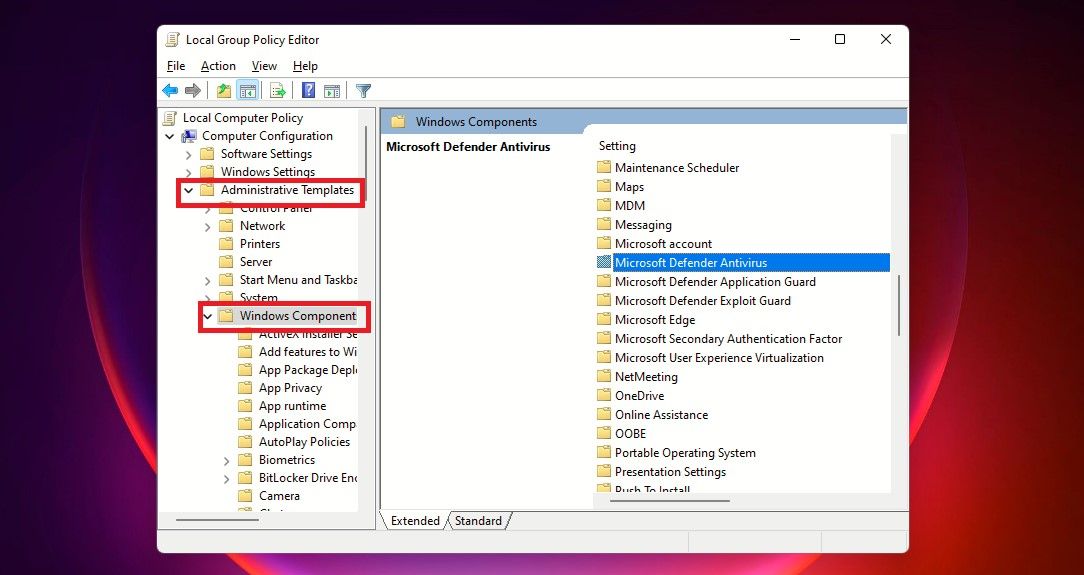
- In the Local Group Policy Editor, on the left pane under Computer Configuration, expand Administrative Templates by clicking on the down arrow next to it.
- Inside the Administrative Templates folder, click on Windows Components and the list of its components would come up on the middle pane of the Group Policy Editor.
-
Then scroll down to find Windows Defender Antivirus and double-click on it.
- In the list of Windows Defender items, double-click on the Scan folder.
-
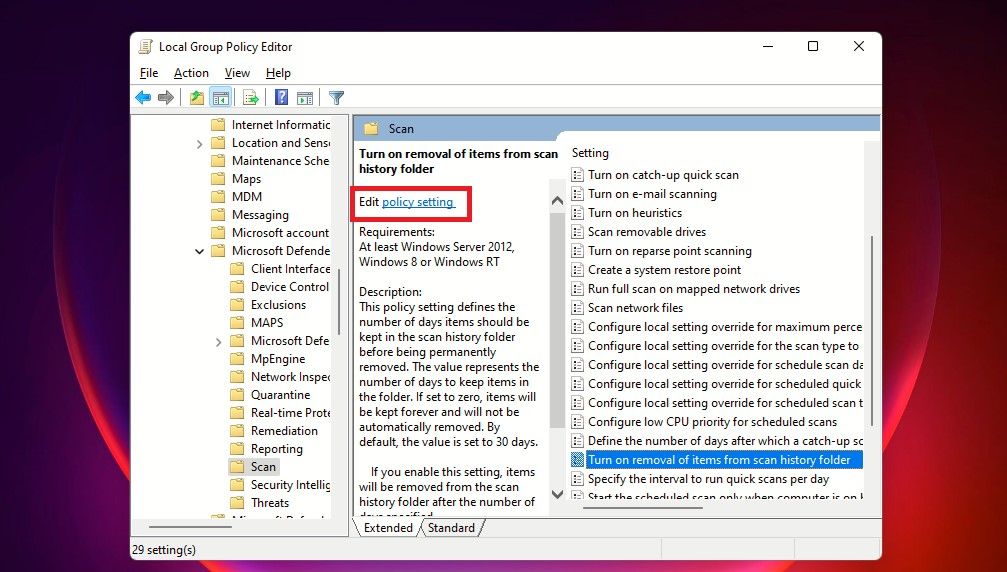
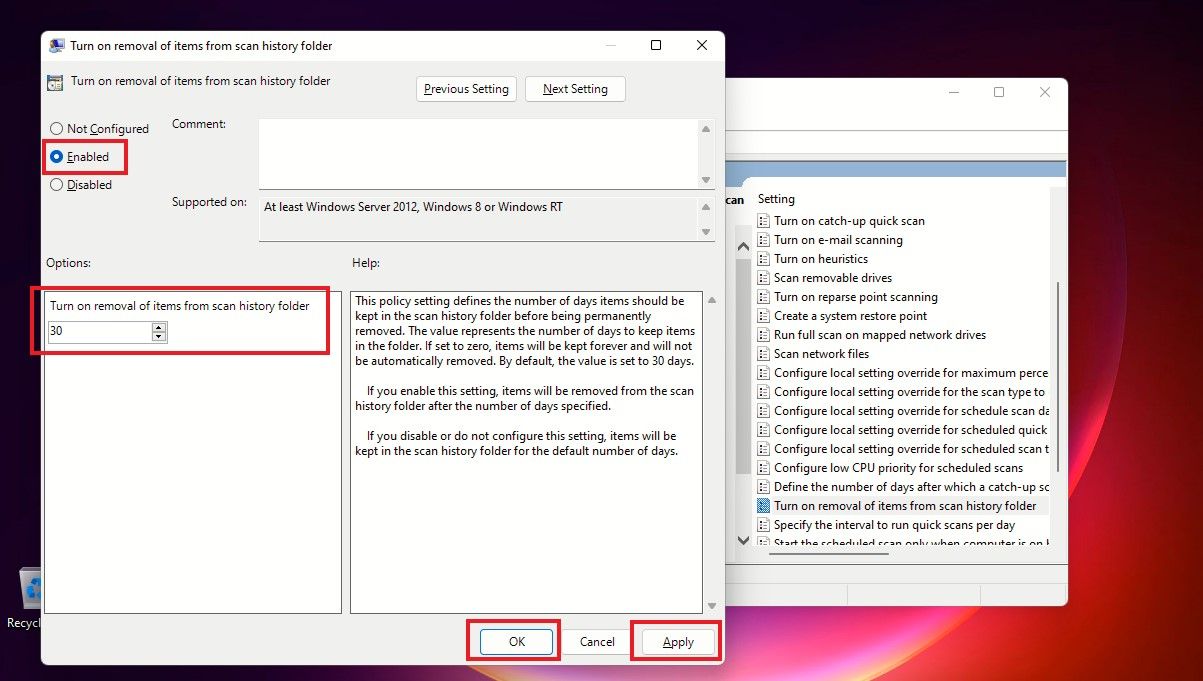
In the right pane, double-click on Turn on removal of items from scan history folder. Or click Edit policy setting in the middle pane. This policy setting defines the number of days items should be kept in the scan history folder before being permanently removed.
-
Next, select Edit policy setting to open the policy window. It would be showing Not Configured by default. To set the number of days, toggle on the button next to Enabled. The default number of days, which is 30, would then be set. If you set the number of days to zero, items will be kept forever and will not be automatically removed. So just change the days to whenever you want the items to be removed. Finally, click Apply and then OK.


Now, you won't need to manually clear Protection History every time—the items in the scan history folder would be deleted automatically after the days you've specified.
Clear the Microsoft Defender Protection History Whenever You Want
If you ever want to clear Defender Protection History, you know how easy it is to do it through any of the four ways discussed above. If you would want to refer to the Protection History logs later, you can use the Save and Clear option while clearing Protection History using Event Viewer.