Windows makes connecting to Wi-Fi networks easy most of the time, even if you regularly use your computer on multiple networks. This is largely thanks to our Wireless Network Profiles, something many of us barely think about until something goes wrong.
So, what is a wireless network profile, and how do they help?
What is a Wireless Network Profile?
A Wireless Network Profile contains details your computer needs to connect to the Internet. These include the network name (SSID), the password, and associated security information. Having a saved network profile on your computer means you don't need to enter the details each time you want to get online.
For each new connection to a wireless network, a new profile gets created. The profile could be for your home network, for the office, and others for the coffee shop, your partner's house, or a hotel Wi-Fi network you used.
Learn more about connecting your Windows computer to wireless networks quickly and easily.
How to View All of Your Wireless Network Profiles
Checking the Wireless Network Profiles on your computer is an easy task. You can view all network profiles in a single list, but only profiles associated with the current user are shown.
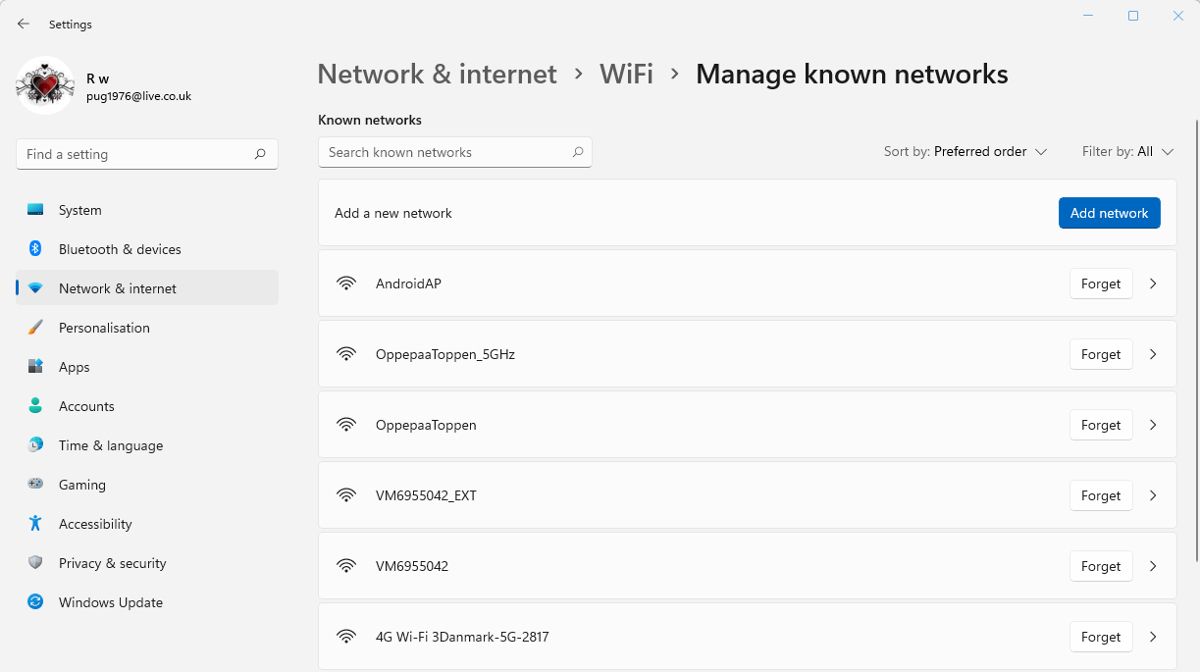
The easiest way to view your network profiles is through the Settings app. On both Windows 10 or 11, go to Settings > Network & Internet > Wi-Fi. Click Manage known networks to see a list of all available network profiles.
You can also view a list of wireless network profiles in Command Prompt. Type cmd into Windows Search and open Command Prompt. Type netsh wlan show profiles and press Return. A list is generated, showing all network profiles for the current user.
If you're interested in learning more about netsh, be sure to check it out alongside the other commands to manage your wireless networks.
How to Find the Password for a Network Profile
Wireless networks almost always require a password or network key to authenticate the connection. If you need to find the password for a network profile, there are a couple of ways you can do so.
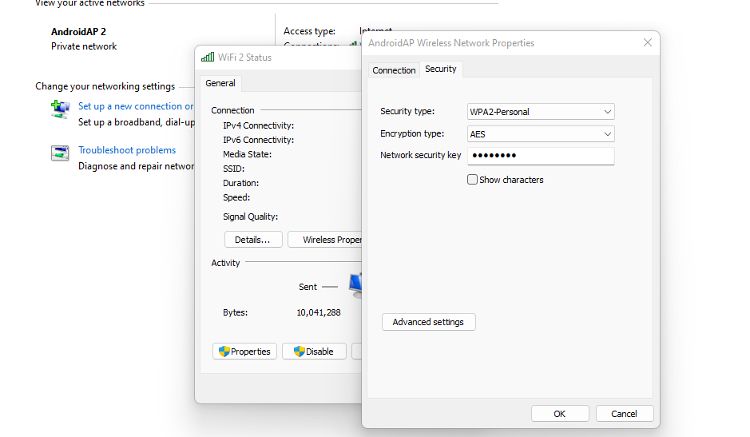
To find the password of the network you are currently using. In either Windows 10 or 11, open the Control Panel. Go to Network & Internet > Network & Sharing Centre. Click on the network name at the top, and then click Wireless Properties > Security. Check the Show characters box to reveal the password.
If you want to know the password for a network you aren't connected to, you can use the netsh command in Command Prompt.
- Open Command Prompt and type netsh wlan show profiles to see a list of SSIDs. Make a note of the one you need.
- Now type netsh wlan show profile name="MyNetwork" key=clear. Replace MyNetwork with the SSID you noted down previously.
- Scroll down the list of details generated and look for the password next to Key content.
How to Manually Add a Wireless Network Profile
A Wireless Network Profile is created automatically when you first connect to a new Wi-Fi network. But you can also create a profile manually should you need to.
- In either Windows 10 or 11, open Settings > Network & Internet > Wi-Fi.
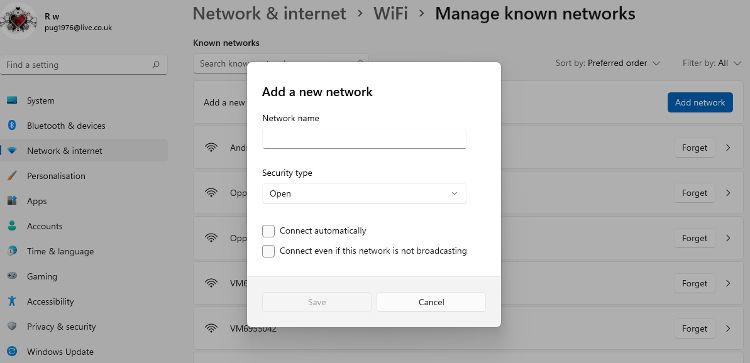
- Select the Manage known networks option and then click Add a new network.
- Enter the SSID of the network and then choose the security type needed for it. This will usually be WPA2-Personal, but there are several options.
- Enter the password for connecting to the network, and check the boxes for connection preferences you require.
- Click Save and the new network profile will appear in the list of known networks.
It is also possible to back up and restore a wireless network profile for use on the same or a different computer.
How to Rename Your Wireless Network Profile
The Wireless Network Profiles created on your computer will take their names from the SSID of the network. These may be default names based on the router you connect to, or it could be something created by whoever set up the network. If you want to change the name of the network profile, here's how:
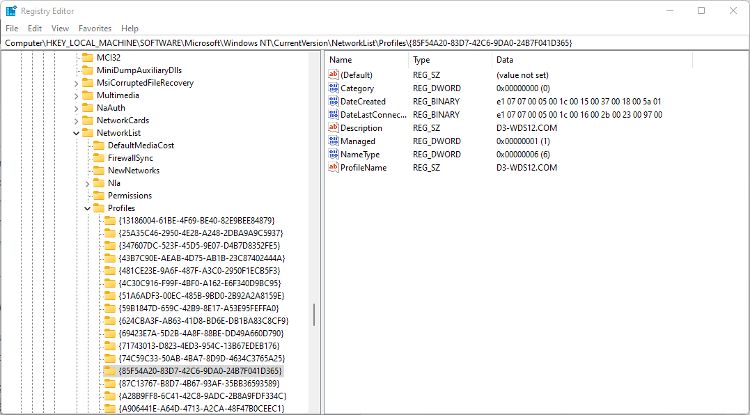
- Open the Run dialog and type regedit to open the Registry Editor.
- Navigate to HKEY_LOCAL_MACHINE\SOFTWARE\Microsoft\Windows NT\CurrentVersion\NetworkList\Profiles.
- Select the long numbers under Profiles to display the profile information in the right-hand pane.
- Find the profile you want to rename by looking at the ProfileName entry.
- Double-click on ProfileName for the profile you want to edit, and then enter the new name you want to use. You can't use special characters such as ? / \ * : < or > in the name.
If you don't see the change applied after clicking Ok and closing Registry Editor, try restarting your computer.
How to Delete a Wireless Network Profile
You can delete a wireless network profile from your Windows computer if you no longer need it. Deleting a wireless network profile, also known as forgetting the profile, is also useful if you are having connection problems. You can then begin a new connection to the network to recreate the network profile.
- Open Settings > Network & Internet > Wi-Fi, and then click on Manage known networks.
- Next to each network profile is a button to Forget. If you are using Windows 10, you may need to click on the network name first.
- You won't see a confirmation prompt when you click Forget, so make sure you are deleting the network profile you no longer want to use.
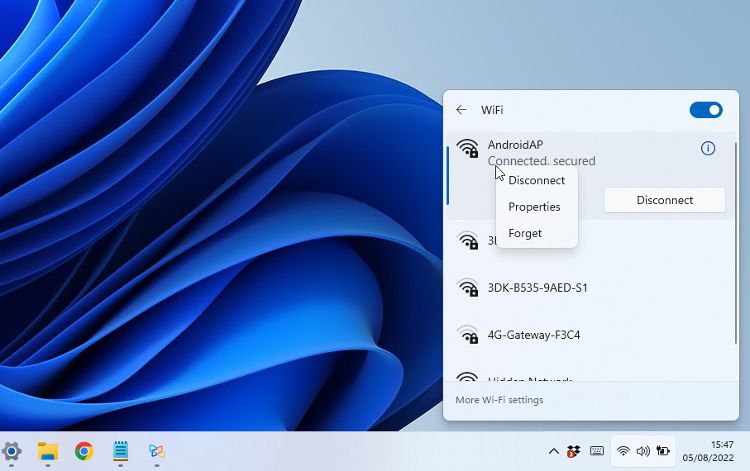
You can also delete a network profile in the Quick Settings panel in Windows 10 or 11.
- Open the Quick Settings panel by clicking the Action Centre button in Windows 10 or the Wi-Fi symbol in Windows 11.
- Select Wi-Fi in Quick Settings and look for the name of the network profile you want to delete.
- Right-click on the profile name and select Forget from the context menu.
Managing Your Wireless Network Profiles on Windows
You may never need to add, delete, or edit a network profile. In an ideal world, almost all the technical side of connecting to the Internet is done automatically. Understanding how your computer connects to Wi-Fi networks means you are better able to find and fix problems if they occur.


