While installing applications on Windows PC, you might come across the "Windows Installer Service could not be accessed" error. The error can appear due to a number of reasons, such as insufficient permissions, generic bugs, and corrupt Windows Installer Service.
Thankfully, you can easily troubleshoot this error message. Follow the methods below to eliminate the problem and continue installing your favorite programs.
What Causes the "Windows Installer Service Could Not Be Accessed" Error?
As aforementioned, the error message mainly appears due to insufficient permissions and generic bugs. But there are several more reasons that can be responsible for the issue. Let's check them out first before getting into the solutions.
- You will face the error on installing the applications if the Windows Installer Service is not working.
- If the Installer Service has been unregistered for some reason, you will likely encounter the error message.
- Windows Installer Service could not be accessed error will appear if msiexec has been replaced with a duplicate file.
Now, let's dive into all the working fixes to eliminate the error message.
1. Restart Your System
Before getting into technical solutions, try the most effective troubleshooting method -- restarting the system. As it turns out, the application installation can fail due to a temporary glitch within the system.
In the majority of cases, restarting the system can do the trick in such cases. So, consider restarting your PC and then installing the application again. If this doesn't fix the problem, try the next solution.
2. Run the Application With Administrative Rights
Windows will fail to install the application due to the lack of required permissions. In this case, you can try running the executable as an administrator to provide all the access and check if it fixes the problem.
You will have to connect with the administrator for assistance if you are using an institutional Windows PC. But, to run the application as administrator on a personal computer, follow the below steps.
-
Right-click on the executable, and choose Run as administrator from the context menu.
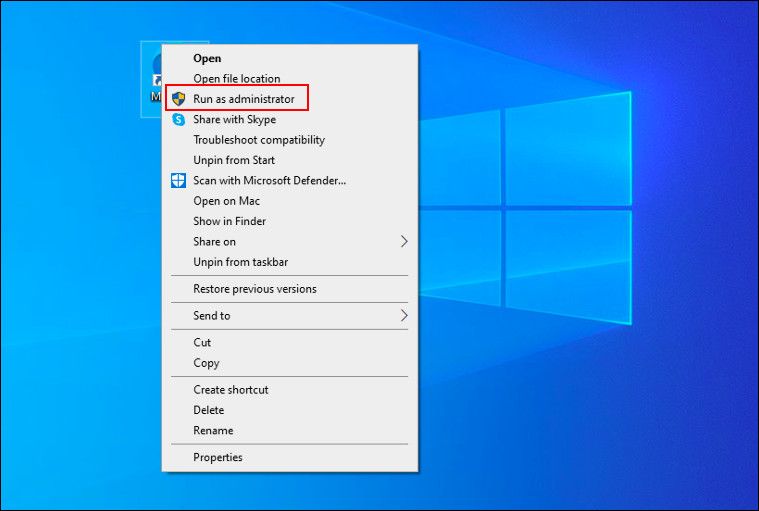
- If UAC pops up, click on Yes.

3 . Run the Program Install and Uninstall Troubleshooter
The Program Install and Uninstall troubleshooter will help you resolve all kinds of installation and uninstallation-related issues. To use the troubleshooter, follow the below steps.
-
Open a browser and navigate to the Troubleshooter download page.
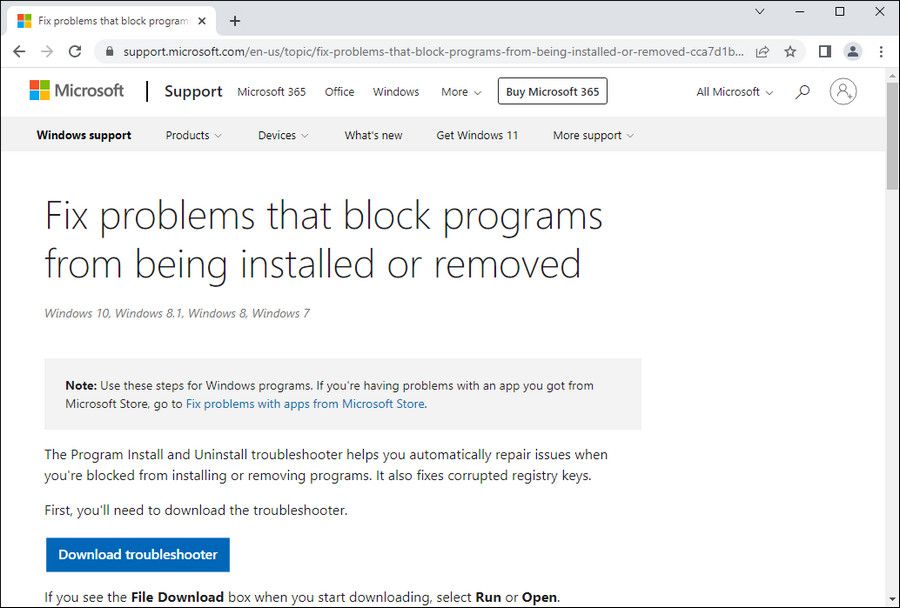
- Click on the Download button to begin the downloading process.
- Click on the downloaded file to open and start the installation.
- In the window that pops up, click on Next.
-
Choose whether you are having problems in installing or uninstalling the program.
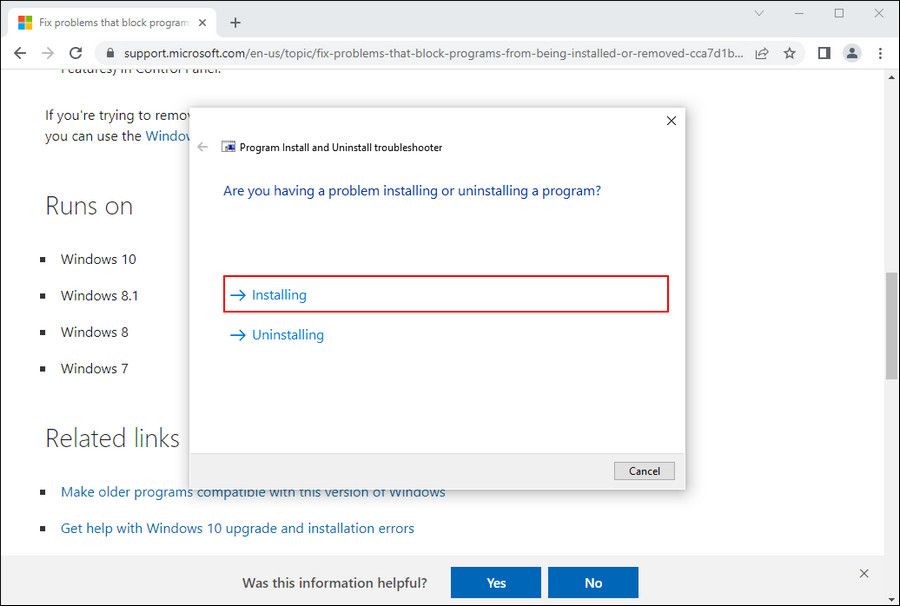
- Select the program that is causing the problem.
-
If it is not on the list, choose the Not Listed option.
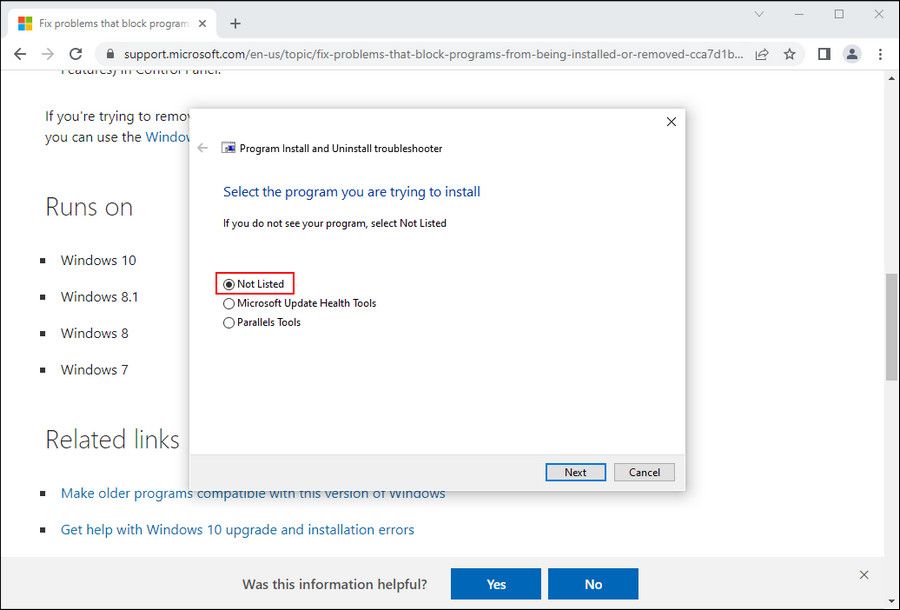
- Click on Next.


The troubleshooter will now scan the system and look for any available issues. If any problem is found, it will suggest the working fixes. You can even run the DISM, and SFC scans to detect and solve issues within the system.
4. Enable the Windows Installer Service
Windows Installer is a software component that helps install, maintain, and remove applications. But if the service is disabled, you will encounter the "Windows Installer Service could not be accessed" error.
So, consider manually enabling this service to solve the problem. You can do it by following the below steps.
- Open the Run dialogue box using Win + R hotkeys.
- Type service.msc and press Enter.
- Locate and double-click on Windows Installer.
-
In the General tab, click on Start under Service status.
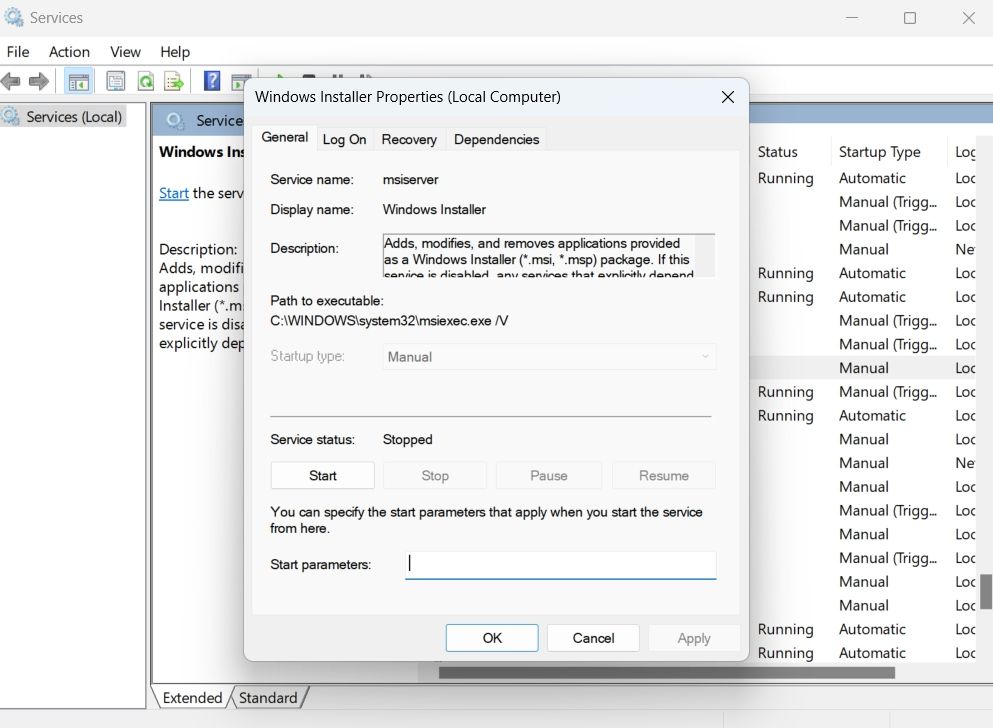
- Click on OK.

That's it. Now, try to install the application again and check if the problem is fixed or not.
5. Re-Register the Windows Installer Service
If the error message is being caused due to any misconfigured settings, you can try re-registering to the Windows Installer Service. Here's how to do it.
- Open the Command Prompt using one of the many ways to open the command prompt.
- Type and execute the following commands one by one:
- %windir%\system32\msiexec.exe /unregister
- %windir%\system32\msiexec.exe /regserver
- %windir%\syswow64\msiexec.exe /unregister
- %windir%\syswow64\msiexec.exe /regserver

Once you're done with re-registering the service, reboot the system and try to install the application again.
6. Rename the msiexec File
The msiexec is the executable program of the Windows Installer that helps to read the installation packages and install them on a target directory. But if the system contains a duplicate msiexec file that has no extension and doesn't contain any data, you will face difficulties in installing the applications.
In this situation, consider renaming the msiexec file followed by restarting the Windows Installer service. Here's how.
-
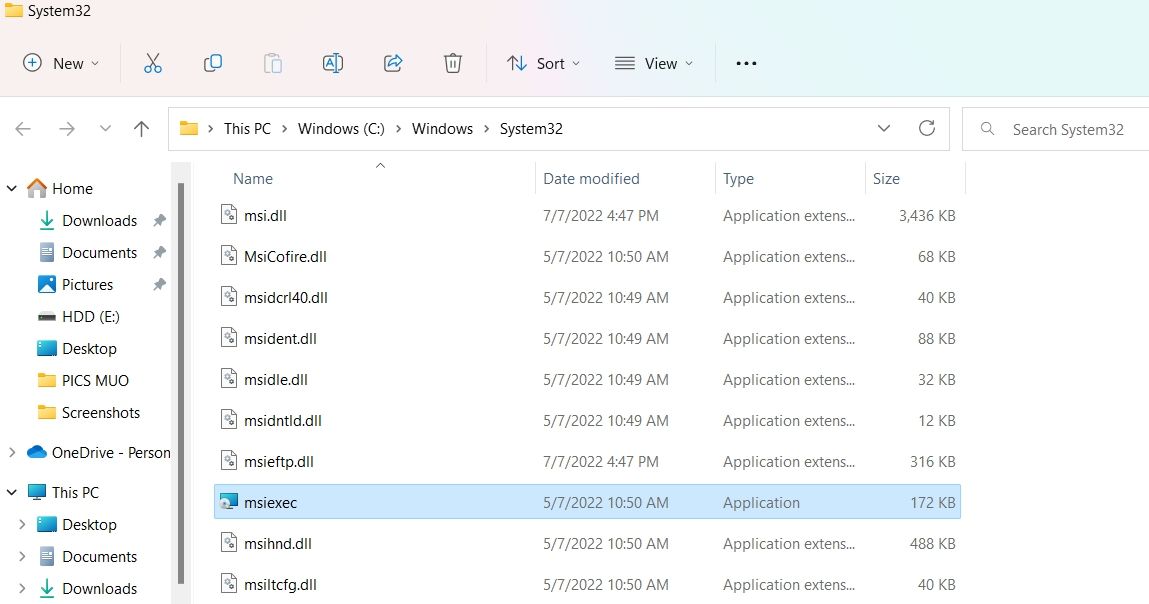
Open the Run dialogue box, type the following location, and press Enter.
C:\Windows\System32 -
Look for the msiexec file and rename it to msiexec.old.
- Now, open the Services window, locate and right-click on Windows Installer.
- Choose Restart from the context menu.

Wait until the service is restarted. After that, install the application and check for the issue.
7. Delete the Old Version of the Application
The "Windows Installer Service could not be accessed" error will appear if the previous version of the application you are trying to install is already available on the system. In this situation, consider first uninstalling the old version of the program. Here's how.
- Open the Run dialogue box, type appwiz.cpl, and press Enter.
- Right-click on the application whose latest version you are trying to install, and choose Uninstall from the context menu.
- Click Yes to the UAC that pops up.
After uninstalling the old version, try to install the latest version of the application and check if the problem continues.
8. Download the Latest OS Update
An outdated operating system can also be why you are facing the error message on installing the applications. As a solution, consider downloading the latest OS update. Here's how to do it.
- Open the Settings menu.
- Choose Windows Update from the left pane.
- Click on Check for updates.
Windows will now look for and download any available update.
Install Applications Without Any Error
We hope the above solutions helped eliminate the "Windows Installer Service could not be accessed" error. But, if the problem continues, you can try resetting the PC.