Quick Links
Key Takeaways
- Local Users and Groups Management is not available in Windows 11/10 Home editions. You need a third-party program to access it.
- You can use Lusrmgr.exe, a portable third-party alternative, to enable the Microsoft Management Console snap-in in Windows 11 Home. The Lusrmgr application provides additional features like account search and defining access times.
- The Command Prompt can also be used to manage users and groups without a third-party utility.
Local Users and Groups Management is a shell application to manage local and remote computers and access system administrator tools. However, Local Users and Groups Management is unavailable in the Windows 11/10 Home editions, so you must rely on a third-party program to use it there.
Enable the Local Users and Groups Management Console in Windows 11/10 Home
Like the Local Group Policy Editor, Local Users and Groups Management (lusrmgr.msc) is an advanced feature available only on Windows Pro, Education, and Enterprise.
However, while you can use workarounds to enable Group Policy Editor on Windows Home, it is not possible to enable the Local Users and Groups Management snap-in console.
Instead, you can use Lusrmgr.exe, a third-party alternative, to enable the Microsoft Management Console snap-in in Windows 11 Home. Lusrmgr.exe is similar to the built-in Local Users and Groups Management console. It is a portable application, and you can download it from GitHub for free.
Here's how to download and use the Local User and Group Management tool on Windows 11 Home. Follow the same steps on a Windows 10 PC:
- Open the lusrmgr GitHub page.
- On the default Code tab, scroll down to the Download link to get the latest version of the file.
- Once downloaded, double-click the lusrmgr.exe file to run the program.

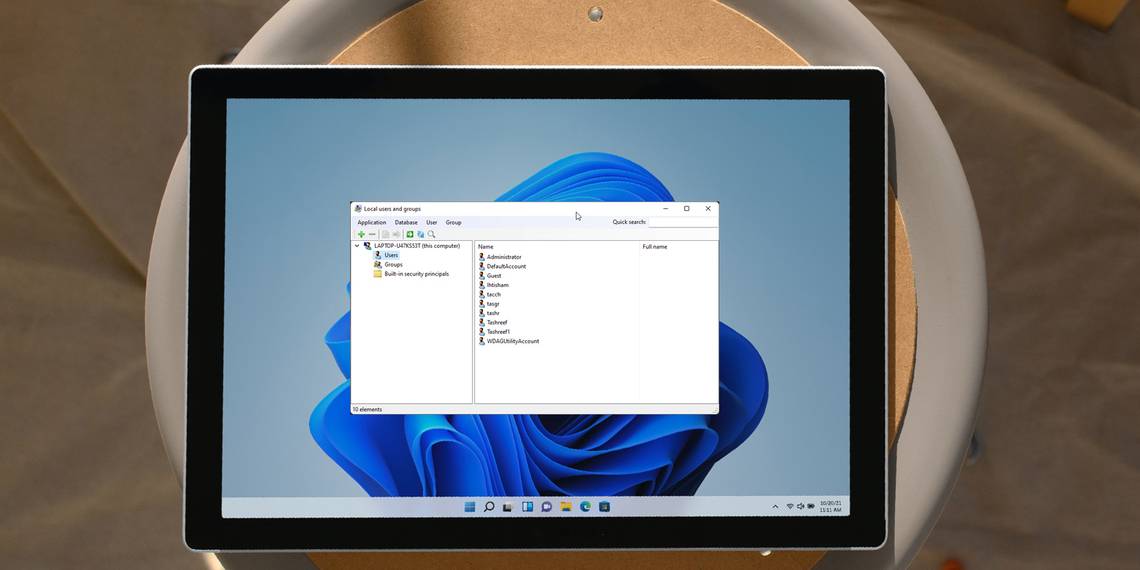
You will notice the lusrmgr application looks similar to opening the native Local Users and Groups Management console. However, the difference lies in the usability of the tool. Below are side-by-side images for the built-in lusrmgr console (left) and the third-party application (right) for reference.

To create a new user account with this Local User and Group Management tool:
- Right-click on User and select Create. Then fill in the details for the new user account.
-
Click the Advanced button to configure the advanced account option, local path, and profile path.
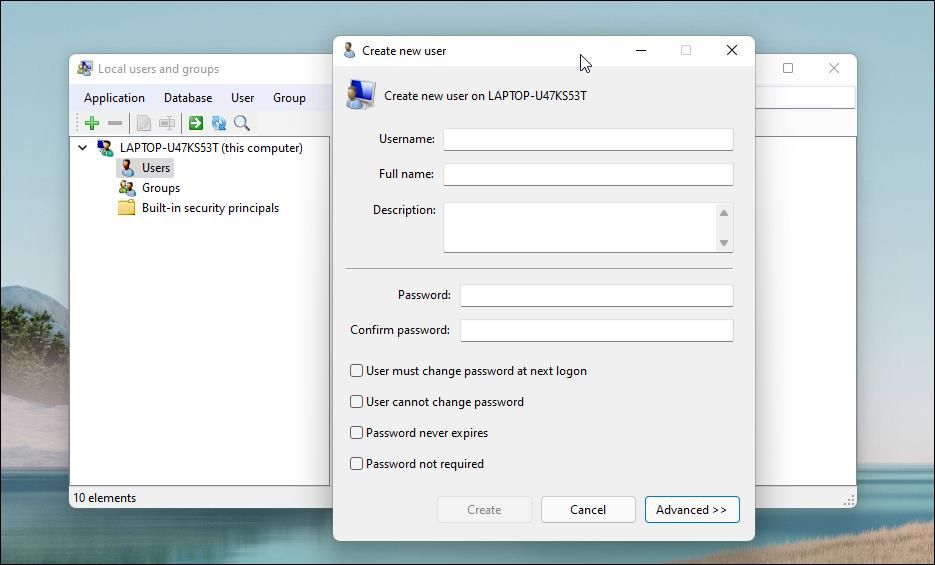
- Click on Create to add the new user account.

Similarly, you can edit, remove, rename, or add a password to the existing user account. You can also enable the secret built-in administrator account using the tool.
Additional Features of the Lusrmgr App

Apart from the usual account management features, lusrmgr.exe provides additional functions not available in the native utility. For example, you can use the search function to find a specific account. This is useful for system administrators who manage multiple user accounts in an organization.
Another handy feature is the ability to define access times for individual accounts. To set an access time, right-click on the username and select Edit. Next, open the Account tab and click on Define access time.

By default, the user accounts have no limit on access time. But you can define this by selecting a time block for different days.
Since lusrmgr is a portable app, you can’t open it with the lusrmgr.msc command like the built-in app. To launch the program, double-click the executable file you downloaded and make the necessary changes to the user account or groups.
2. Manage Local Users and Groups Using the Command Prompt
You can use the "net localgroup" or "net user" command-line utility to manage users and groups on Windows 11/10. It's a handy way to view, add, and delete local groups and users without using a third-party utility.

First, open a Command Prompt window with administrative privilege. To do this, press the Windows key, type cmd, right-click on Command Prompt, and select Run as administrator.
Below is a list of commands to view and manage local users and groups using the Command Prompt:
-
To view the name of the server and local groups on the computer, type:
net localgroup -
To view all users in a group, enter:
net localgroup [groupname] -
To create a new group, use the following command. Replace xyz with the group name you want to create:
net localgroup xyz /add -
To view all user accounts:
net user -
To create a new user account (replace abc with the username you want to add):
net user abc /add -
To view all the accounts with administrator privileges:
net localgroup administrator -
To add a user account to the administrator group (be sure to change abc, and Administrator to the group name if needed):
net localgroup Administrator abc /add -
To delete a local group:
net localgroup xyz /delete -
To delete a local user:
net user abc /delete -
If you need help with syntax for a specific command, use this:
net help <command>

The Local Users and Groups Management console is a handy utility for system administrators to manage local computers and connect remotely to compatible systems. However, if you are running Windows 11 Home and need to use the lusrmgr.msc tool, your only option is to use the third-party application from GitHub.