
Using a fingerprint scanner is perhaps the most convenient way to log in to your Windows computer. It not only eliminates the need to type in a complex password or PIN every time you want to access your computer but also saves you time. But what if Windows Hello fingerprint authentication stops working on your computer?
Fortunately, there are several ways to fix this annoying issue. So, let’s dive in and explore what you should do when Windows Hello fingerprint login isn’t working.
1. Remove and Re-Register Your Fingerprint
Your first step is to remove your Windows Hello fingerprint and register it again. This may sound basic, but it is one of the most straightforward ways to get your fingerprint reader to work again. Here are the steps you can follow.
- Press Win + I to open the Settings app.
- Head to Accounts > Sign-in options.
-
Under the Windows Hello section, click the Remove button.
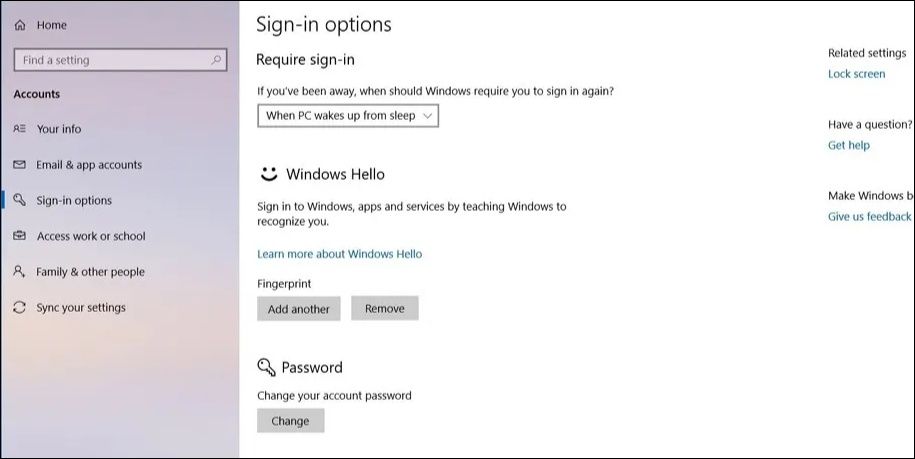
- Once removed, click the Set up button and follow the on-screen instructions to register your fingerprint again.

If the issue persists or if you are unable to remove and re-add your fingerprint due to the "This option is currently unavailable" error on the Windows Hello page, there may be a problem with the Biometric drivers on your PC.
2. Reinstall the Biometric Device Driver
Biometric drivers on your PC help Windows communicate with your PC's fingerprint scanner. If these drivers are outdated or malfunctioning, you may run into problems.
Most of the time, you can fix the problem by simply uninstalling and reinstalling the driver on your PC. Here’s how you can go about it.
- Right-click on the Start icon to open the Power User menu.
- Select Device Manager from the list.
-
Expand Biometric devices.
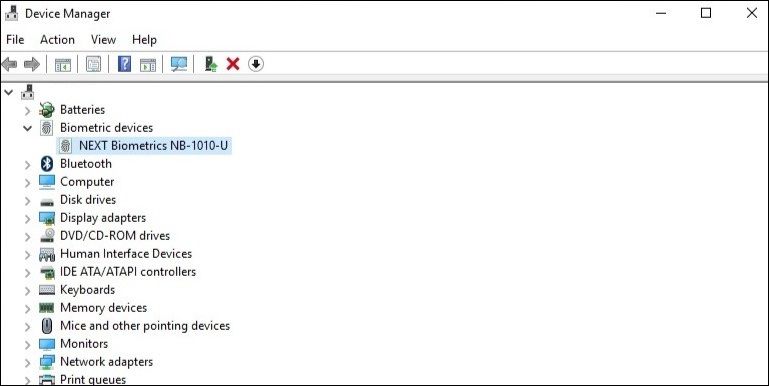
- Right-click on your fingerprint scanner device and select Uninstall device.
- Select Uninstall to confirm.

Additionally, you should also expand the Universal Serial Bus Controllers section in the Device Manager and look for any entries with a yellow exclamation. If you find any, right-click on them one by one and select Uninstall device to remove them.
Restart your PC after completing the above steps and check if the issue still occurs.
3. Run the Hardware and Devices Troubleshooter
Windows 10 and 11 include a number of troubleshooters for resolving various system-related issues. In this case, you should run the Hardware and Devices troubleshooter. It will scan your computer’s fingerprint scanner for any issues and attempt to fix them.
Follow these steps to run the Hardware and Devices troubleshooter on Windows:
- Press Win + R to open the Run dialog box.
- Type msdt.exe -id DeviceDiagnostic in the Open field and press Enter.
-
In the Hardware and Devices window, click Next.
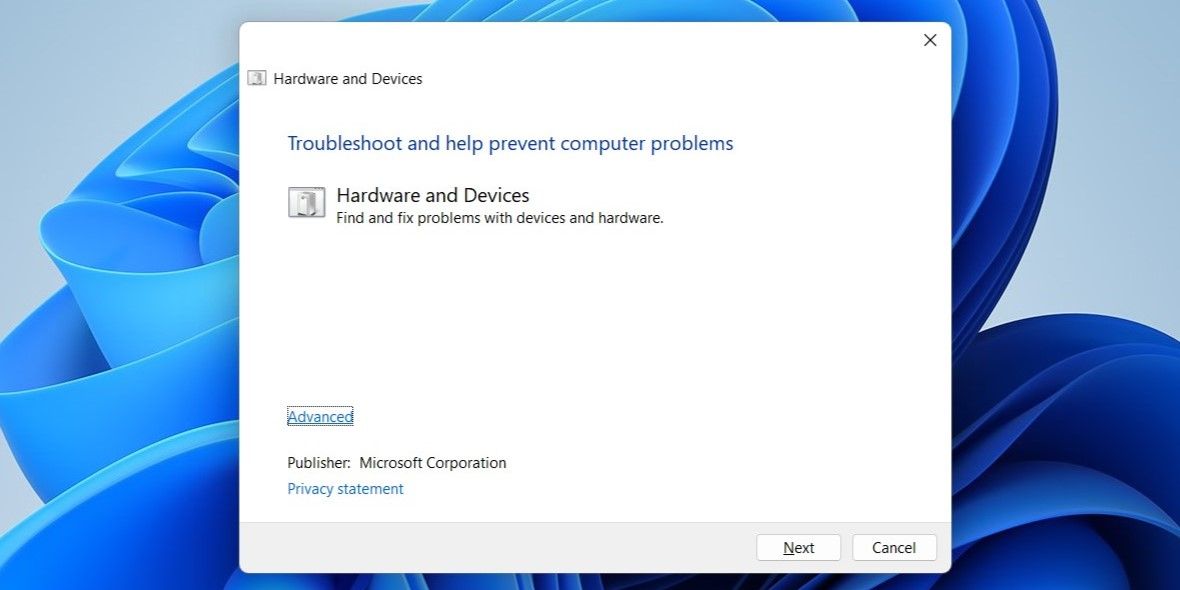

Wait for Windows to diagnose any issues with your computer. If any issues are detected, follow the on-screen instructions to apply the recommended fixes.
4. Turn Off Fast Startup
Fast Startup is a handy Windows feature that speeds up your PC's boot time after shutdown. However, this feature might sometimes prevent Windows from loading properly. When this happens, the fingerprint scanner may not work on your Windows 10 or 11 PC.
Use one of the many ways to disable Fast Startup on your Windows computer and see if that gets the fingerprint scanner to work.
5. Configure Windows Biometric Service to Start Automatically
The Windows Biometric Service is an essential program for Windows Hello, as it captures and manages your fingerprint data. Ideally, the service should start automatically every time Windows boots. However, this might not happen if the service is not configured correctly.
Use these steps to configure the Windows Biometric Service:
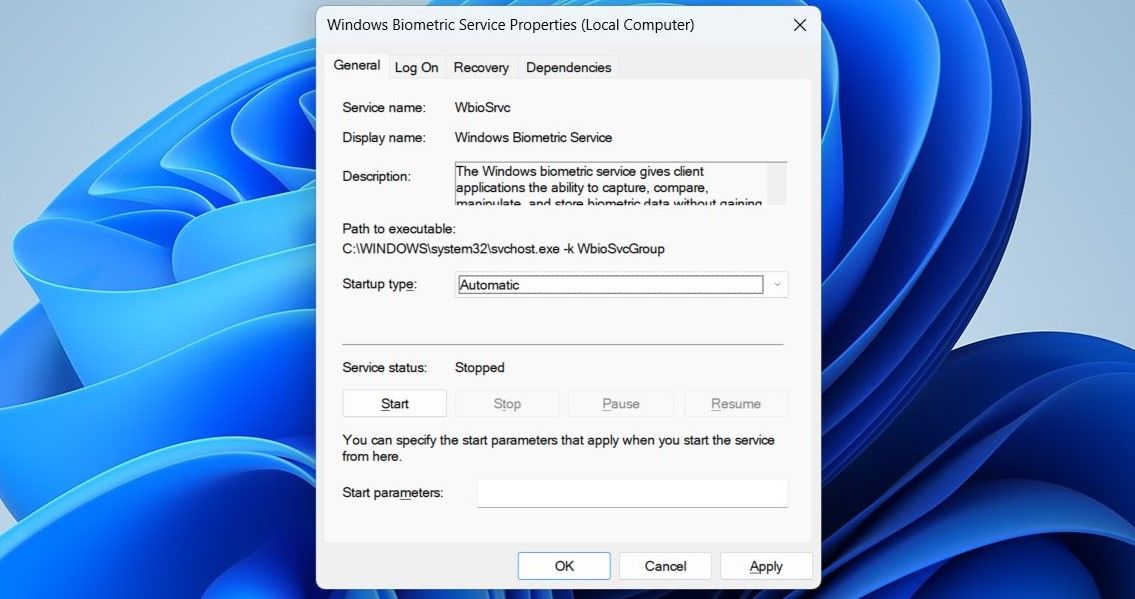
- Open the Services app using the search menu.
- Scroll down to locate the Windows Biometric Service on the list.
- Right-click on it and select Properties.
- Click the drop-down menu to change the Startup type to Automatic.
-
Hit Apply followed by OK.

Restart your PC after this. Following that, you should be able to sign in with your fingerprint.
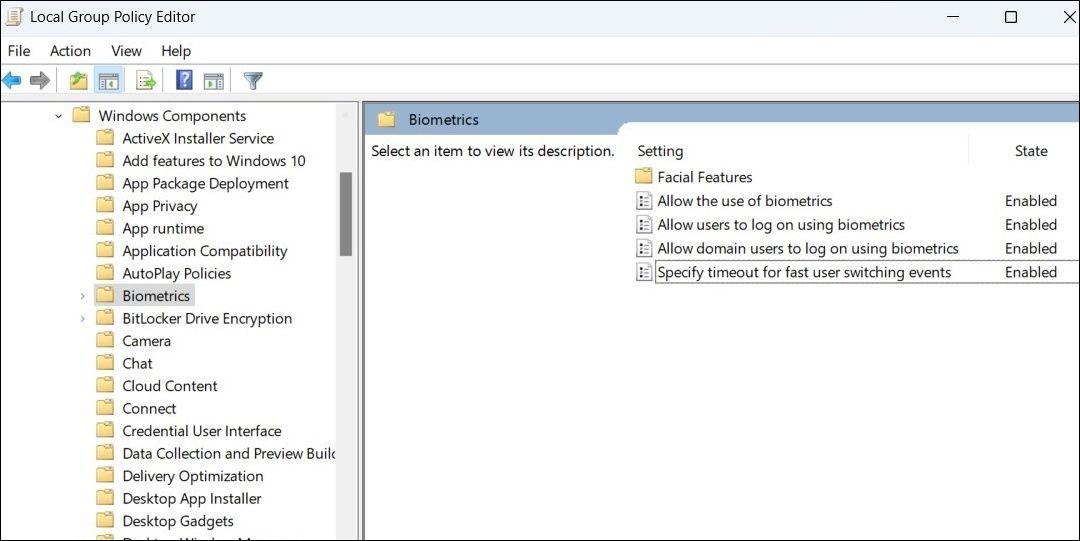
6. Enable Biometrics via the Local Group Policy Editor
Another reason why Windows Hello fingerprint sign-in may not work is if the feature is disabled from the Local Group Policy. It's important to note that Group Policy Settings are only available on Professional, Education, and Enterprise editions of Windows. If you are on Windows Home, you don't need to worry about this step.
To enable fingerprint authentication via the Local Group Policy Editor, use these steps:
- Press Win + S to open the search menu.
- Type gpedit.msc in the search box and press Enter to open the Local Group Policy Editor.
- Use the left pane to navigate to Computer Configuration > Administrative Templates > Windows Components > Biometrics.
-
Check if all the policies within the Biometrics folder are enabled. If not, double-click each policy one by one and set them to Enabled.

Restart your PC one more time and check if the issue is still there.
7. Create a New User Account
An issue with your current user account can also cause certain Windows features to stop working. This usually happens when your user account files get corrupted. If you suspect that to be the case, you can create and switch to a new user account to fix the issue. Here’s how you can go about it.
- Press Win + I to open the Settings app.
- Head to Accounts > Other users.
- Click the Add account button.
-
In the Microsoft account window, click on I don't have this person's sign-in information and follow the on-screen prompts to create a new user account.
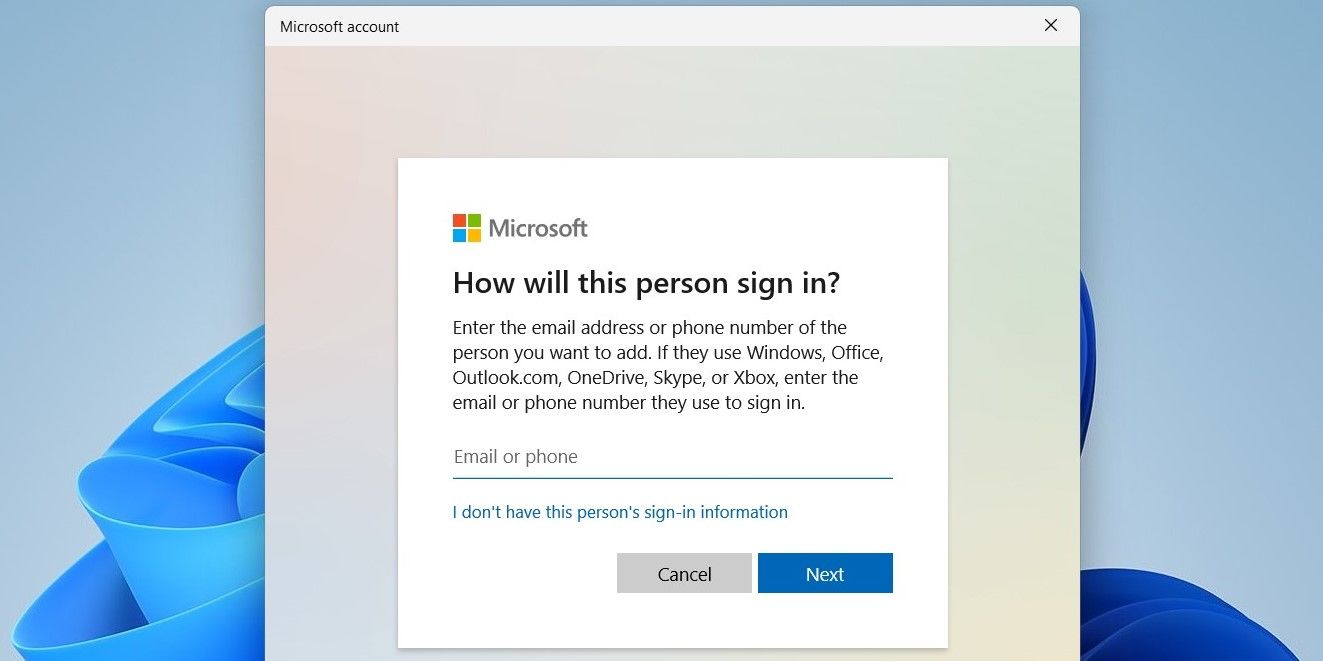

Set up Windows Hello fingerprint login for your new user account and see if you can sign in with your fingerprint.
8. Perform a System Restore
If the fingerprint not working issue only occurred recently, you can use System Restore to revert Windows to a previous state. This will allow you to undo any changes that may have caused the issue. Note that this is only possible if you have previously enabled System Restore on your PC.
Follow these steps to perform a system restore on Windows:
- Press Win + S to open the search menu.
- Type Create a restore point in the search box and press Enter.
- Under the System Protection tab, click on System Restore.
- Click Next.
- Select a restore point before the issue first appeared and hit Next.
-
Review all the details one more time before hitting Finish.
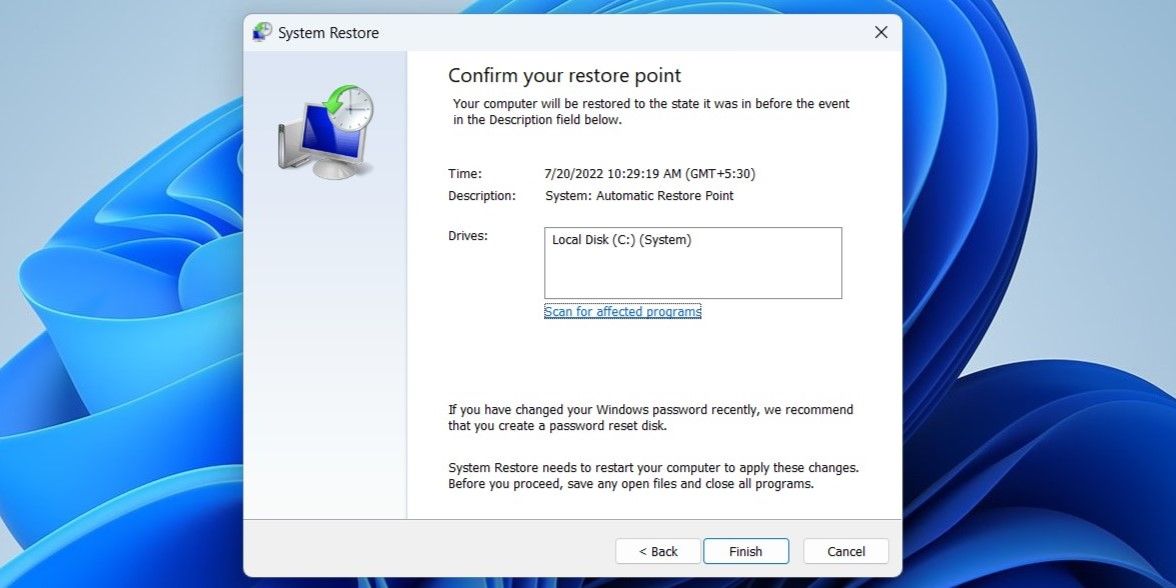

Windows will restart and revert to the specified restore point. After that, the fingerprint should work as before.
9. Install the Latest Windows Updates
Microsoft regularly releases software updates for Windows 10 and Windows 11 to add new features, improve performance, and—crucially for our purposes—fix bugs. If the fingerprint not working issue is caused by a system bug, updating Windows to its most recent version should help.
You can check for new updates by going to the Windows Update tab in the Settings app. Download and install any pending updates on your PC. Hopefully, this will resolve the issue.
Fixing Windows Hello's Fingerprint Check
It’s annoying when your PC's fingerprint scanner stops working all of a sudden. However, that shouldn’t force you to use your password or PIN to sign in to your computer.
We hope one of the methods mentioned above has helped and you are able to sign in with your fingerprint again. However, if all else fails, you may want to consider resetting your Windows computer.