Many software windows that you can maximize and minimize have a system menu. You can view a software window’s system menu by right-clicking its title bar. The default system menu includes Restore, Maximize, Minimize, Move, and Size window options, to name a few.
However, you can considerably extend that system menu with the freeware SmartSystemMenu software. This program expands the system menu with 18 new options. This is how you can extend the system menu with SmartSystemMenu in Windows 11/10.
How to Expand the System Menu on Windows Apps With SmartSystemMenu
SmartSystemMenu is a lightweight app compatible with 64 and 32-bit Windows 11, 10, 8, and 7 platforms. It’s a portable program you don’t need to install. However, you will need to extract SmartSystemMenu’s ZIP archive. This is how you can download, extract, and run SmartSystemMenu to expand the system menu.
- Open Softpedia’s SmartSystemMenu page.
- Click Download Now to select the Softpedia Secure Download (US) option.
- Next, you’ll need to open File Explorer (press Win + E) along with the folder SmartSystemMenu’s ZIP file downloaded in.
-
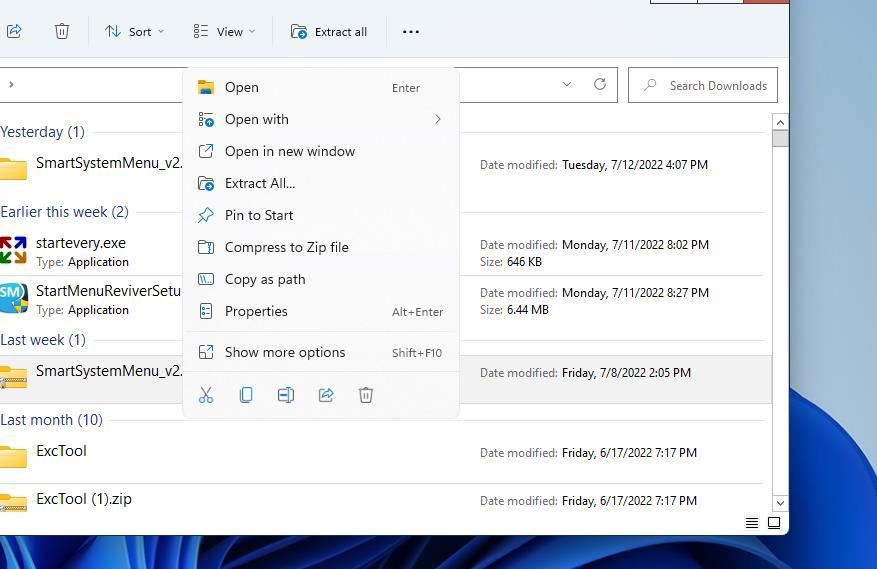
Right-click the SmartSystemMenu_v2.21.1.zip file to select the Extract All option for decompressing ZIP archives.
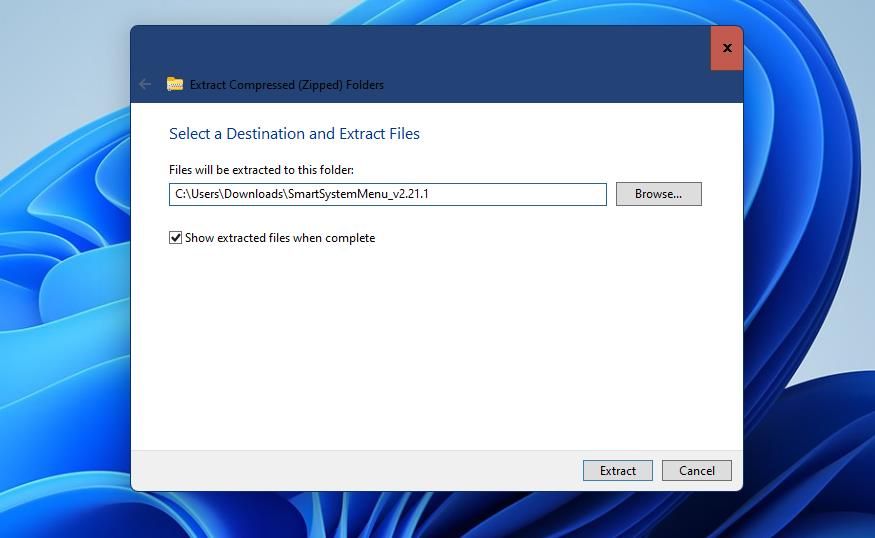
- You can change the default path for the extracted folder by clicking the Browse button. Then choose a folder in which to extract the ZIP.
-
Check off the Show extracted files setting to select that option, and click Extract to continue.
- Double-click the SmartSystemMenu.exe in its extracted folder.
- To view your expanded system menu, open the Notepad app. To launch it, press Win + S, type Notepad in the search box, and select the text editor.
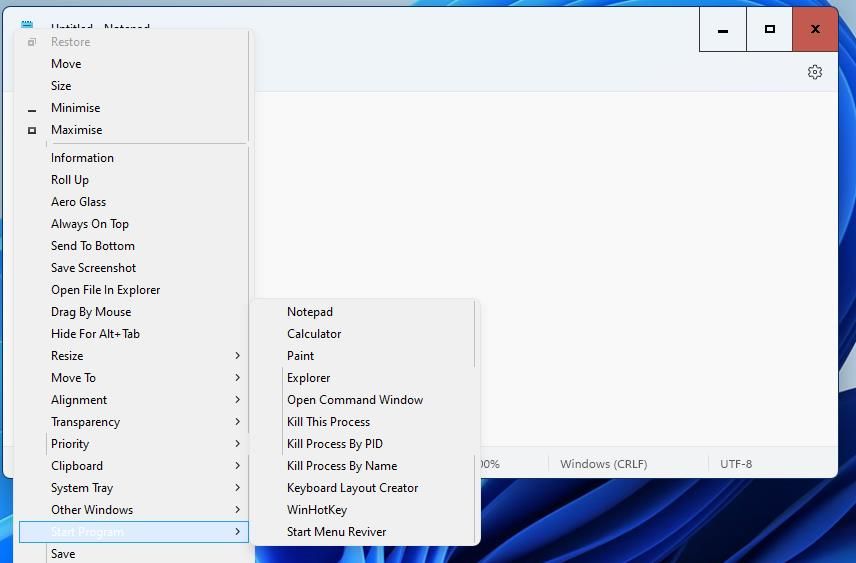
- Right-click Notepad’s title bar to open the extended system menu shown in the screenshot directly below.


Now you can try out a transformed system menu in Notepad. There are many useful new options you can select on that menu with SmartSystemMenu running in the background. Seven of those options are submenus from which you can select alternative settings for them.
For instance, you can make windows transparent by selecting the Transparency submenu. Choose a percentage value on that menu to set a transparency level. Or you can select Custom to input a transparency value.

You can minimize windows to the system tray. To do so, select the System Tray submenu and the Minimize to tray option. Then you’ll see a small icon for the minimized window in the system tray you can click to reopen the window.

The Priority submenu includes the priority settings for running programs you can usually only select via the Details tab in Task Manager. There you can choose six priority level options to change the system resource allocation for the window’s software.
Check out our guide on how to select the priority level for further details about program priority levels.

You can select different options for aligning windows from the Alignment submenu. That menu includes nine options for aligning a window along the top, middle, or bottom. You can also press Alt + Num hotkeys to select those alignment options.
Do you need to capture screenshots of software windows? If so, the new Save Screenshot option on the extended system menu will come in handy. Select this option to save a BMP screenshot image of the active software window to a folder.
Always on Top is another useful new option available on the extended system menu. Selecting that option will keep your software window of choice always on top of any others.
Your selected window options will reset if you don’t save them. To save all your selected window settings for a specific program, click the Save option. Then all your selected options for a window will remain as you configured them after you restart its software.
Setting SmartSystemMenu to start automatically will save you from manually running the program after restarting your PC. To do so, right-click the SmartSystemMenu system tray icon and select Auto start program. Selecting that option adds the program to the startup items.

How to Add Program Shortcuts to SmartSystemMenu
SmartSystemMenu adds a handy Start Program submenu to the system menu. That submenu enables you to add software shortcuts to the system menu. You can add new shortcuts to the Start Program menu via SmartSystemMenu’s Settings window like this:
- Right-click SmartSystemMenu’s system tray icon and select Settings.
-
Select the Menu (Start Program) tab.
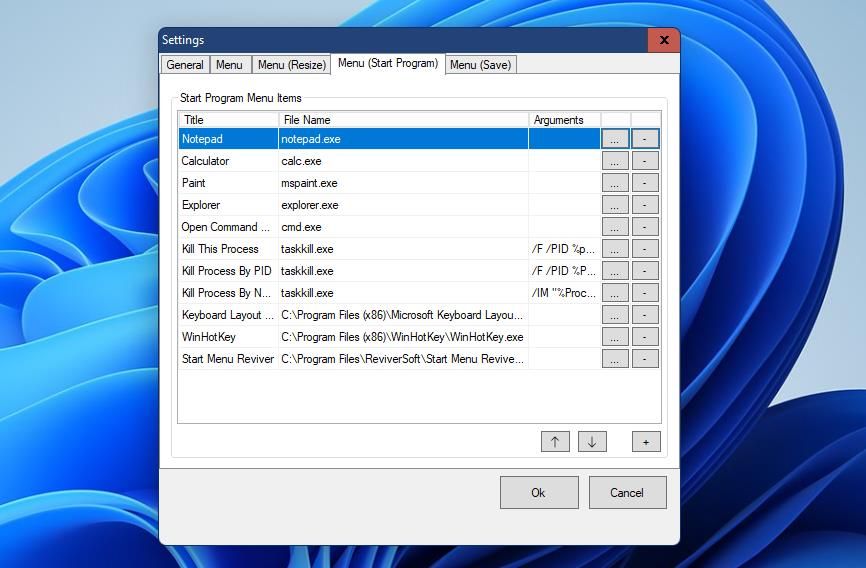
- Press the Add Start Program button.
-
Click the ellipsis button for the File Name box.
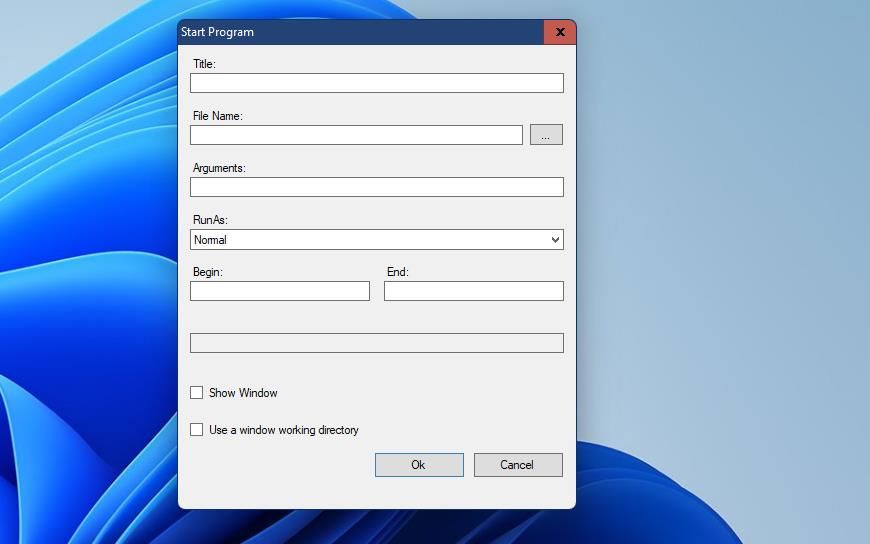
- Select a program for the shortcut to launch, and click the Open button.
- Enter the program’s name in the Title box.
- Click OK on the Start Program window.
- Next, click OK on the Settings window.
- Select OK on the Attention dialog box that pops up.
- To apply the new options, you’ll need to restart SmartSystemMenu. Right-click the SmartSystemMenu in the system tray to select Exit.
- Then restart the SmartSystemMenu program, and open a software window.
-
Right-click the window’s title bar to select Start Program on the system menu.
- Now you’ll see the new software shortcut you added on that submenu. Click that shortcut to open its software from the system menu.


How to Change SmartSystemMenu’s Menu Layout
You can also change the layout of the system menu with SmartSystemMenu’s options. To do so, open SmartSystemMenu’s Settings window from the program’s system tray icon. Then click the Menu tab to view the options shown below.

You can change the order of the system menu’s options from that tab. Select an option to change the position of and click the arrow buttons to move it up or down the menu. To remove options you don’t use, uncheck their selected checkboxes.
There you can also assign keyboard shortcuts to the menu options. Click the … (ellipses) button for an option to assign a hotkey. Then select three keys for hotkey in the drop-down menus, and click OK to exit. Select OK to close Settings, and then restart SmartSystemMenu.

Turbocharge the System Menu With SmartSystemMenu
The default system menu for software windows is somewhat basic, to say the least. SmartSystemMenu transforms that menu with all the new options it adds. With so many new options and submenus, the extended Windows 11 system menu SmartSystemMenu provides is much, much more useful than the default one.