The Windows Internet Connection Sharing (ICS) tool is quite awesome. It allows you to share an internet connection with other devices on a Local Area Network (LAN).
However, you might often run into issues while using this tool. For example, you might have recently seen an error message that reads, “An error occurred while Internet Connection Sharing was being enabled.”
Well, we’ve got some solutions for you. So, let’s dive in and find out how you can resolve this “ICS tool” error.
1. Enable the ICS Tool the Right Way
You’ll likely encounter issues if you don’t enable the ICS tool properly. So, let’s explore how you can enable this tool the right way:
- Type View network connections in the Start menu search bar and select the Best match. This should open the "Network Connections" window.
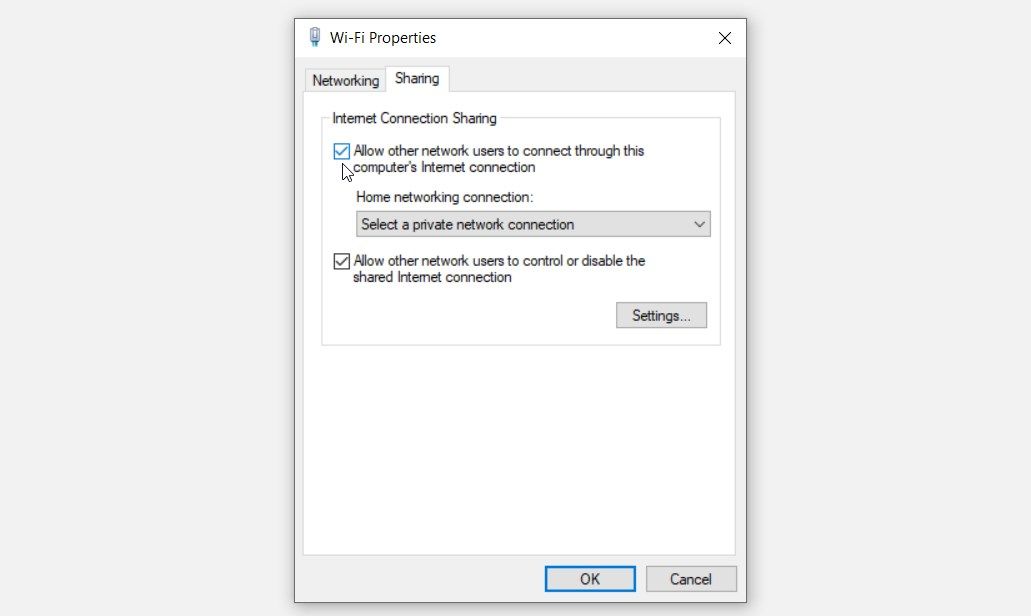
- Right-click on the Wi-Fi option and select Properties.
- Navigate to the Sharing tab.
- Check the Allow other network users to connect through this computer’s Internet connection box and then press OK. This should enable the ICS tool.
Also, ensure that the host PC has a strong internet connection. Otherwise, the ICS tool might run into various issues. To get started, you could consider testing your Wi-Fi speed and refreshing your connection.
Want to disable the ICS tool at a later stage? Follow these steps:
- Open the Network Connections window by applying the previous methods.
- Right-click on the Wi-Fi option, select Properties, and then navigate to the Sharing tab.
- Uncheck the Allow other network users to connect through this computer’s Internet connection box and press OK.
If the issue persists, then you could try tweaking a few "ICS Service" settings.
2. Configure the Relevant ICS Service Settings
Sometimes, the ICS tool fails because some services aren’t configured correctly. So, let’s explore how you can tweak a few service settings to tackle the issue:
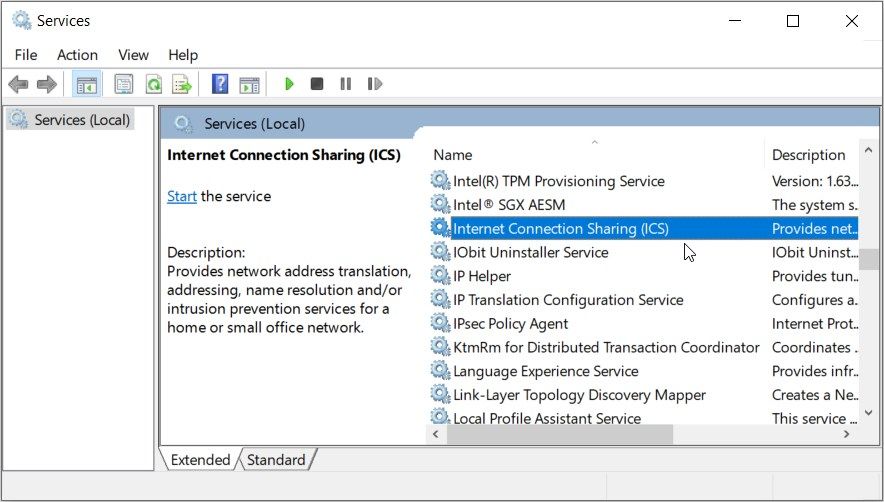
- Type Services in the Start menu search bar and select the Best match.
- Right-click on the Internet Connection Sharing (ICS) service.
- Select Properties from the options.
Click the Startup type drop-down menu and select Automatic. From there, press the Start button.
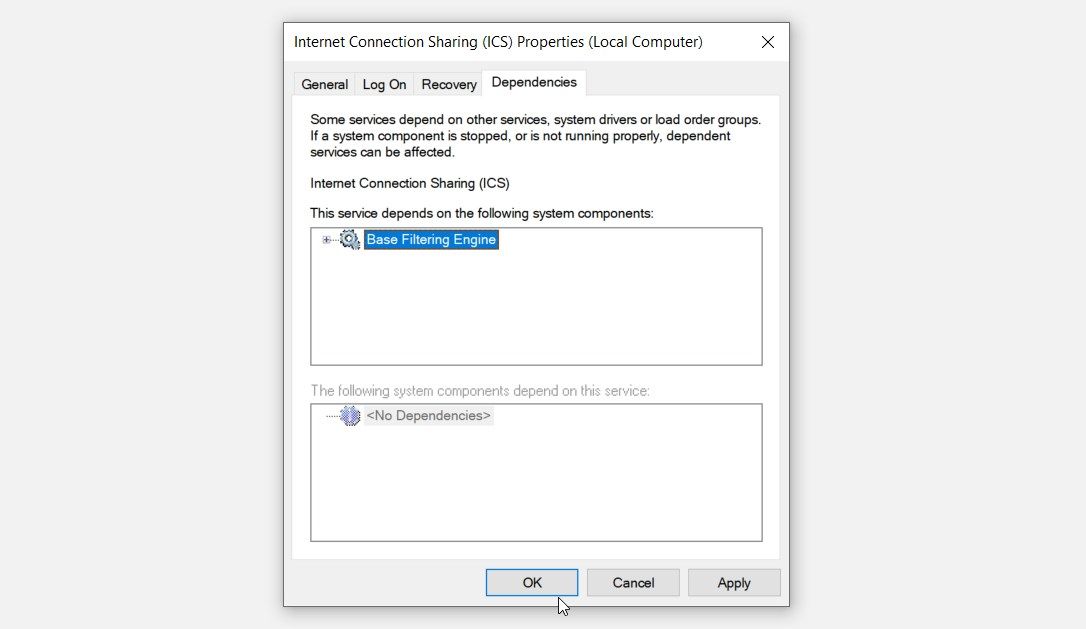
Next, navigate to the Dependencies tab. This is where you’ll find the services that the ICS tool depends on.
By looking at the "Dependencies" tab options, it's clear that the ICS tool depends on the "Base Filtering Engine" service. So, let’s also configure the settings for this service:
- Close the ICS Properties window.
- Scroll up on the Services window and right-click on the Base Filtering Engine service.
- Select Properties from the options.
- Click the Startup type drop-down menu and select Automatic.
- Press the Start button, press Apply, and then press OK.
3. Use the Built-In Troubleshooters
The Windows built-in troubleshooters can also help. So, we’ll take a look at how you can run some of these incredible tools.
To get started, run the "Internet Connections" troubleshooter through these steps:
- Type Settings in the Start menu search bar and select the Best match.
- Click Update & Security and then select Troubleshoot on the left-hand side.
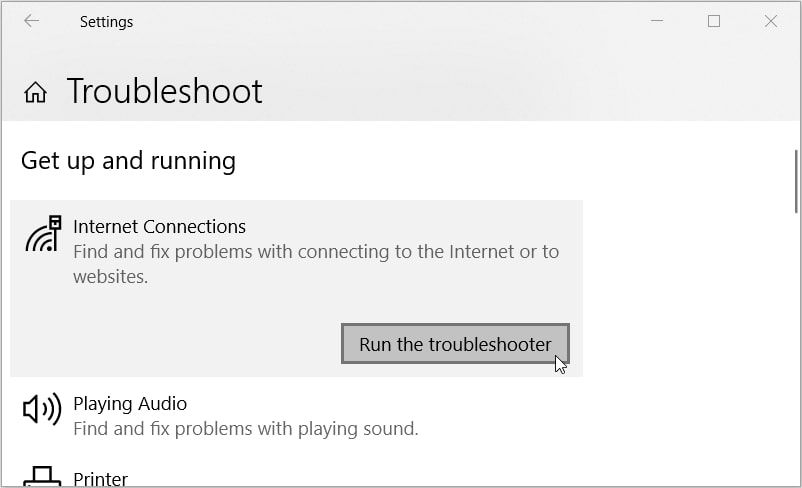
- Select the Internet Connections troubleshooter on the right-hand side.
- Press the Run the troubleshooter button and follow the on-screen steps.
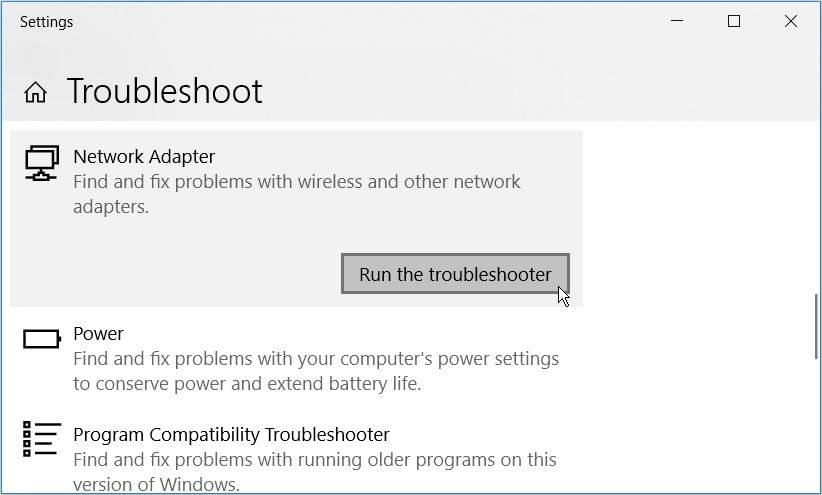
Next, run the "Network Adapters" troubleshooter through these steps:
- Open the Troubleshoot settings window by applying the previous steps.
- Click the Network Adapters troubleshooter on the right-hand side.
- Press the Run the troubleshooter button and then follow the on-screen instructions.
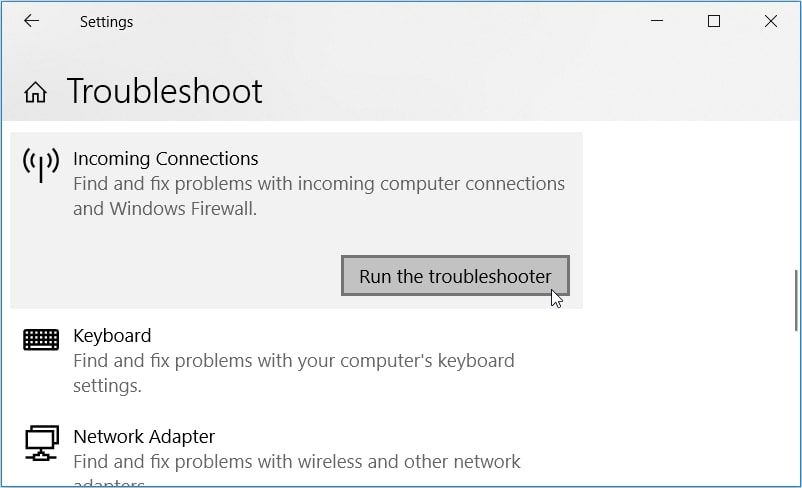
From there, run the "Incoming Connections" troubleshooter through these steps:
- Open the Troubleshoot settings as per the previous steps.
- Click the Incoming Connections troubleshooter on the right-hand side.
- Press the Run the troubleshooter button and then follow the instructions.
Finally, restart your device to apply all these changes.
4. Repair the Network Drivers
The issue at hand might be caused by corrupted or incompatible network drivers. So, you can resolve it by repairing these drivers.
First, let’s tackle the issue by updating the network drivers:
- Press Win + X to open the Quick Access menu.
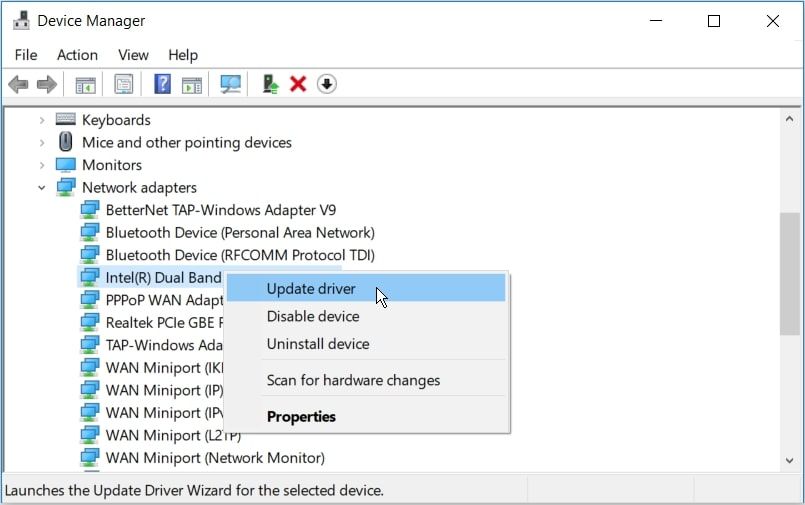
- Select Device Manager and double-click the Network adapters option to expand it.
- Right-click the relevant network adapter and select the Update driver option.
Select Search automatically for updated driver software on the next screen. From there, follow the on-screen instructions and then restart your device.
If the previous method didn't help, then try reinstalling the Network adapters.
Here are the steps you need to follow:
- Expand the Network adapters option by applying the previous methods.
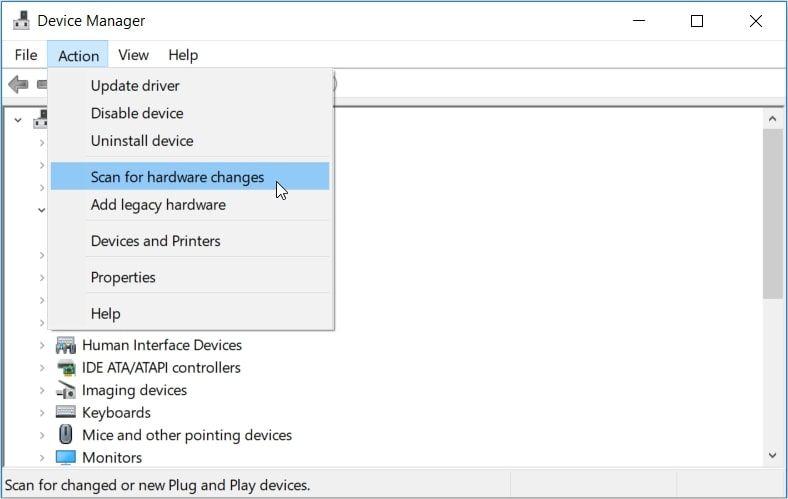
- Right-click on the relevant network adapter and select the Uninstall device option.
- Navigate to the Action tab and select Scan for hardware changes. This should automatically reinstall the network adapters.
- Restart your device to apply these changes.
5. Sign In Using a Different Account
Are you still struggling to resolve the issue? Maybe the problem is with the account you’re using.
So, you could resolve the issue by signing in using a different account.
Here are the steps you need to follow:
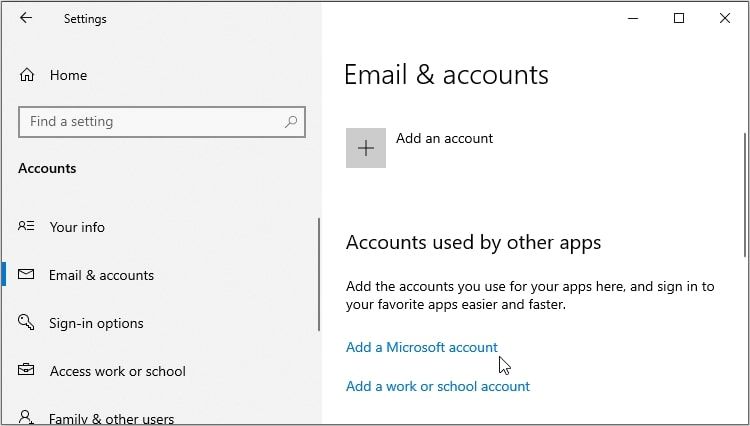
- Type Settings in the Start menu search bar and select the Best match.
- Select Accounts from the options.
- Click the Email & accounts option on the left-hand side.
- Select Add a Microsoft account on the right-hand side and then follow the on-screen instructions.
Alternatively, you can change your account details on the ICS Service settings.
Here are the steps you need to follow:
- Press Win + R to open the Run command dialog box.
- Type services.msc and press OK to open the Services window.
- Locate the Internet Connection Sharing service and right-click on it.
- Select Properties from the options.
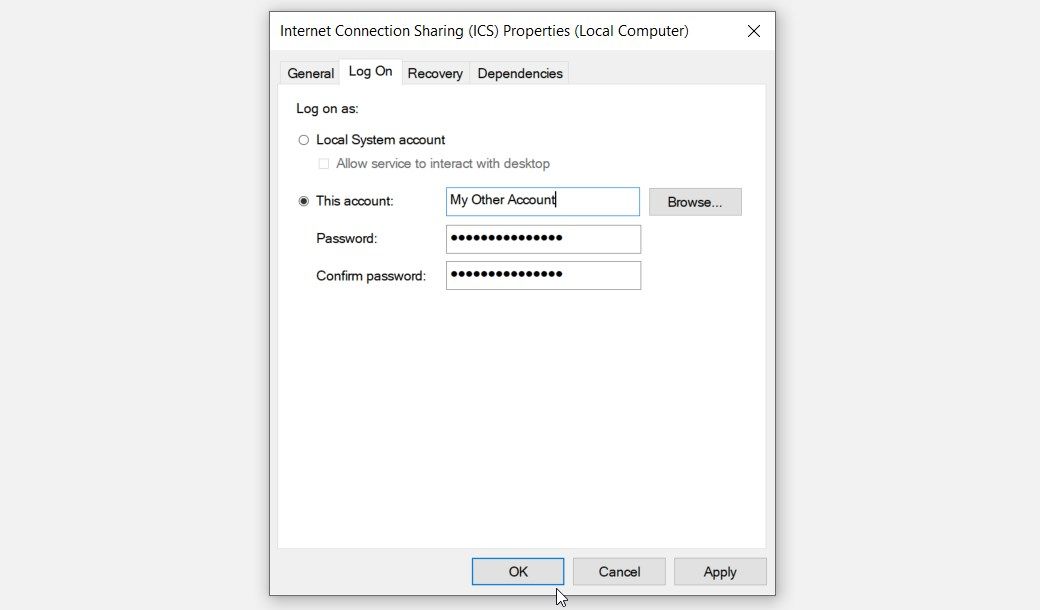
- Navigate to the Log On tab and click This account option.
- Press the Browse button and then select the relevant account.
- Press OK to save the changes.
Finally, press Apply and then press OK on the "Log On" tab.
6. Remove Corrupted Third-Party Programs
In some rare cases, the issue might be caused by a faulty third-party program. So, you could resolve it by updating any suspicious program.
Alternatively, you might also consider deleting any app that seems problematic.
If you decide to delete faulty apps, use a reliable Windows uninstaller. That way, you’ll be able to remove the residual files that might remain and cause further issues.
You’ve Conquered Your “Internet Connection Sharing” Problems
The ICS tool makes it quite easy for you to share an internet connection with anyone. However, the tool has its flaws and often runs into issues.
If you run into problems while using this tool, apply any of the methods we’ve covered. If the issue persists, then try other tricks to get an internet connection without an internet service provider.


