Windows contains a lot of built-in tools to make your experience as smooth as possible. These tools help you troubleshoot problems, clean up any messes, and maintain your system’s overall health.
While most of these tools work fine in the background, there are times when you can face issues using them. One such tool that can often cause trouble is the Disk Cleanup utility, which is responsible for freeing up disk space on your drive.
In this guide, we will take a look at troubleshooting the disk cleanup utility if it's not working on your Windows computer.
What Does the Disk Cleanup Utility Do?
Temporary folders and cache files can accumulate on your hard drive over time; unfortunately, this tends to slow down your system. The Disk Cleanup tool is a utility developed by Microsoft that identifies these unnecessary files and removes them to increase the speed and improve the performance of your system.
The utility has been available since Windows 98, and it is usually recommended to run it at least once a month to keep your computer running smoothly.
What to Do if the Disk Cleanup Utility Does Not Work on Windows
While the Disk Cleanup Utility can be handy, it can sometimes fail to launch or perform a scan. Here's how to get it fixed again.
1. Run the Disk Cleanup Utility as an Administrator
If you encounter issues with any app on Windows, the first thing that you should try is running it with administrative privileges. Oftentimes, the utilities fail to run or function simply because they are not given sufficient permission to access the system resources.
Here is how you can the Disk Cleanup tool as an administrator:
- Open Windows Search with Win + S, and type in "disk cleanup."
- Right-click on the Disk Cleanup utility and choose Run as administrator from the context menu.
Now that Disk Cleanup has administrator rights, try running it again.
2. Switch to an Administrator User Account
You might encounter this problem if the Disk Cleanup tool is trying to access files that only administrators can modify. And much like what we did in the first solution, the best way to fix the issue is by switching to an administrator user account.
If you own the device you are using, then follow the steps mentioned below to switch user accounts. You should, however, contact your administrator if you are using a work computer.
- Head over to the Start menu and right-click on the current user. It should appear as a small circle with the account profile picture on the left side of the Start menu.
- From the context menu that appears, click on Sign Out.
- Sign into the account with administrative privileges.
Alternatively, you can also make your current standard user account an administrator one. For this, follow the steps below:
- Press Win + I to open the Settings app.
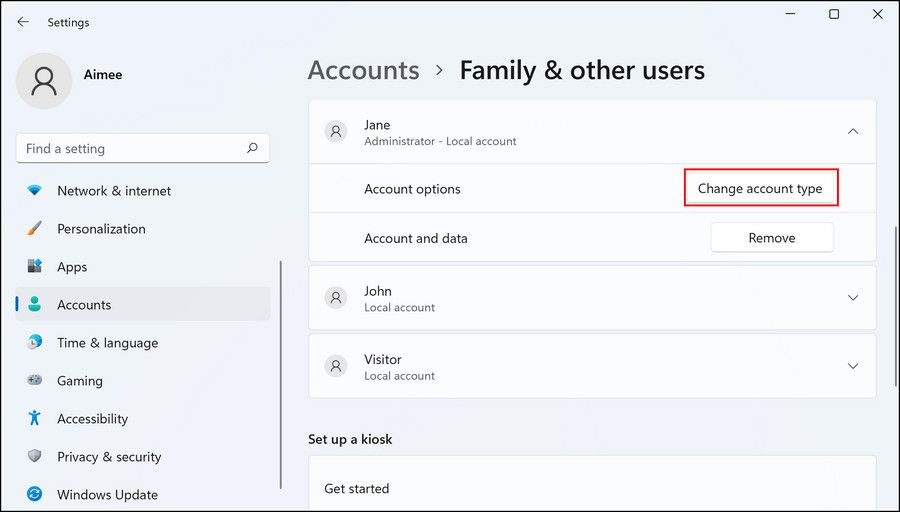
- Choose Accounts from the left pane and click on your current user account.
-
Then, hit the Change account type button.
-
In the following dialog, expand the dropdown under Account type and choose Administrator.
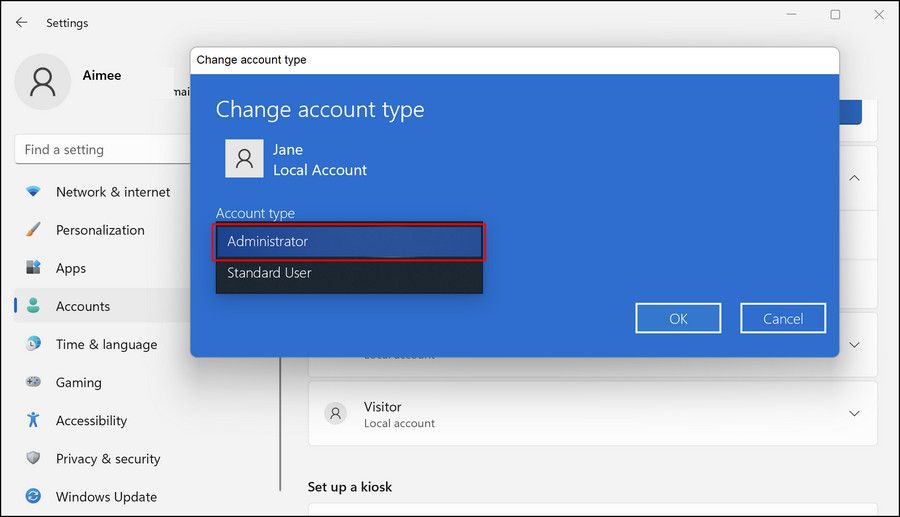
- Click OK to save the changes.


Once your account is given administrative privileges, try running the disk cleanup utility again and check if the issue is resolved.
3. Remove Temporary Files
Deleting the system's temporary files can also help get things moving again. If any of the temp files are corrupt or buggy, it will prevent the Disk Cleanup utility from doing its job properly.
Luckily, these files are safe to remove, so you can delete them and see if that resolves the problem. Here is all that you need to do:
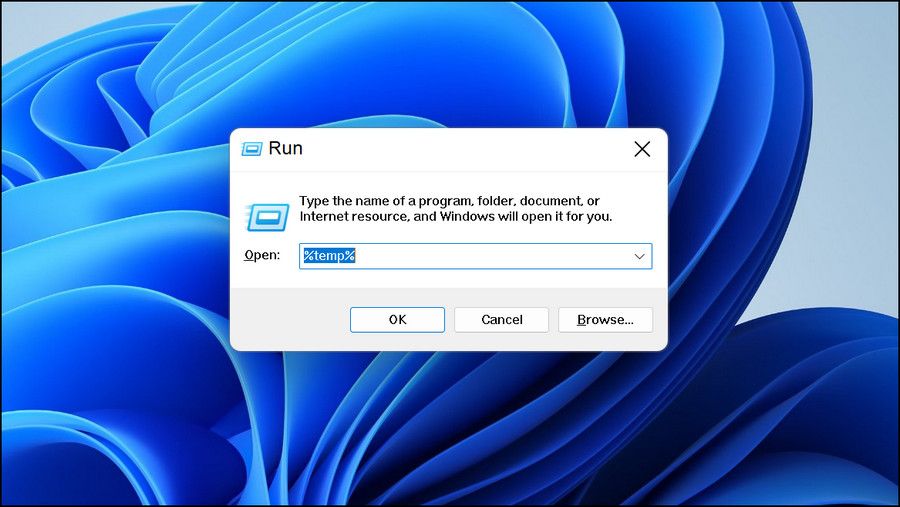
- Press Win + R together to open Run.
-
Type %temp% in the text field of Run and click Enter.
-
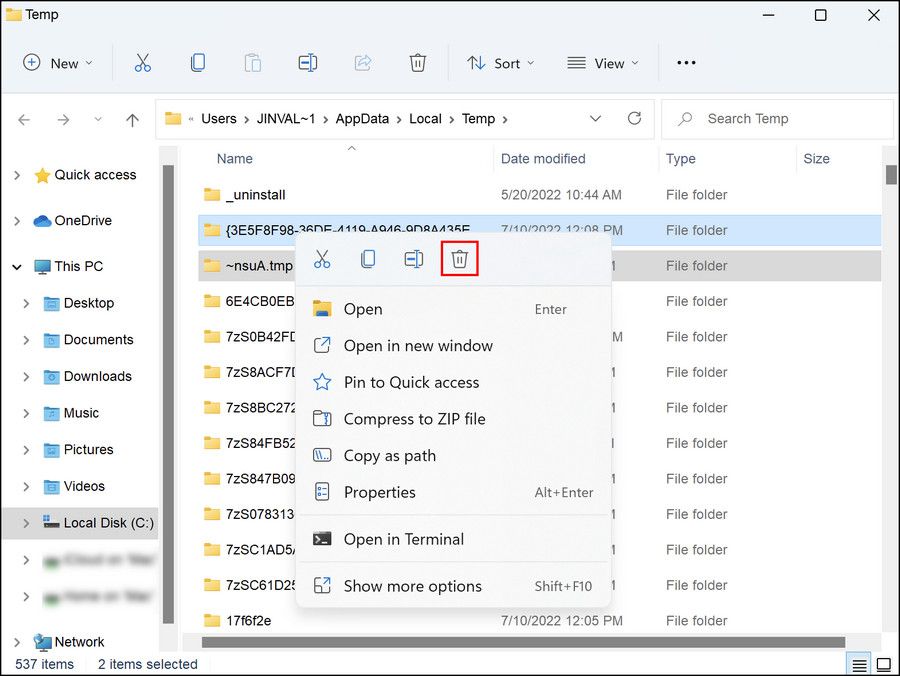
In the following window of File Explorer, you will see a list of the temporary files. Select all of them, right-click on them, and choose Delete.
- If a confirmation prompt pops up, confirm your action to proceed.


While we are at it, we recommend running the system scans as well. This will further make sure that no corrupt files are causing the problem. We suggest that you run the System File Checker and the DISM utilities in this case. If you're not sure what those are, be sure to check out the difference between CHKDSK, SFC, and DISM for more information.
If any corruption is found within the system, these tools will identify and fix them without much input from your side.
4. Boot Into Safe Mode
In some instances, people have fixed the problem by booting into Windows Safe Mode. In Safe Mode, only the required drivers and programs—the ones needed by the operating system—are loaded into the system.
You can use this troubleshooting mode to determine whether a third-party or non-critical program is causing the problem. Once you boot into Safe Mode, try using the Disk Cleanup tool again.
If the problem does not reoccur in Safe Mode, that implies that the culprit is most likely a recently installed application or program. In this case, we suggest that you uninstall any third-party apps that you recently installed and see if that makes any difference.
If the problem persists, it may be time to try something else.
Windows Disk Cleanup Alternatives You Can Try
In the event that the troubleshooting methods don't work for you, and you want to get rid of the mess quickly, there are several free and paid Disk Cleanup alternatives that you can try.
To get started, head over to our ultimate Windows cleanup guide and follow the methods listed in it.
Here are some third-party options that you can try as well:
You can also remove the large, unused applications or files that are just sitting there. To proceed, the first thing that you should do is visualize what takes up space in your system. After identifying the programs and files that your system can live better without, you can remove them manually or by using a tool.
Free Your Disk Space Using the Disk Cleanup Tool
You now know how to fix issues related to the disk cleanup utility on Windows. In case the troubleshooting methods above did not work for you, then we suggest you reach out to the official Microsoft support team and report the issue to them. They will help you pinpoint the exact cause of the issue, and suggest relevant fixes accordingly.