Windows generally performs a check for disk integrity on startup if it detects an error with a drive or if the system was not shut down properly. But sometimes, it goes into a loop and surfaces a scan even if everything is alright. If that’s the case, you may want to disable disk checking on Windows startup.
It isn’t advised that you do this, but if you’re sure that Windows is offering to check disks in error and that your disks and the data they contain are fine, then there is a workaround.
How to Skip Chkdsk on Windows via the Command Prompt
An easy way to disable disk checking on Windows startup is to use the chkntfs command. Here’s what to do:
- Click on the Start menu and type “command prompt.”
- Right-click on the Command Prompt app and select Run as administrator. You may have to allow user access.
-
To skip disk checking on C drive, type the following into the console and hit Enter. You can replace C with any drive you want to be skipped.
Chkntfs /x C: -
If you want to skip more than one disk drive at Windows startup, simply append that drive letter to the command. The command for skipping C and D drive checking would look like this:
chkntfs /x C: D:
This should stop Windows from asking to check your disks at startup.
How to Cancel Disk Checking on Startup via the Registry
Alternatively, you can get Windows to skip surfacing the option to check your disks at startup. However, be warned that changing registry entries could make your system unstable. If you’re ready to give it a shot, here’s how.
- Press Win + R, type in “regedit,” and click on OK. You may be asked for user access control permission.
-
Navigate to the following location and click on the folder Session Manager to bring up its contents.
HKEY_LOCAL_MACHINE\SYSTEM\CurrentControlSet\Control\Session Manager -
Look for the string named BootExecute.
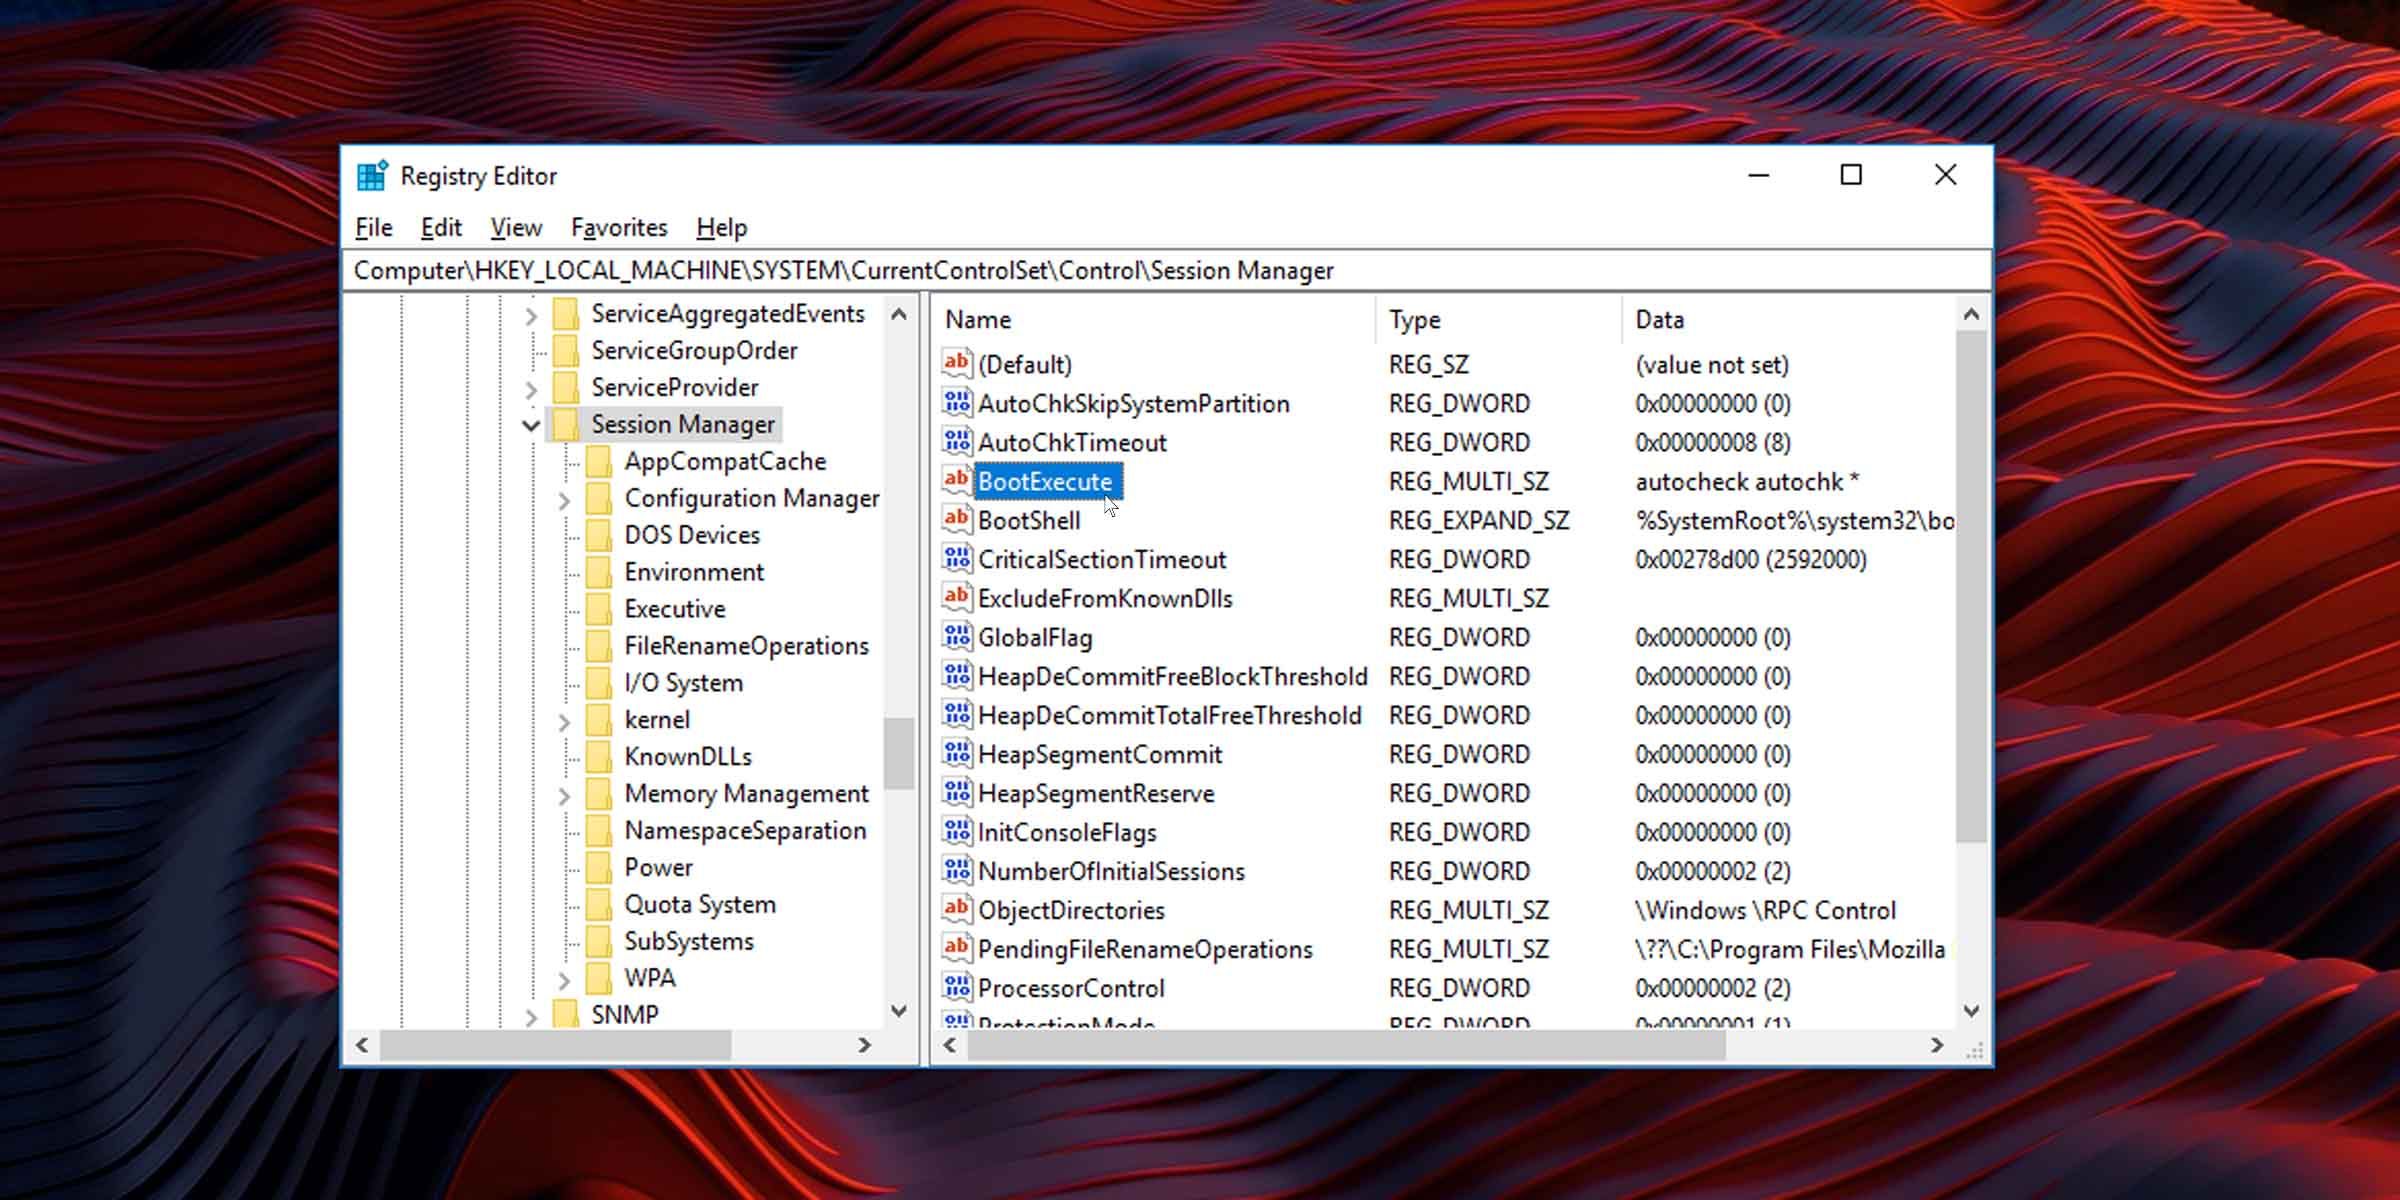
- Double-click it to open and edit its contents.
-
Type this into the value data field to skip disk checking on C drive:
autocheck autochk /k:C *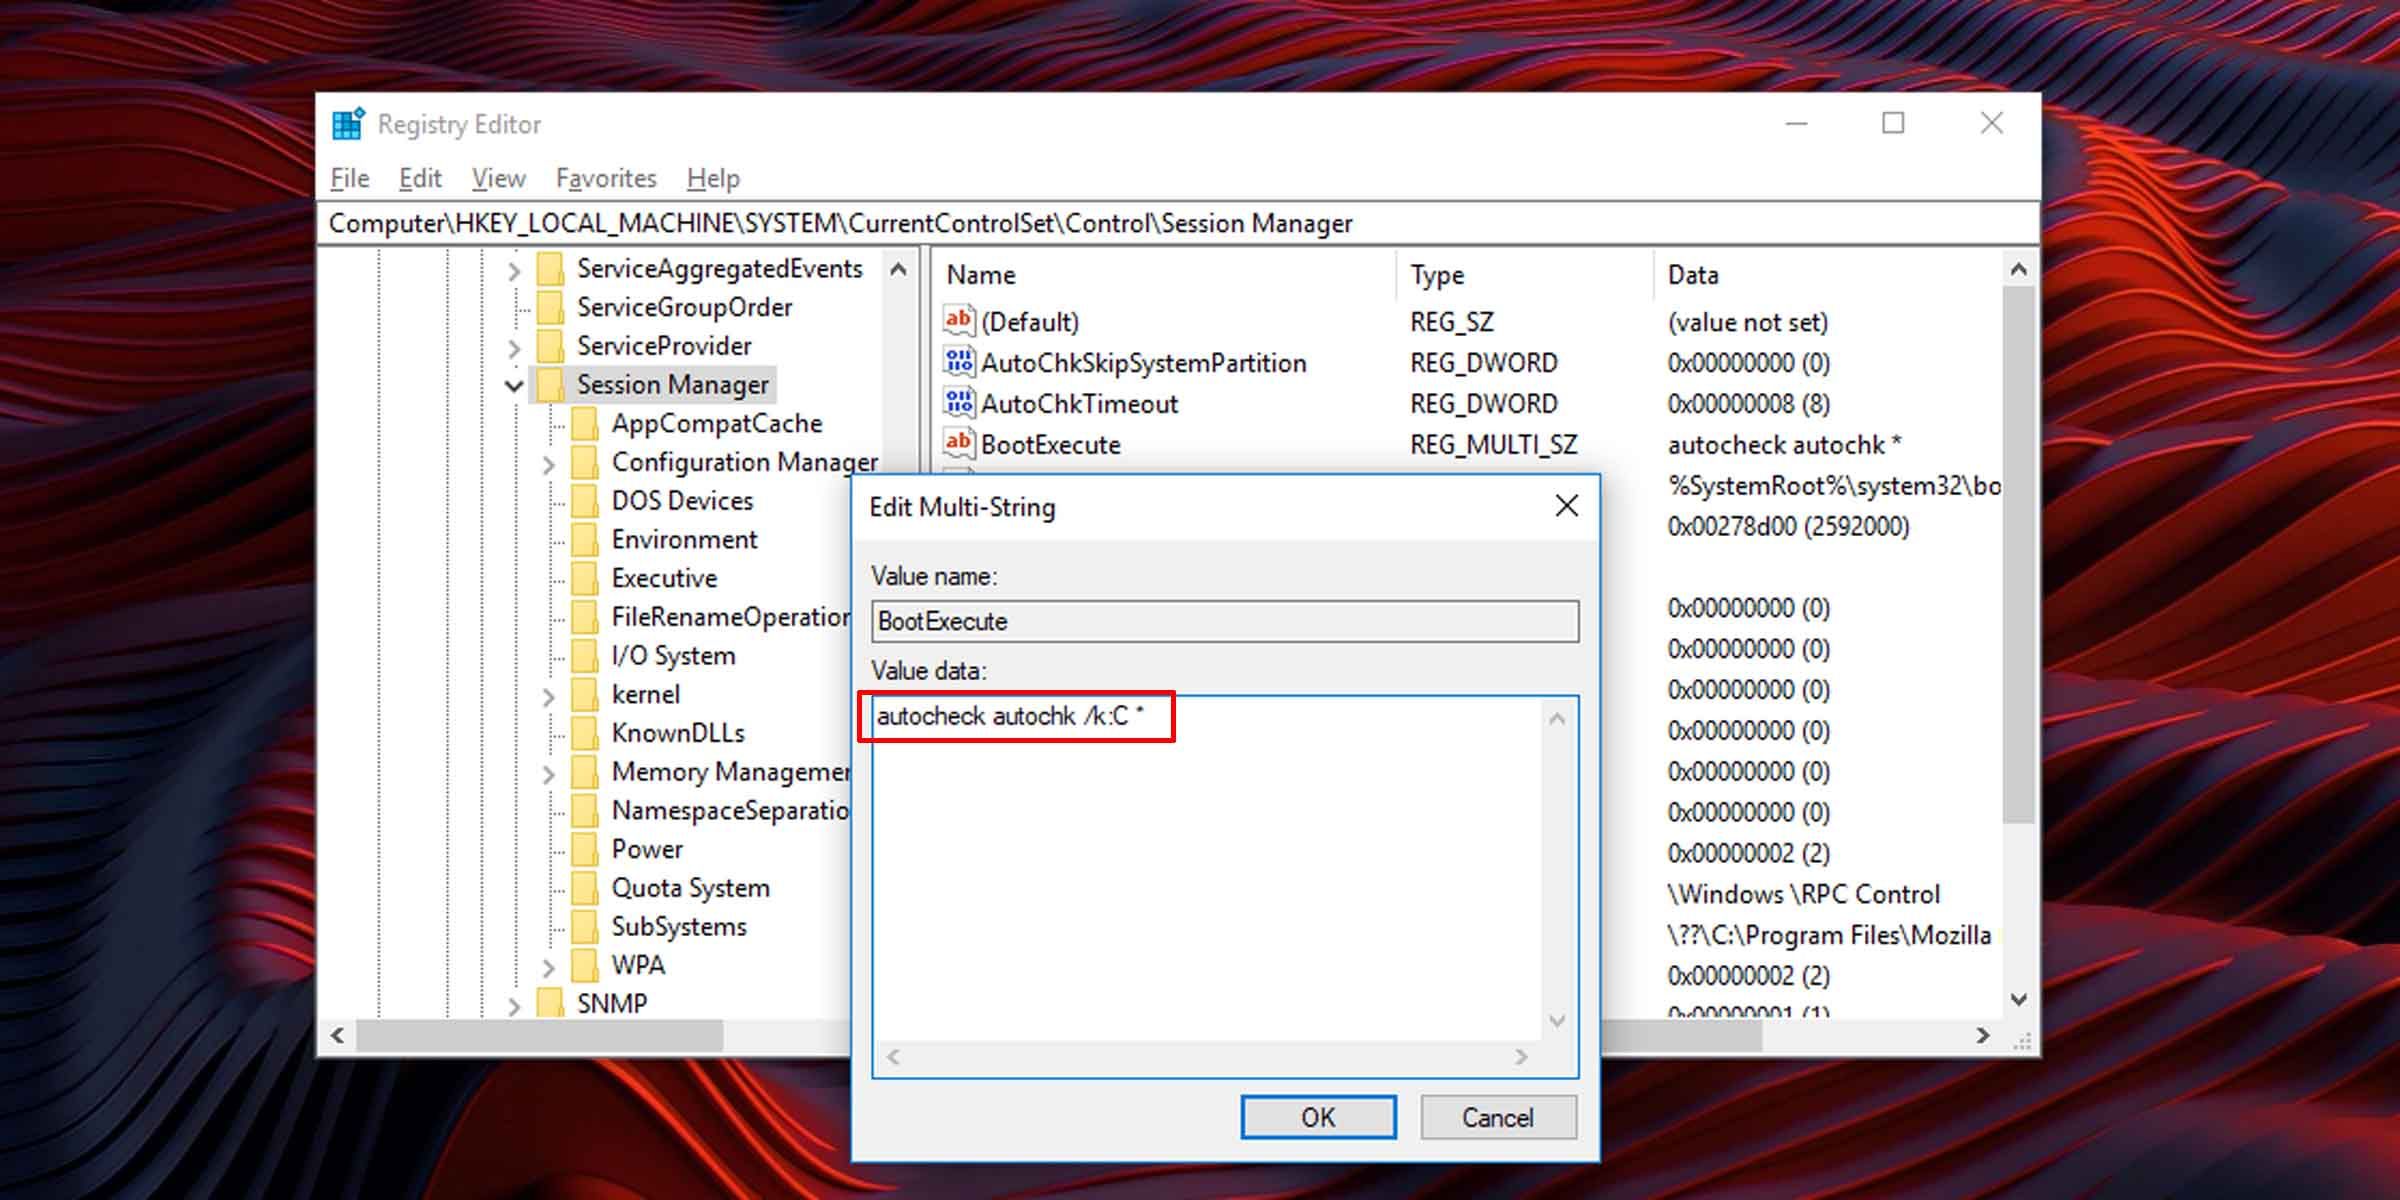
-
To skip disk checking on multiple drives add those drive names into the field. The value data for skipping C and D drive checking would look like this:
autocheck autochk /k:C /k:D *


If you want to revert to scanning and checking for disk errors at startup, you’ll need to reset BootExecute to its default value. To do this, simply set its value data to the following:
autocheck autochk *
If Disk Checking Persists, Run a Scan
If you’ve tried these methods but your computer still attempts to check disks on every startup, you should consider letting the system run a disk check. If the scan reports any errors, it could mean that there is a serious problem with one or more of your disk drives. In such cases, it’s best to back up your data as soon as possible.
Turn Off or Fix Windows Chkdsk
These workarounds should turn off disk checking on Windows startup, but it is advised that you do this only if you are sure that your disks are in good health. If, on the other hand, you are skipping Windows Chkdsk because it gets stuck or it freezes on startup, there are other fixes.