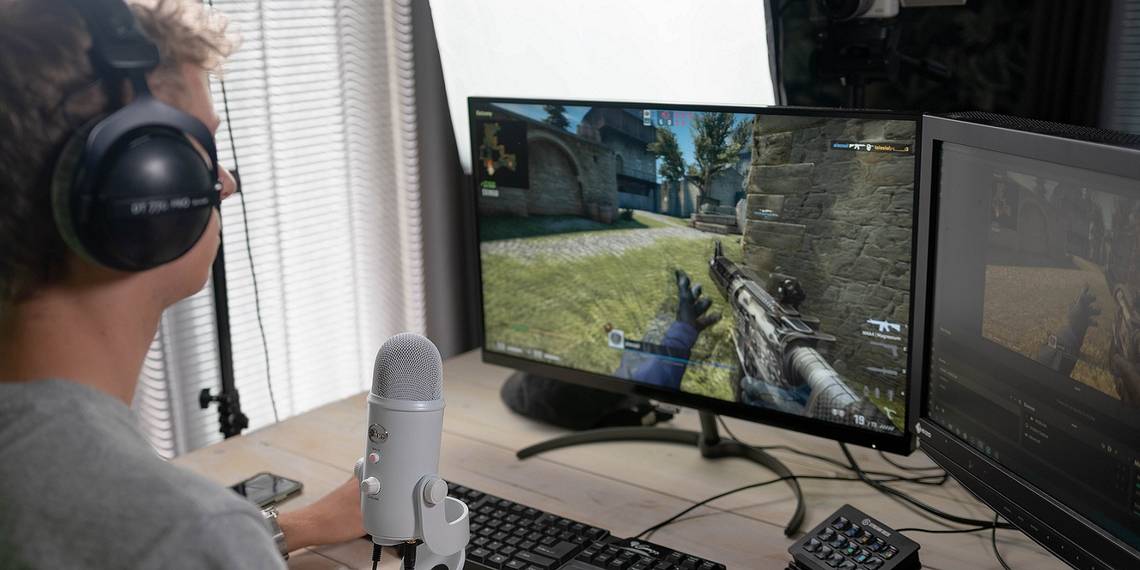
The “D3D11-compatible GPU” error is a common game-related error for both Windows 10 and 11. You usually see this error message when you try to start certain affected games. It will present an error message that reads “a D3D11-compatible GPU (feature level 11, shader model-5) is required to run the engine," and affected games don’t start.
This error has been more widely reported for Fortnite but also occurs for other Windows game titles. If you're struggling with this same issue, here is how you can fix the “D3D11-compatible GPU” error in Windows 10 and 11.
1. Install Any Available Windows Updates
When you update Windows, your computer will also update DirectX This is important, as DirectX is a gaming and multimedia API. The “D3D11-compatible GPU” error message references Direct3D 11, a part of DirectX. As the “D3D11-compatible GPU” error is linked with DirectX, it’s recommended that you install all available Windows updates and see if that solves the error.
Here is how you can check for and install updates in Windows:
- Click Start with the mouse’s right button to select Search.
- Input the keyword updates in the search tool.
-
Select the Check for updates search result to open Settings.
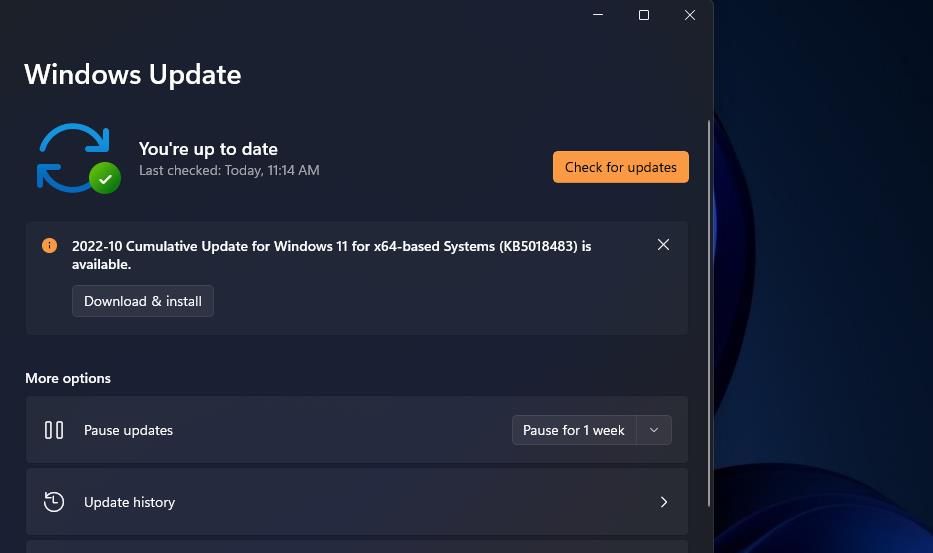
- Click the Windows Update tab’s Check for updates option. Selecting that option will automatically download and install available patch updates in Windows.
- Select Restart now if the Windows Update tab presents that option to you.

If you see any optional updates listed there, click their Download and install buttons. That includes the current Windows 11, version 22H2 update, or any other new build version, which you should select to upgrade to if available.
2. Scan Your System Files With SFC
To check for possible system file corruption causing the “D3D11-compatible GPU” error, run a System File Checker (SFC) scan. The SFC tool will scan for and repair corrupted system files in Windows. You can run an SFC scan like this:
- Open Windows Search (see how to find Windows Search if you need help opening it) and type cmd into it.
- Right-click Command Prompt in the search results and select Run as administrator.
-
Run the SFC scan by typing in and executing this command:
sfc /scannow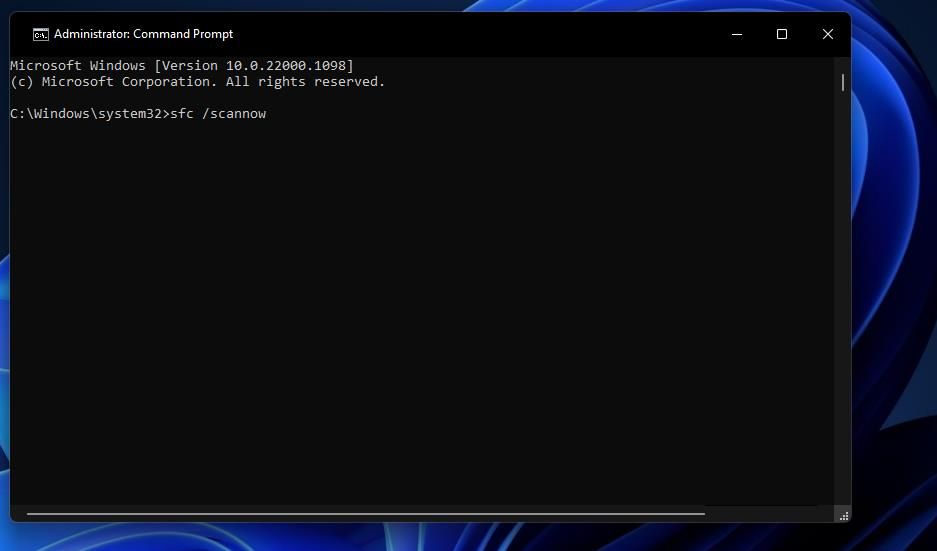
- Wait for the System File Checker to finish its scanning and show an outcome message.
3. Set the Game to Utilize a Dedicated Graphics Card
Does your PC have integrated and discrete (dedicated) graphics adapters? If it does, make sure the affected game is utilizing your PC’s dedicated GPU. To do so, you can select a High-performance graphics option for the game via Settings. Our guide to choosing a preferred graphics card for an app tells you how to set a dedicated GPU for a game in Settings.

Or you could select to disable your PC’s integrated GPU instead. That will ensure all your games utilize the PC’s superior dedicated graphics adapter. You can disable the integrated GPU like this:
- Open Device Manager, which you can access by pressing the Windows key + X and clicking on that utility’s shortcut.
-
Double-click on the Display adapters category to view graphics adapters.
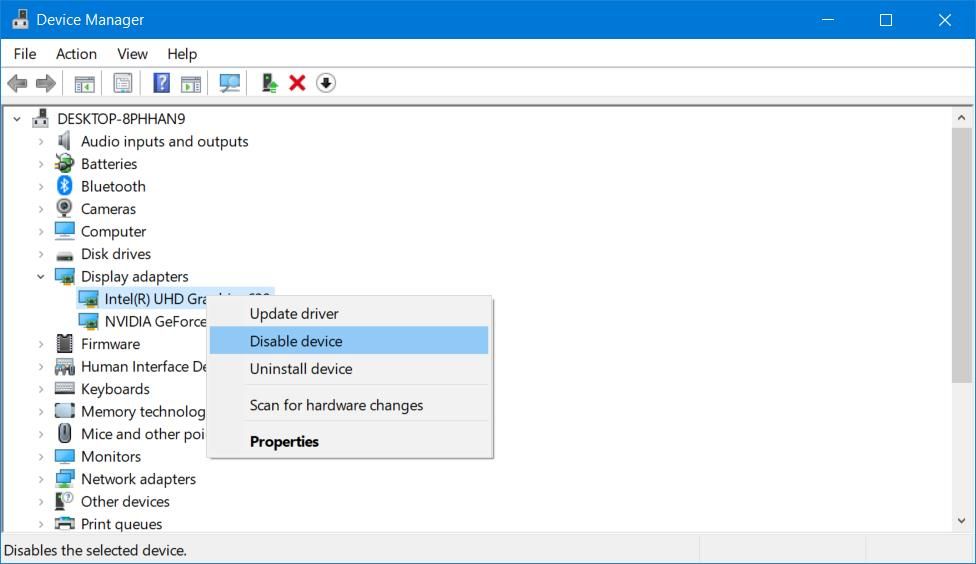
- Click on your PC’s integrated graphics adapter to select Disable.
- Select Yes on the dialog box that asks you to provide additional confirmation.

4. Update the Driver for Your Graphics Card
Sometimes, updating your graphical processing unit (GPU) drivers fixes the “D3D11-compatible GPU” error. If your graphics card’s driver is outdated, updating it could be the solution.
We recommend users manually download and install the latest drivers for their graphics cards from the NVIDIA, Intel, or AMD websites. Our guide on how to update graphics drivers on Windows has more info on the topic if you need help.
5. Repair or Update Visual C++ Redistributables on Your PC
The “D3D11-compatible GPU” error can sometimes be due to missing or corrupted Microsoft Visual C++ Redistributable runtime libraries. So, you may need to repair or install a runtime library on your PC.
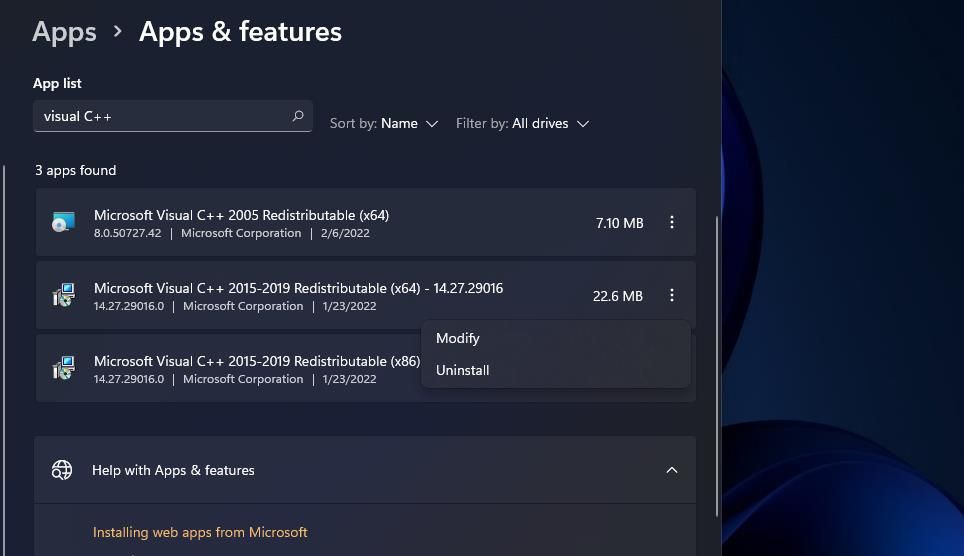
Here is how you can select to repair Visual C++ Redistributables via Apps & Features:
- Open the Apps & Features Settings tab using one of the methods outlined in how to open the Apps & features tool on Windows.
- Type Microsoft Visual C++ in the search box at the top of Apps & features.
- Then click the three-dot menu button for a Microsoft Visual C++ Redistributable to repair there.
-
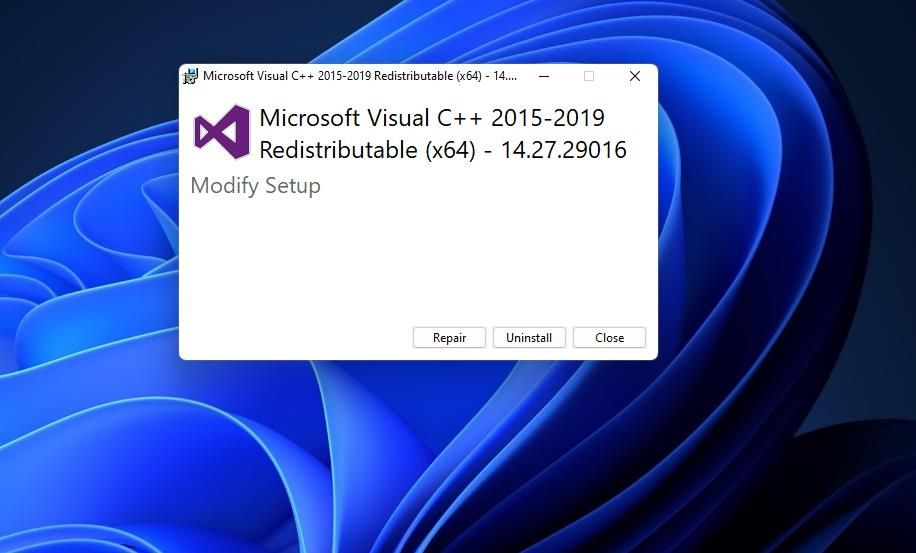
Select the Modify option.
-
Press the Repair button in the Visual C++ window that opens.
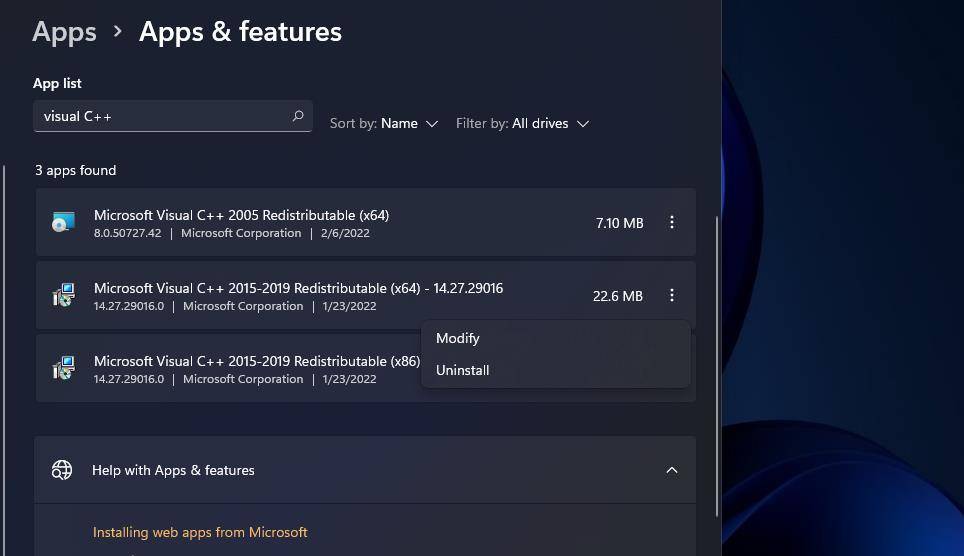
- Repeat the previous two steps for all Microsoft Visual C++ Redistributables listed in Apps & features.

Or you may need to install some missing Visual C++ Redistributables libraries. You can install the latest runtime libraries with the Microsoft Visual C++ 2015-2022 Redistributable pack like this:
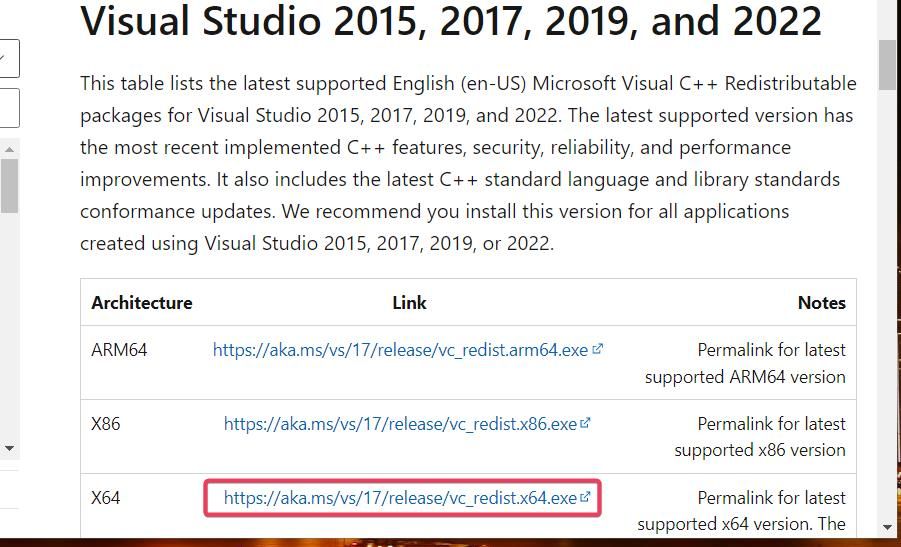
- Navigate to Microsoft’s Visual C++ Redistributable download page.
-
Click the X64 download link for Visual Studio 2015-2022.
-
Your browser will likely include a tab or menu that shows downloaded files. Open that Downloads tab, which has a Ctrl + J hotkey in the Firefox, Opera, Edge, and Chrome browsers.

-
Then click VC_redist.x64.exe to bring up the window shown below.
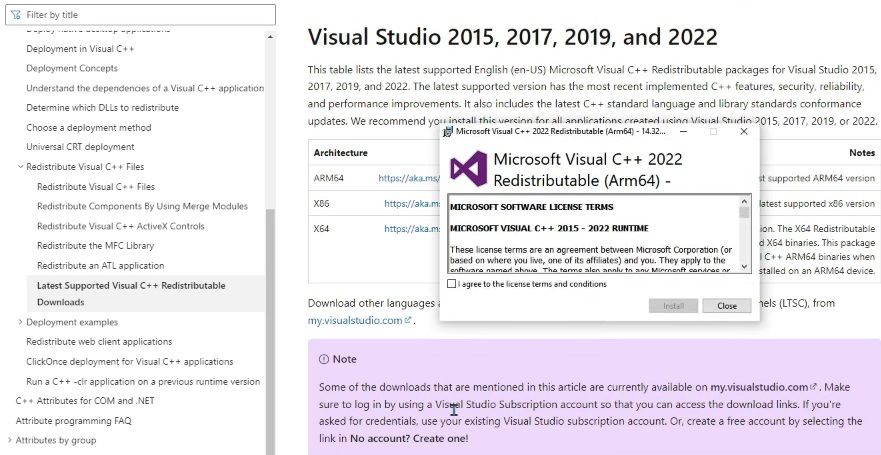
- If your PC is missing some runtime libraries, the Microsoft Visual C++ 2015-2022 Redistributable window will have an Install option. Click that Install button.
- Select the Restart now option after updating libraries.


6. Install the DirectX Runtime Libraries
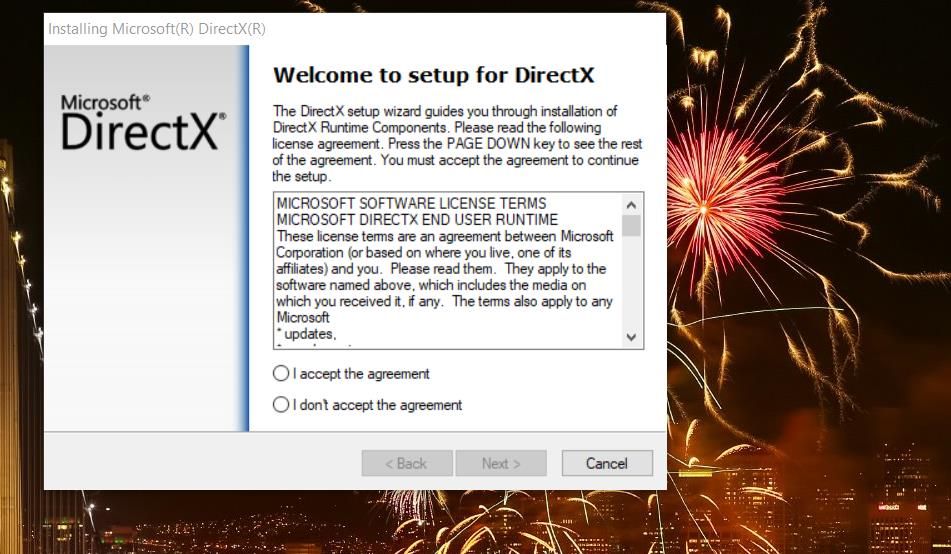
The DirectX End-User Runtime Web Installer has helped some users resolve the “D3D11-compatible GPU” error. That installer replaces missing or corrupted DirectX files. These are the steps for installing runtime libraries with the DirectX End-User Runtime Web Installer:
- Open Microsoft’s DirectX End-User Runtime Web Installer download webpage.
- Select that page’s Download option.
- Next, click the dxwebsetup.exe file in the download section of your browser.
-
Select the radio button for the I accept the agreement option inside the DirectX setup wizard.
- Click Next to view the Bing Bar offer.
- If you don’t want the extra software, uncheck the selected Install the Bing Bar option.
- Press the DirectX Setup wizard’s Next button.
- Click Finish in the wizard.
- Restart your Windows laptop or desktop.

7. Set Affected Games to Run With DirectX 11
If you can, try setting an affected game to run with DirectX 11 instead of DX12. Of course, you won’t be able to do that though the game’s settings screen if it doesn’t start in the first place.
However, you can set games to run with DirectX 11 with command line arguments in Epic Games and Steam. This is how to set an affected game to run with DirectX 11 in Epic Games and Steam:
How to Force DirectX 11 on Epic Games
For any titles on Epic Games:
- Bring up Epic Games Launcher’s window.
- Click the user account button near the top-right corner of the Epic Games Launcher window.
-
Select the Settings menu option.

- Click an affected game’s title to expand options for it.
-
Then select the game’s Additional Command Line Arguments checkbox.
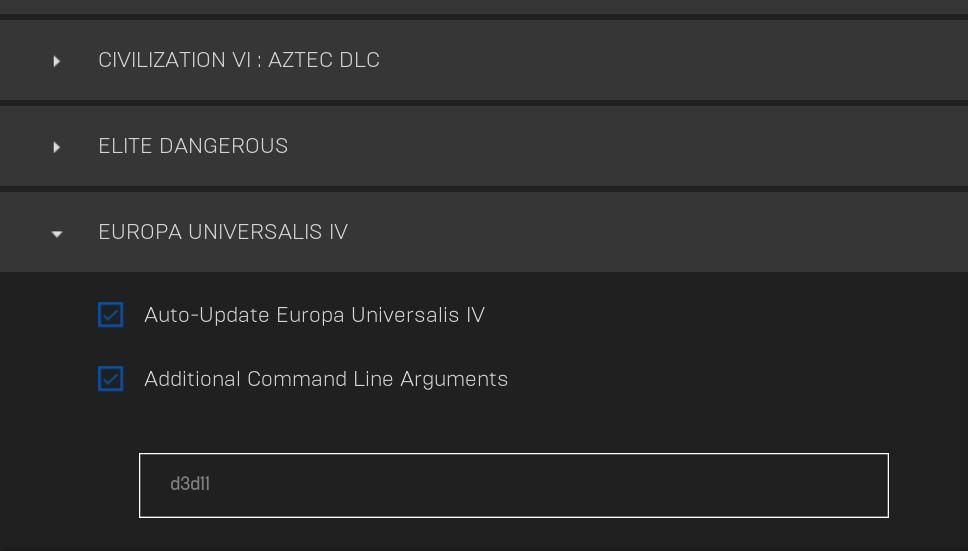
- Input d3d11 in the text box for the command line argument.

How to Force DirectX 11 on Steam
Likewise, if you're a fan of Steam:
- Bring up the Steam client software.
- Select Library along the top of Steam’s window.
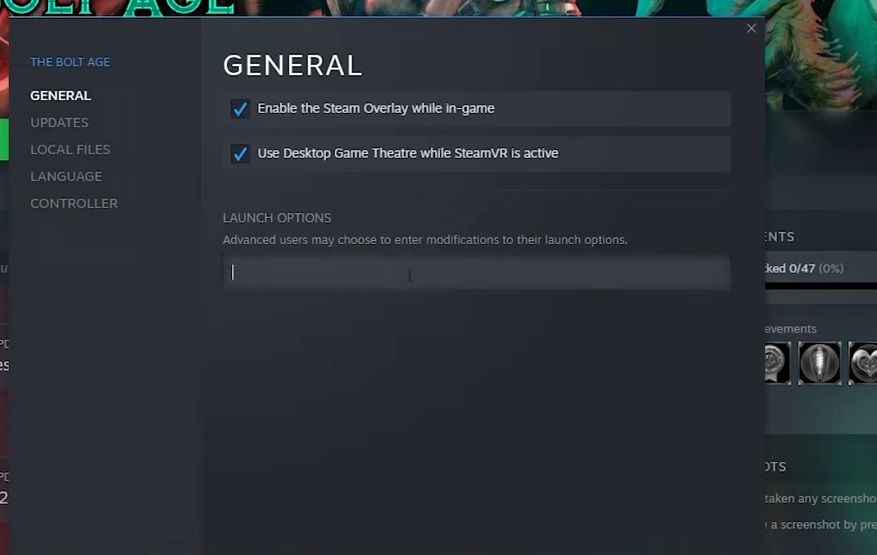
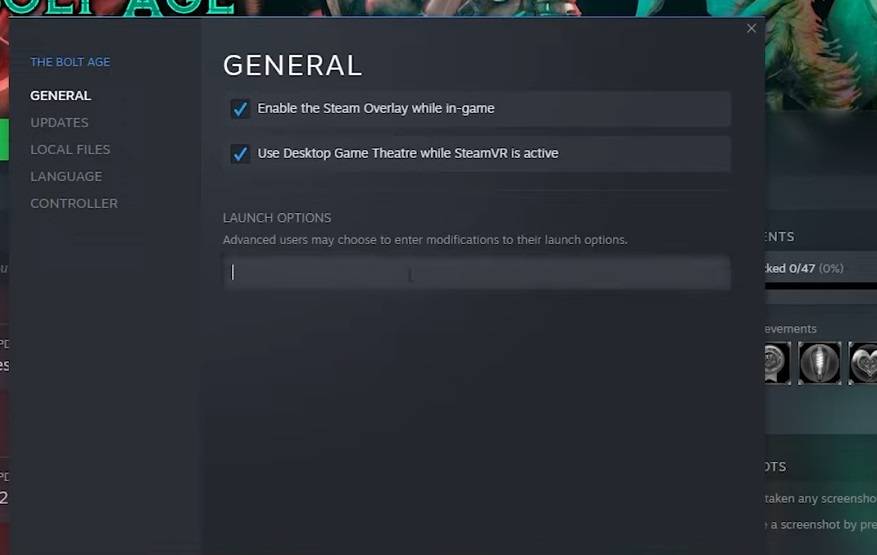
- Right-click whatever game the “D3D11-compatible GPU” occurs for and select Properties.
-
Input -dx11 in the launch option text box on the General tab.
8. Expand the Page File for More Virtual Memory
Expanding the page file will increase the amount of virtual memory available for games. That’s a recommended troubleshooting method for the “D3D11-compatible GPU” error since your PC can better handle system demands for graphically intensive games with a larger page file. Check out our guide to extending virtual memory in Windows to apply this potential fix.

Enjoy Your Windows Games Again
Many players have resolved the “D3D11-compatible GPU” error with the resolutions outlined in this guide. So, there’s a good likelihood that one of them will also get that issue sorted for your Windows 11/10 games. However, some players with PCs that have old GPUs might need to upgrade their graphics cards to fix the “D3D11-compatible GPU” issue.