A screen recorder is a handy tool, you'll agree. Recording your screen lets you capture important details, like the steps to use an app that you want to share with friends.
It gets better if you can also record yourself via your webcam while you're recording a screen. The possibilities are numerous, especially if you create videos for work or fun— and the results are great too.
So let's explore how to easily record your screen and camera via Microsoft's Clipchamp video editor.
Clipchamp: The Free and Built-In Screen Recorder for Windows
Microsoft's Clipchamp video editor has a built-in screen recorder for Windows that allows you to easily record your PC screen and feed from your PC's webcam simultaneously.
The Clipchamp Video Editor comes pre-installed on the latest Windows 11 version. You'll find the app's icon in the Start menu. If you don't see it or are on Windows 10, you can download it from the Microsoft Store.
Clipchamp is free and has several cool video editing tools to edit and shape your video the way you want. You can even resize your screen recording to vertical or horizontal aspect ratios to suit any platform like YouTube, LinkedIn, or social media stories.
You'll find it handy if you're a creator or educator, as you'll be able to create explainer videos and YouTube tutorials with it.
Or if you're someone who likes creating videos as a hobby or for fun, the Clipchamp screen and camera recorder will enable you to make personal videos to gift a loved one.
How to Record Your Screen and Camera Together With Clipchamp
Open the Clipchamp app on your Windows 11 or 10 computer. You can even use Clipchamp online on your browser by going to Clipchamp.com
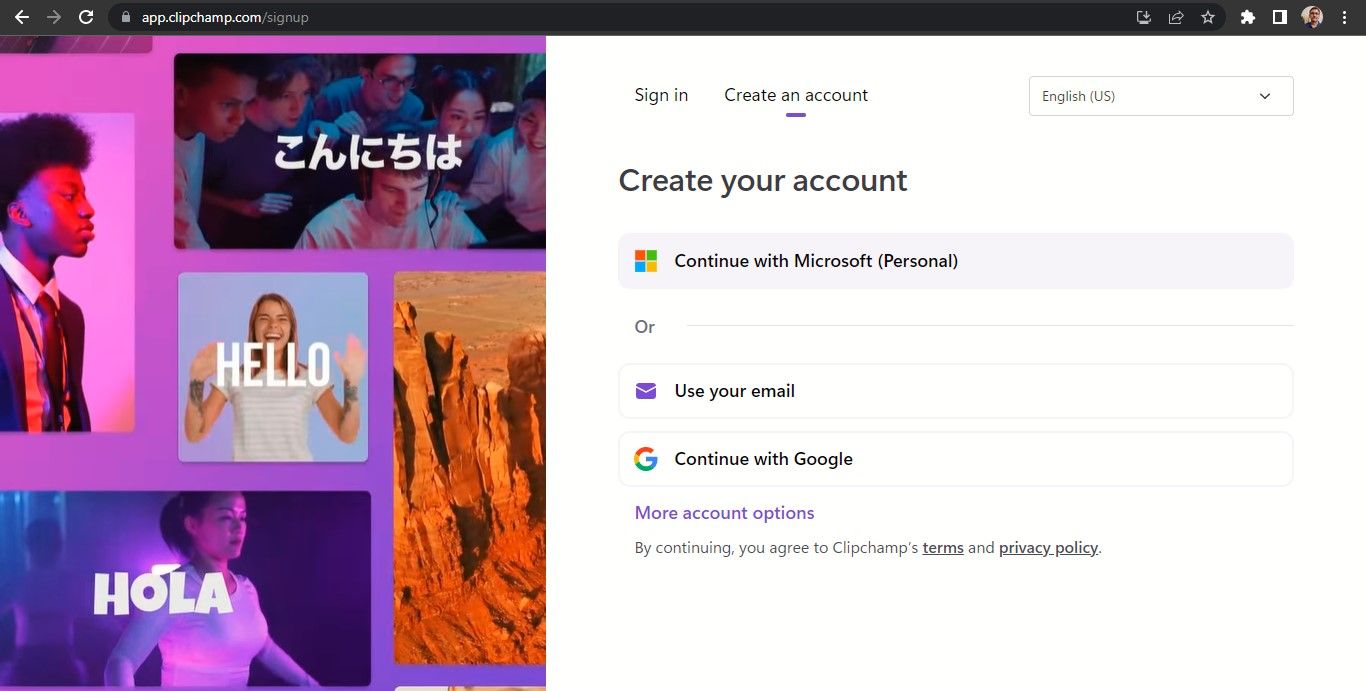
Firstly, sign in to Clipchamp with a Microsoft personal account, the same account you use to sign in to Windows. Or you can sign in with Google or email or create a new email.
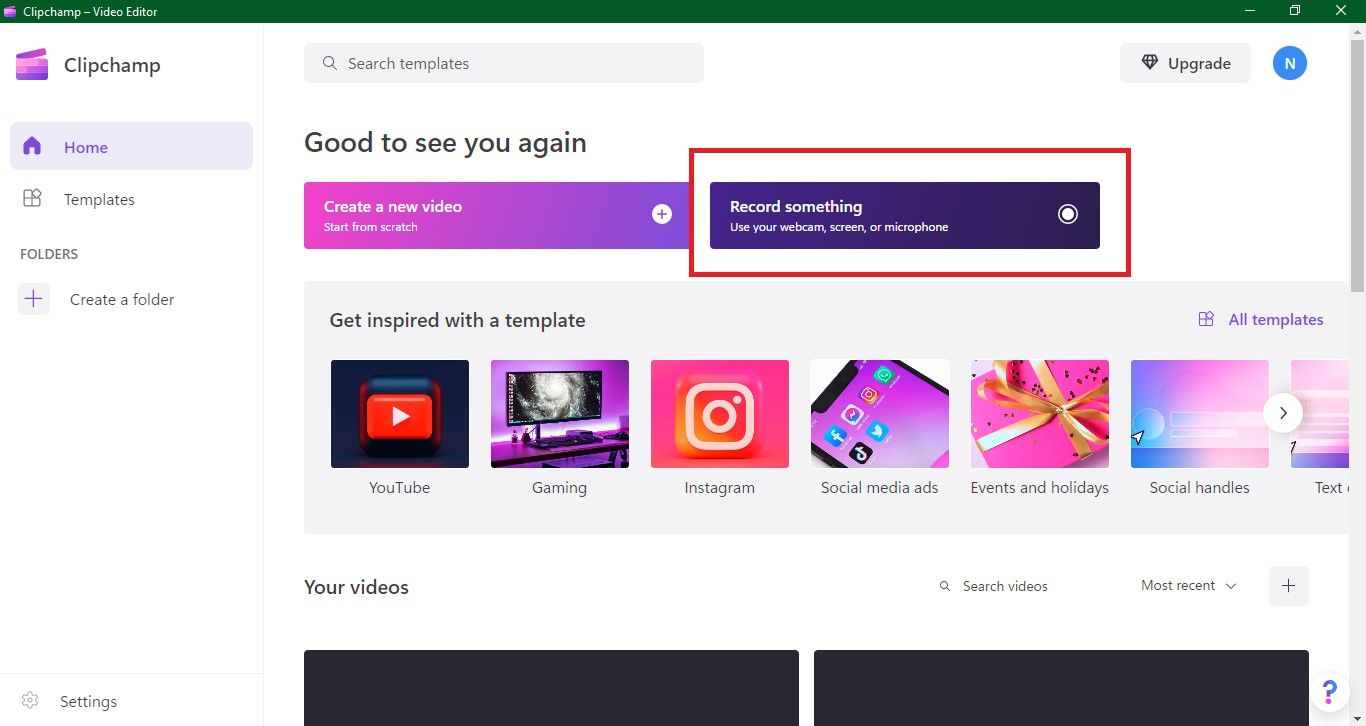
On the Clipchamp home page, click on the Record something button. The Clipchamp recording and editing screen will open up.
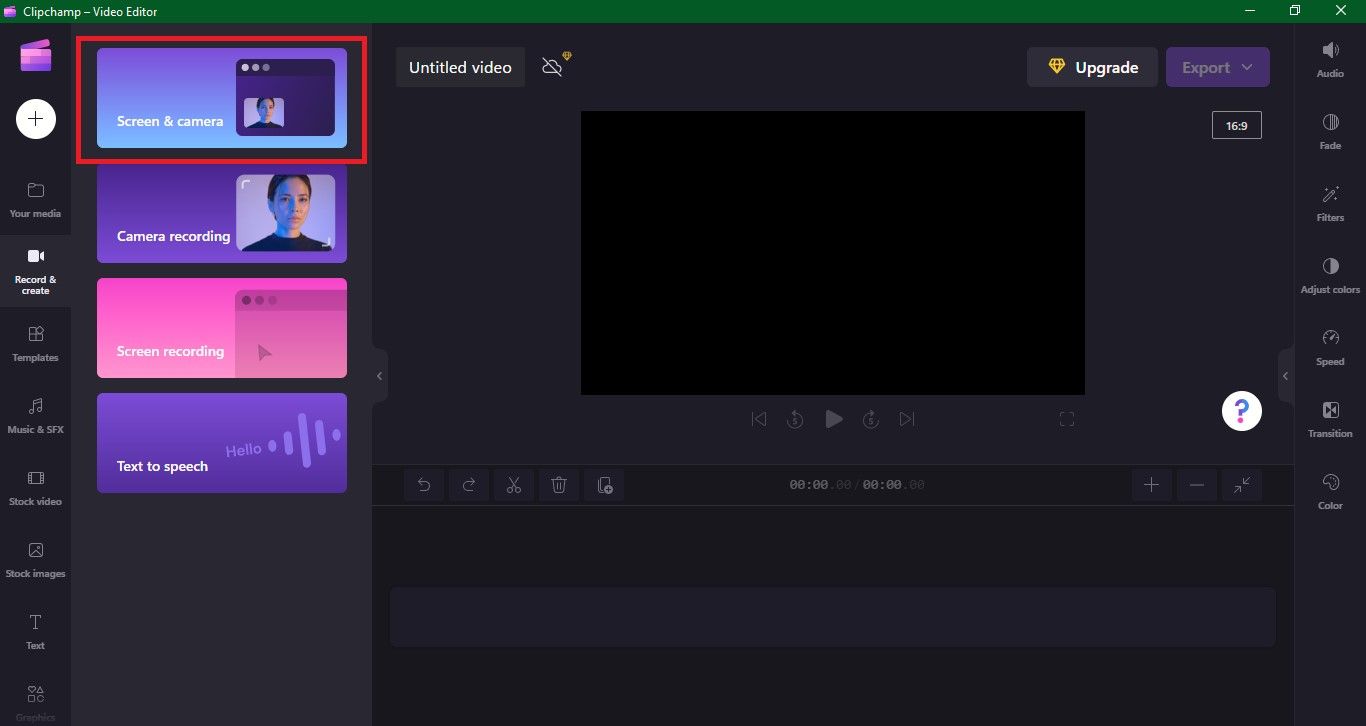
On the left of the page, you will find options to record Screen & camera, only Camera recording, or only Screen recording. Click on Screen and camera button.
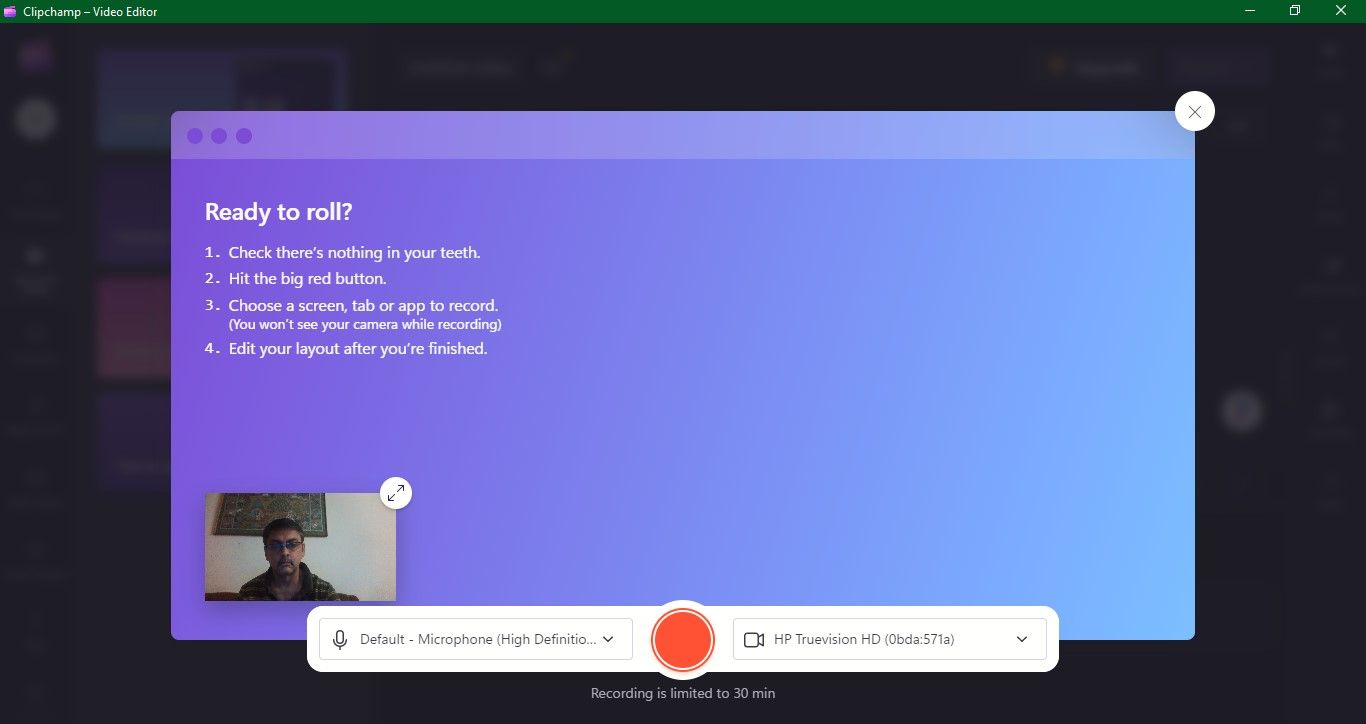
The blue recording screen will open up with your webcam feed appearing in a small window on the bottom left. You'll see yourself projected through the webcam on this small window. If you're using an antivirus, you might be prompted to allow the application to use your webcam.
On the bottom of the screen, you'll see that your PC's microphone and webcam have been selected by default. If you're using an external webcam, you would get the option to use that webcam and the webcam's microphone instead of your PC's built-in webcam and mic.
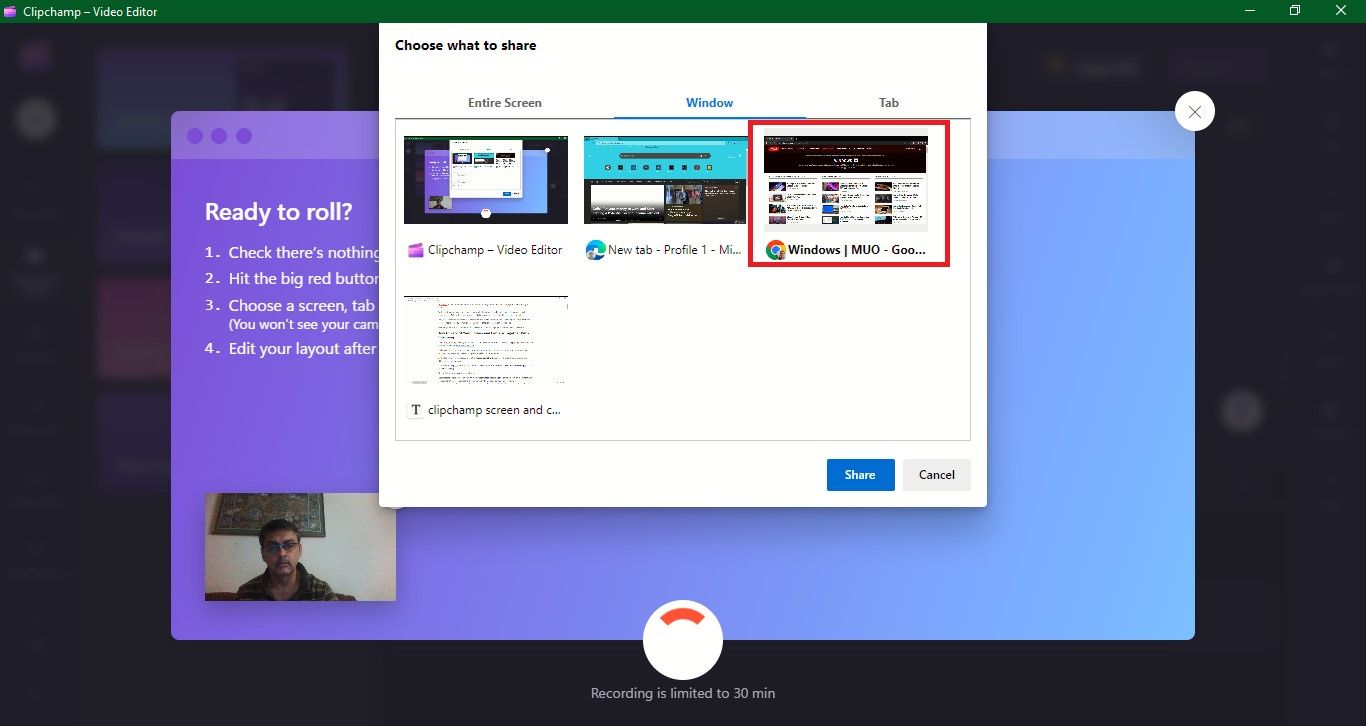
In the center, you'll see the round, red record button. Click the red button and a smaller pop-up window will open with screen recording options—Entire Screen, Window, or Tab.
For this tutorial, we chose to record a webpage from a window (I chose the Windows page on makeuseof.com), so we'll click the webpage to select it and then click the blue Share button. Using this, I can create a video about publishing articles on Windows for MakeUseOf as that's what I do.
Similarly, you can choose any website, webpage, or PowerPoint presentation in case you want to create a video explaining the presentation. You could go through the pages and talk about each point by recording yourself through the webcam. In fact, check out our guide on how to use the PowerPoint screen recorder for an even better presentation.
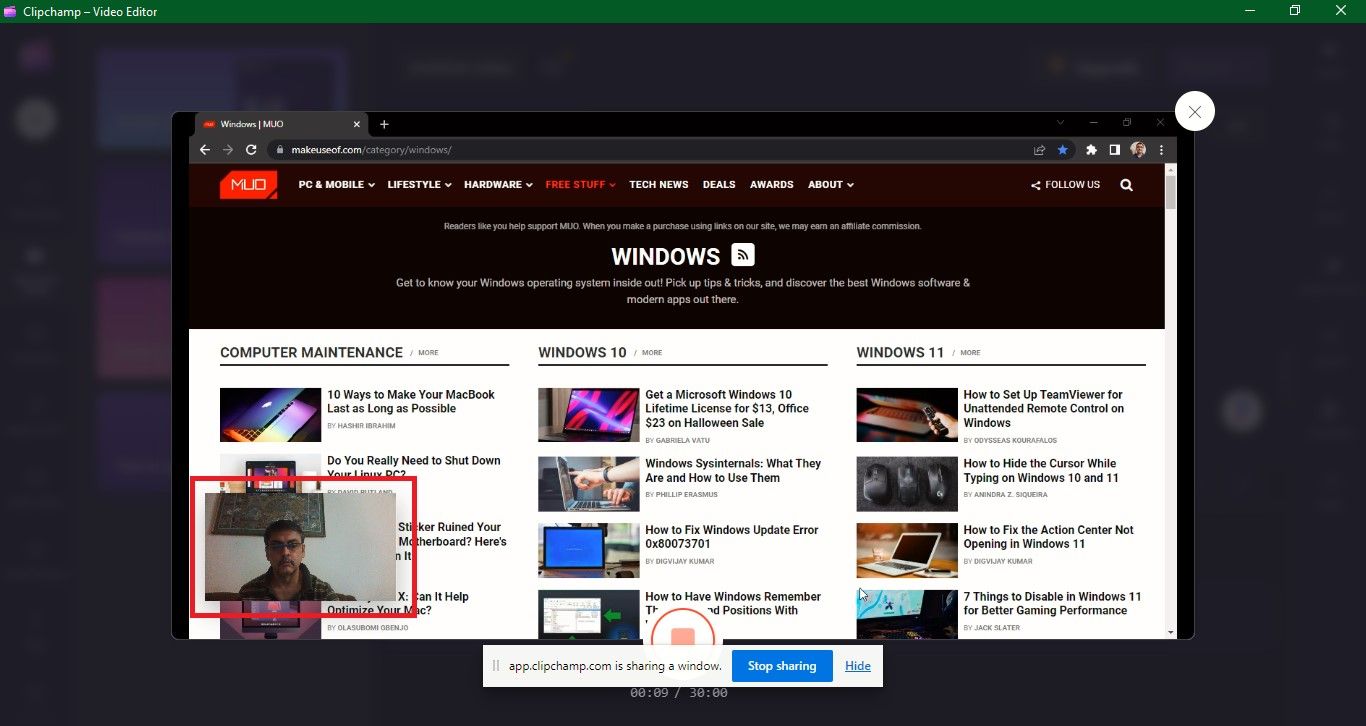
So once you click the Share button, the recording of your screen and camera will start and the window you want to record will appear. If you can't see your camera, just click on the Clipchamp icon on your PC's taskbar and you'll come to the screen with both the window and webcam being recorded.
You can record videos of up to 30 minutes per session. But there's no limit to the number of 30-minute recordings you can create. They can be combined later when you edit your video.
Once you've recorded what you want, click on the Stop sharing button. The recording will stop, and a preview of your recording will play. You can choose to Retake recording if you're not happy with it, which is handy, especially if you make a lot of YouTube videos. If you like the recording, you can choose to Save and edit.
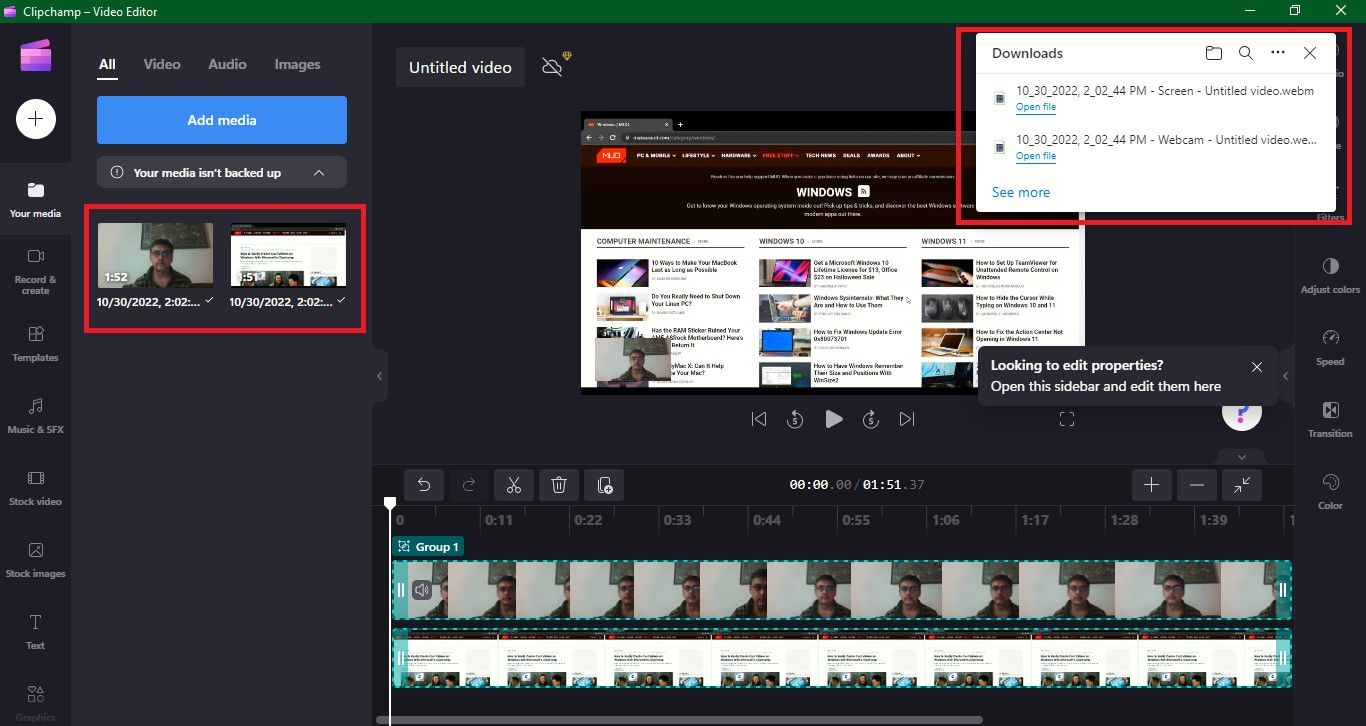
You will be brought back to the editor, and two files of your screen recording and your webcam feed will download on your PC, with a pop-up listing those files. Both recordings will appear on Your media tab and also be automatically added to your timeline, grouped one above the other.
What makes recording with Clipchamp great is that you can edit and enhance your recorded videos to suit your needs and media. Let's see how.
How to Edit Recorded Videos With the Clipchamp Video Editor
It's easy to edit your recorded videos with the Clipchamp Video Editor. There are many options to add text, graphics, pictures, audio, and even videos from the free and paid resources available within the app. So, no need to look up an external website.
Though both screen and camera recordings are on the timeline, you can also drag them individually from the Your media tab and drop them to the timeline, for easy editing, resizing, and replacing.
Click on the video you'd like to edit on your timeline—the camera or the screen recording. Your selected video will be highlighted in green.
Let's check out a few edits to see how you can enhance your videos.
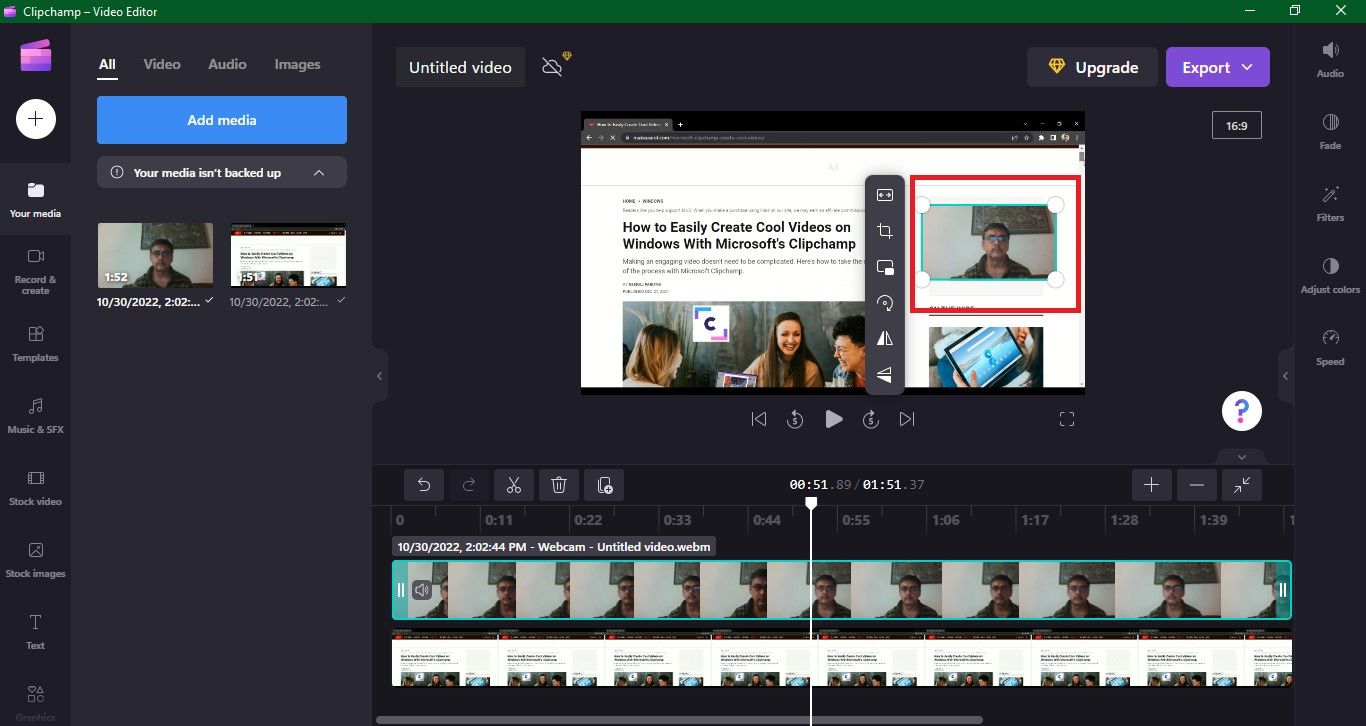
You can freely move your webcam recording around the screen by dragging and dropping the webcam video around the video preview screen. As you can see in the screenshot below, I have moved the webcam video to the top right and even increased the window size.
You can also have the webcam video fill the entire screen by choosing Fit from the vertical edit menu.
And you can always edit out the awkward silences or delete parts that have not come out well. Just cut them out by using the split and delete tool.
Click your timeline video and make sure your video is highlighted in green. Place your cursor at the time length you would like to crop. Click Split, the Scissors icon to cut your video clip. Then click the Delete button to delete the unwanted clip.
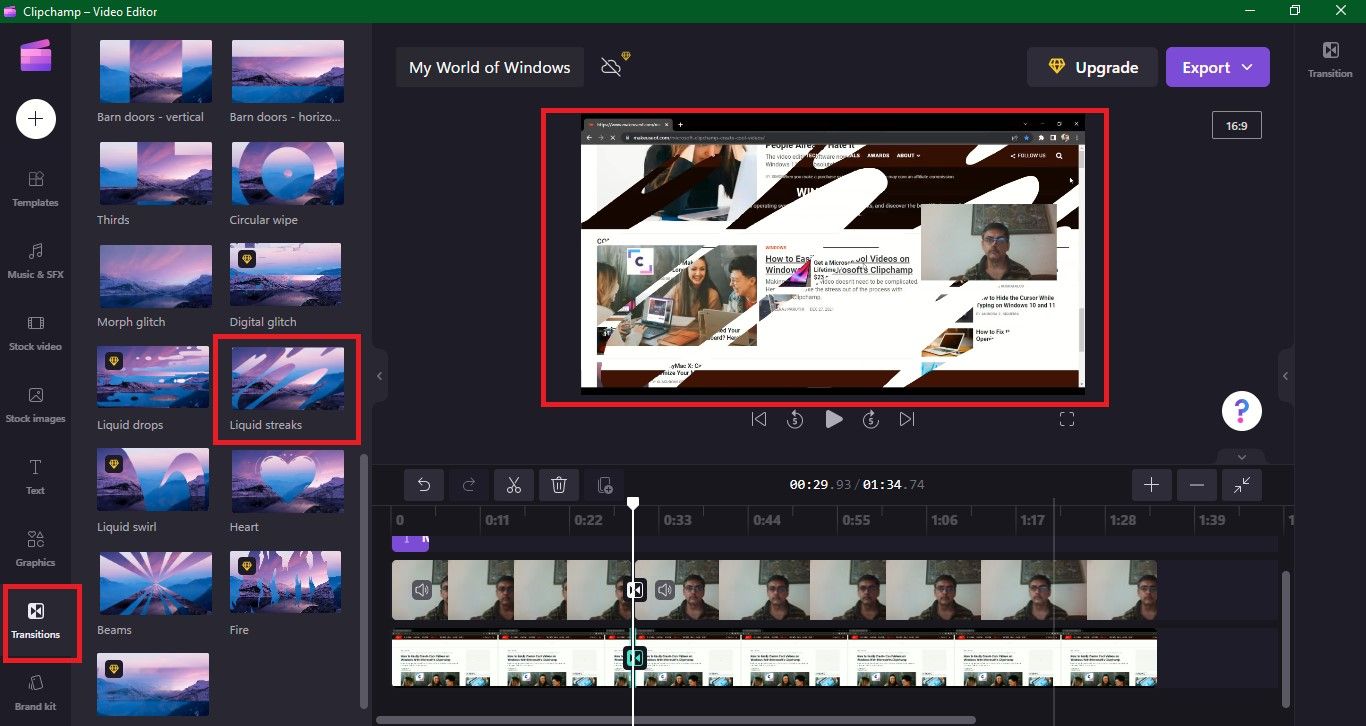
After deleting a clip, the video might seem jerky when playing. Click on the Transitions tab on the left toolbar and choose a transition. As you can see in the screenshot below, the Liquid streaks transition has been added by simply dragging and dropping it on the timeline.
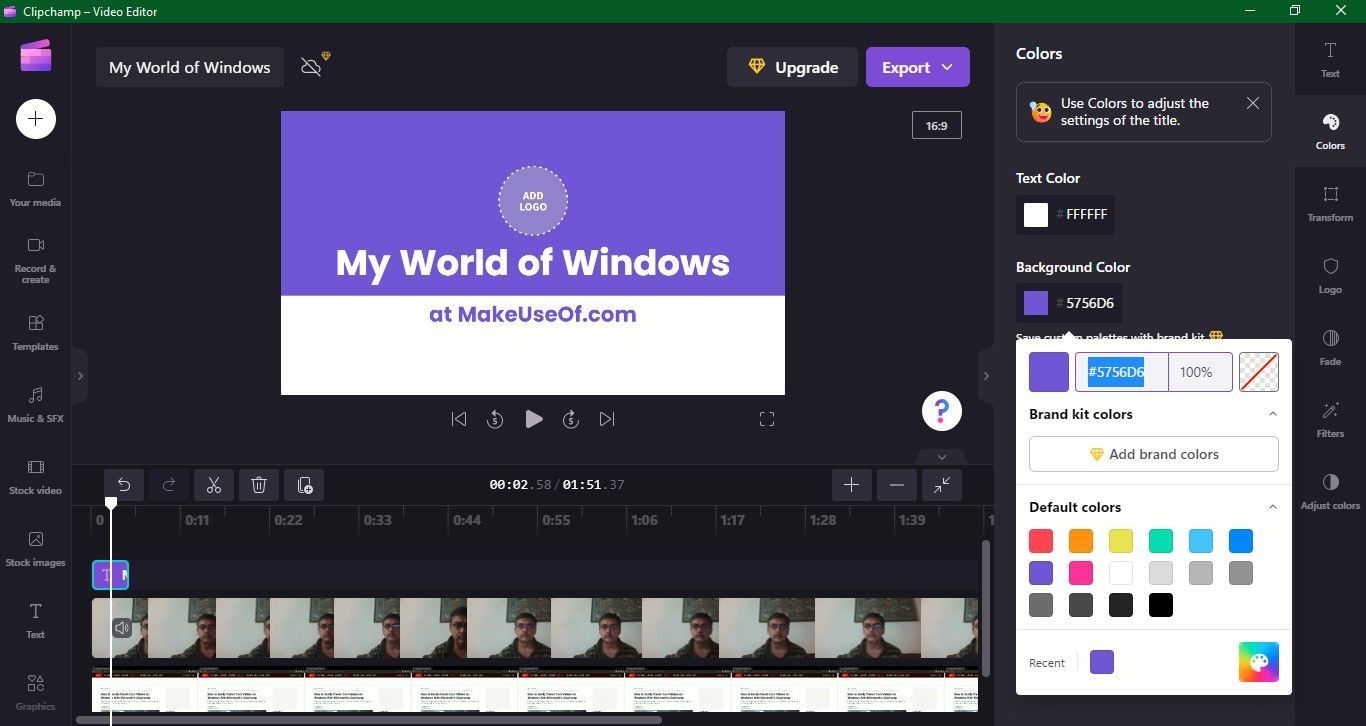
You can also add an introduction frame by clicking Text on the left sidebar. Then, click on the plus button next to the title thumbnail or drag and drop your chosen title onto the timeline.
As you can see in the screenshot below, the title of the video has been given as My World of Windows at MakeuseOf.com and the color has been changed to purple. You can also add your brand logo, and alter the size and color of the text.
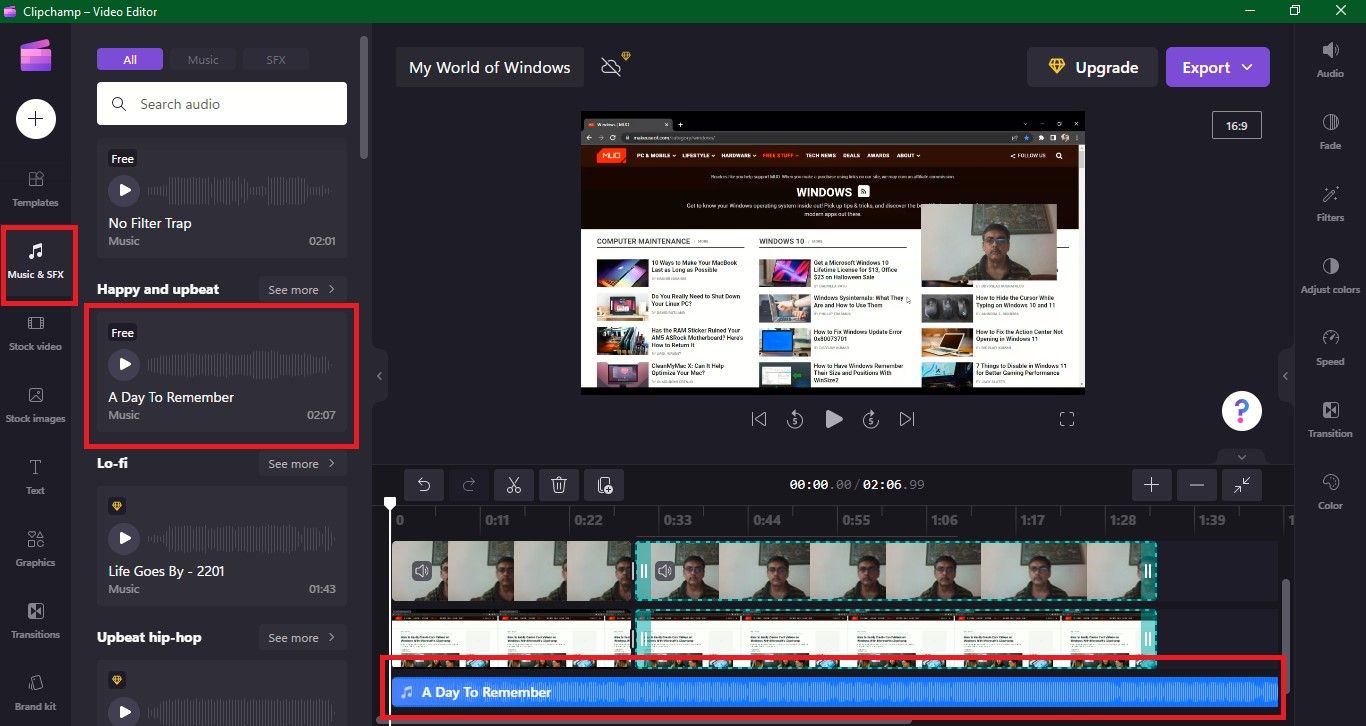
Similarly, you can add a music track to your video. Click on Music & SFX from the left toolbar, drag your preferred piece on the timeline, and preview it to alter the length to fit the video. The screenshot below shows A Day to Remember music piece added to the timeline.
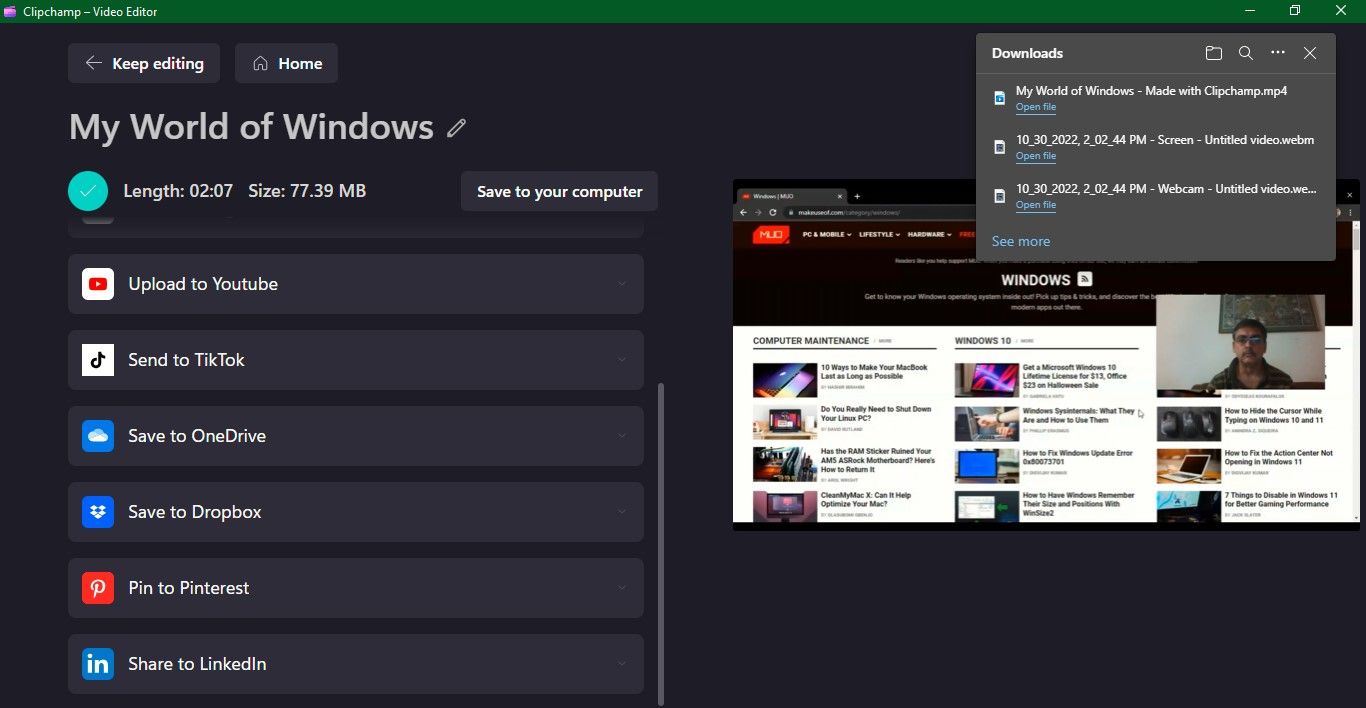
When you're happy with your video, click on the purple Export button at the top right corner. You can save your video in 480p, 720p, or 1080p resolution.
Once done it will automatically download on your computer. You can also create a link to share with anyone, save to Google Drive, upload to YouTube or TikTok, save to OneDrive, or share on LinkedIn.
Moreover, you can also easily create cool videos for Instagram and YouTube with Clipchamp. And you can also screen record using AMD Radeon.
Enjoy Recording and Creating Cool Videos for Work and Fun
The kind of videos you can create using Clipchamp's screen and camera recorder is only limited by your imagination.
You could create and share professional-looking presentations, engaging explainer videos, sales pitches, and more. Or you could create videos of a family holiday or celebration and describe each moment to make the experience memorable for your loved ones.

.jpg)
