Isn't it ultra-annoying how, at least on Windows, any window might pop up anywhere on the screen? Does that daily randomness get on your nerves, and you'd prefer having more control over your windows' on-screen placement? Well, now you can, thanks to AutoHotKey.
In this tutorial, we'll see how you can solve this problem with an AutoHotKey script. We'll build it so that it moves any window to the center of your screen at a keypress. Sounds sweet? Let's see how it's done!
How to Set Up a Window-Centering Hotkey With AutoHotKey
Half the battle when creating a script is coming up with how it will work before even typing a single character. So, let's make such an action plan in plain English that we'll then "mutate" into a script.
The "Problem" Windows Has
Windows (as in "the rectangle thingies on our screens", not the OS) tend to pop anywhere on the screen. It's distracting, and it can also be annoying when it happens repeatedly. Especially when dealing with multiple requesters popping on different spots, expecting user input.
The Solution to the Problem
Apart from sending keystrokes and mouse clicks to any window, AutoHotKey can also manipulate them. We saw in the past how you can use AutoHotKey to pin windows "always on top" using a keyboard shortcut. This time, though, we'll take advantage of AutoHotKey's window manipulation abilities to:
- "Read" the active window's ID.
- Also "read" its dimensions (width & height).
- "Read" the monitor's dimensions.
- Combine the monitor's and window's dimensions to calculate the optimal coordinates for presenting said window in the screen center.
- Move the window to those coordinates.
Finally, we'll map the above to a shortcut. This way, you can call it "on-demand" instead of applying it on all windows - which could interfere with full-screen apps and games.
Note that in this tutorial, we'll dive right into AutoHotKey. If you're unfamiliar with it and want to learn more beforehand, check our quick AutoHotKey guide for beginners.
First, Setting Up the HotKey
We mentioned how we'll map the function we'll create to a shortcut. However, it's probably better if we begin with that part to get it out of the way.
Start by downloading the installer from AutoHotKey's official site. Go for the "current" version instead of the v2 beta or the deprecated 1.0 version. Then, install it on your PC.
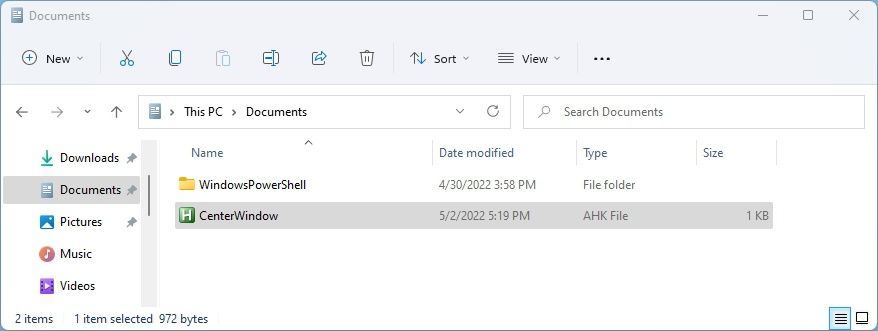
Launch the File Explorer (the quickest way is with the Windows Key + E key combination) and move to the path where you want to create your script. With AutoHotKey installed, you'll have some new options appear on the right-click menu. So, right-click on the empty space of File Explorer's window and choose New > AutoHotKey Script.
Give your script's file a name, and then right-click on it and edit it. If you aren't using a code-friendly text editing app, like Visual Studio Code or Notepad++, use Windows Notepad. Avoid editors like Wordpad, which could add useless (for the purpose) syntax to your "code".
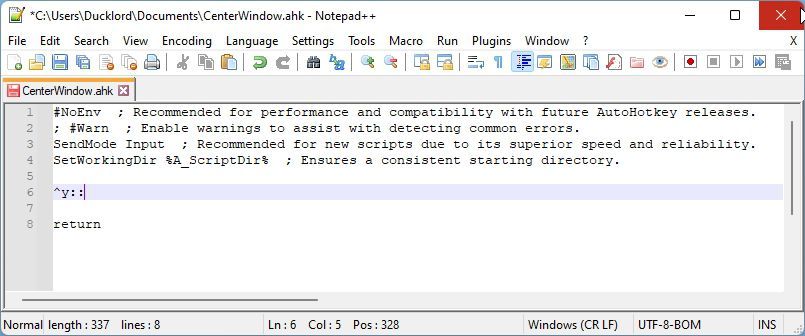
When in your editor of choice, you'll see your AutoHotKey script already has some lines pre-populated at the top. They're there for stability and compatibility reasons. They're tweakable, but leave them as they are for this tutorial.
"Move" two or three lines below them and enter the shortcut that will launch your function. You can craft a key combination by using "+" for Shift, "^" for CTRL, "!" for Alt, and "#" for the Windows Key, as well as any "normal" key from the keyboard (letters and numbers).
For example, to have the CTRL + Y combination launch your script, use:
^y::
The double ":" is like saying, "hey, AutoHotKey, please map the string or key combination on the left to everything on the right".
"Move" two or three lines below that by pressing Enter, and type "return", which will mark the end of the particular function. The complete result should look like the following:
        ^y::

; This is a comment.

return
The "; This is a comment." line is precisely that, a comment in the script's "code" that AutoHotKey won't execute. It's there for documentation purposes to mark the spot where we'll enter the script's "code" in the following steps.
If you've followed our guide on creating app-specific hotkeys with AutoHotKey in the past, in this case... don't. You want your window-centering hotkey to be "global" to center any window from any app. If you "tie it" to a particular app, it will only act on this app's windows.
Get the Active Window’s Details
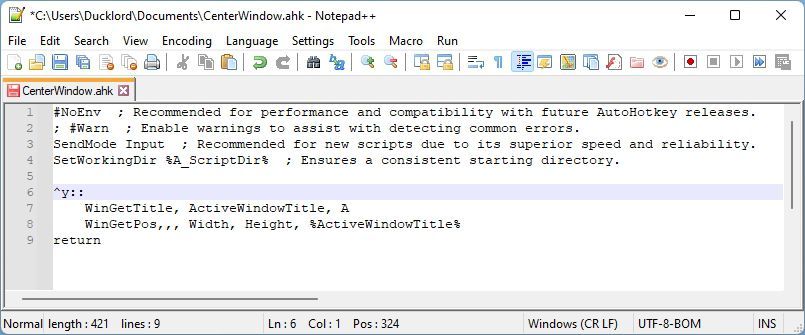
We want our shortcut to act on the active window, and we also need its dimensions for our calculations. We can find those details with the following:
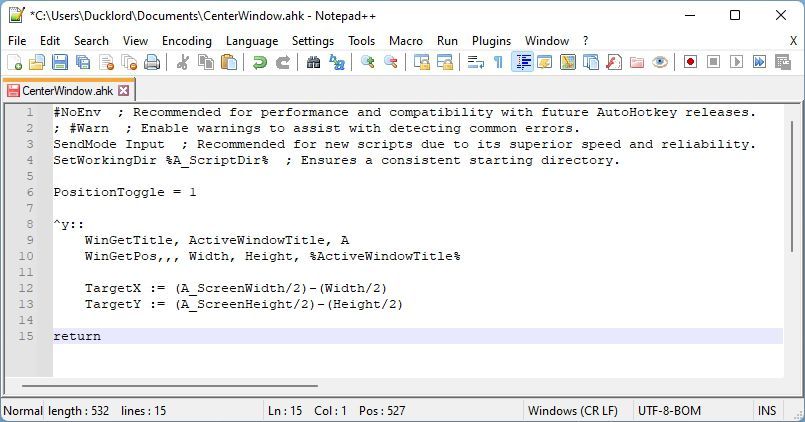
        WinGetTitle, ActiveWindowTitle, A
WinGetPos,,, Width, Height, %ActiveWindowTitle%
Replace the comment line we've added to the script in the previous section with the two lines above. The result?
- The first line grabs the active window's title.
- The second line reads its width and height and maps them to the words/variables "Width" and "Height", which we'll use next for our calculations.
We got the active window's details, but we also need the monitor's visible area's dimensions to achieve our goal. Thankfully, finding those out is even easier.
What About the Primary Monitor Area?
We don't need extra commands to find our primary monitor's width and height. AutoHotKey comes with two preset variables that already contain that information for us: "A_ScreenWidth" and "A_ScreenHeight".
So, when you see them in the next section, they already "contain" the primary monitor's width and height. There's nothing needed to assign the correct values to them. Thus, we can use them directly in our calculations.
Time to Calculate the Target Position
We can include the calculations directly in the points of the script where we need them. Still, it's easier and better for readability if we map them to two variables and then use those variables in our script.
So, let's go for "TargetX" as the variable that will hold the horizontal coordinates and "TargetY" as the one with the vertical coordinates where we should move the window to have it appear in the center of the screen.
        TargetX := (A_ScreenWidth/2)-(Width/2) ; Here we calculate the horizontal window target...
TargetY := (A_ScreenHeight/2)-(Height/2) ; ...and here the vertical one.
Let's decipher those lines in plain English:
- "TargetX" and "TargetY" are the two variables.
- ":=" informs AutoHotKey that the variables should be equal to the results of the calculations on the right, and that those results should be treated as numbers.
- "(A_ScreenWidth/2)" divides the full monitor's width by two.
- "(Width/2)" does the same for the active window's width.
With the above, we're subtracting half the active window's width from half the screen's width. What's left is the space to the left of the window - from the left side of the screen and up to where the window should appear. The second line does the same but for the height.
Now to Reposition the Window
Equipped with the all-powerful knowledge acquired from the mystical commands we saw above, we can now craft our magical incantation that will complete the window teleportation ritual. Or, in plain English, use AutoHotKey's "WinMove" command to move windows around the screen.
WinMove expects us to "feed" it with at least three pieces of information to do its deed: the targeted window's title and the coordinates where to move it. Since we've already mapped those pieces of information to variables, the command is as simple as:
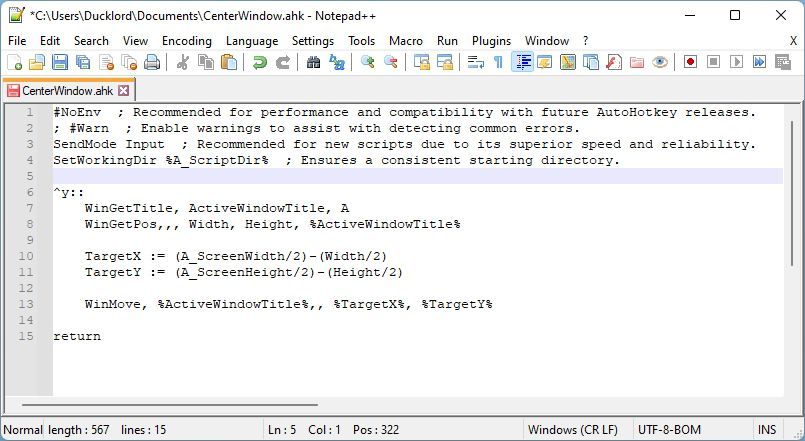
WinMove, %ActiveWindowTitle%,, %TargetX%, %TargetY%
In the above:
- "WinMove" is the AutoHotKey command that moves a window around.
- "%ActiveWindowTitle%" is the variable where the active window's title is mapped.
- "%TargetX%" and "%TargetY%" are the horizontal and vertical coordinates where to move the window.
You can also resize windows with WinMove, skip those with particular text stings in their titles or content, etc. Since those features are outside the scope of this article, check AutoHotKey's official documentation on the WinMove command for more on them.
The Final Script
Finally, we reach the most challenging part of our journey. Brace yourself for the next step expects you to save the script and, well... Run it.
Yes, that was it - the script's complete, and there's nothing more to do than try it out. Use the shortcut you defined, and any active window will move to the center of your screen.
The final script file, as opened in a text editor, should look something like this:
        #NoEnv  ; Recommended for performance and compatibility with future AutoHotkey releases.
; #Warn  ; Enable warnings to assist with detecting common errors.
SendMode Input  ; Recommended for new scripts due to its superior speed and reliability.
SetWorkingDir %A_ScriptDir%  ; Ensures a consistent starting directory.

^y::
	WinGetTitle, ActiveWindowTitle, A ; Get the active window's title for "targetting" it/acting on it.
	WinGetPos,,, Width, Height, %ActiveWindowTitle% ; Get the active window's position, used for our calculations.

	TargetX := (A_ScreenWidth/2)-(Width/2) ; Calculate the horizontal target where we'll move the window.
	TargetY := (A_ScreenHeight/2)-(Height/2) ; Calculate the vertical placement of the window.

	WinMove, %ActiveWindowTitle%,, %TargetX%, %TargetY% ; Move the window to the calculated coordinates.

return
Note that you can copy the script above, paste it in Notepad or a similar text editor, and save it with an AHK extension. Then, "run" it, with AutoHotKey installed, to center any window whenever you press CTRL + Y. If you don't like that shortcut, tweak the "^y::" line to a different key combination. For example, !+c:: would map the function to the Shift + Alt + C key combination.
Bonus Track
For your convenience, we've decided to conjure and include a secondary script that will be useful to those with dual monitor setups.
To keep this article streamlined, we've instead included information on how the script works within it in the form of comments. You can remove them from your iteration.
The short story of how it differs from the script above is that we also add a PositionToggle variable and some "IF logic". We then use those to "flick" the window between monitors. We should note that it's an inelegant and "hack-y" solution to the problem. However, we preferred it to more streamlined code since this approach is easier to understand and tweak for everyone not familiar with AutoHotKey.
        #NoEnv  ; Recommended for performance and compatibility with future AutoHotkey releases.
; #Warn  ; Enable warnings to assist with detecting common errors.
SendMode Input  ; Recommended for new scripts due to its superior speed and reliability.
SetWorkingDir %A_ScriptDir%  ; Ensures a consistent starting directory.

PositionToggle = 1 ; Use a number as a toggle for marking on which monitor the window should appear.

^y::
	WinGetTitle, ActiveWindowTitle, A
	WinGetPos,,, Width, Height, %ActiveWindowTitle%

	If PositionToggle = 1 ; Check the toggle's state and "do what's between the curly brackets" if it's set to 1 for our primary monitor.
	{
		TargetX := (A_ScreenWidth/2)-(Width/2)
		TargetY := (A_ScreenHeight/2)-(Height/2)

		PositionToggle = 2 ; "Flick" the toggle so that if we reuse the hotkey, our active window will move to the second monitor.
	}
	Else If PositionToggle = 2 ; Have we used the hotkey before, "flicking" the toggle number to the second monitor? Then the script should instead do what's between the following curly brackets instead of the ones above.
	{
		SysGet, Mon2, Monitor, 2 ; Get the second monitor's details
		Mon2Width := Mon2Right - Mon2Left ; Calculate the second monitor's actual width.
		Mon2Height := Mon2Bottom - Mon2Top ; Calculate the second monitor's actual height.

		TargetX := (Mon2Width/2)-(Width/2)+A_ScreenWidth ; Calculate where to move the window. Notice that we also add the primary monitor's width since AutoHotKey can't move windows on individual monitors but across their combined "surface".
		TargetY := (Mon2Height/2)-(Height/2)+Mon2Top ; Calculate the optimal vertical target for moving the window on the second monitor. Like above, the second monitor's vertical details are detected in relation to the primary monitor. Thus, we have to get creative to get an optimal target by acknowledging how the second monitor's top isn't equal to 0 (like the primary one's).

		PositionToggle = 1 ; Flick the toggle back so that if we reuse the hotkey, the window will move back to the primary monitor.
	}

	WinMove, %ActiveWindowTitle%,, %TargetX%, %TargetY% ; The actual action, moving the active window to our calculated coordinates.

return
Center a Window With a Key, the Easy Way
And now you're done! If everything works well, you can now use your newly-set up hotkey to center a window anytime.

