Just when you’re about to open your favorite app, you bump into an error message that reads, “This app does not support the contract specified.”
Fortunately, there are solutions to this problem to help you get back into your apps. So, let’s dive in and explore all the easy ways to resolve the issue at hand.
1. Turn Off the Windows Defender Firewall
The Windows Defender Firewall often prevents you from running malicious apps. When it detects a threat, it usually pops up various error messages.
However, the tool might also prevent you from running third-party apps that aren't faulty. In such instances, it might be worth disabling this tool.
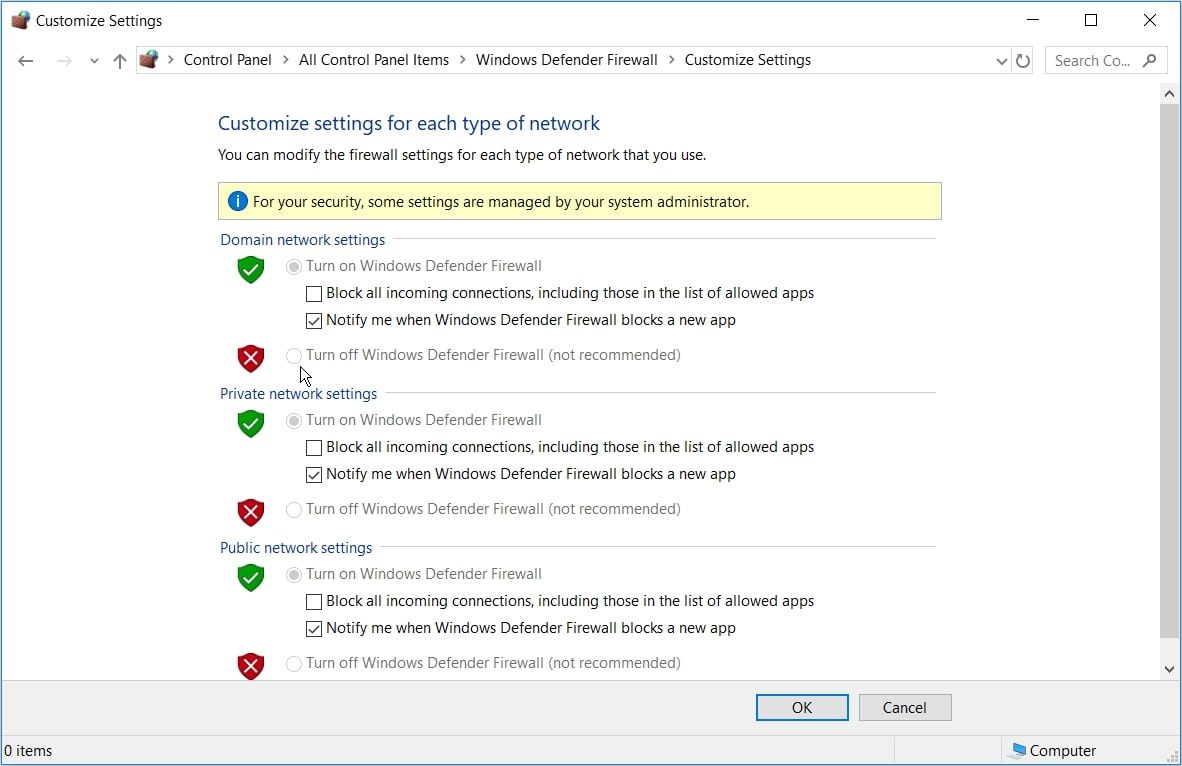
So, let's tackle the issue at hand by disabling the Windows Defender Firewall:
- Type Control Panel in the Start menu search bar and select the Best match.
- Click the View by drop-down menu and then select Large icons.
- Select Windows Defender Firewall from the options.
- Click the Turn Windows Defender Firewall on and off option.
- Next, check the Turn off Windows Defender Firewall boxes on the Private, Domain, and Public network settings. Finally, press OK to save these settings.
It might also be worth turning off your third-party antivirus program to resolve the problem. However, remember to switch it on again after resolving the issue at hand.
2. Use the System Troubleshooters
The Windows system troubleshooters can help you resolve almost any problem on your PC. However, you have to pick the right tool depending on the nature of the problem.
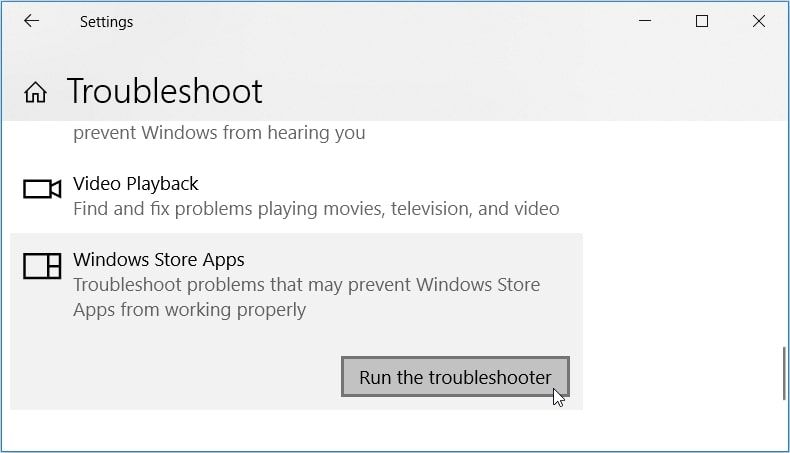
For example, are you experiencing issues when running apps from the Microsoft Store? If so, then the Windows Store Apps troubleshooter could help.
So, here's how to resolve the issue with the Windows Store Apps troubleshooter:
- Type Settings in the Start menu search bar and select the Best match.
- Select Update & Security from the options. Next, select Troubleshoot on the left-hand side pane.
- Select the Windows Store Apps troubleshooter on the right-hand side. From there, press the Run the troubleshooter button.
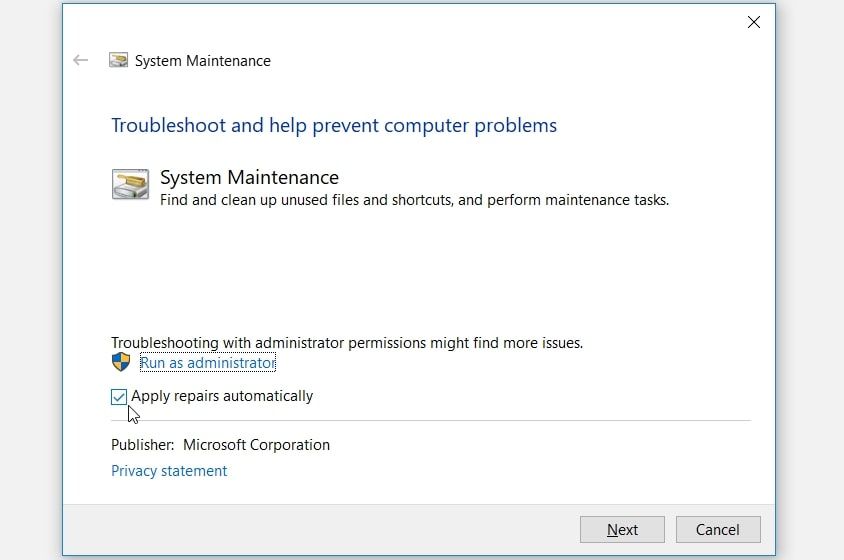
Let’s now suppose that this issue is caused by system maintenance problems. In such instances, the System Maintenance troubleshooter should help.
Here are the steps for running this tool:
- Type Recommended maintenance tasks automatically in the Start menu search bar and select the Best match. This should open the System Maintenance troubleshooter.
- Click Advanced in the bottom-left corner and then check the Apply repairs automatically box.
- Press the Next button in the bottom-right corner and then follow the on-screen instructions.
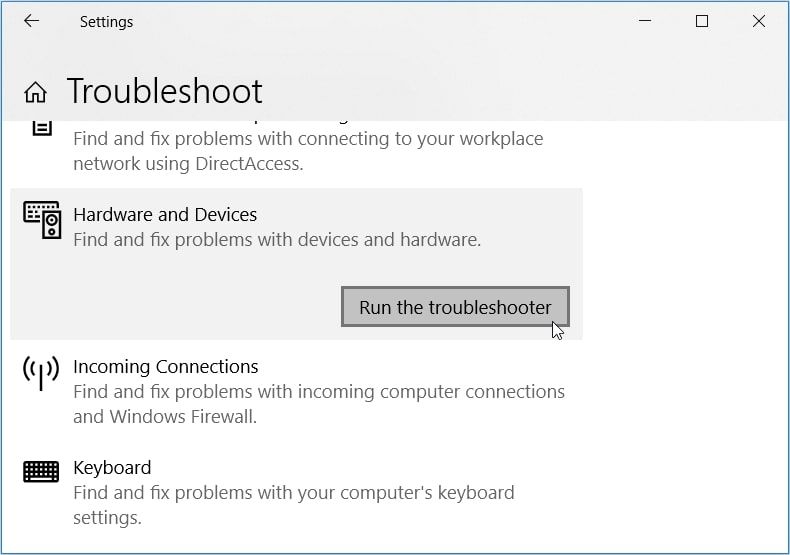
If the issue persists, then you might be dealing with a hardware-related problem. In this case, the Hardware and Devices troubleshooter should help.
Here are the steps for running the Hardware and Devices troubleshooter:
- Type Settings in the Start menu search bar and select the Best match.
- Select Update & Security from the options. Next, select Troubleshoot on the left-hand side pane.
- Click the Hardware and Devices troubleshooter on the right-hand side.
- Press the Run the troubleshooter button and then follow the on-screen instructions.
3. Fix or Replace Corrupted System Files
Struggling to resolve the issue using the built-in troubleshooters? If so, then you should use sophisticated diagnostic tools such as CHKDSK, SFC, and DISM.
These three tools always come in handy for fixing or replacing corrupted system files. So, if the issue at hand is caused by a system bug, these tools should help you out.
Let’s start by running a CHKDSK scan:
- Type Command Prompt in the Start menu search bar.
- Right-click on the Best match result and select Run as administrator.
- Type the following command and press Enter:
chkdsk C: /f
If you want to scan a different drive, replace the C: command with the letter of the relevant drive. Finally, restart your device once the CHKDSK scan is complete.
If the issue persists, try running the DISM and SFC tools.
Here are the steps for running a DISM scan:
- Open the Command Prompt by applying the previous methods.
- Type the following command and press Enter to run the scan:
DISM /Online /Cleanup-Image /ScanHealth
Wait for the process to complete. From there, type the following command and then press Enter:
DISM /Online /Cleanup-Image /RestoreHealth
Restart your device when this process is complete. From there, run an SFC scan through these steps:
- Open the Command Prompt as per the previous steps.
- Type the following command and press Enter:
sfc /scannow
Wait for the scan to complete. Finally, close the Command Prompt and restart your device to save these changes.
4. Find Faulty Apps and Update or Re-Install Them
In some instances, the issue at hand is caused by faulty third-party apps. So, the best solution is to find the problematic apps and do something about them.
For example, you could update or reinstall any suspicious third-party app. If the issue persists, you might consider deleting your faulty apps.
If you struggle to find any suspicious app on your device, try performing a clean boot. That way, your device will boot up and run only the essential apps required by the operating system. In this case, all your third-party apps won’t be running in the background.
If clean booting resolves the problem, then it’s clear that there’s a third-party app that’s causing problems. To get to the root of the problem, try updating or re-installing all your third-party apps—one at a time.
5. Restore Your Device to Its Previous State
Is the “App does not support the contract specified” error a recent issue? If so, then the System Restore tool could help.
When using the System Restore tool, your PC will return to its previous state. During this process, the device will get rid of any recent systems issues. So, this could also get rid of the “App does not support the contract specified” error.
But here’s the thing: you can only use the System Restore tool if you’ve created a Restore Point.
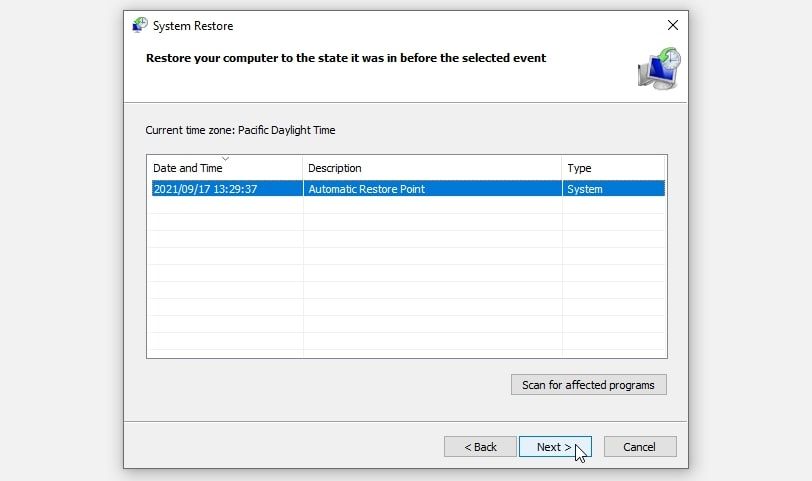
So, if you have some restore points saved on your PC, here’s how you can use one of them:
- Type Create a Restore Point in the Start menu search bar and select the Best match.
- Navigate to the System Protection tab, click System Restore, and then press Next.
- Select Show more restore points, select your preferred restore point, and click Next.
- Press the Finish button and then follow the on-screen instructions.
6. Update Your Windows Device
If all else fails, then updating your device might be the solution. When you update Windows, the system installs the latest features that eliminate most security threats and bugs.
So, here are the steps for updating your Windows PC:
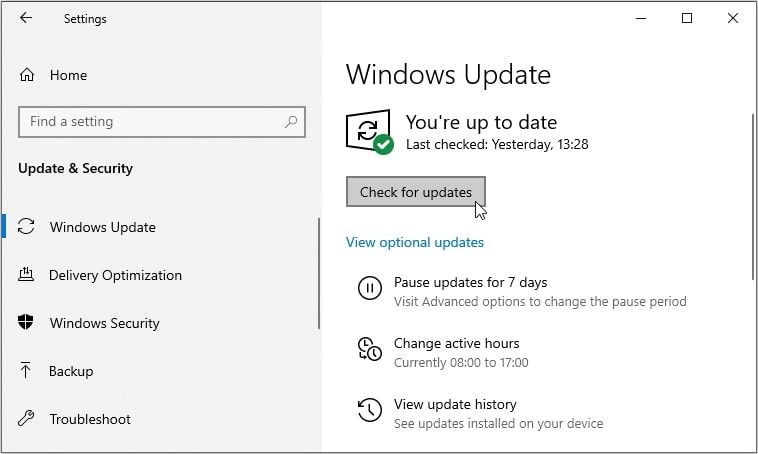
- Type Windows Update settings in the Start menu search bar and select the Best match.
- Finally, press the Check for updates button and then follow the on-screen instructions.
Run All Your Windows Apps Without Limitations
Error messages like “This app does not support the contract specified” can be quite a nightmare. In most cases, such errors are caused by changes in the system settings or faulty third-party apps.
Fortunately, you can easily resolve the issue at hand by applying the methods we’ve covered.
Struggling to install apps on your device? There are some solutions for that too.


