
Android Studio is one of the best programs for Android app development. It offers a plethora of features and integrated tools for creating professional Android apps.
The program includes a feature-rich Android emulator, testing tools, and a consistent development environment. In addition, it also features an intelligent code editor that provides you with advanced code suggestions.
Due to many configuration steps, Android Studio may be challenging to set up if you're a novice developer. Here, we show how to install Android Studio on Windows and create a sample application.
How to Download and Install the Java JDK
Before installing Android Studio, you first need to install the Java JDK and set up the Java environment to start working on it.
The Java Development Kit (JDK) is a required development package for creating Java-based applications. Additionally, it also includes tools for developers for testing Java-coded applications.
Follow these steps to get the latest version of Java JDK for Windows and set it up:
- Go to the official Oracle Java Downloads page.
-
Choose the most recent version of Java JDK and download the x64 MSI Installer under the Windows tab.

- Open the file you've just downloaded from the Downloads folder.
- Follow the on-screen instructions to install the latest Java JDK.

Now that you've successfully installed JDK, you need to set up a Java environment so that Android Studio can easily find the location of Java on your desktop.
Setting Up the Java Environment
Here are the steps you've to perform for setting up the Java environment:
- Open Windows search and type "Edit environment variables."
- Hit the Enter key to open the Environment Variables window.
-
Now, under the System variables section, click Path > Edit > New
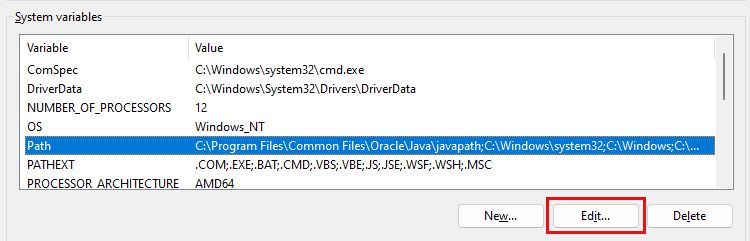
- Copy the path of the folder where the JDK binaries are installed. For example, in our case, the path is C:\Program Files\Java\jdk-18.0.1.1\bin
- Switch to the Environment variables window and paste the path you've copied and save the changes.
- Next, under the User Variables section, click New.
- Add PATH_HOME in the variable name box and C:\Program Files\Java\jdk-18.0.1.1 in the variable value box.
- Finally, save the changes by clicking OK.

Don't forget to replace the JDK version with the version you're currently using. In our case, we've used the jdk-18.0.1.1 version.
In general, you do not need to reconfigure any environment variables if you have already done so. But if it's your first time, setting the variables will help you reduce Java-based errors during compilation.
How to Install Android Studio on Windows
Follow these steps to download and install Android Studio for Windows:
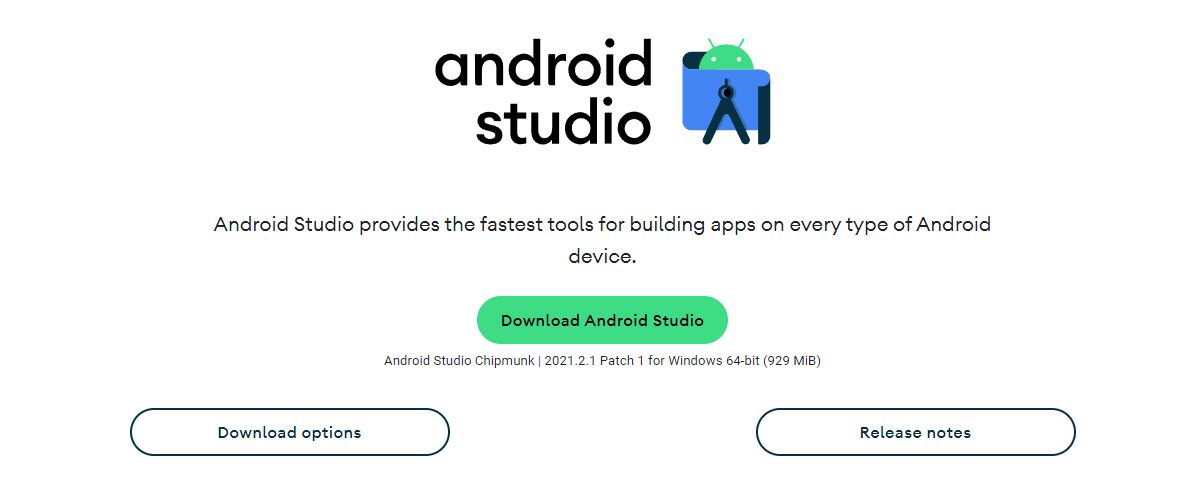
-
Visit the Android Developers website and click on Download Android Studio.
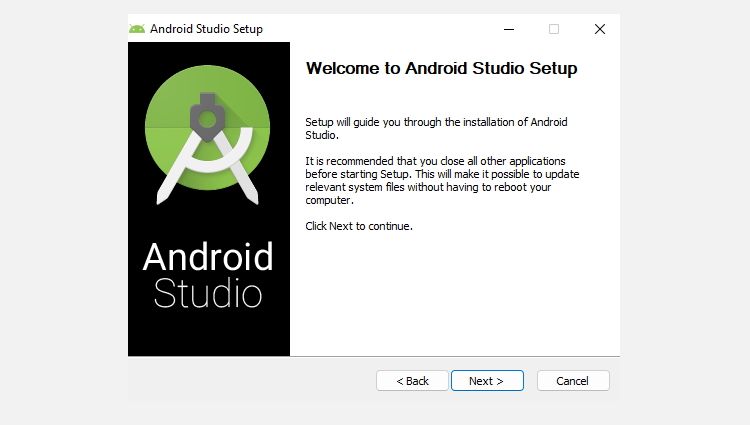
- Now, open the downloaded file to install Android Studio.
-
Click Next to continue installing Android Studio.
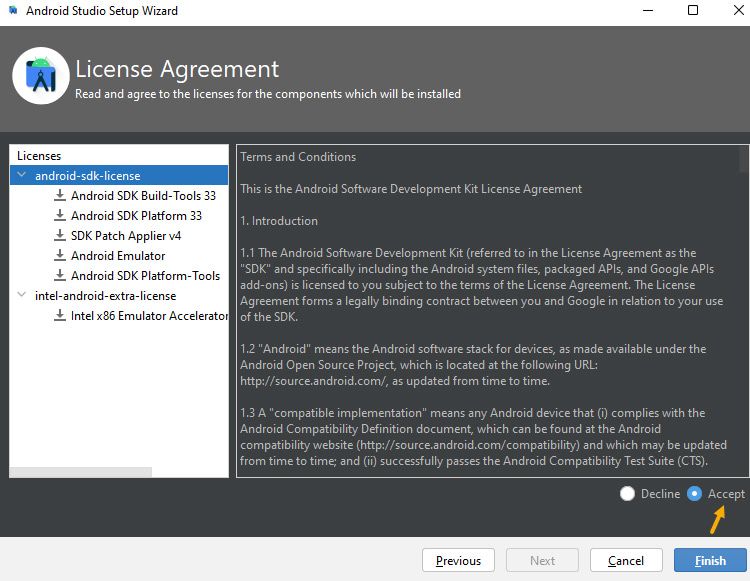
- Further, click Install and wait while Android Studio is being installed on your PC.
- Once done, click Finish to close the installer and start Android Studio.
- Android Studio will now ask you to import settings. Click OK to continue to set up Android Studio.


You should use SSD storage when working with Android Studio to get better performance and faster processing. Moreover, if you want to know more about the reasons, we've already explained why SSDs are better than HDDs.
If the installer crashes or closes with a random error code, the chances are that your PC doesn't meet the minimum system requirements. For this, you must check the below-mentioned requirements once.
The System Requirements for Android Studio on Windows
Your PC must meet the following requirements to run Android Studio efficiently:
- 64-bit Microsoft Windows OS 8/10/11.
- 1280 x 800 minimum screen resolution.
- x86_64 CPU architecture; 2nd generation Intel Core or newer; or AMD CPU with Hypervisor support.
- 8GB of RAM or more.
- 12GB of available disc space is required (IDE + Android SDK + Android Emulator).
If you're not sure about your PC's specifications, do check out our guide on how to check a PC's hardware specs.
If your PC is too old or fails to meet the above requirements, you won't be able to install the program properly. And so, it'll be a waste of time for you to continue any further with the steps.
How to Set Up Android Studio on Windows
While you've installed Android Studio on your Windows PC, to create a new project you'll have to configure the Setup Wizard. The Setup Wizard will help you create a development environment for your future projects.
Follow these steps to set up Android Studio:
- In the Setup Wizard window, select the Standard option to apply the recommended settings and click Next.
- Next, select a theme you want and click Next again to verify the settings you've configured.
-
On the following screen, select Accept and click Finish to apply the changes.
- Wait till the Setup Wizard downloads some required files. It may take somewhere around 15 to 30 minutes, depending on your network speed.
- Once the download is completed, click Finish to complete the setup process.

If it gets stuck while downloading, it's because of either high CPU usage or interruption in downloading. This is why you must close all the programs that may consume the internet or are still running in the background.
To fix this issue, we recommend you read our article on how to fix the high CPU usage issue in Windows. In addition, if you're facing slow downloading issues—have a look at some effective ways to check for internet throttling in Windows.
How to Create a New Test Project in Android Studio
Now, that you've set up and configured Android Studio, follow these steps to run a test project from scratch:
-
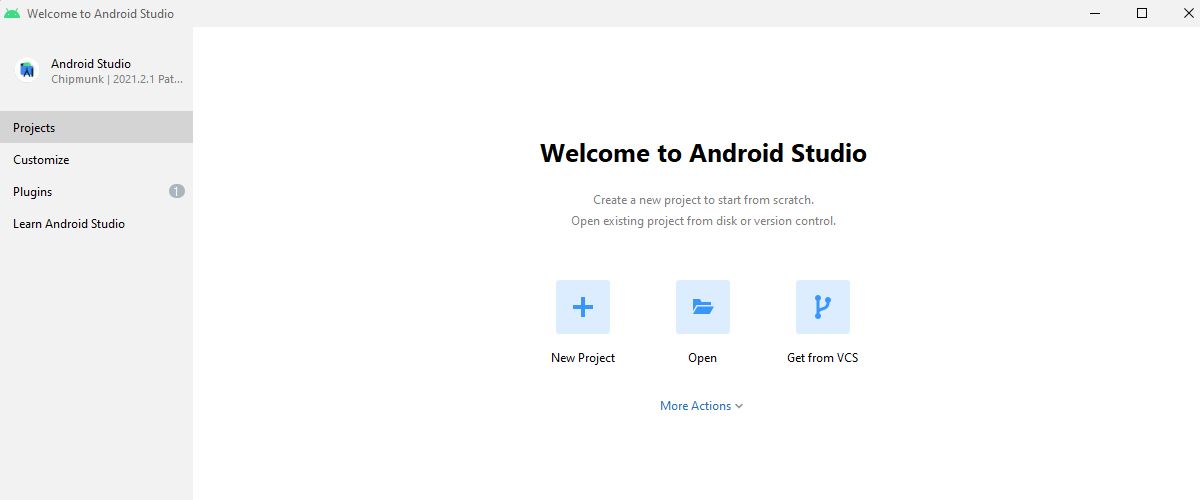
Open Android Studio and click New Project.
- Select the Basic Activity option and click Next to proceed further.
- On the next screen, type in a name for your app, and select the language (for example, Java).
- Next, select the Minimum SDK for your app. The Minimum SDK defines the minimum Android version needed to run your test app.
- Once done, click Finish to generate a new test project.
- Finally, click Allow access on the next screen to allow ADB to access your public network.
-
That's it. Now, you can make changes to your test project and build your Android app.


The first test project takes around 10-15 minutes to load all the files and sync the project using Gradle (a build automation tool). Once it is done, you can interact with your app's project structure and view different activities in Android Studio.
After making the changes to your project, you have many different options to run your test app:
- Device Manager: You can create a new emulator from the device manager and run your app on it. However, the emulator consumes a large number of resources, so we don't recommend using this option if you're using a low-end PC.
- Pair Devices Using Wi-Fi: You can also run the test app on your Android smartphone. The only condition here is that your smartphone and your PC should be connected to the same Wi-Fi network.
- ADB Connection: Lastly, you can use a USB cable and turn on USB Debugging on your phone to run your app via an ADB connection.


App Development Made Easy With Android Studio
Without a doubt, Android Studio is a robust app development software. The best part is that you are not limited to Android apps only. With Android Studio, you can create apps for tablets, watch faces for Wear OS, and even apps for your Android TV.
Furthermore, Android apps are developed in Java (or Kotin) and rely on XML. So, if you're just getting started with app development, you should enroll in some app development courses.