
Network errors are nothing new for veteran Windows users and can be caused by a number of reasons. One specific issue that pops up when the users attempt to transfer large files from another device or server is the 'An Unexpected Network Error Occurred' error message. This is typically caused by an over-protective antivirus program, corrupt Windows Search service, and inconsistencies within the system.
While the error message states that there is an issue with the network, simply checking your Wi-Fi connection will not do the trick. Let's see how to resolve this problem with the utilities already present in your Windows operating system.
1. Disable You Antivirus and Windows Defender
If you cannot transfer large files from your network driver to PC to laptop, then the first thing that you should do is temporarily disable the security programs you are using on your system. This is because while the security programs protect your system from threats, there are times when they falsely classify the legitimate processes as harmful, interrupting their functioning.
In this method, we will be disabling third-party antivirus and Windows Defender Firewall.
1. How to Disable a Third-Party Antivirus Program
If you are using a third-party antivirus program, you can typically disable it by right-clicking on its icon in the taskbar and choosing Disable option from the context menu.

If this does not work for you, then try launching the program and look for the Disable antivirus temporarily option. The exact steps will be different for each program, but the basic principle behind the disabling feature remains the same.
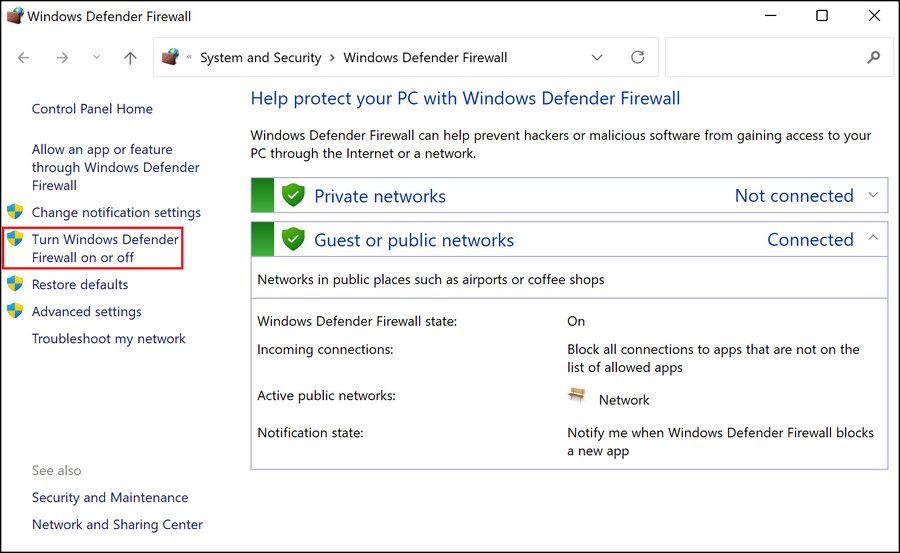
2. How to Disable the Windows Defender Firewall
The Windows Defender Firewall also has a history of blocking secure processes as a result of false alarms. To disable it, follow the steps listed below:
- Type Windows Defender Firewall in Windows search and click Open. Alternatively, you can also navigate to Firewall manually by heading over to Control Panel > System and Security > Windows Defender Firewall.
-
Choose Turn Windows Firewall on or off from the left pane.
-
Checkmark the Turn off Windows Firewall options under both Public and Private network settings.
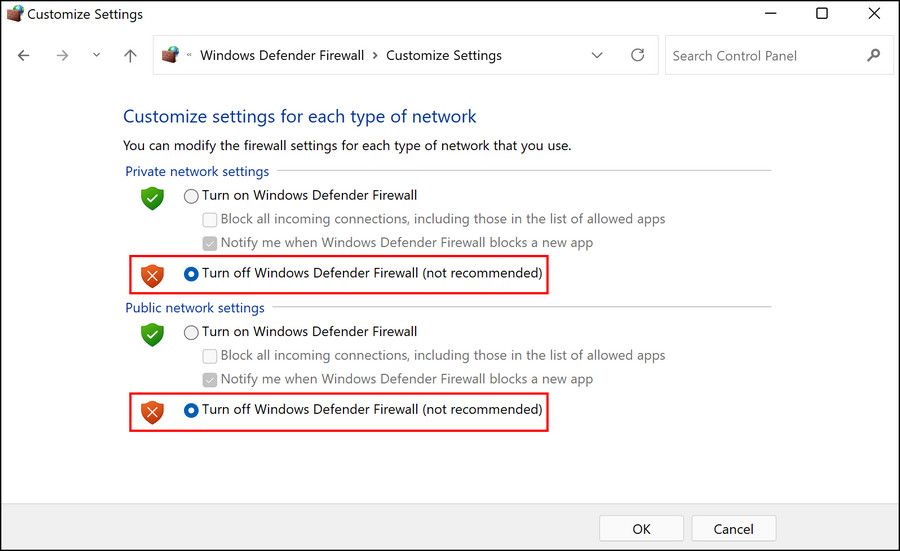
- Click OK to apply the changes and restart your PC.


2. Verify the Hard Disk's Format
Generally, Windows operating systems use two types of file systems: File Allocation Table (FAT) and New Technology File System (NTFS). These file systems play a crucial role in managing the system drives and the information stored in them.
If you are facing the error code 0x8007003B on your system, we recommend you check the formatting of the destination drive where you plan on transferring the files. If the drive supports the FAT32 format, then you cannot transfer single files which are more than 4 GB in size. Any attempt of doing so is likely to result in a crash.
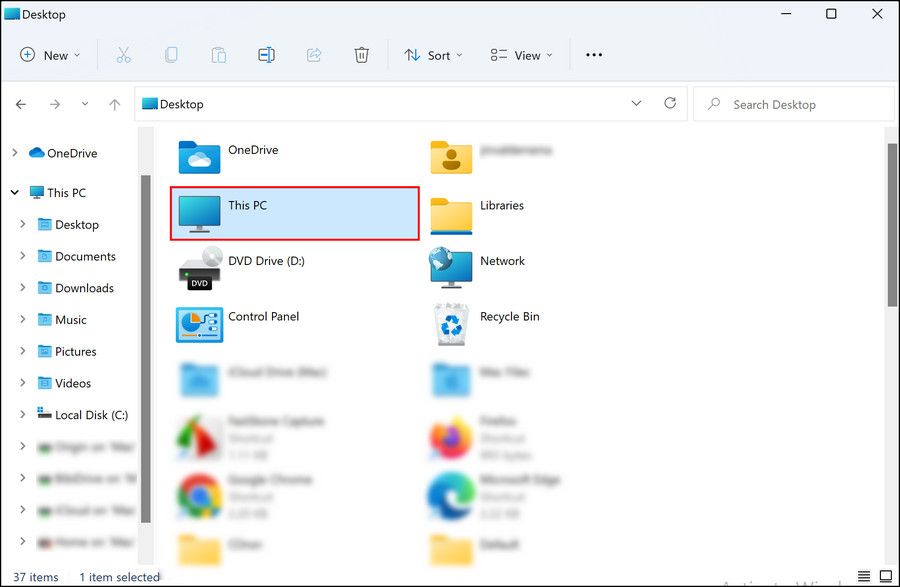
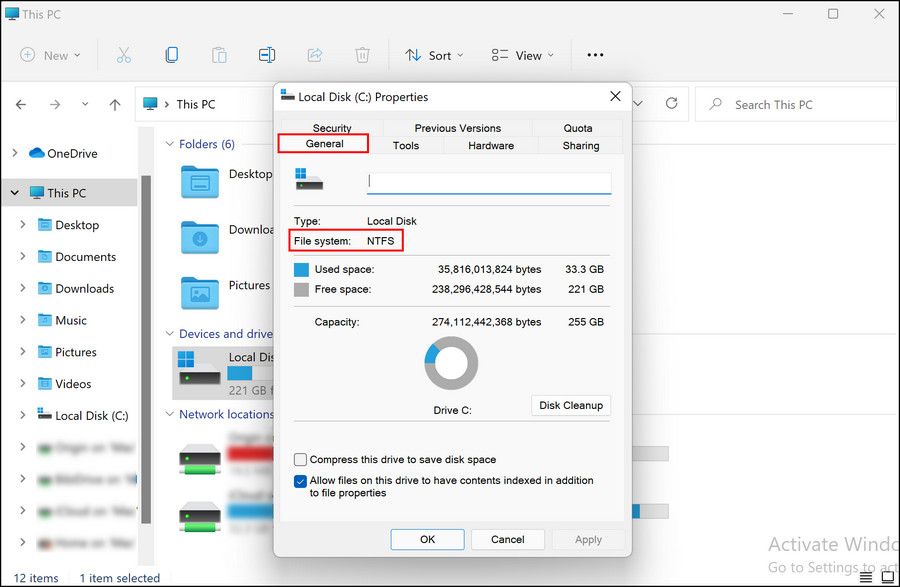
Here is how you can check the destination drive’s format:
-
Launch File Explorer and head over to This PC.
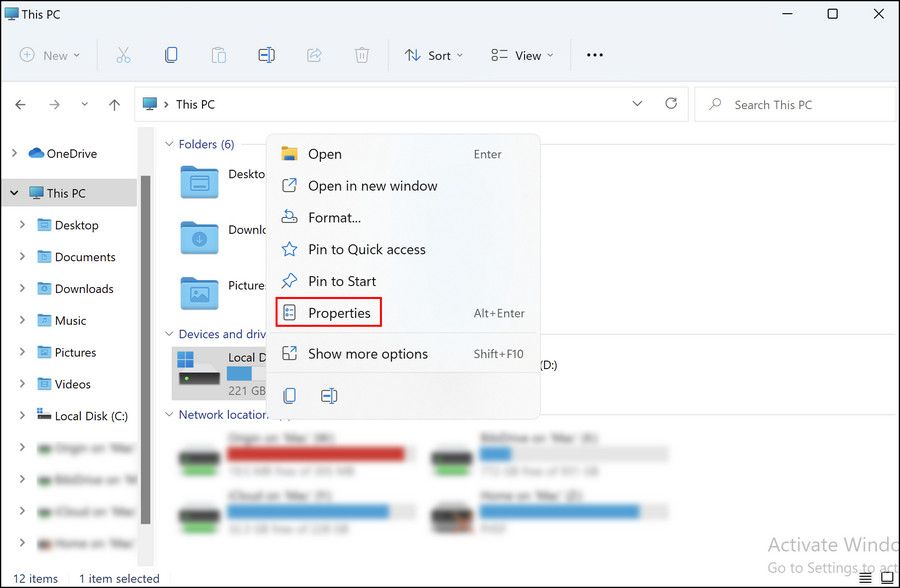
-
Right-click on the targeted drive and choose Properties from the context menu.
-
In the following dialog, navigate to the General tab and check the format against File System.


3. Disable the Windows Search Service
This method might sound irrelevant, but there were instances where the users were able to fix the problem by simply disabling the Windows Search service. As per our research, this service’s process sometimes overlaps with the transferring process, resulting in a crash.
The solution, in this case, is simple, as all that you need to do is temporarily disable the Windows Search service. Once you are able to transfer files over the network successfully, you can switch it back on.
Follow these steps to proceed:
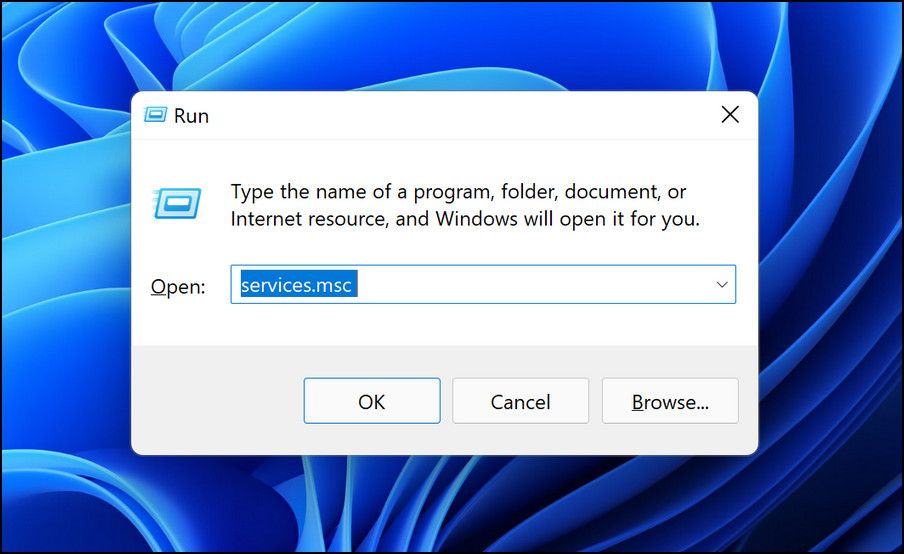
- Open the Run window by pressing Win + R.
-
Type services.msc in the text field and click OK.
-
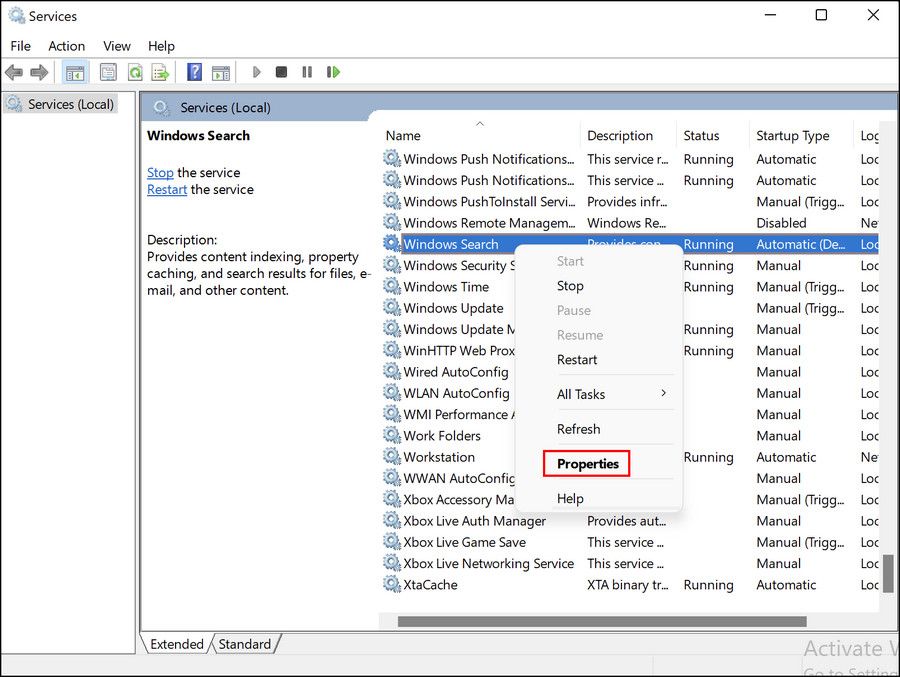
In the Services window, right-click on Windows Search and choose Properties.
-
Expand the dropdown menu for Startup type and choose Disabled.
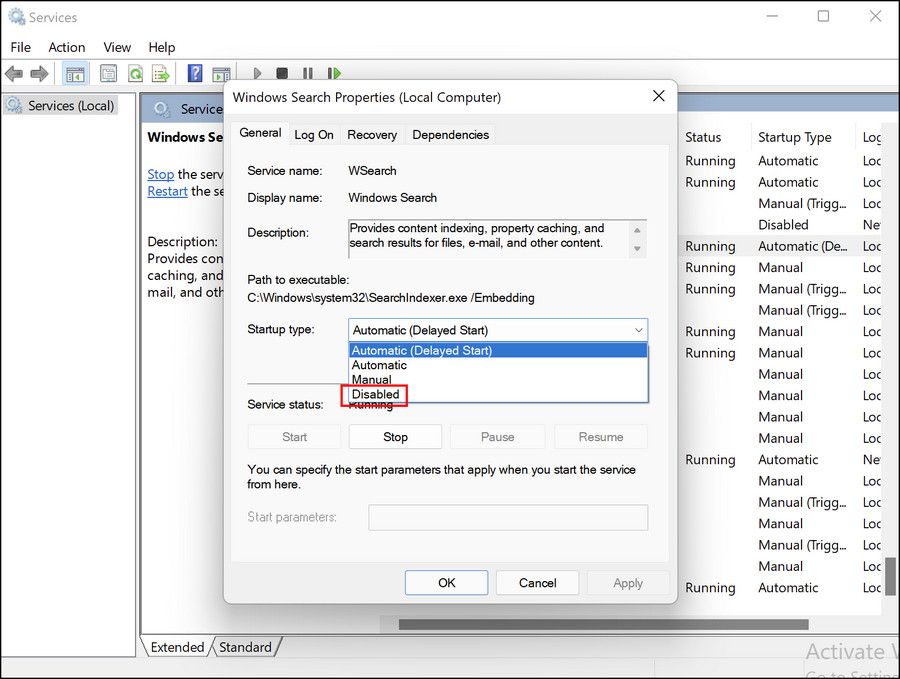
- Click Apply > OK to save the changes.


You can now transfer the required files again and see if disabling the Windows Search service made a difference.
4. Modify Windows Registry
Another fix that worked for users was renaming a specific key in the Registry Editor. This fix has proven to be effective for both Windows 8 and Windows 10 users, and thus we recommend you give it a shot if you are comfortable using Windows Registry.
If you are going to proceed with this method, it is important that you create a Registry backup. Doing so will help you revert to the current working state of the Registry in case anything goes wrong. While you are at it, you can also enable automatic Registry backups to save time when a scenario like this pops up again in the future.
Once you have created a backup, follow these steps:
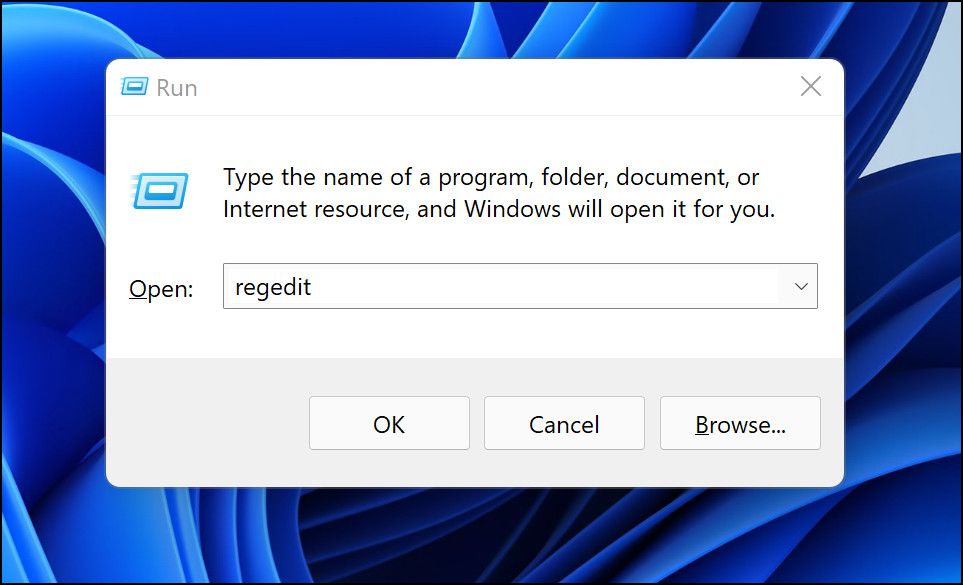
- Press Win + R together to open Run.
-
Type regedit in the text field and hit Enter.
-
Inside the Registry Editor, navigate to the location mentioned below:
Computer\HKEY_LOCAL_MACHINE\SOFTWARE\Microsoft\Windows\CurrentVersion\WINEVT\Channels\Microsoft-Windows-DXP/Analytic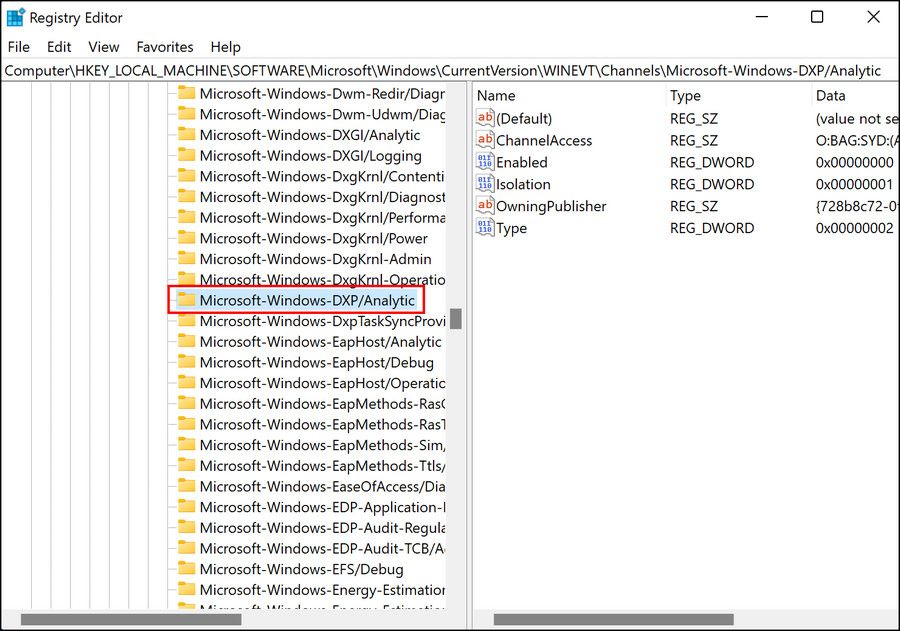
-
Right-click on Microsoft-Windows-DXP/Analytic and choose Rename from the context menu.
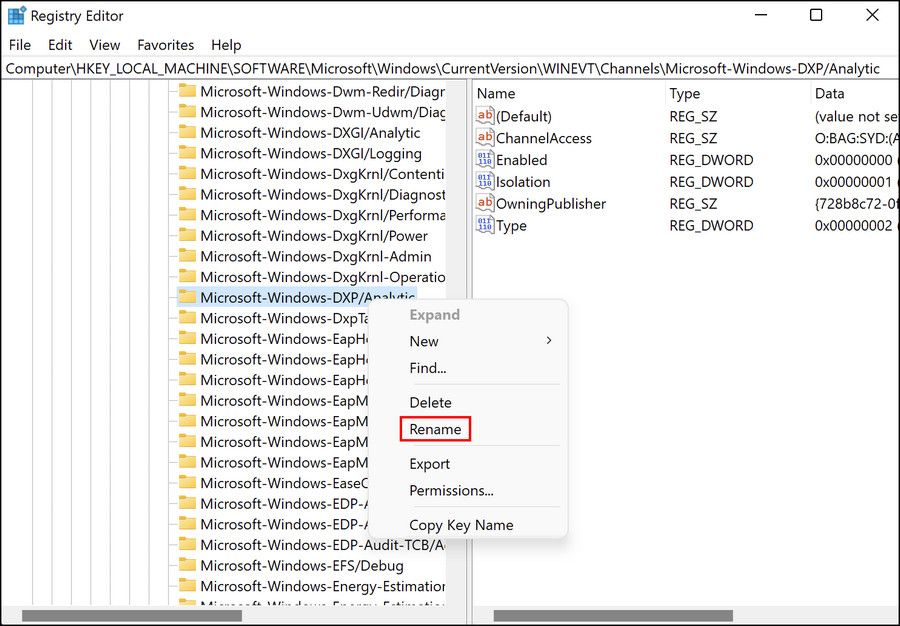
- Rename this key as Microsoft-Windows-DXP/Analytics.
- Exit the Registry Editor and restart your computer.


Upon reboot, check if you can now transfer the files without any problem.
5. Perform a System Restore
Windows creates restore points of your system occasionally (typically before performing critical operations), which are basically snapshots of the working states of your system. These restore points come in handy when you are facing an issue within the system and want to revert to a previous point in time when the system was working perfectly fine.
You can try to restore your system to a previous working state if you have come this far without finding a solution. However, it is important to keep in mind that restoring the system to a previous point will make you lose all the changes that you made after the restore point was created. This can include changing system settings, installing new applications, etc.
Unexpected Network Error, Now Resolved
Network errors can be frustrating, as the error codes do not give much information about what might be causing the issue. Hopefully, the methods mentioned above will help you get rid of the error for good. To stay away from such issues in the future, we highly recommend keeping your network drivers up-to-date at all times.