The Wireless Display feature in Windows 11 lets you connect and mirror your smartphone's screen to your PC. It is a useful utility to view contents from your phone or tablet on a bigger display.
In Windows 11, Wireless Display is an optional feature and requires a Miracast-compatible PC to work. Since it is an optional feature, you will have to install it to get started with Miracast. Here we show you the two ways to install Wireless Display in Windows 11 to mirror your Android phone's screen to your PC.
How to Enable Wireless Display Using Settings
You can install the Wireless Display feature as an optional feature from the Settings panel. Before that, make sure to check if your PC is Miracast compatible. If yes, follow the steps below to install Wireless Display.
To install Wireless Display:
- Press Win + I to open Settings.
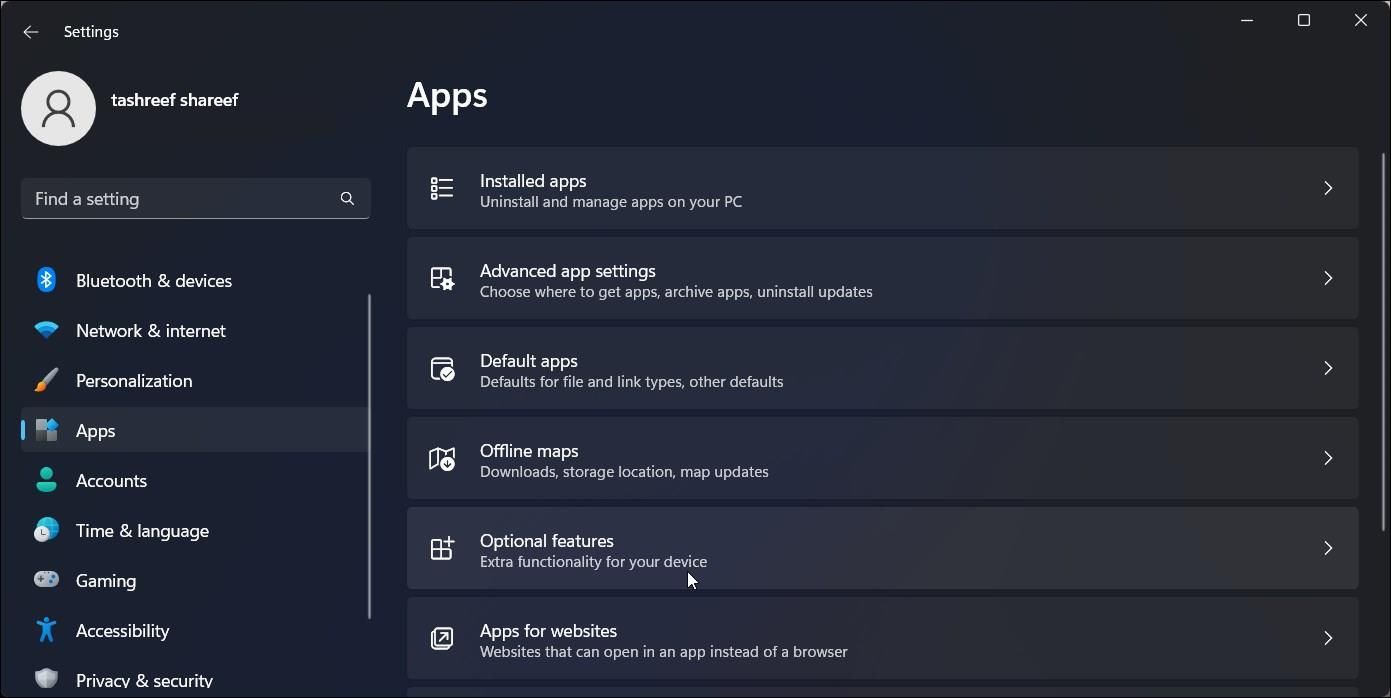
- Open the Apps tab in the left pane.
-
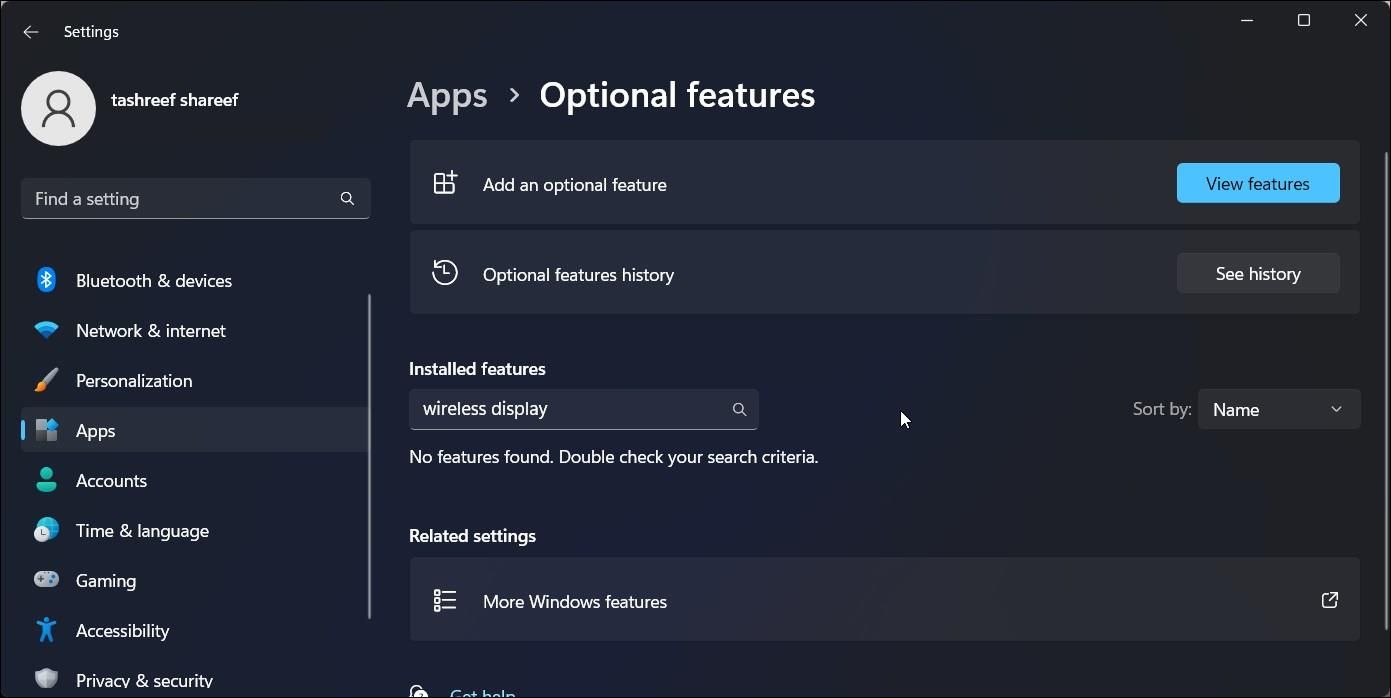
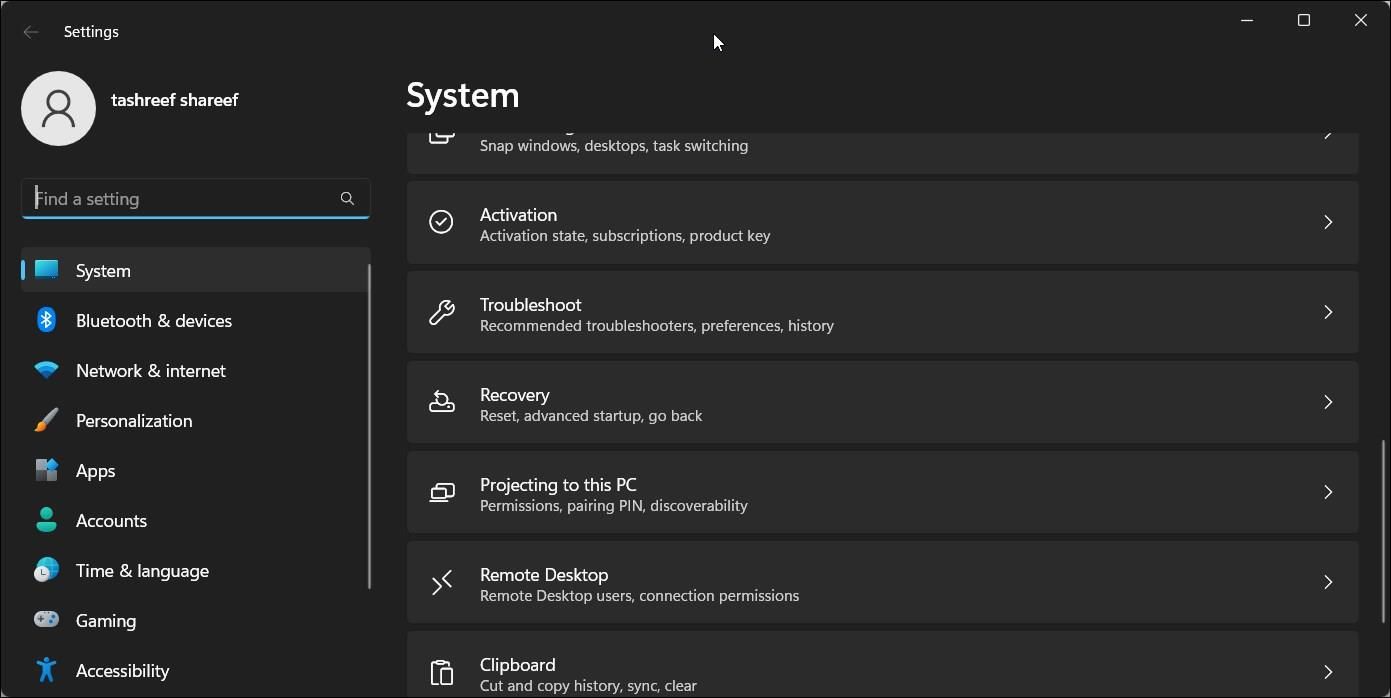
Next, scroll down and click on the Optional features option.
-
Click on View features for Add an optional feature.
-
In the Add an optional feature dialog, type wireless display.
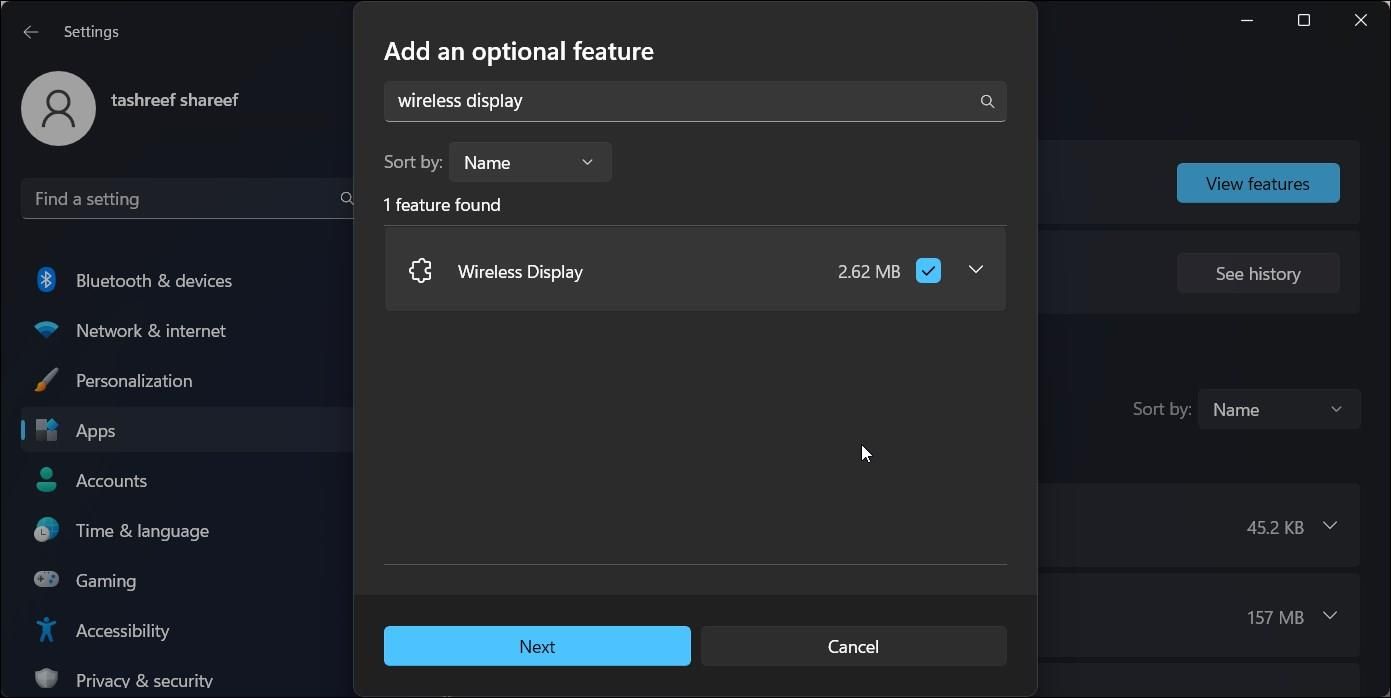
- Select Wireless Display from the search result and click Next.
- Click Install and wait for Windows to download and install the app.


Once installed, restart your PC. After the restart, open Windows Search (Win + S) and type Wireless Display. Now you can connect your smartphone or tablet to your PC and project wirelessly.
How to Install Wireless Display Using the Command Prompt

You can also install Wireless Display using the Command Prompt. To install the app, you can use the Features on Demand(FODs) command in the command-line utility.
To install Wireless Display with the Command Prompt:
- Press the Win key and type cmd.
- From the search results, right-click on Command Prompt and select Run as administrator.
-
In the Command Prompt window, type the following command and press Enter:
DISM /Online /Add-Capability /CapabilityName:App.WirelessDisplay.Connect~~~~0.0.1.0 - Windows will download and install the Wireless Display app. This process may take some time, so wait till the progress bar reaches 100%.
- When you see a success message, close the Command Prompt window, and restart your PC.
How to Screen Mirror Using Wireless Display

Now that you have the Wireless Display installed, you can start mirroring your smartphone or other compatible devices to your screen.
To use Wireless Display:
- Connect your Android phone and the Windows PC to the same Wi-Fi network.
- Next, press the Win key and type wireless display.
- From the search result, click on Wireless Display to open the app.
- On your Android phone, scan for a wireless display. For example, on a Samsung Galaxy device, open Smart View and select your PC from the list of available devices.
You can further configure the projection settings on your PC to make Wireless Display always available. This way, you can project from your Android phone even if the Wireless Display app is not open on your PC.
To make Wireless Display always available:
-
Press Win + I to open Settings.
-
With the System tab selected, scroll down, and click on Projecting to this PC.
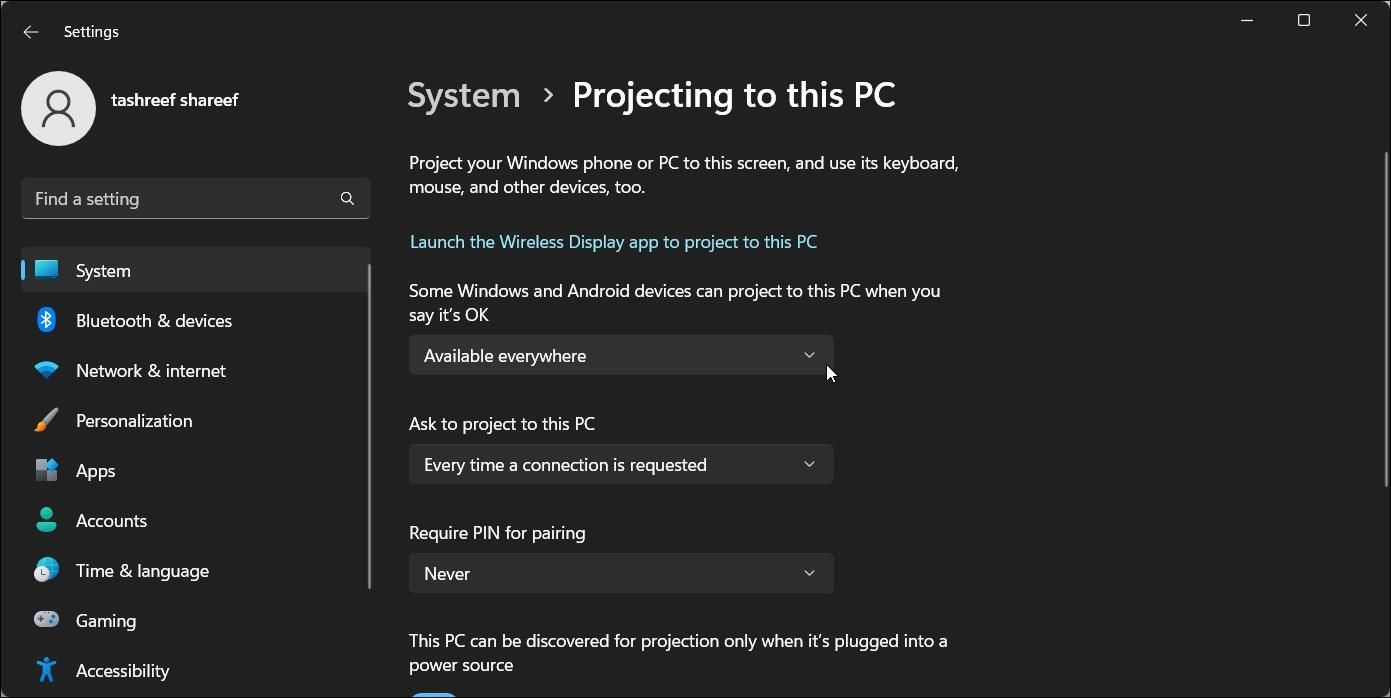
- Next, click the drop-down for Some Windows and Android devices can project to this PC when you say it’s OK and select Available everywhere.


Now, if you try to screen mirror your Android phone to your PC, Windows will automatically launch the Wireless Display app and start screen mirroring.
How to Uninstall Wireless Display in Windows 11
You can uninstall Wireless Display from the settings. Similarly, the Command Prompt is another reliable option to uninstall the app in a jiffy.
Let’s look at the two ways to uninstall Wireless Display in Windows 11.
Using Settings:
- Press Win + I to open Settings.
-
Go to Apps > Optional features.
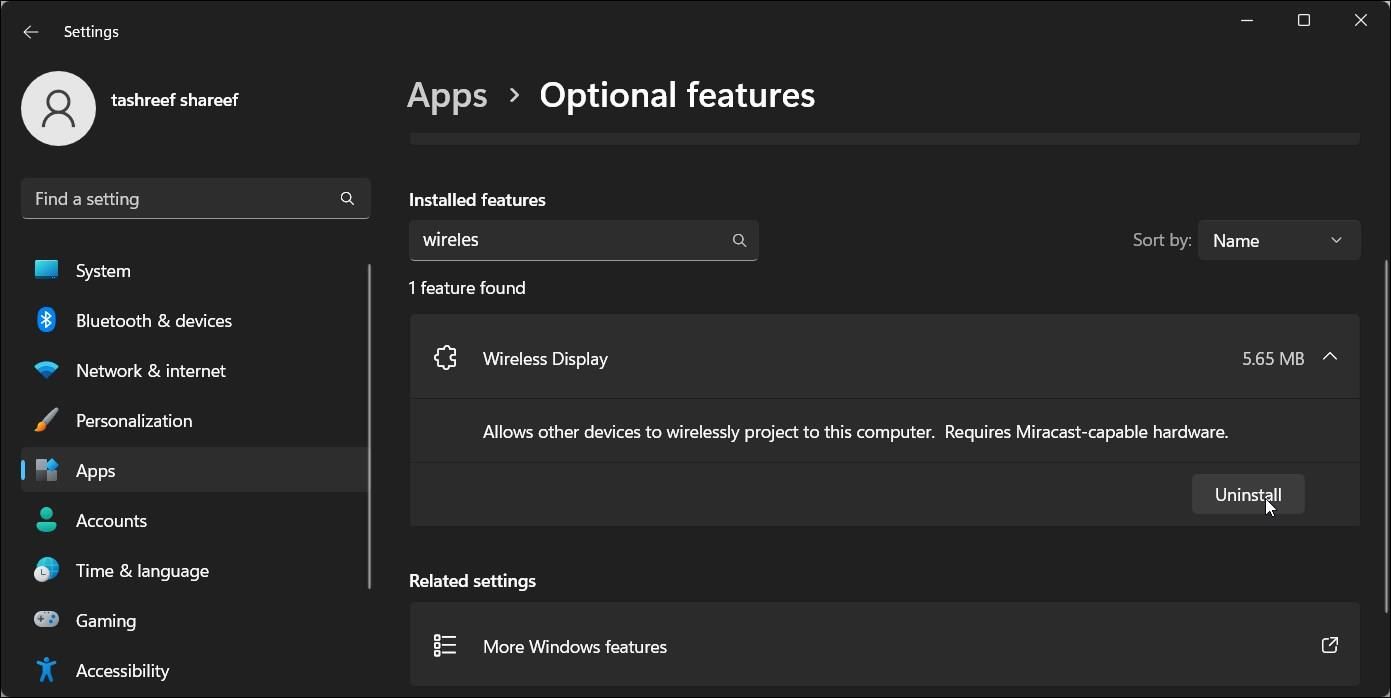
- Type wireless display in the Installed features search bar.
- Click on Wireless Display and then click Uninstall.

Using Command Prompt:
-
Open the Command Prompt as administrator.
-
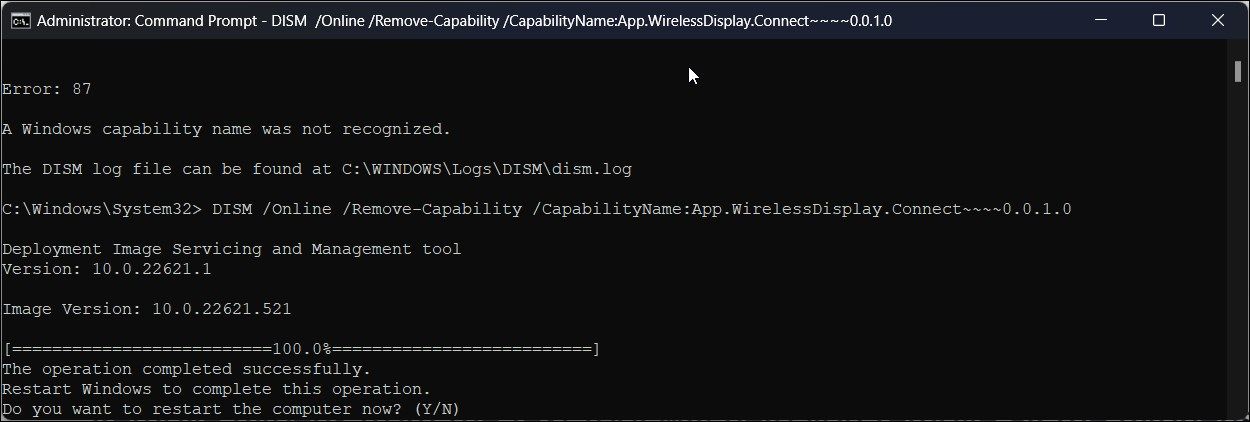
In the Command Prompt window, type the following command and press Enter:
DISM /Online /Remove-Capability /CapabilityName:App.WirelessDisplay.Connect~~~~0.0.1.0 - Wait for the app to uninstall. Then restart your PC to apply the changes.

Install Wireless Display in Windows 11
The Wireless Display app makes it easy to view your Android screen on a Windows computer. It also saves you from the hassle of installing third-party screen mirroring apps which often require a subscription.
Unfortunately, you can't use Wireless Display to mirror your iPhone's screen to your PC. Thanks to Apple’s ecosystem, you will have to rely on third-party apps to cast your iPhone screen to your Windows computer.