
Few things are more annoying than a Windows 11 computer that fails to detect nearby Wi-Fi networks. Unfortunately, this is a common issue, and there are a lot of variables that influence this behavior.
If you can't figure out what's causing the problem, work your way through the troubleshooting tips below to resolve it.
1. Restart Your Router
Before you try any of the advanced troubleshooting tips on this list, it’s important to rule out any issues with your router. Power cycling the router is a simple troubleshooting step that could help you solve a number of network issues, including this one. Hence, it’s the first thing you should try.
2. Toggle Airplane Mode
The other simple fix for such network-related problems is to toggle the Airplane mode. When you enable Airplane Mode, Windows disables all radio services, including Wi-Fi. Enabling and disabling Airplane mode is a good way to refresh all the network connections on your PC.
Start by pressing Win + A to open the Quick Settings panel on Windows. Click the Airplane mode tile to enable it. Wait for a few seconds and then click the tile again to turn off Airplane mode.

If you can’t find the Airplane mode tile in the Quick Settings panel, navigate to Settings > Network & internet. Turn on the toggle for Airplane mode and turn it off after a few seconds.

Check to see if Windows 11 can detect your Wi-Fi network now.
3. Disable and Re-Enable Wi-Fi Adapter
A Wi-Fi adapter is an essential component that allows your computer to connect to a network. At times, temporary glitches with the Wi-Fi adapter can prevent Windows from detecting a nearby network.
In most cases, disabling and re-enabling the Wi-Fi adapter will resolve any temporary issues. Here's how to do the same.
- Press Win + R to open the Run dialog.
- Type control in the Open field and press Enter.
- In the Control Panel window, navigate to Network and Internet > Network and Sharing Center.
- Click on Change adapter settings.
-
Right-click on the Wi-Fi adapter and select Disable.
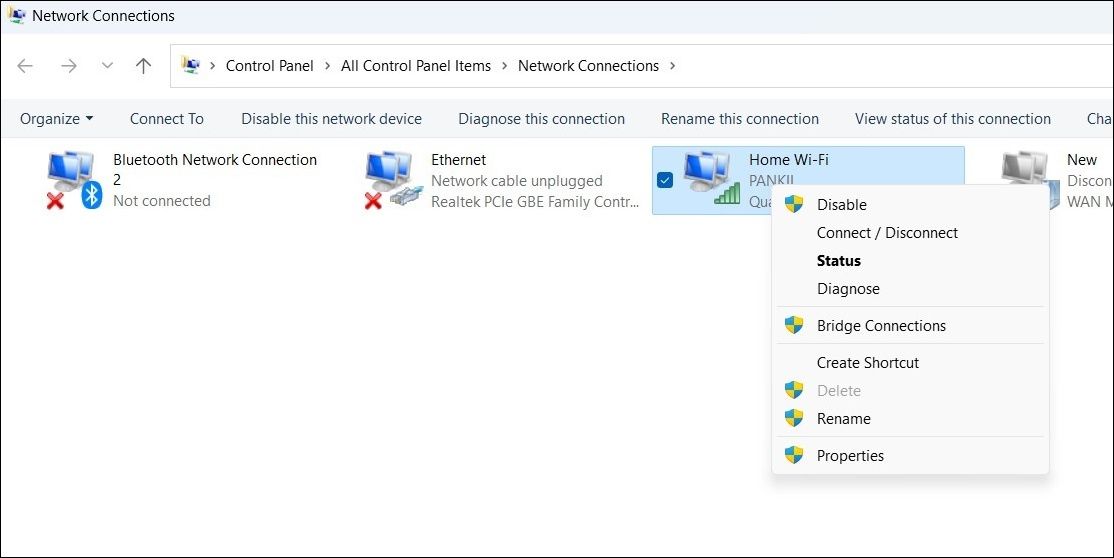

Wait for a minute or so and then right-click on the Wi-Fi adapter again and select Enable.
4. Run Windows Troubleshooters
Windows 11 comes equipped with various troubleshooters that can help resolve common system-level issues. You can run the network adapter troubleshooter to allow Windows to detect and fix any network connectivity problems.
To run the network adapter troubleshooter on Windows 11:
- Press Win + I to open the Settings app.
- Navigate to System > Troubleshoot > Other troubleshooters.
-
Click the Run button next to Network Adapter.
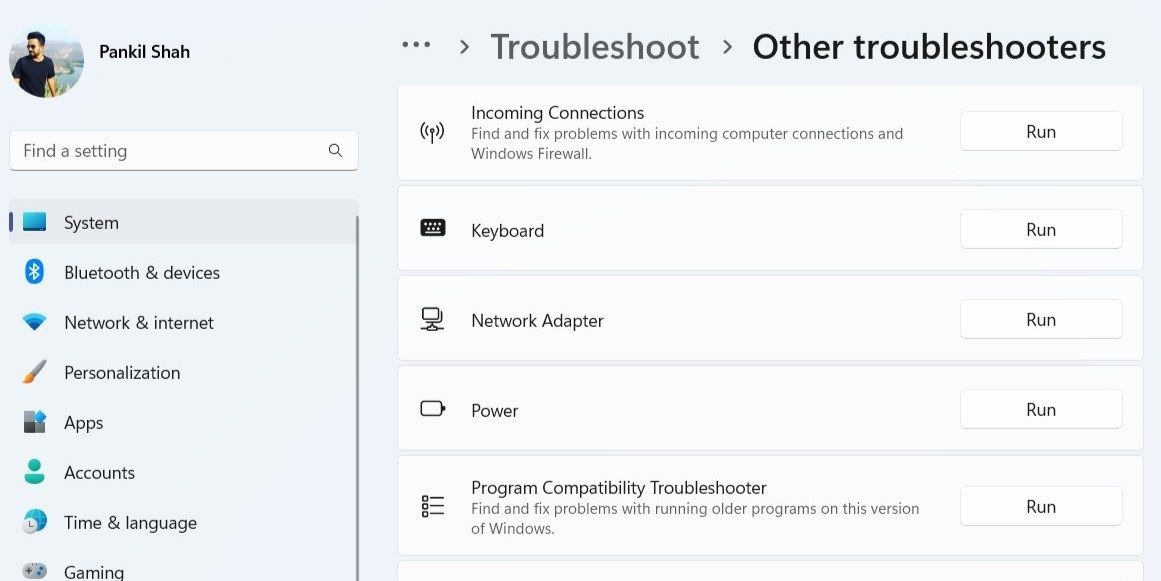

Allow the troubleshooter to check your network adapter for problems. If it discovers any issues, follow the on-screen instructions to apply the recommended fixes.
5. Delete the Wireless Profile
If Windows 11 does not show one of your saved networks even when it is in range, it’s likely that the wireless profile for that network is corrupt. The easiest way to fix it is to remove your wireless profile.
- Press Win + S to open the search menu.
- Type command prompt and select Run as administrator.
- Select Yes when the User Account Control (UAC) prompt appears.
-
Run the following command to remove a wireless profile from your PC.
netsh wlan delete profile name =NetworkName
Replace NetworkName in the command with the actual name of your network.

After running the above command, your network should show up as an available network.
6. Set Channel Width to Auto
Another thing you can do to resolve this issue is to set the network adapter channel width to Auto. Here are the steps you need to follow.
- Right-click on the Start icon and select Device Manager from the list.
- Double-click the network adapter to open its properties.
- Under the Advanced tab, set Value to Auto.
-
Click OK to save the changes.


7. Configure WLAN AutoConfig Service
WLAN AutoConfig is an essential service that helps Windows 11 discover and connect to nearby Wi-Fi networks. However, if the service is experiencing issues, Windows will have trouble locating nearby networks. Here’s what you can do to fix it.
- Open the search menu, type services, and select the first result that appears.
- In the Services window, scroll down to locate the WLAN AutoConfig service. Double-click on it to open its properties.
- Set the Startup type to Automatic.
-
Click Apply followed by OK to save the changes.


Restart your PC after this and see if the issue is resolved.
8. Update or Reinstall the Network Drivers
A faulty network driver can also cause such issues in Windows 11. If that seems to be the case, you can try updating the network adapter on your PC.
To update the network adapter driver on Windows 11, use the following steps.
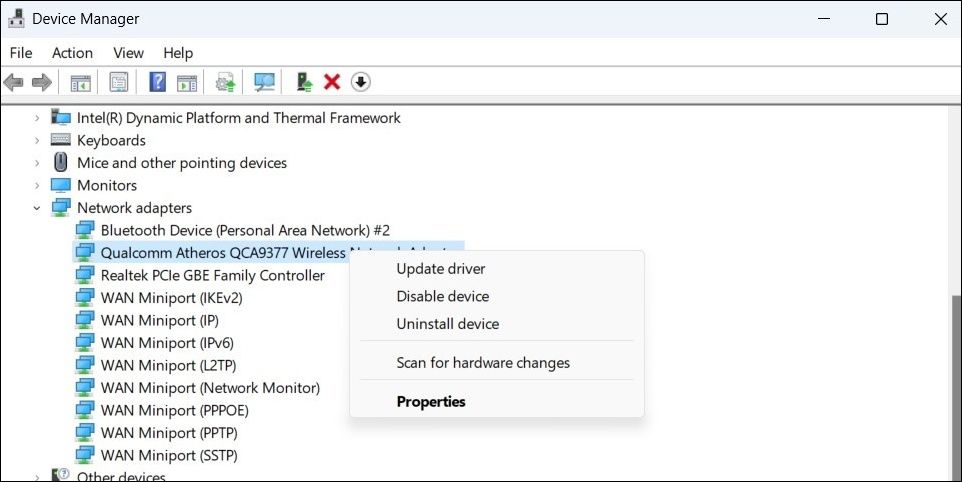
- Open Device Manager. Expand the Network adapters section.
- Right-click on your network adapter and select Update driver.
-
Select Search automatically for drivers. Windows will scan for new drivers and install them if available.

Alternatively, you can use a driver updater for Windows to ease the process.
If updating the driver does not help, you’ll have to reinstall the network adapter drivers. For that, open the Device Manager again, right-click on the network driver, and then select Uninstall device.
Once removed, restart your PC and Windows should install the missing network driver during boot. After that, check to see if Windows can detect your Wi-Fi network.
9. Reset TCP/IP and Flush DNS Cache
A problem with the Transmission Control Protocol and Internet Protocol (or TCP/IP) can also prevent Windows from detecting Wi-Fi networks. So, resetting the TCP/IP stack and flushing the DNS cache should be your next step.
- Press Win + X to open the Power User menu and select Terminal (Admin) from the list.
- Select Yes when the User Account Control (UAC) prompt appears.
-
Run the following commands in the console and press Enter after each one:
        netsh winsock reset
netsh int ip reset
ipconfig /release
ipconfig /flushdns
ipconfig /renew
Restart your PC after running the above commands. Hopefully, this will resolve the issue.
Troubleshooting Wi-Fi Issues on Windows 11
Fixing such network-related issues on Windows can be tricky, especially if you don’t know where to look. Unless there’s a hardware issue, one of the above solutions should get Windows 11 to detect your Wi-Fi network.