You can use the built-in tools in Windows 11 to monitor and set data usage limits. However, its functions are quite limited, as you cannot set upload and download speed limits for individual apps.
While you can configure Windows' QoS (Quality of Service) to control the throttle rate, it is a little complicated. Instead, you can use third-party bandwidth management apps for this task. Here we show you the two best apps to limit upload and download speed for individual apps and services in Windows 11.
How to Set an Upload and Download Limit Using NetLimiter in Windows 11
NetLimiter is a popular internet traffic control program available for the standard and Server editions of the Windows OS. You can use it to monitor inbound and outbound Internet traffic, block connections, and set quotas.
You can use NetLimiter to set the upload and download speed limit for all the apps and services slowing down your home Wi-Fi network. Unfortunately, it is only available in the premium version. However, you can use the 28-day free trial to test the app before making a purchase.
To set upload and download limits using NetLimiter:
- Go to the NetLimiter page and download the installer.
- Once downloaded, run the installer. It will automatically activate the 28-day free trial, giving unrestricted access to all the features.
- To set a limit, launch the app for which you want to set the upload/download limit. We will use Google Chrome as an example for this guide.
- Next, launch NetLimiter.
-
Open the Application List tab.
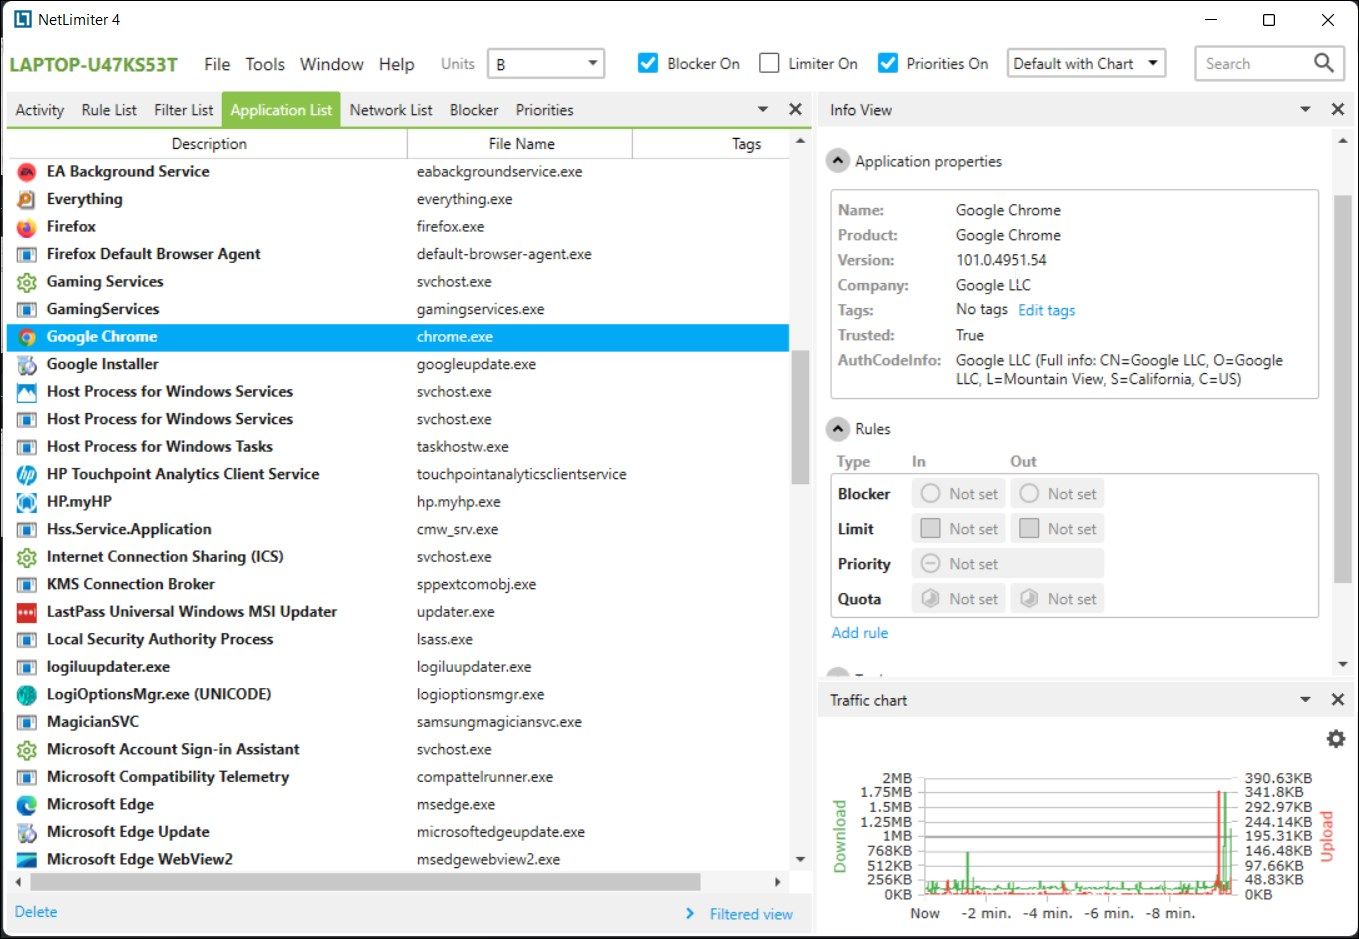
- Scroll down and select Chrome from the list of apps.
-
In the right pane, you can view the application information and rules section.
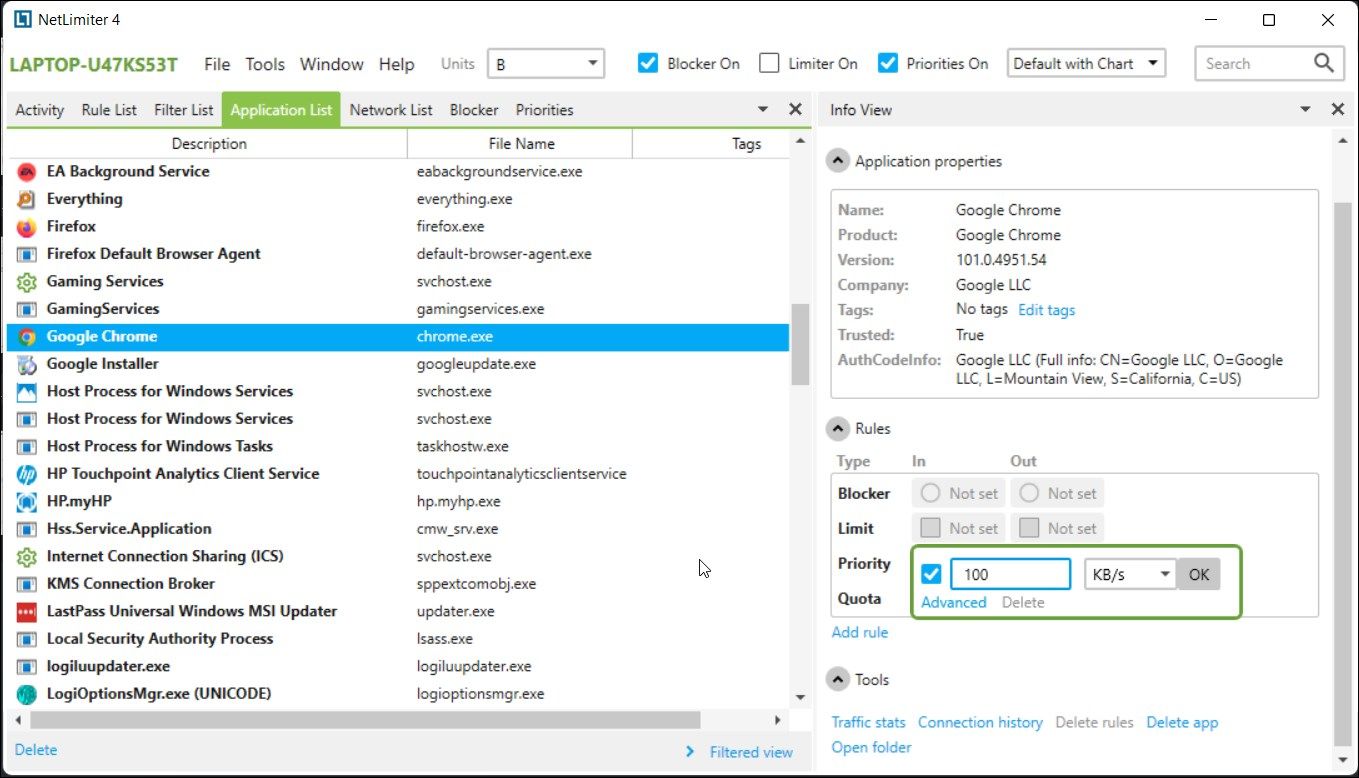
- In the Rules section, click the Not Set option for Limit. Here In and Out denotes Incoming (Inbound) and Outgoing (Outbound) Internet traffic.
- Next, enter the speed limit. For example, if you want to set a 100 KBps limit, type 100 and select KBps from the bit rate unit drop-down.
- Click OK to save the changes.
-
If you want to set a limit for upload speed, click on Not Set under the Out column and make the changes.
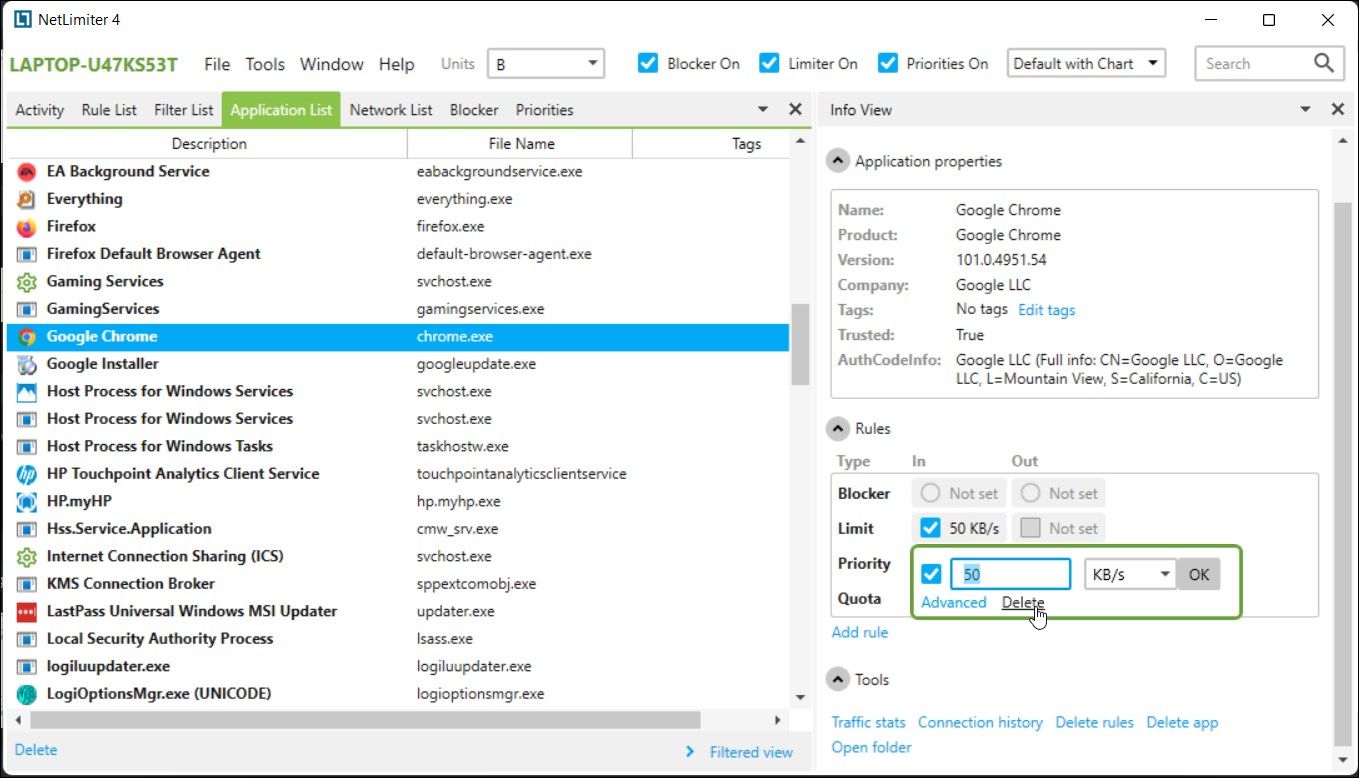
- Once done, check the Limiter On option in the upper part of the app to enable the speed limit for inbound or outbound traffic.
- When you want to disable the limit, uncheck the Limiter On option.


To remove the limit for individual apps, do the following:
-
In the Application List tab, select the app.
- In the right pane, uncheck the Limit option for In/Out option.
- If you want to delete the limit, click on In/Out option for Limit and select Delete.
NetLimiter is an excellent Internet traffic management utility and makes it easy to limit upload and download speeds for individual apps. However, it is a premium utility and will set you back $24.95 for a single-user license.
Download: NetLimiter (Pro $24.95)
How to Set Internet Upload and Download limit In Windows Using TMeter
If you are looking for a free alternative to NetLimiter, try TMeter. It is a powerful Internet traffic monitoring application available in both free and paid versions.
The free version is limited by features and offers up to 4 free filters that you can set up to limit upload and download speed for multiple apps.
Here's how to set the Internet speed limit for individual apps in Windows 11 using TMeter.
- Go to the TMeter page and download the latest version of the installer.
- Once installed, launch TMeter Administrative Console. You can also launch it from the system tray area.
-
Next, you need to set up the Network Interface (Ethernet/Wi-Fi network adapter). So, click on Network Interfaces in the left pane.

-
Under Available Network Interfaces, select your network device. For example, if you want to set a speed limit for apps using your Ethernet connection, select the Ethernet device. In this case, we will select Ethernet Realtek Gaming GbE Family Controller.

- In the pop-up dialog, select the Public network option if you are connected to the Internet or Public Wi-Fi Network. If you are connected to an internal network, then select Private.
- Click OK to save the changes.
- Next, click Apply to save the changes.
- After successfully configuring the network adapter type, you can create a new process definition to define the apps for which you want to set the speed limit.
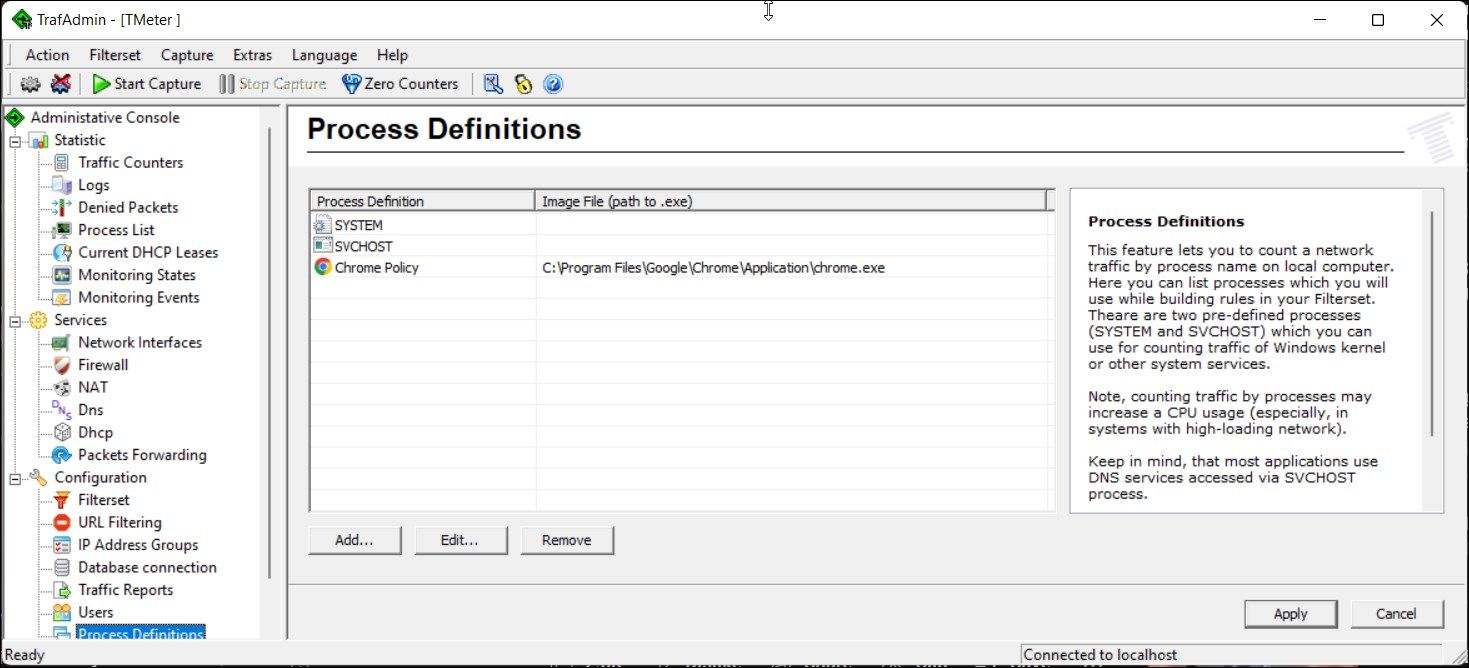
- To do this, click on the Process Definitions option in the left pane. Expand the Configuration section if the option is not visible.
-
Next, click on Add.
-
In the Process Definition field, type a description of the process. For example, type Chrome Speed Limit.
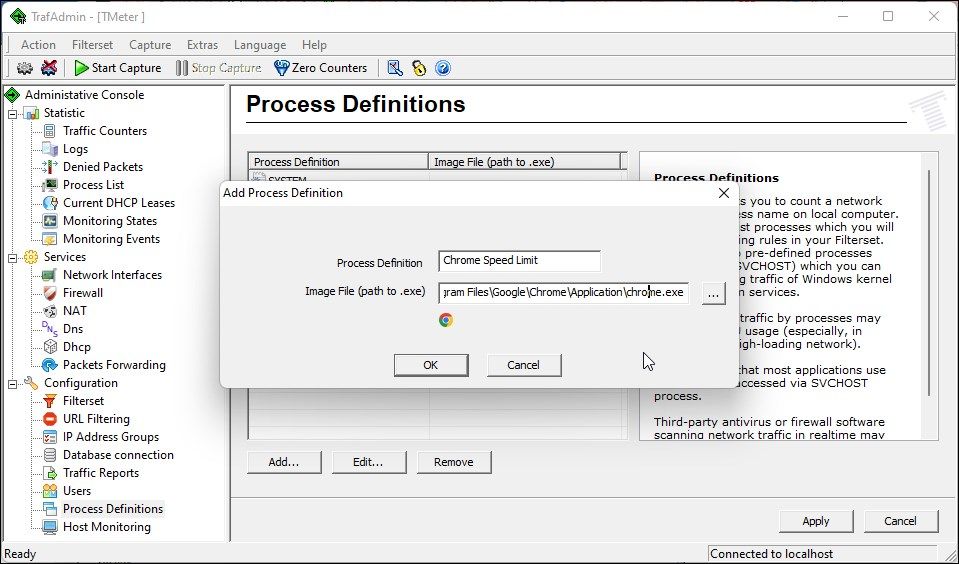
-
Next, click the three dots (browse button) for Image File and select the app executable (.exe) file to set the speed limit. For example, to select Chrome, the file path will look something like this:
C:\Program Files\Google\Chrome\Application\chrome.exe - Next, click OK to save the changes.
-
Next, in the left pane, select Filterset.
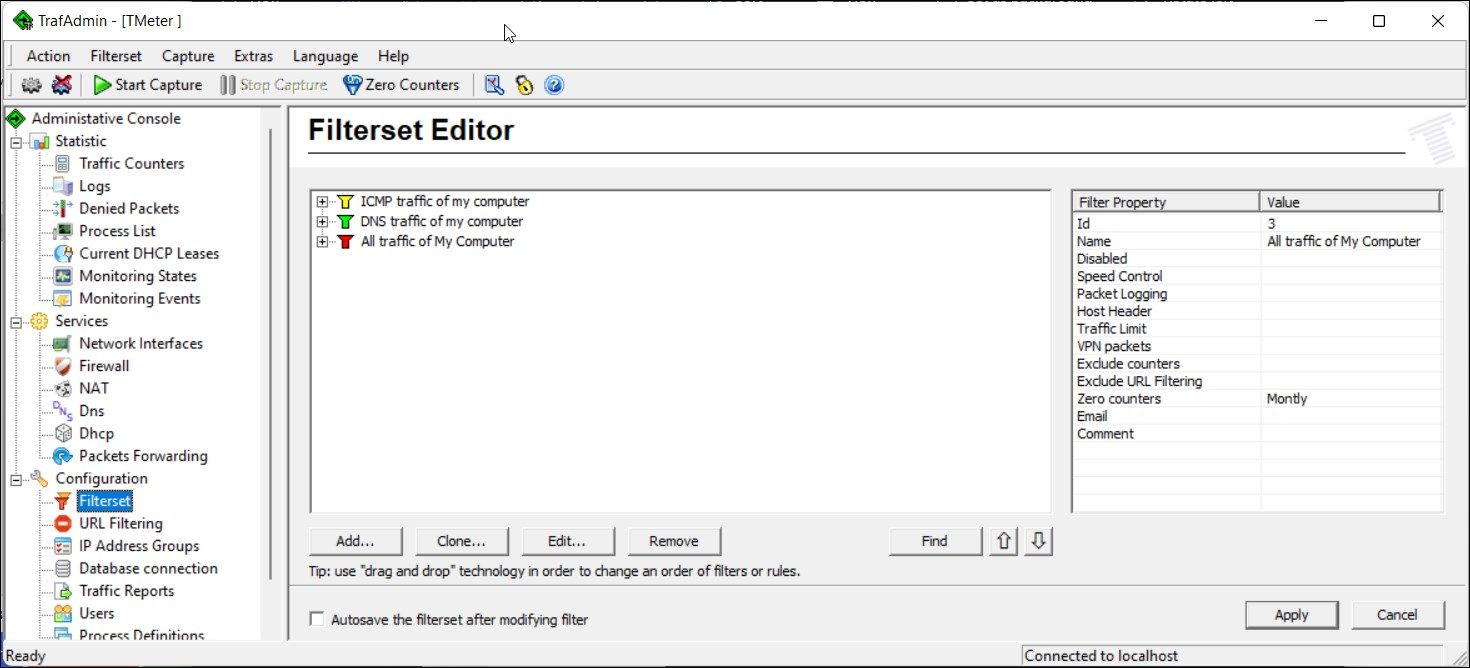
-
In the right pane, click on Add and select Filter.
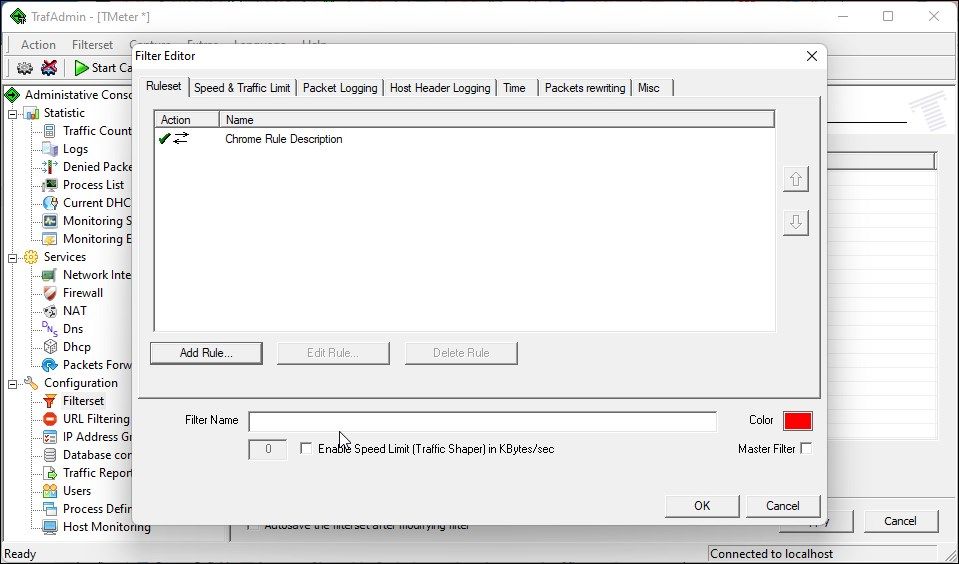
- In the pop-up dialog, click on Add Rule.
-
In the Rule Editor window, type a Rule Description. For example type Chrome Rule Description.
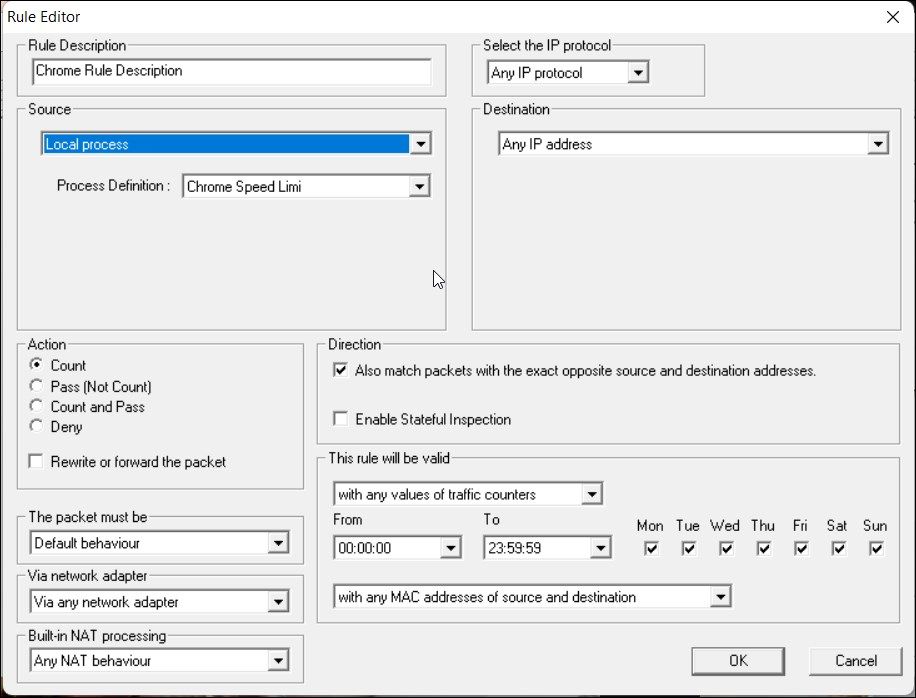
- Click the drop-down under Source and select Local Process.
- Click the drop-down for Process Definition and select the process definition you created earlier.
-
Leave other options as default and click OK.
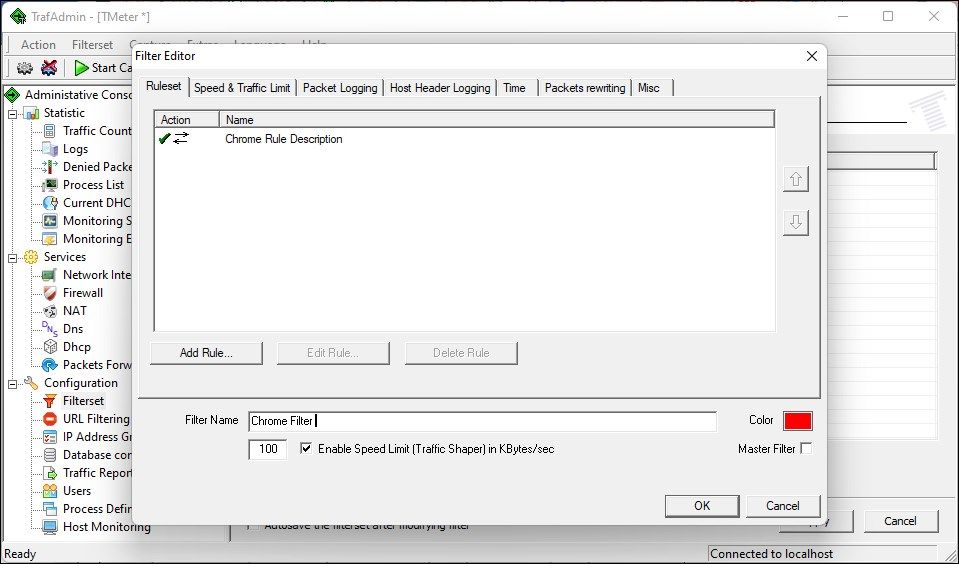
- In the Filter Editor dialog, check the Enable Speed Limit (Traffic Shaper) option.
- Then, type the speed limit you want to set in KBps.
- Type a name in the Filter Name field and click OK. You can also color-code the filters if you want.
-
Click on Apply to save the changes.
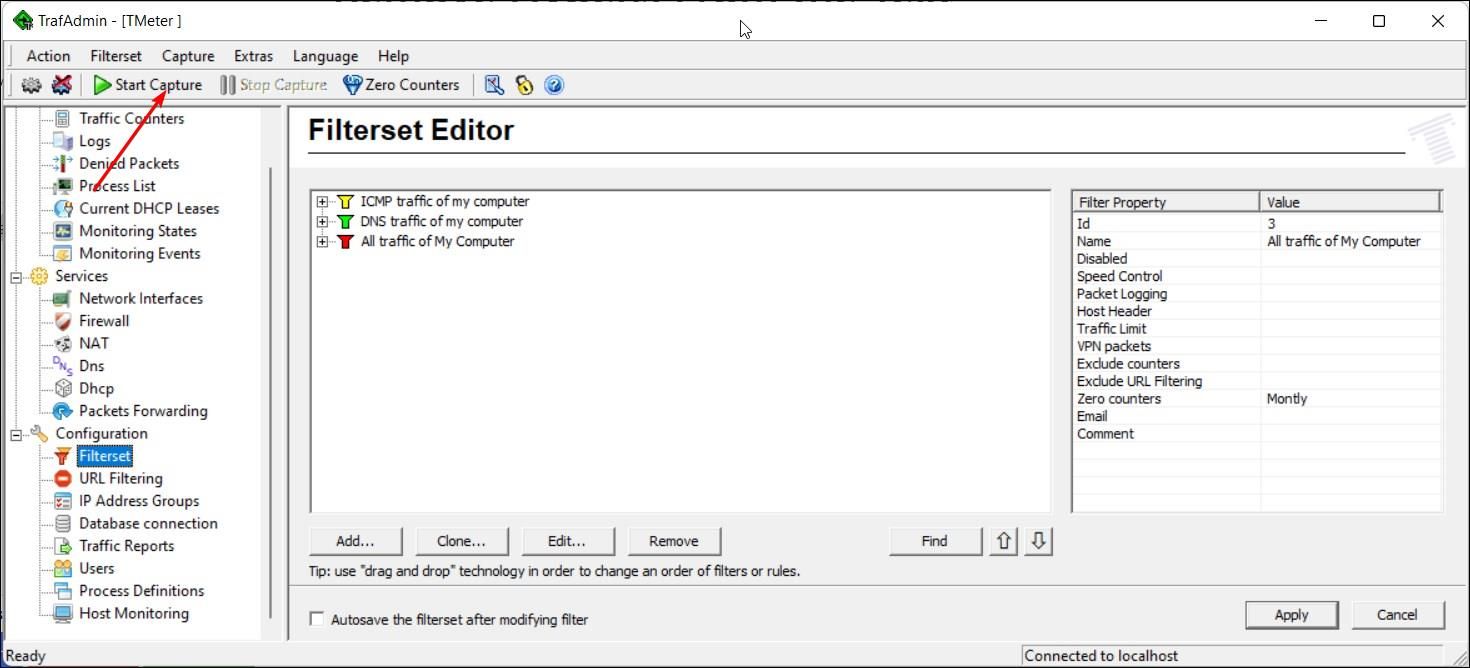
- To apply the new rules, click the Start Capture button in the toolbar (top left corner).
- If you want to remove the limit, click on Stop Capture to stop TMeter from enforcing any limitations.
- Repeat the steps to configure more process definitions and filterset.


Since there is a limitation in the free version, and you can create only 4 filtersets, you can delete existing filters to make place for new filtersets.
To delete a filterset, right-click on an existing filterset and select Remove.
Download: TMeter (Free, Premium)
Control Your Apps Internet Usage and Speed in Windows 11
TMeter and NetLimiter work similarly and offer a similar set of features. However, if you can afford to put down money on a premium speed limiter utility, NetLimiter is an excellent option. While TMeter is feature-rich and offers tons of customization and monitoring options, it features a dated UI and involves a learning curve.
That said, if you are not looking to manage the speed limit for individual apps but set data usage limits, you can use the built-in limiter to track data usage and stay under your limit in Windows 11.