The release of the new Windows 11 operating system has raised many eyebrows in the Microsoft community. While the new version of Windows comes packed with a plethora of fresh features, responses from longtime users have been mixed. Dedicated users critiqued everything from design changes to the stern hardware requirements for the new system.
Thankfully, Microsoft has carefully kept tabs on user responses and has responded with swift updates. But as good as these updates are, they are created by humans. As a result, an update sometimes ends up introducing new glitches in your PC.
If you suspect a new update has caused bugs in your system, you can remove it following the methods we've covered below.
1. How to Roll Back Windows 11 Updates via Updates History
This is probably one of the simplest and easiest methods on the list. You can use the Update History—a central hub on your Windows that displays all your past updates—to remove all the updates from your Windows computer.
To get started, go to the Start menu search bar, type in 'settings,' and select the Best match. Alternatively, you can also press the Win + I shortcut to open the Settings menu.
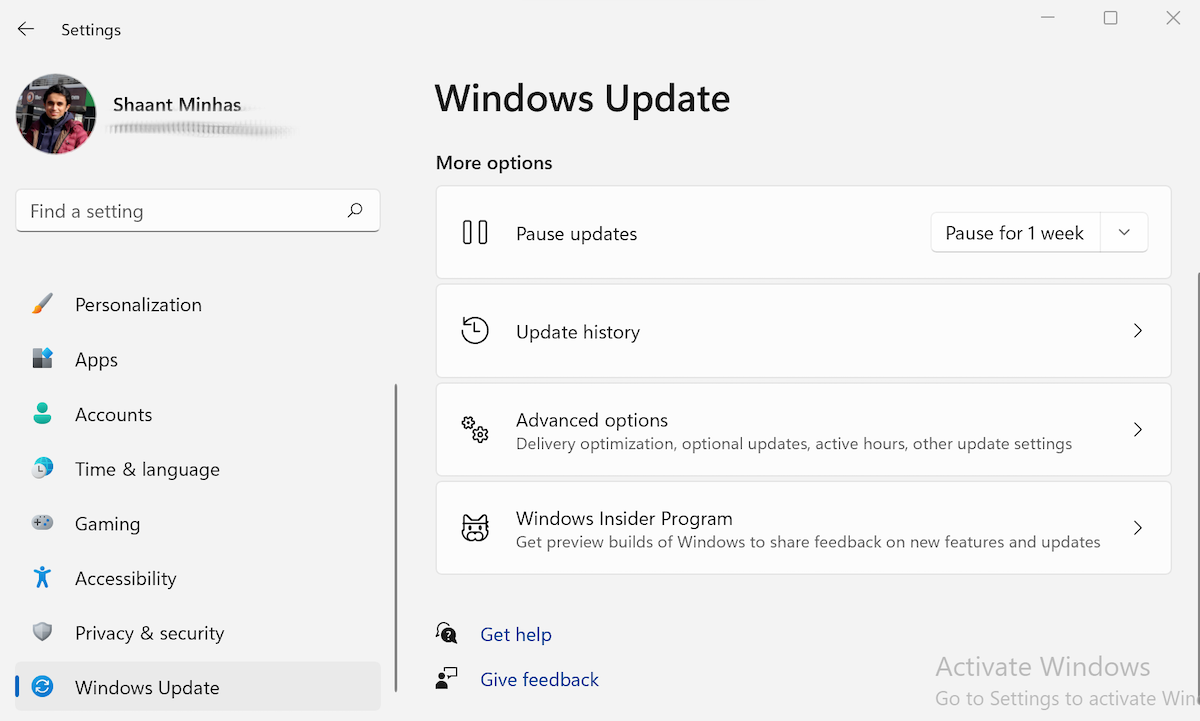
From there, select the Windows Update menu. Now, click on the Update history option.
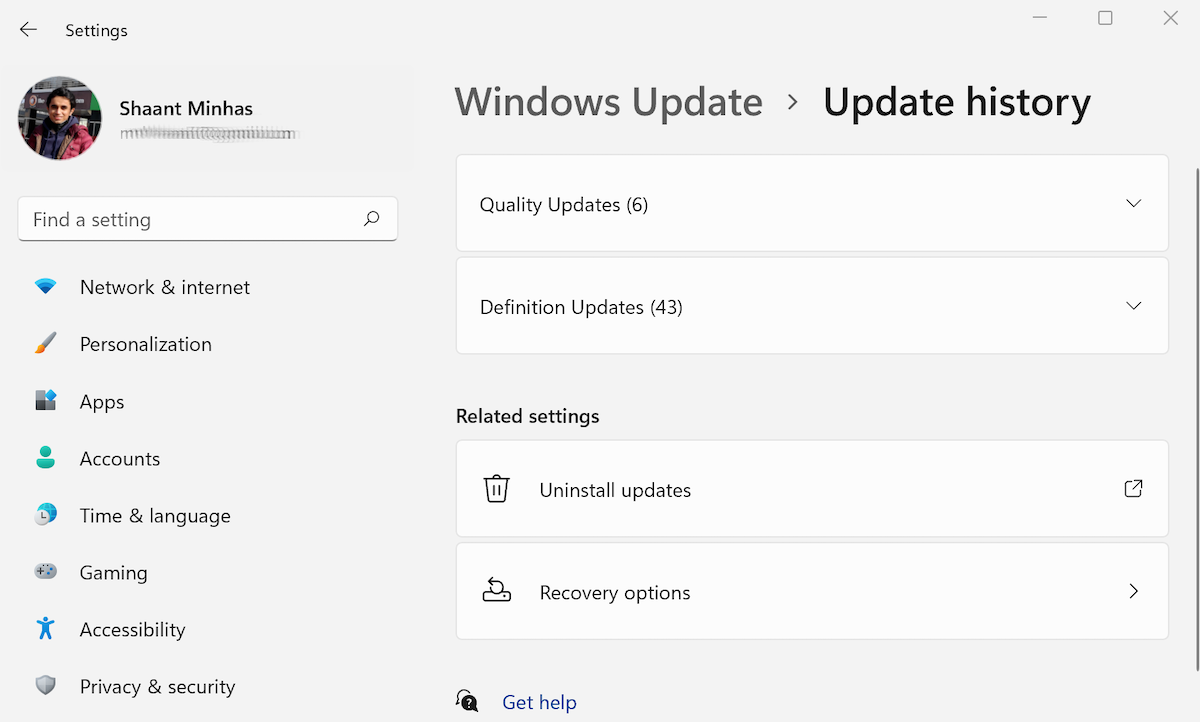
The update history will be laid out on your screen. Click on Uninstall updates to begin the uninstallation procedure. As soon as you do that, a new dialog box will pop open with a list of updates installed on your copy of Windows. Choose the updates you’d like to get rid of and click on Uninstall.
Click on Yes on the final pop-up box to proceed with the uninstallation. As soon as you do that, the selected update will be uninstalled in a few seconds.
2. How to Uninstall Windows 11 Updates via the Command Prompt
The Command Prompt is the go-to tool for most Windows power users. While most people prefer to use the Windows operating system through the graphical user interface (GUI), you can undertake all kinds of operations from the Command Prompt terminal.
As it turns out, this includes managing your Windows updates. Command Prompt lets you see the update's history of your operating system just with a few commands.
To get started, navigate to the Start menu search bar, type in ‘command prompt,’ and run the Command Prompt as an administrator. To do that, right-click on the Command Prompt icon and select Run as administrator.
This will launch an elevated Command Prompt on your screen. Type the following command into your terminal:
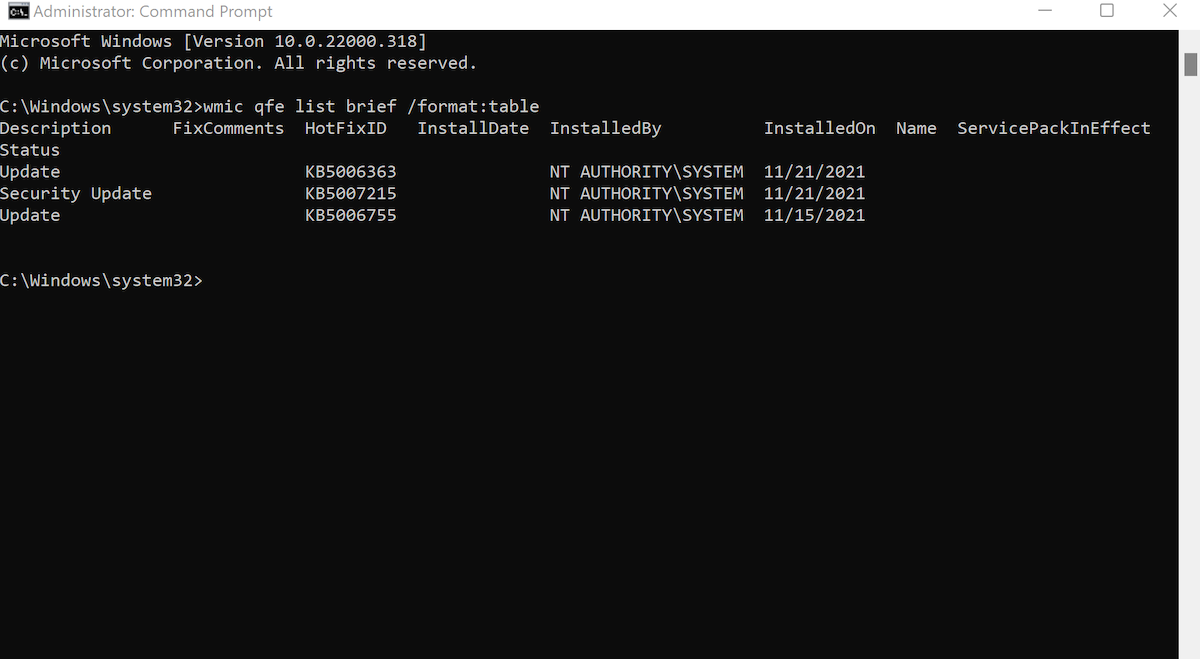
wmic qfe list brief /format:table
Hit Enter and Command Prompt will list all the updates on your PC.
Note the HotFixId of the update you’d like to uninstall, use that in the following command:
wusa /uninstall /kb:HotFixID
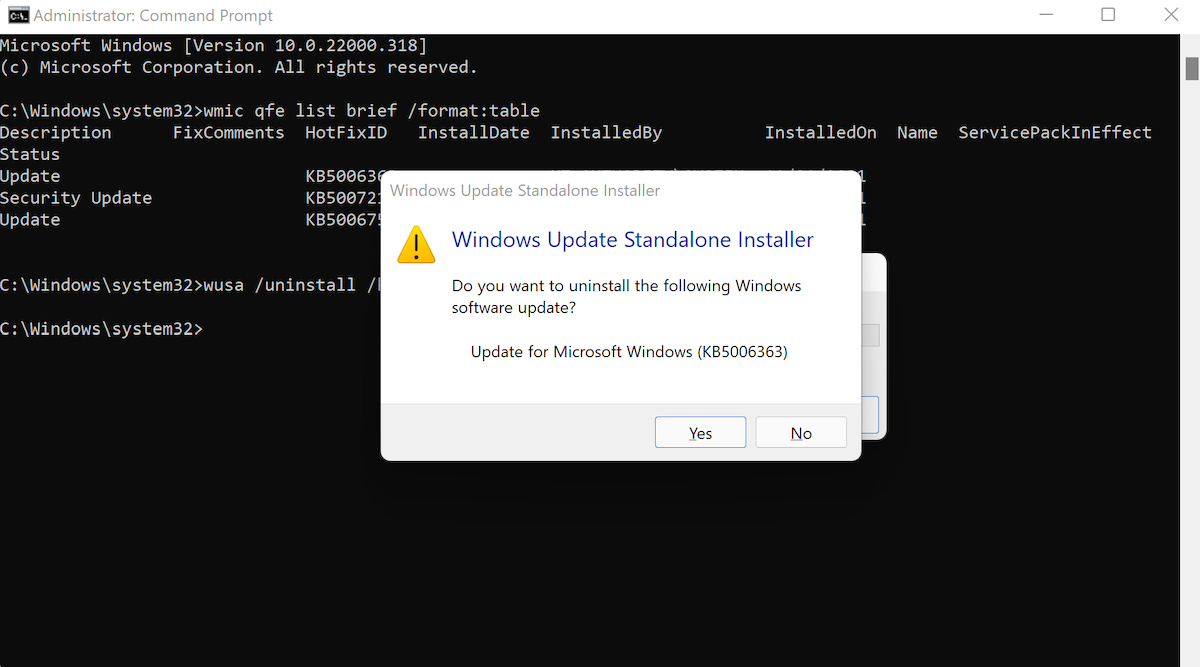
If you want to uninstall, say, an update with HotFixID of KB5006363, then you’ve to put the ID number in place of HotFixID template. As such, here’s what your command will look like:
wusa /uninstall /kb:5006363
When you hit Enter, a ‘Windows Update Standalone Installer’ dialog box will pop up; click Yes to begin the uninstallation.
Your update will be successfully uninstalled in a few seconds.
3. Roll Back an Update via the Windows Recovery Environment
There are times when an update might damage the critical files of your PC—perhaps you stopped it midway or some network issue kept it from completion. In cases like that, it's not uncommon for boot errors to crop up. If you suspect a recent update is the cause of this issue, then booting up your PC in the Windows Recovery Environment can help.
The Windows Recovery Environment, abbreviated as WinRE, is a startup environment that can help you fix a wide variety of Windows problems. In your case, it can be used to remove the update patches that might be the culprit in perpetuating the Windows issues.
To get inside the WinRE, turn on your PC again. When it reaches the boot-up screen, press the power button to turn off the system. Repeat this process three times, and on your fourth try, the Windows will enter the Automatic Repair Mode.
Wait for a while as the WinRE diagnoses the issue. When the scanning comes to a halt, click on Advanced options.
Click on Troubleshoot from the available list of options, and then click on Uninstall updates.
Now choose the update you'd like to install: feature update or quality update. Feature updates are updates that are released twice a year with big, overall improvements in the OS; quality updates, on the other hand, are released throughout the year—they typically include fixes for common bugs, security patches, and so on.
Choose the update you'd like to uninstall and click on Uninstall. Within a few seconds, the selected update will be removed. Restart your PC to see if uninstalling the update has fixed the bugs on your Windows 11.
Uninstalling Updates on Windows 11
We hope one of the methods helped to get rid of an unwanted update on your Windows 11. While we agree that updates are a crucial part of functional software, they can sometimes introduce random glitches to your computer. In fact, that’s one of the reasons many users stray far away from the automatic updates feature.


