
If you’re an experienced Windows user who recently upgraded to Windows 11, you've likely noticed that the Start menu does not have the Hibernate power option anymore. Microsoft stripped hibernation from the default Power menu in Windows 11, but you can still bring it back and extend your system’s battery life.
Hibernate mode is similar to sleep mode, but it extends your battery life by saving the current state of your system into a file on your hard drive and then using that to restore your work once you boot up. Read on as we discuss all you need to know about enabling and configuring hibernate mode on Windows 11.
What Is Hibernate Mode in Windows?

When you go away from your PC for a while, your system typically goes into Sleep mode. The sleep mode saves the current state of your PC (meaning all the files and programs you’re working on) within the RAM.
It also transitions into an idle state, and it seems that the PC has been powered off, but once you turn on your PC, you find all of your files and programs precisely the way you left them (provided there is no power cut).
Hibernation mode on Windows does precisely the same, but it saves the active application instances and files onto the hard drive in a “Hiberfil.sys” file. Doing so gives hibernate mode the advantage of retaining the work environment even if there is a complete power cut.
More importantly, hibernate mode also preserves the battery as it does not consume system resources to keep the contents of the RAM alive. While hibernate mode is not as fast as sleep mode, it is much more efficient in terms of reliability and effectiveness.
How to Enable Hibernate Mode on Windows 11
As mentioned above, the Hibernate option is missing from the Power button within the Start menu. Similarly, you also cannot access it through other Power options in Windows 11, so you’re going to have to enable it through the Control Panel settings manually.
Here’s how you can enable hibernate mode on Windows 11:
- Launch the Start menu, search for Control Panel and select the Best match.
-
Click on System and Security, and then under Power Options, click on Change what the power buttons do.
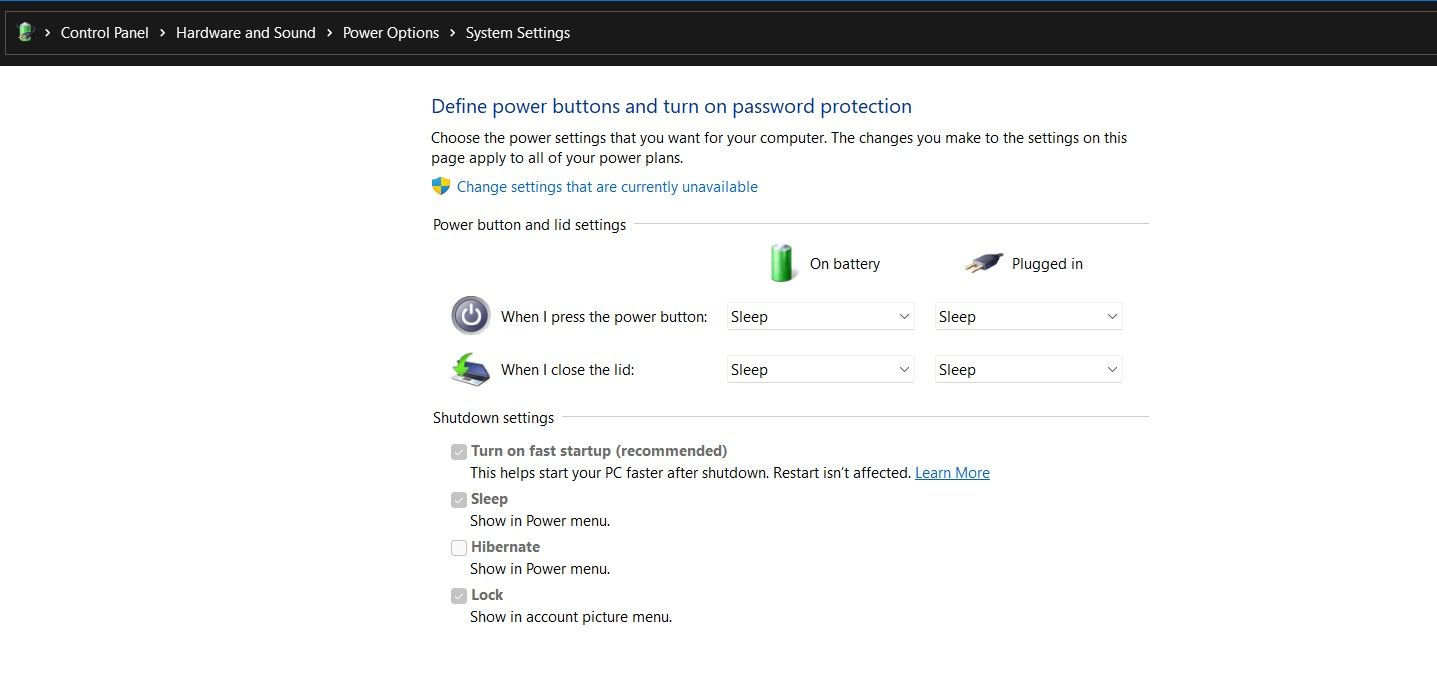
- Click on Change settings that are currently unavailable.
-
Under Shutdown settings, select the Hibernate checkmark and then finally click on Save changes to enable hibernate mode on Windows 11.
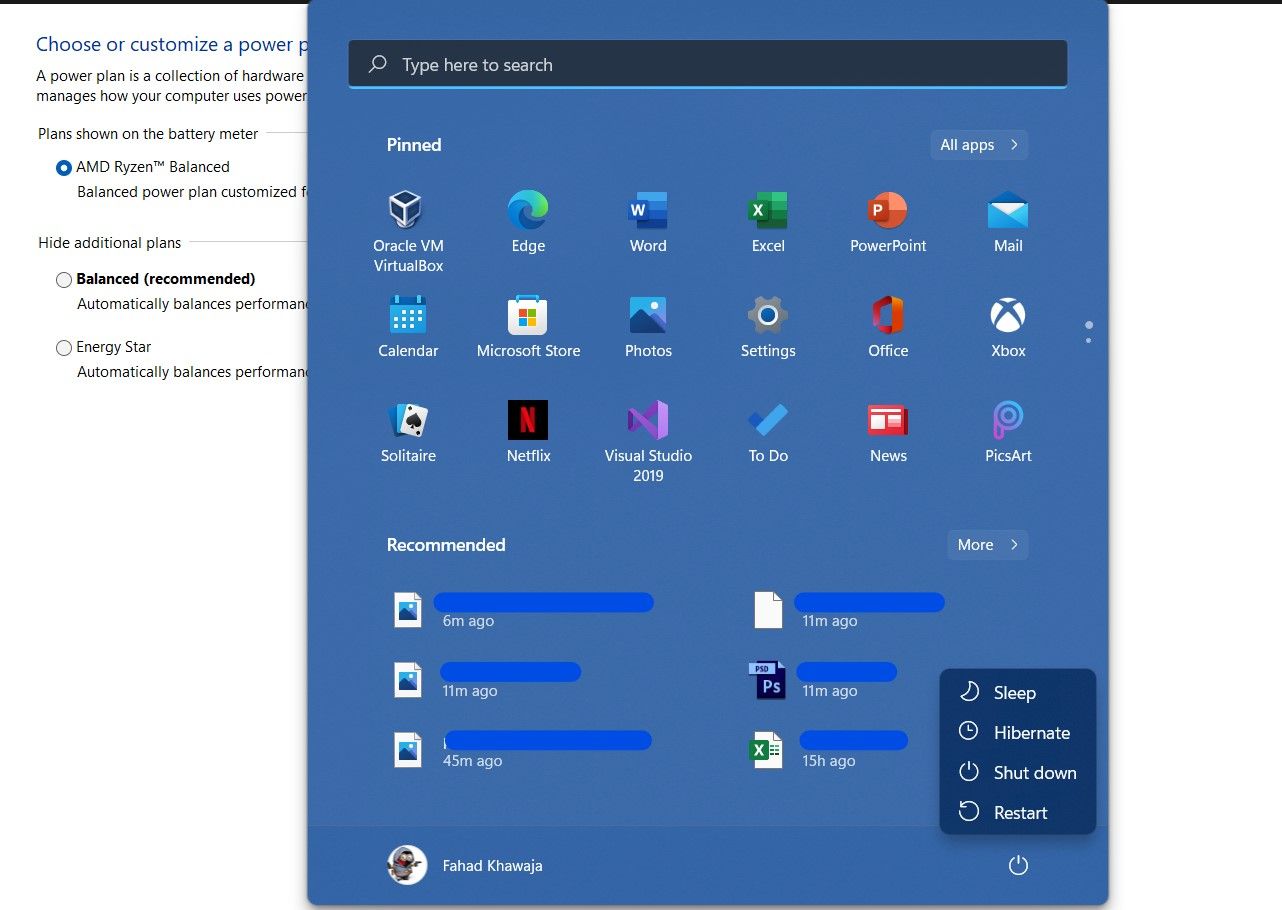


You can now put your system on hibernate mode through Start > Power > Hibernate.
How to Customize Hibernation Mode on Windows 11
Once you’ve enabled hibernation mode on Windows 11, you can tweak a few settings to customize it to suit your workflow.
Here’s how you can adjust the hibernation settings on Windows 11:
- Open the Start menu, search for Control Panel and select the Best match.
- Click on System and Security and then click on Power Options.
-
For the currently selected power plan, click on Change plan settings and then select Change advanced power settings to open the Power Options dialogue box.
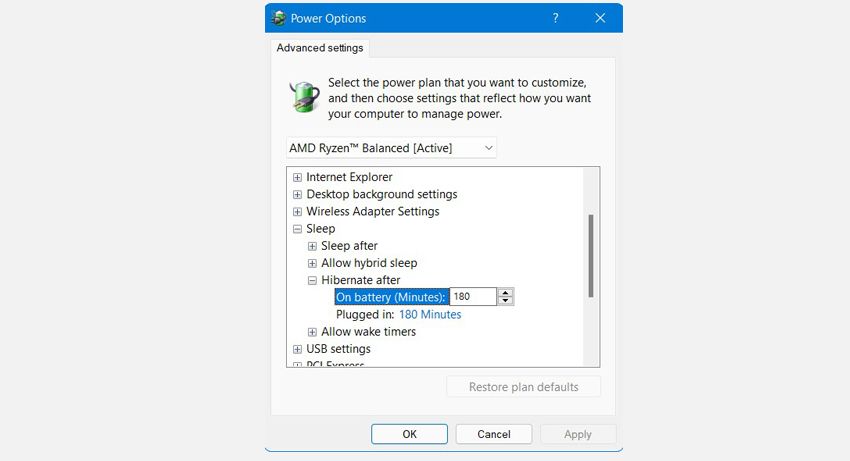
- Expand the Sleep options and then expand Hibernate after options.
- Adjust the required On Battery and Plugged in hibernation mode timings.
- To make your changes permanent, click on Apply and then click OK.

Similarly, you can also configure hibernation mode as the default power mode if you close the lid or go inactive. You can set these options through Control Panel > System and Security > Power Options > Choose what closing the lid does.
Save Battery With Hibernation Mode
Laptops don’t usually have a good battery life, so a long workday on the move can become increasingly more frustrating if your laptop gets drained quickly. Hibernation mode extends your battery life and saves your currently open files and programs in a file, making it possible for you to restore the current state.